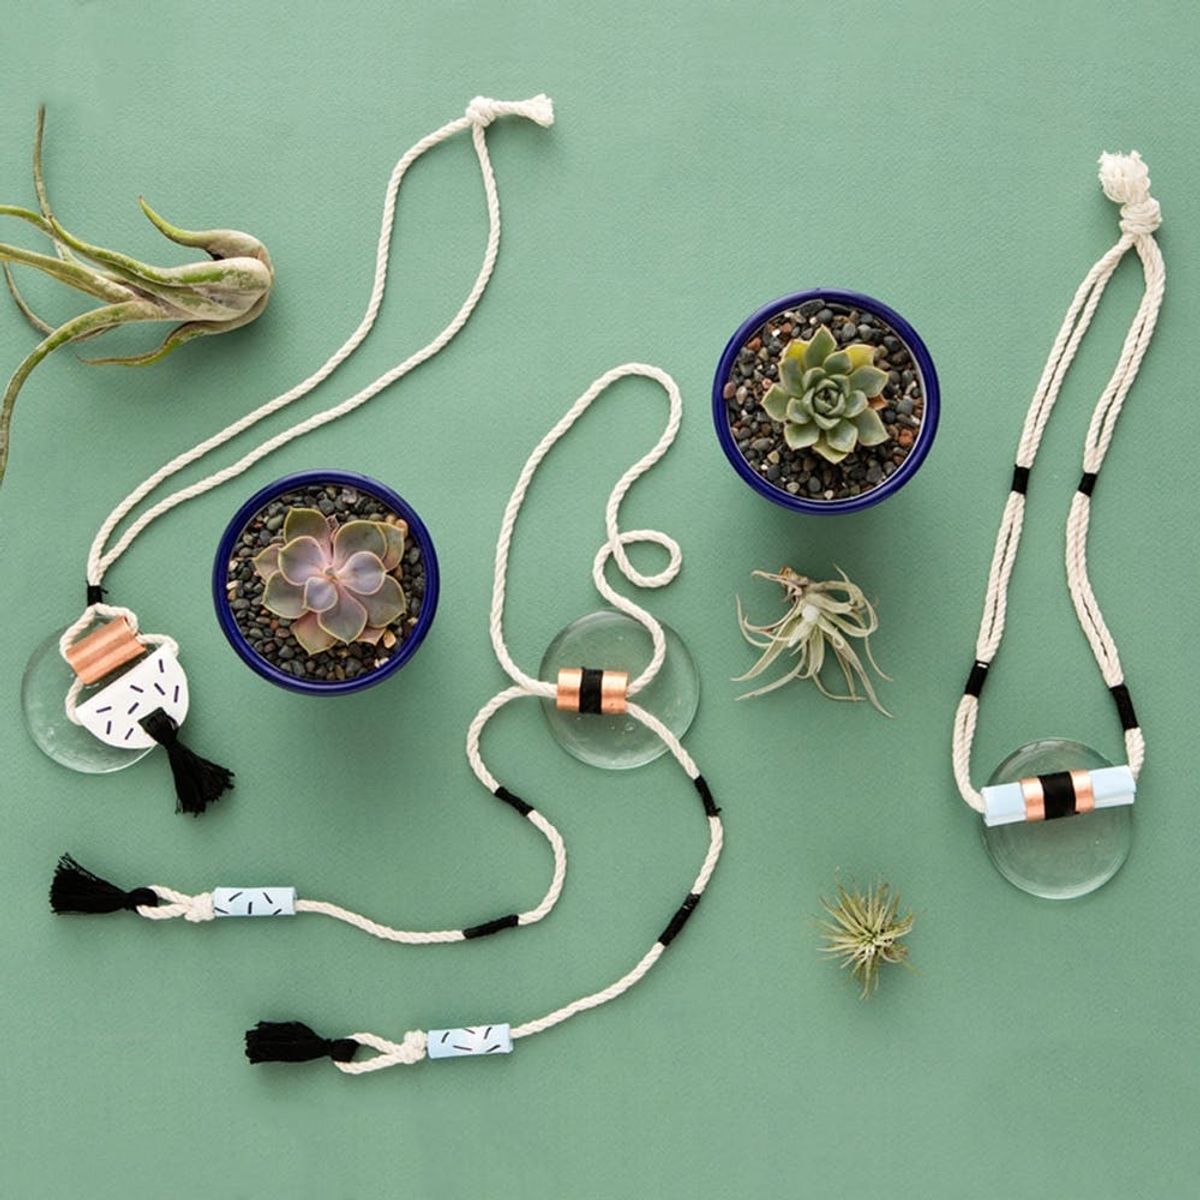
You’ll never look at a hardware store the same way again.
Make These 3 Statement Necklaces With Hardware Store Finds

Walking down the aisles of a hardware store gives me an adrenaline rush that rivals entering a candy shop or finding a crumpled $20 bill in my jacket pocket. There’s something about raw materials perfectly lined up waiting to realize their crafty potential that really gets me thinking about hardware store hacks. That, paired with a recent trip to the Renegade Craft Fair here in San Francisco (PSA: polymer clay is still going strong!), inspired this collection of necklace designs. We rounded up our favorite hardware store finds to create our Metal Clay Necklace Kit, and guess what? You can actually make all three of these necklaces with just one kit!

If you dress like I do, these statement necklaces are the perfect accessory to a lazy, comfy outfit, so you can look put together at peak comfort levels ;)

Materials (included in our kit!):

— Sculpey (blue and white)
— embroidery floss
— 3/8-inch rope
— copper pipe
— E6000 glue
— Shapes template
Materials (not included in our kit):
— rolling pin or dowel
— ruler
— utility knife
— permanent marker
— scissors
Get your materials together (or get the kit HERE) and let’s get started!
This democratic design is sure to please even the pickiest of gift recipients. This pared-down, simple design definitely celebrates the raw materials.
MARBLED BEAD

Mix equal parts of blue and white Sculpey. We like to twist them together to get a nice marble effect, but be sure not to over blend the colors. Roll the Sculpey out to about 1/8 inch.

Cut out the square pattern printable and use it as a template for cutting.

Carefully roll your newly cut square into a bead and use the copper pipe to test the fit. When you have a good fit, trim the excess clay off and bake the bead at 275 degrees Fahrenheit for 15 minutes.

Allow the bead to cool before handling. Create a color block by first tying the embroidery thread onto the copper pipe. Tightly wrap the thread around the copper until you have a color block that you’re happy with. Trim the thread and add a dab of E6000 glue to hold it in place.

String your bead onto two pieces of rope cut to your desired length, and tie the end of the rope with a simple knot. Add color block details to mirror the bead by wrapping sections of the rope with embroidery thread. We chose to add two color blocks on either side of the bead.

Secure the threads with a dab of E6000 glue and there you have it!

Ladies, bolos are definitely trending (take it from our resident Texan, Victoria!). Read on to learn how to make our modern take on a bolo necklace.
BOLO

Mix equal parts of blue and white Sculpey. We like to twist them together to get a nice marble effect, but be sure not to over blend the colors. Roll the Sculpey out to about 1/8 inch.

Cut out two 1.5 x 1.5 inch squares and roll them into beads. Make sure the hole is wide enough for your rope.

Add a color block detail to your copper pipe (reference the “Marbled Bead” section of this tutorial for step by step instructions). Cut a piece of rope to your desired length (we cut a piece about 24 inches long for a nice, dramatic length), and tie one end of the rope with a simple knot. String both beads onto the rope and knot the other end.

Add color block details by wrapping thread around the rope. We chose to add two black color blocks on either side of the bolo. To make tassels, first wrap the thread around three fingers about 15 times.

Remove the wrapped thread and trim one end of the loop. Pull the thread through the loop of the rope and tie it into place. Trim the bottom fringe and repeat on the other side of the necklace.

Here’s the tricky part: String the copper fitting onto one end of the rope and pull the other end (marbled bead and all) through to create a neck loop.

Add accents to the beads using the permanent marker.

There you have it! Now go get your cowgirl on.

This medallion necklace has some serious hipster vibes going for it. Gift this necklace to your coolest pal and be prepared to feel the love.
MEDALLION

Roll out white Sculpey to about 1/8 inch. Cut out the medallion pattern printable and use it as a template. When you’re finished cutting out the exterior pattern, go in and cut out a rectangular piece (you’ll loop the tassel through this hole).

Carefully roll the tapered end of the medallion over to create a loop that’s wide enough for the rope to go through. Bake this in the oven at 275 degrees Fahrenheit for about 15 minutes.

When the Sculpey cools, draw on sprinkle details with a permanent marker.

Add a tassel to the medallion (reference the “Marbled Bead” portion of this post for a step-by-step tutorial).

Trim a piece of rope to your desired length (we did about 20 inches), and string the medallion on. String the copper pipe onto one end of the rope, then pull the other through so that each end of the rope is now on the opposite side. Tie the rope with a simple knot and then wrap the two pieces of rope with embroidery thread. Make sure to wrap it close to the copper pipe. Trim the excess thread and add a dab of E6000 glue to hold it in place.

You’re all done! This simple necklace is sure to impress.
<em><br/></em>

Models: Yising Chou, Victoria Haas, Lolly Dormido


