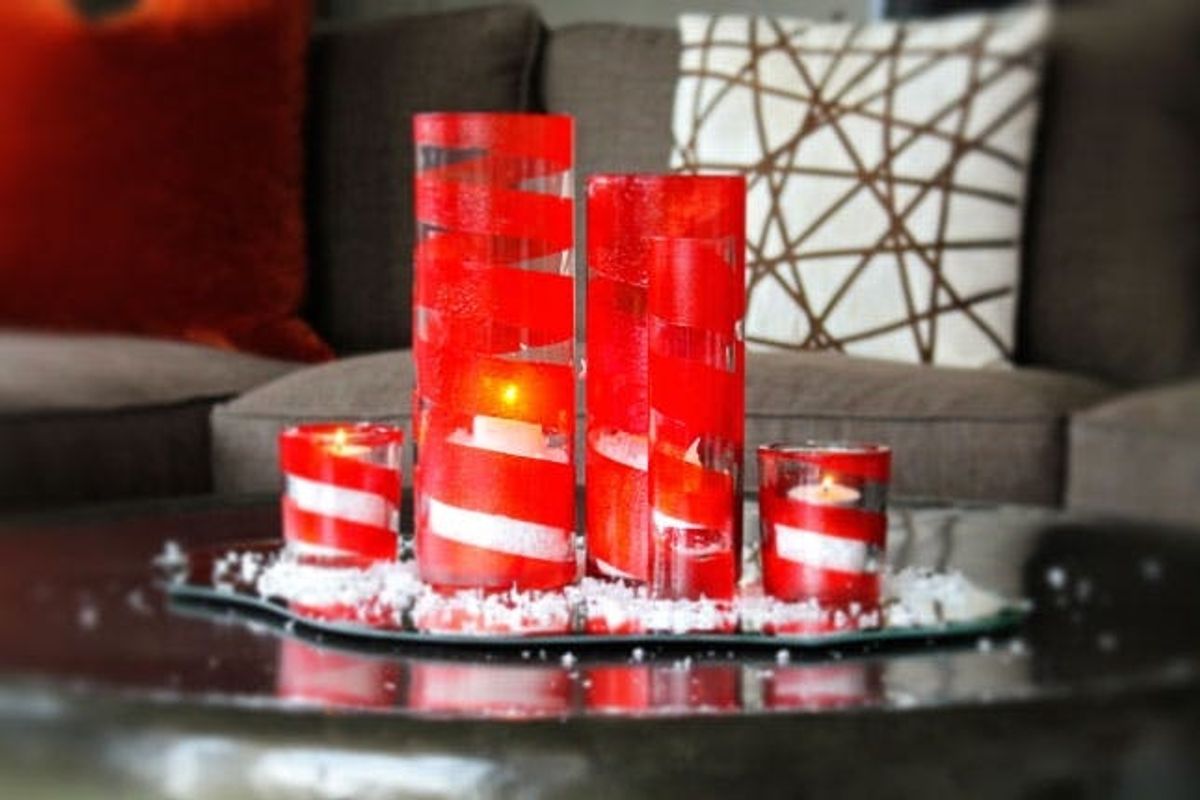
Everyone loves peppermint candy canes, especially in candle form. The phrase “candy cane candles” tripped us up so often as we were making these that we decided to just call them “candle canes” for ease of speech. Plus, we happen to have a thing for puns. You may have caught me demoing the how-to for these beautiful votives on the Today show last week. But in case you missed it, I thought I’d give the full step-by-step run down on this super chic and easy holiDIY project.
Deck the Tables with Candy Cane Votives

Hi, I'm Brit, the founder and CEO of Brit + Co. I'm a young mom of two, tech nerd and design-inclined lady who has a zillion hobbies and curious about... just about everything! My mission from the beginning has been to unlock women's creativity and courage to try new things so that they can find the path to their true passions.

Everyone loves peppermint candy canes, especially in votive form. The phrase “candy cane candle votives” tripped us up so often while making these that we decided to just call them “candle canes” here at Brit HQ. (We happen to have a thing for puns.) You’re free to use the same terminology if you wish.
You may have caught me demoing the how-to for these beautiful votives on the Today Show last week. But in case you missed it, I thought I’d give the full step-by-step run down on this super chic and easy holiDIY project.

Materials:

– Glass candle votives or vases
– Spray shellac
– Elmer’s glue
– Food coloring
– Electric or painter’s tape
– Sponge paint brush
To get started, you’ll want to create your stencil. Take your tape and, starting at the bottom of each votive, wrap upwards in a spiral until you reach the top. Be sure to try and keep the same distance in between your taped lines if you want a more uniform stripe.

Next, time to mix up your paint! We loved our recent hack for making stained glass out of glue and food coloring and thought it would look incredible on these votives. Just pour in your glue then add food coloring until you reach the color you’d like.

Next, start painting! We used a sponge brush after finding that a regular paint brush came out looking a bit streaky. The sponge effect also made for a beautiful textured look. Depending on the amount of color you’d like, you may have to do a couple of coats. Pro Tip: To speed up the drying process in between coats, use a blow dryer.

Once the paint is dry, give it a quick spray with shellac. This will seal in the paint and allow for hand washing. Finally, just peel off the tape, drop in a few candles, and arrange your centerpiece. We used a bit of fake snow inside and around the votives for a more wintery look. Isn’t it pretty? This same DIY tactic would work well on wine glasses or tumblers as well. Send us photos if you try it out yourself!
What type of centerpiece are you rocking this holiday season? We’d love to see ’em! Let us know in the comments below or find us on Facebook.


