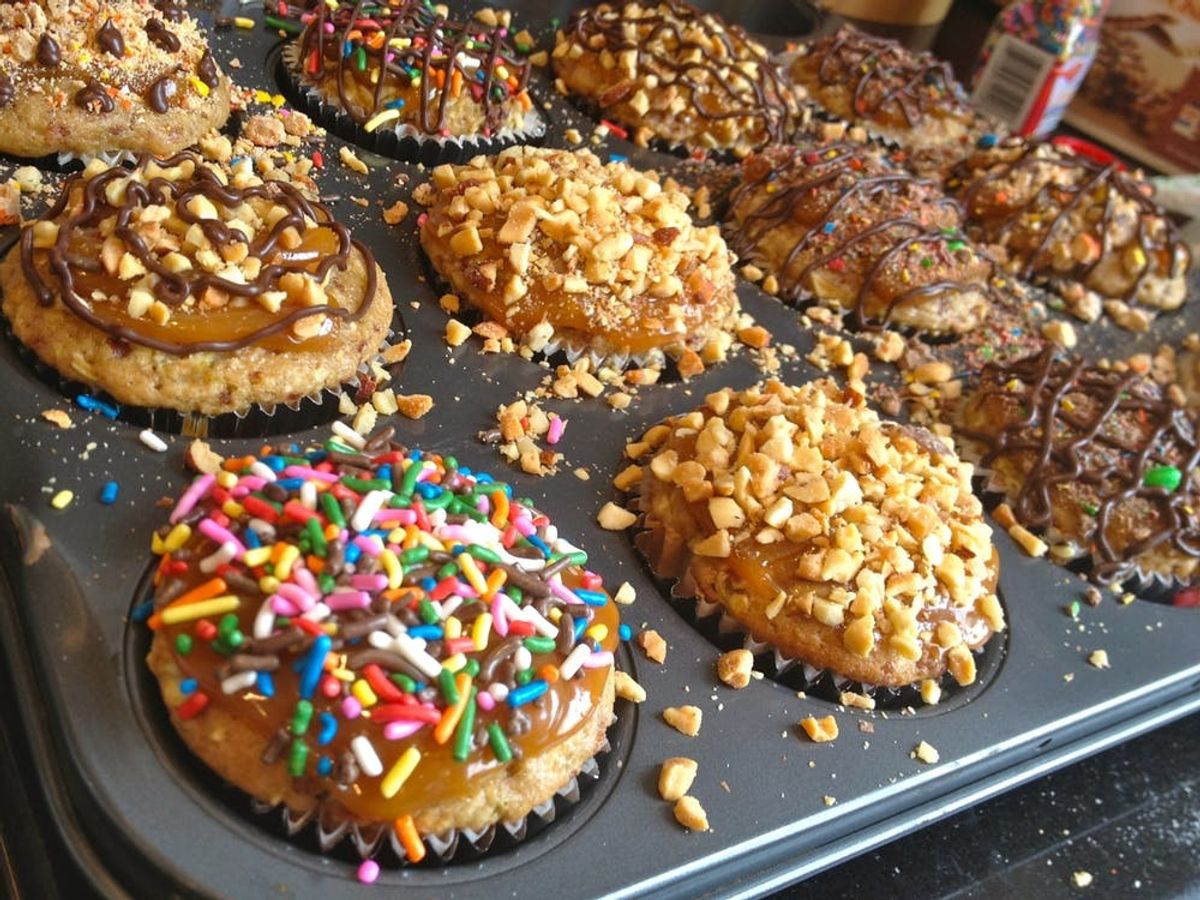
I had some apples and caramel sauce left over after making my candy apple cookies, so I decided to create caramel apple muffins as a hostess gift for a recent brunch. It was certainly an experiment, and I’m still not sure if I’d refer to them as muffins or cupcakes, but the end result was easy and fabulous, both to the eye and the taste bud. Since they were a hostess gift, I knew I also had to package them up in something pretty. But, it was too late to go shopping, so I had to be scrappy around the house. I ended up finding an old shoebox that I taped together and decorated with chalkboard paint and chalked messages. It turned out great! Get the how-to below.
Caramel Apple Muffins Are Too Delicious & Easy To Resist

Hi, I'm Brit, the founder and CEO of Brit + Co. I'm a young mom of two, tech nerd and design-inclined lady who has a zillion hobbies and curious about... just about everything! My mission from the beginning has been to unlock women's creativity and courage to try new things so that they can find the path to their true passions.
I had some apples and caramel sauce left over after making my candy apple cookies, so I decided to create caramel apple muffins as a hostess gift for a recent brunch. It was certainly an experiment, and I'm still not sure if I'd refer to them as muffins or cupcakes, but the end result was easy and fabulous, both to the eye and the taste bud.
Since they were a hostess gift, I knew I also had to package them up in something pretty. But, it was too late to go shopping, so I had to be scrappy around the house. I ended up finding an old shoebox that I taped together and decorated with chalkboard paint and chalked messages. It turned out great! Get the how-to below.

Muffin Materials
– Apple muffin mix – I used Fiber One's apple cinnamon flavor (and pretended it was healthier this way) but I'm sure your local grocer has many apple muffin mixes to choose from.
– Green apples – Optional. The muffin mix alone could work but the apples give it flair.
– Caramel sauce – I bought the pre-made kind but you could also melt caramels to make your own.
– Toppings – Your call on these. I used chopped peanuts, sprinkles, M&Ms and Reeses Pieces.
– Hard chocolate shell sauce ( – Optional.
– Cupcake/muffin pan
– Ziplock bag – Optional.
Muffin Instructions
1. Follow your muffin mix instructions for adding water/oil, etc in a big bowl

2. Before you fill your pan, chop up your apple into diced pieces and mix into the batter. I used a food processor but this can be done by hand as well. Oh, and see that photo above of me spooning apple into my muffins? Yeah, that's because I forgot about this step and pre-filled my pan first. (It worked just as well, just took longer.) Remember that this is an optional step! I made a second batch of these w/o the apples and it still tasted great.


3. Bake muffins as directed on your box.

4. Once cooled, top muffins with caramel sauce. I used a ziplock bag with a tiny hole cut in the corner to do some wavy designs on a few, but it works to frost them like cupcakes, too.

5. As if you were adding glitter to glue, add toppings to your carmelized muffins. If you are using different toppings, I definitely suggest taking the muffin out of the pan first and setting on top of a plate or wax paper so that your toppings don't intermix.


6. Optional: Use a ziplock bag and fill with heated chocolate sauce. Make a tiny cut in the corner of the bag and use as a frosting bag, drizzling patterns and lines across your muffins. (This was the most fun of the whole project for me.) You're done!
Muffin Display Materials
– Any type of box you like. If it doesn't fold over like mine did, just go topless or remove the top with scissors or an x-acto knife.
– Tissue paper
– Chalkboard spray paint (If you don't have this, you should! It's useful for SO many neat projects.)
– Primer spray paint (This is also useful for tons of painting projects. Makes things 10x easier.)
– Chalk
– Newspaper
Muffin Display Instructions


1. Prepare your box to be painted. Remove all lids/tops, tape where needed to secure, and flip over on top of newspaper.
2. Use the primer spray to prime your box to be painted. Cover the outside and bottom of your box completely. (Don't worry about the inside, you'll cover it with tissue paper.)
3. Once the primer paint is dry to the touch (20 minutes), repeat using chalkboard spray.

4. Once the chalkboard paint is dry to the touch (20 minutes), decorate however you want to with chalk. I wrote messages and drew little pictures.


5. Line your box with tissue paper.

6. To keep muffins in place, I bunched up pieces of tissue paper into long strands and made a criss-cross pattern inside the box. (My inspiration? The cotton strands they use in between toes at pedicure salons.)

7. Fill with your muffins, and get excited to make someone's day a LOT better :)


