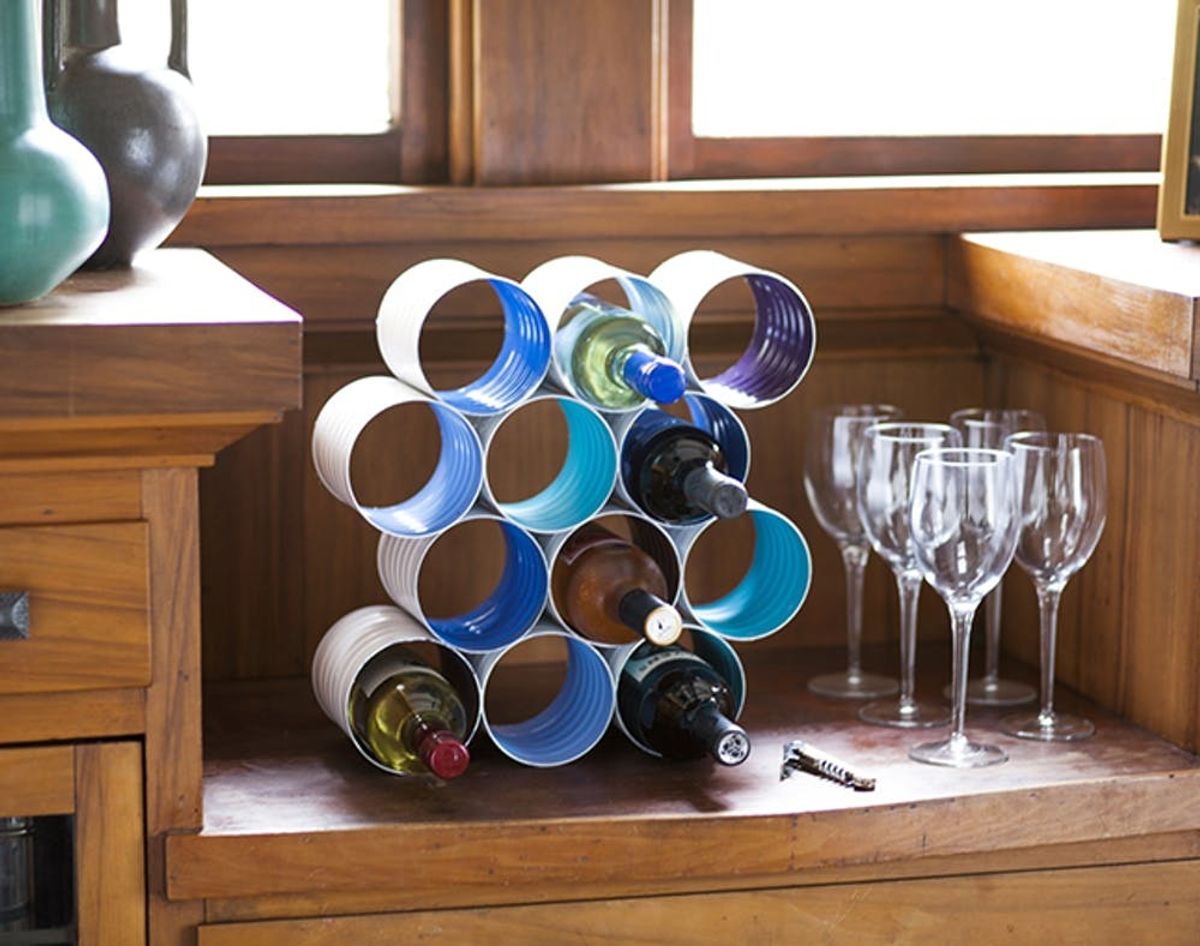
We’ve been showing you fun ways to color-block your wardrobe, your decor, and even your desserts all month long. And now we’re taking on your wine rack No, we’re not asking you to arrange by reds, whites, and rosés (though we wouldn’t say no to that, either). Instead we’ve taken some jumbo tin cans—the kind used for coffee grounds or crushed tomatoes—and turned them into this color-blocked wine rack. You’ll be shocked at just how easy it is to make.
DIY Color Block Wine Rack Made From Coffee Cans

We’ve been showing you fun ways to color-block your wardrobe, your decor, and even your desserts all month long. And now we’re taking on your wine rack No, we’re not asking you to arrange by reds, whites, and rosés (though we wouldn’t say no to that, either). Instead we’ve taken some jumbo tin cans—the kind used for coffee grounds or crushed tomatoes—and turned them into this color-blocked wine rack. You’ll be shocked at just how easy it is to make.
Materials:
– 4–12 large coffee or tomato cans (depending on the size of rack you want to make)
– can opener
– 1 can white spray paint
– 3–4 cans brightly colored spray paint
– E6000 Glue
– cardboard or a drop cloth
– gloves (optional)
Instructions:
1. Remove the labels and make sure the cans are completely clean and dry.
2. With a can opener remove the bottom of each can so they are open on both ends. (If there are any rough edges, file them down to protect your fingers.
3. Spray the insides of each can in a bright color. We chose to go with a range of blues and purples. Be sure to spray from both ends.
4. Once the insides are dry, spray the outsides of the cans white. We found that this took two coats to be fully covered.
5. After the cans are completely dry arrange them into groupings by horizontal row. Glue the cans together in a row, and secure with binder clips or clothespins while they dry. Repeat with the additional rows
6. Once the glue has dried, glue each row together and secure with binder clips. Allow this round of glue to dry fully before using.
These labels (thankfully!) were easy to remove since they were only glued in one stripe.
Remove the bottom of the can, and the inner ring around the top if your can has one. This will allow you to slide the bottles in evenly and make sure everything is balanced.
We chose to do a blue and purple color palette, and since we had four shades we did three cans in each color. Because the interiors are ridged, spray first from one end, then flip the can over and spray again from the other side.
We found that it took two coats to cover the cans evenly. Just allow enough drying time between coats. Once again, it helps to flip the can over halfway through.
We grouped our four colors into rows of three making sure not to repeat a color combination twice.
Glue your rows together and give the glue time to dry. Securing the cans with binder clips or clothespins will make sure nothing shifts.
Finally, start gluing your rows together. You’ll need to stack the cans and mark where to put the glue.
Now all that’s left is to add some wine!
Done! Now who’s ready to toast?
What’s your favorite color-block DIY project? Tell us in the comments!


