Sometimes carving pumpkins can be a serious chore. Though we appreciate the effort that goes into a well-carved pumpkin, we also love a good hack. Earlier this week we shared our striped and studded pumpkins, and now we’ve got another no-carve trick. Glitzy Color-Dipped Pumpkins!
No-Carve Glitzy Color-Dipped Pumpkins
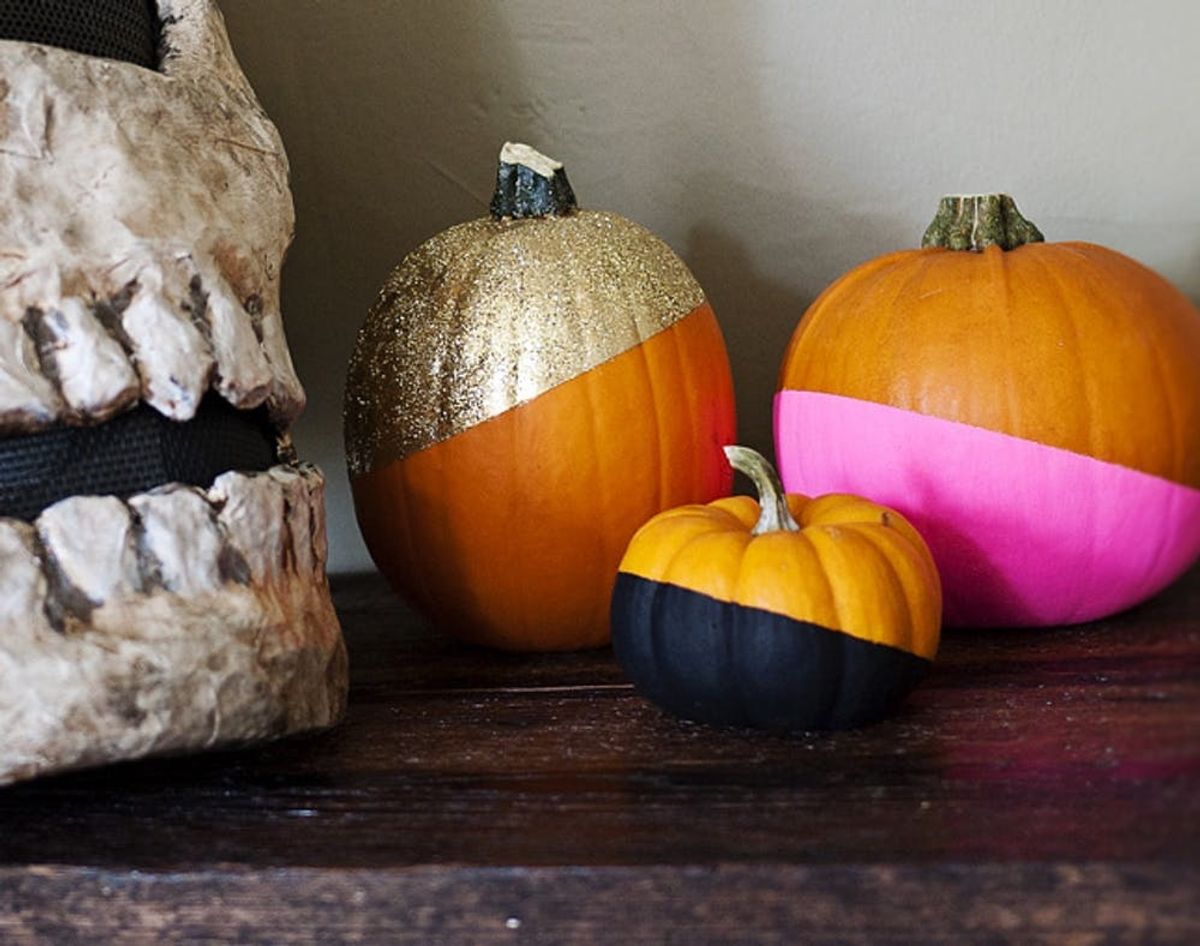
Sometimes carving pumpkins can be a serious chore. Though we appreciate the effort that goes into a well-carved pumpkin, we also love a good hack. Earlier this week we shared our striped and studded pumpkins, and now we’ve got another no-carve trick. Glitzy Color-Dipped Pumpkins!
Materials:
– white acrylic paint
– gold acrylic paint
– black acrylic paint
– pink acrylic paint
– gold glitter
– Mod Podge
Tools:
– paint brush
– masking table
First, section off your pumpkin with masking tape. You can tape it right down the center if you like, but I decided to tape mine at an angle to make it a little more interesting. Make sure the tape is firmly pressed down, otherwise your paint will run underneath it.
Next, you will want to prime your pumpkin with white paint so the final color is not dulled by the orange of the pumpkin. I applied two coats letting it dry in between.
After the white primer is dry, now comes the fun part! Pick any color acrylic paint you like and paint over the same area of the pumpkin that is now white.
I painted one with neon pink and one with black. Depending on the color and thickness of your paint, you may need to apply multiple coats. Once you achieve coverage that you are happy with and your colored paint dries, pull the tape off being careful not to pull the paint off with it. And there you have it, a beautiful color blocked pumpkin!
Next up, a glitter pumpkin! For this one, instead of priming with white, I primed the pumpkin with gold paint. Once that was dry, I painted the same area with Mod Podge and then sprinkled gold glitter over the glue covered area. It’s as easy as that!
What are your go-to decorations for Halloween? Want to share some genius no-carve pumpkins with us? Talk to us in the comments below.


