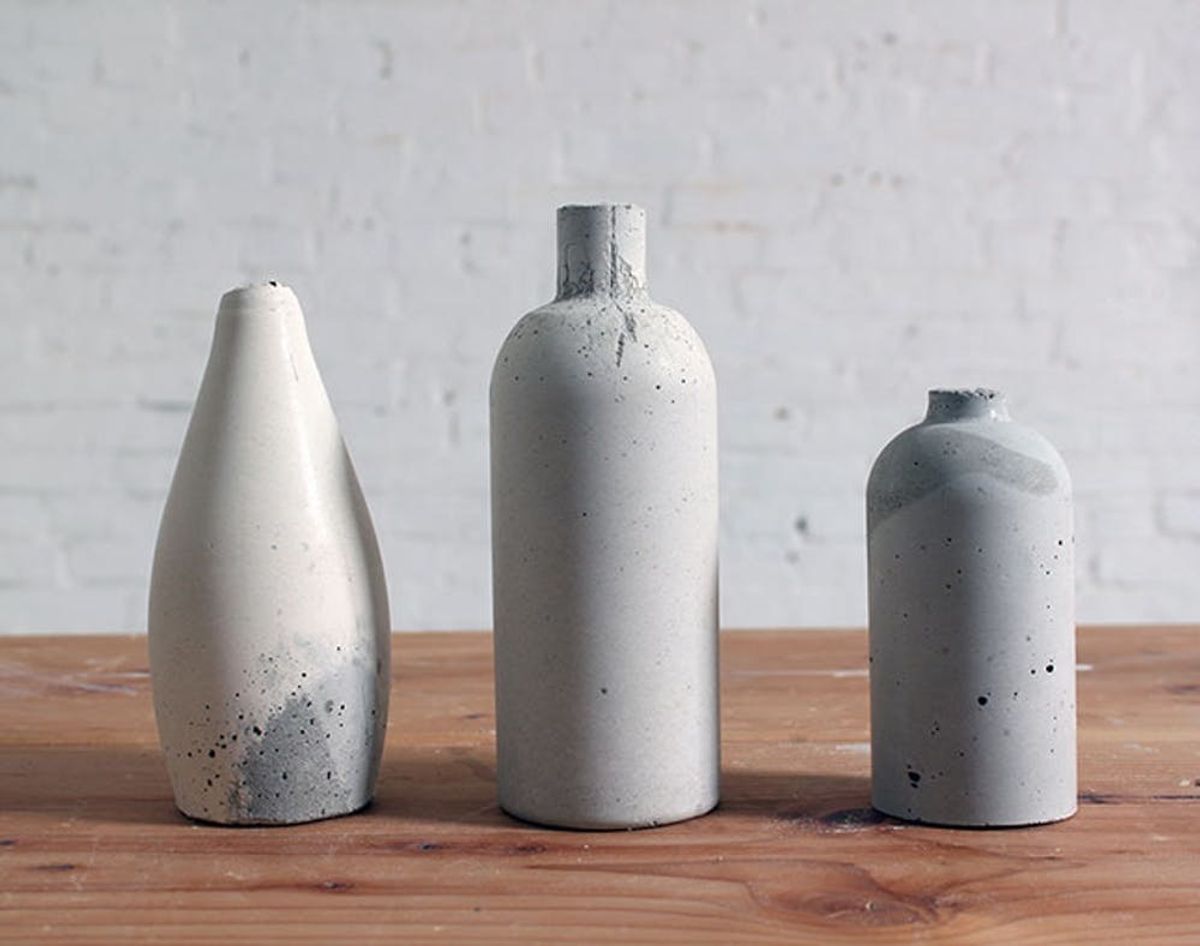
Got a Kombucha addition? Hooked on Perier? We’re right there with ya. But the next time you gulp your precious last sip, don’t be so fast to toss your bottle into the bin—be it glass or plastic, they make dynamite molds for decorative vases. Makes sense right? So for just the price of concrete and your fave bevvy, you can make chic home decor. Here’s how to do it.
Use Old Bottles to Make Chic Concrete Vases

Got a Kombucha addition? Hooked on Perier? We’re right there with ya. But the next time you gulp your precious last sip, don’t be so fast to toss your bottle into the bin—be it glass or plastic, they make dynamite molds for decorative vases. Makes sense right? So for just the price of concrete and your fave bevvy, you can make chic home decor. A totally thrifty DIY? Your mom would be so proud ;)
Materials:
– Quikrete Commercial Grade Countertop Mix in white and grey
– plastic or glass bottles with caps
– pens, candles or test tubes
Tools:
– RYOBI 18 Volt Cordless Drill
– Husky Box Cutter
– Husky 7 inch Diagonal Pliers
Instructions:
1. If you’re using a plastic bottle, cut the bottom off to create a large hole. Only use glass bottles with a wide mouth.
2. Drill a hole in the caps of the bottles large enough to hold your pen, candle, or test tube—this will mold the inner chamber of the vase. Screw the caps back on the plastic bottles.
3. Mix the concrete—we used a mix of white and grey. You want it to be on the runnier side for the glass bottle since the mouth isn’t huge.
4. Fill the bottles—this will be messy! So lay down a drop cloth or fill on a work surface. Tap and shake the bottles to remove air bubbles, then screw the caps back on if necessary and let sit for at least 24 hours, or up to 4-5 days if you used a glass bottle.
5. Once the concrete has set, gently cut away the plastic with a box cutter and diagonal pliers—the concrete is still fragile at this stage, so be gentle. If you used a glass bottle as a mold, break the glass with light taps from a hammer (wear your safety glasses!).
6. Remove the caps. If you used a plastic pen or candle to create the inner chamber of the vase, apply heat before removing. If you used a test tube, crush with diagonal pliers and pour out the fragments.
7. Level the bottoms of the vases if necessary with the box cutter. Then add them into your home decor!
First, prep your bottles. Make sure they’re nice and clean! If you’re using a plastic bottle, cut off the bottom, drill through your cap and insert a pen body, then screw the cap back on. If you’re using a glass bottle, simply drill through your cap and insert a test tube.
Now pour in your concrete! This part is messy, so make sure you’re working on a surface that you can get nice and grimy. Let the plastic bottle sit open-side up (with the help of a mason jar, of course!) but once you pour the concrete into your glass bottle, tap it so that you get all the air bubbles out and screw the cap on slowly. Then wait at least 24 hours before you get your hands on ’em again—longer for the glass bottles, about 4-5 days.
Once the concrete has hardened, it’s time to rip open those bottles. Shatter the glass bottle with a few gentle taps of a hammer, or take to your plastic bottle with a box cutter and diagonal pliers. Be extra careful as you pull out the cap so that it doesn’t break inside the bottle! Then, shave the bottom of the concrete to get it perfectly level.
And there you have it—chic concrete vases. We’re obsessed with the marbling effect from the mix of white and grey concrete—and the air bubbles that did form add some rustic charm. Since there’s tons of wait time, we totally recommend making two or three at a time—these types of decor pieces always look better in clusters anyway.
Drop in some flowers—fresh or dry is up to you—and you’re all set. Place your vases anywhere you please—on a mantel, on the dining table, or even on a small side table like this one I made out of a $2 log (yeah, you read that right—$2!), now that we’re thinking about it, the vases and the table make quite the couple. You can find the tutorial here—why keep them apart? ;)
What was your latest repurposing project? Tell us in the comments below.


