It’s no secret that we love trying different ways to glam up jewelry basics. From adding studs to bare bangles to completely blinging out a metal cuff, these easy additions transform plain pieces into high-fashion statements. So for this upgrade, we’re showing you our new favorite way to amp things up: by turning embroidery floss into colorful tassels that you can toss onto nearly any accessory.
Amp Up Your Jewelry With Cotton Tassels!

It’s no secret that we love trying different ways to glam up jewelry basics. From adding studs to bare bangles to completely blinging out a metal cuff, it’s awesome how small additions transform plain pieces into high-fashion statements. For this upgrade, we’ll show you our new favorite way to amp things up: by adding embroidery floss tassels to nearly any piece of jewelry.
While we love rocking the leather tassel look, it’s great to have the option to wear something equally as fun, but much lighter and brighter! These cotton charms are easy to make—we’ll show you the step-by-step first—and even easier to attach to jewelry that you most likely already have, like a gold chain, a beaded necklace, and a pair of drop earrings.
Materials:
– variety of embroidery floss
– gold headpins
– E-6000 glue
– plain jewelry in need of an upgrade like a gold chain, a beaded necklace, and drop earrings
Tools:
– two needle nose jewelry pliers
– round nose jewelry pliers
– scissors
If you’ve got nimble fingers, it’ll be a cinch to make these frilly tassels. To make a small tassel like the size we’ll attach to our earrings, grab onto one end of the embroidery floss and wrap it around two of your fingers a total of 10 times. Of course, if you want a larger tassel, simply double your digits and the number of times you wrap the colorful floss around ’em. Once you slide the loop of floss off your fingers, snip the bottom to create the actual fringe.
Next, grab a gold headpin and slide it under your floss. This jewelry finding will pull double duty in this project by acting first as a tool to help tie off the tassel, then by morphing into the jump ring that will attach the finished tassel to the jewelry (more on that later).
Now, let’s tie off that tassel. Using a piece of embroidery floss that’s double the length of your fringe, tie a basic knot on one side and then the other, being sure to gently tug on your tassel strings so that the fringe stays nice and tight.
Once the knot is tied, don’t snip off the excess string! It’ll camouflage nicely with its fringy friends, so just pull it down and in line with the rest of the tassel.
To get this tassel camera ready, squeeze the tiniest bit of E-6000 onto the last knot you tied to set it in permanently in place. You can use a toothpick to apply the E-6000 to make it easier. Next cut a clean line across the bottom of your formerly shaggy tassel (we thought it was about time for a trim!).
Check out that fantastic tassel! See how the knot ends blend in with the rest of the string? Only one more step to turn this finished tassel into a true charm—shape the headpin into a jump ring!
You can break this process down into three easy parts: curl, slide, and snip. With a pair of round nosed pliers, curl the end of your headpin so it looks more like an eye hook (we didn’t have any handy, but you could definitely substitute that material and skip the “curl” part). Then, slide the tassel into the hook and finally, snip the hairpin so that there’s only enough left to close your finding.
And that’s it! The sky’s the limit on the number of tassels you make, but we recommend whipping up a bunch upfront so it’s a breeze to attach to whatever basic accessory may come your way :)
In the back of our jewelry box, we found a pair of laser cut drop earrings, a medium-sized gold chain, and a basic black and white beaded necklace all in need of dolling up. Once we matched each with our favorite embroidery floss colors, we took our own advice and made a bunch of tassels in one massive swoop. You should, too!
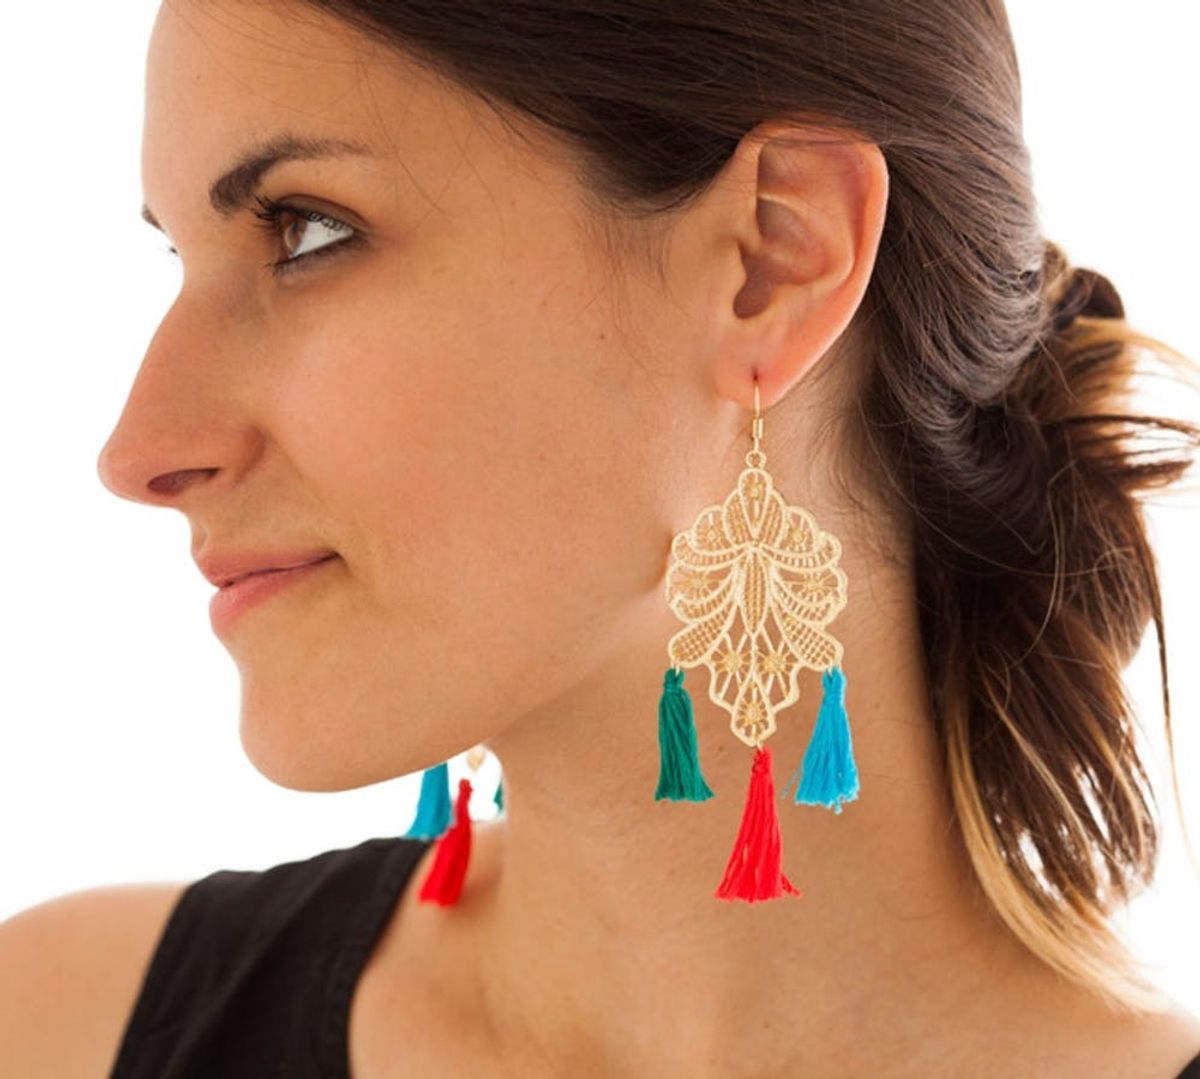
First up, a lovely combo of teal, red, and sky blue tassels with these gold earrings. The laser cut pattern made it way easy for us to attach the tassels on the sides and bottom of each earring.
And done! We love how the tassels call more attention to these delicate earrings—they look almost like gold lace! The tassel placement creates a stunning tiered effect that’s both dramatic and fun.
Next up, our gold chain necklace. We went with a more evening-appropriate palette for this look, and also changed up the sizes of our tassels. While the fuscia and purple ones are the same small size as our earring tassels, this single emerald tassel is twice their size (to make, simply wrap the embroidery floss around four fingers a total of 20 times).
The key to this design is making sure your tassels are placed evenly along the chain. You can either count or bend the necklace in two to make sure your tassels are lined up. Then latch the large green tassel to the very center.
Chain, meet your new best friend! These fringy tassels are the perfect way to soften up the hard look of any plain chain. Plus, this regal color combo is perfect for fall.
Last but not least, the beaded necklace with what may be our favorite color combo yet: pink, yellow, and orange!
As you can see, we made one cool charm out of two small tassels and one large tassel. So instead of making each tassel on a different headpin, make them all on one! This way, you can just mold that headpin into one large jump ring. Don’t forget to slide each tassel over to cover up the closure! Now all that’s left to do is open up your necklace and drop on that tassel trio.
You know we love a good pop of color, and this tassel centerpiece definitely fits the bill. As you can see, it’s the perfect way to accessorize a black blouse. Though we think this piece will be on heavy rotation no matter what top we’re rocking!
Would you dress up your jewelry basics with cotton fringe? Let us know what you think of this playful look in the comments below!


