A dessert that will make everyone say, “Ooh!”
Dig Into Sweet Nostalgia With This Ding Dong Cake

Cookbookmarked! is our new series where we review the latest cookbooks from the foodie influencers you follow. Check back often to find out which new releases are worth your hard-earned cash and the recipes you should try first from each.
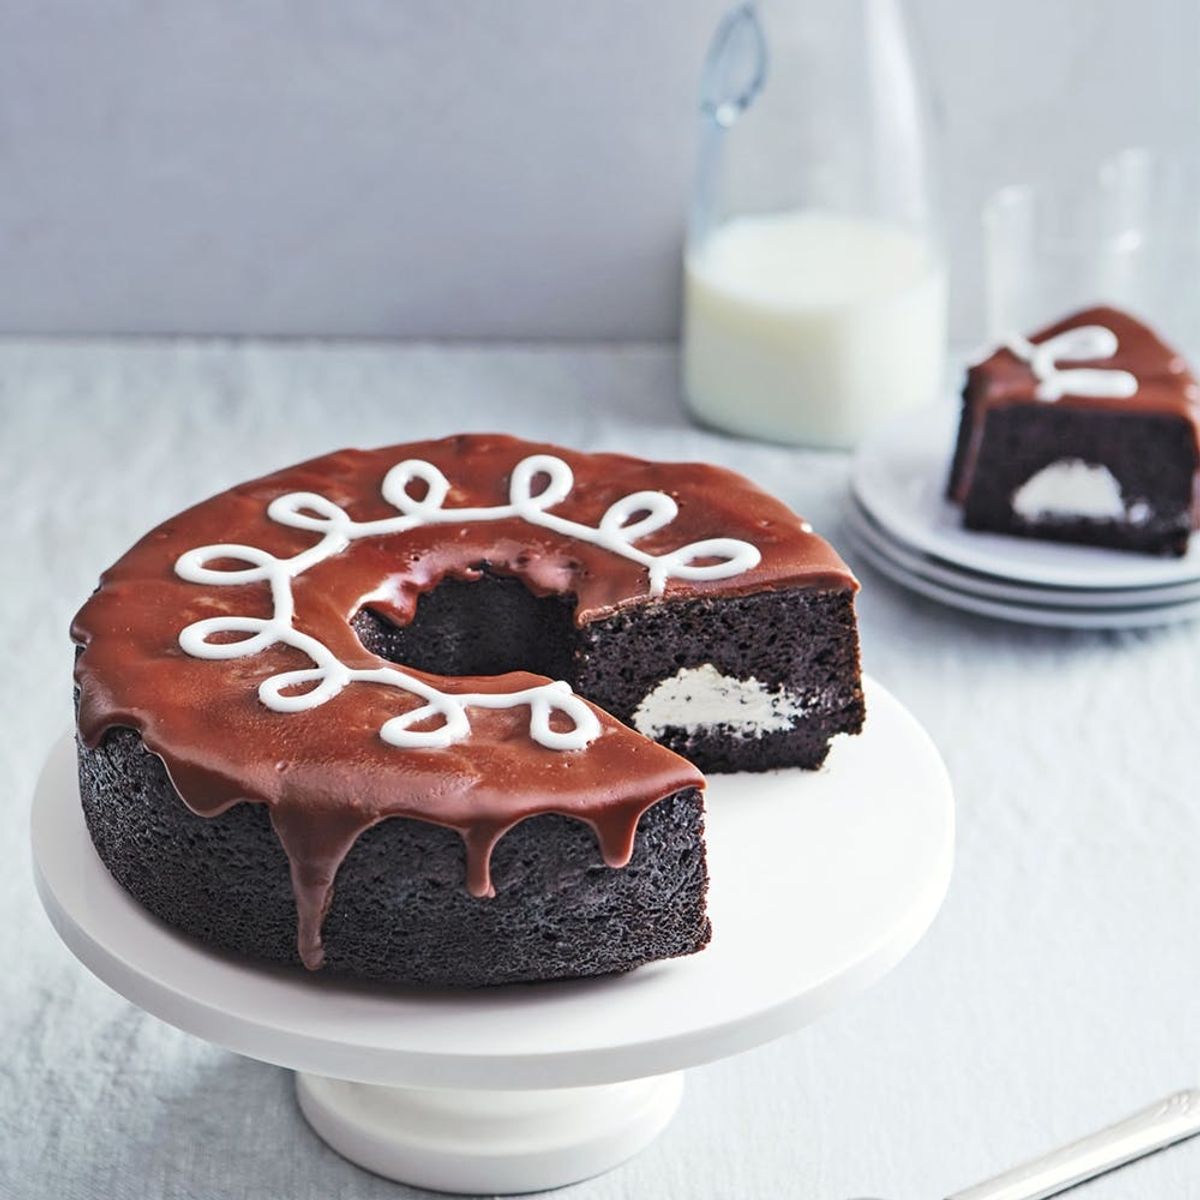
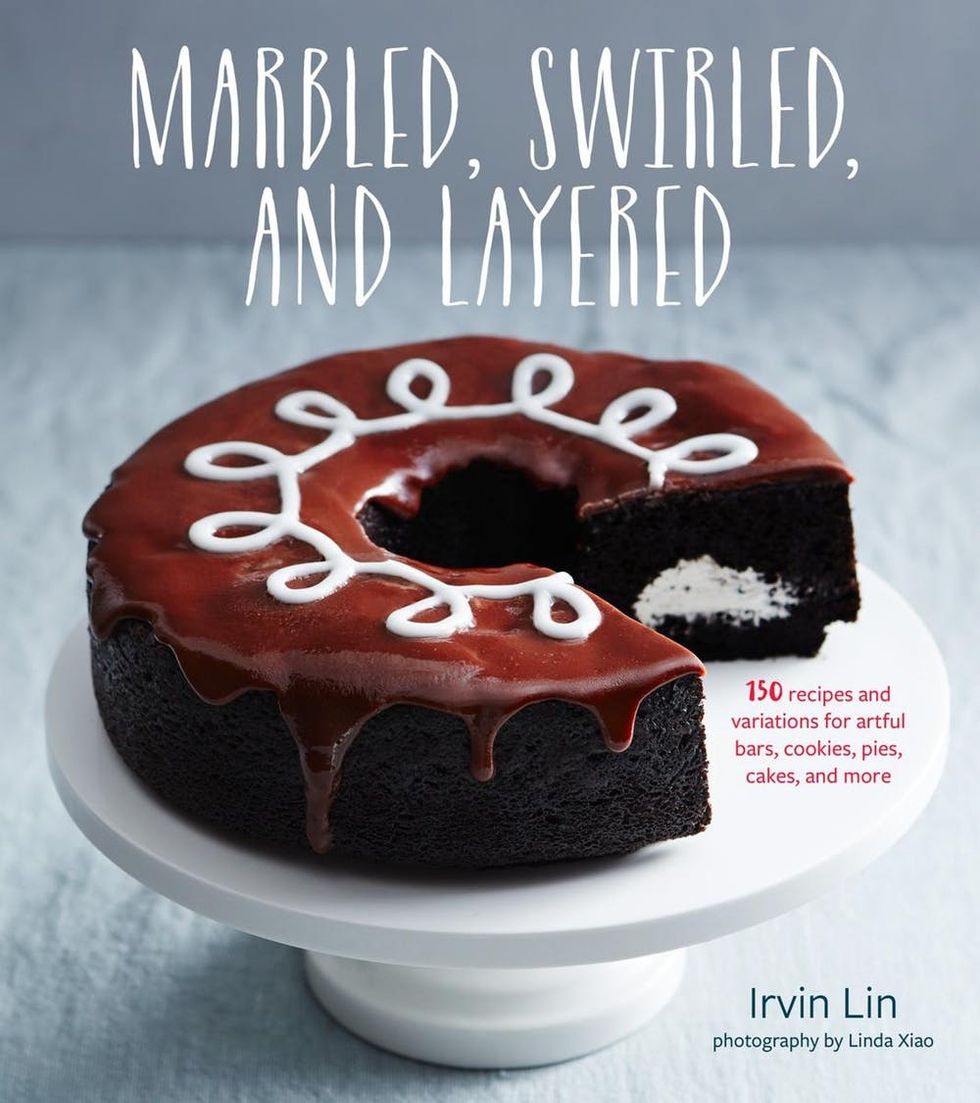
It doesn’t take much to understand the appeal of the Hostess Ding Dong Cake or why copycat versions have become ridiculously popular on Pinterest. Injecting marshmallow filling in between two layers of chocolate cake with a chocolate glaze hits all the right notes, doesn’t it? To learn more about how to recreate this hacked cake at home, we turned to baker Irvin Lin of the blog Eat the Love and author of the cookbook Marbled, Swirled, and Layered ($30). The cover photo of his cookbook features this iconic cake, and he’s shared the recipe with us.
Lin said what it took him about four attempts to perfect his nostalgic cake. He was looking for his version to “have a good chocolate cake in moisture, crumb, and flavor.” The marshmallow filling needed to be “a rich vanilla flavor; buttery not just sugary” and mmto be “something that is more than just what I can buy at a store.”
Of the universal appeal of Ding Dong cakes, Lin suggests that it’s one part nostalgia and another part elevating something simple. “A few years ago, I would see people buying Ding Dongs in silver wrappers and stacking them like wedding cakes… currently trending on Pinterest is the donut board — it’s something that’s easy to make and that everyone reacts to,” he says.
Lin describes this cake as a bit of an aspirational recipe or a weekend project but warns that the frosting crusts quickly. “Be fearless when you pour it on…The icing can sense your fear; you just have to go for it!” he encourages. If you’re ready to take it on (or pin it for later), check out the full recipe below.
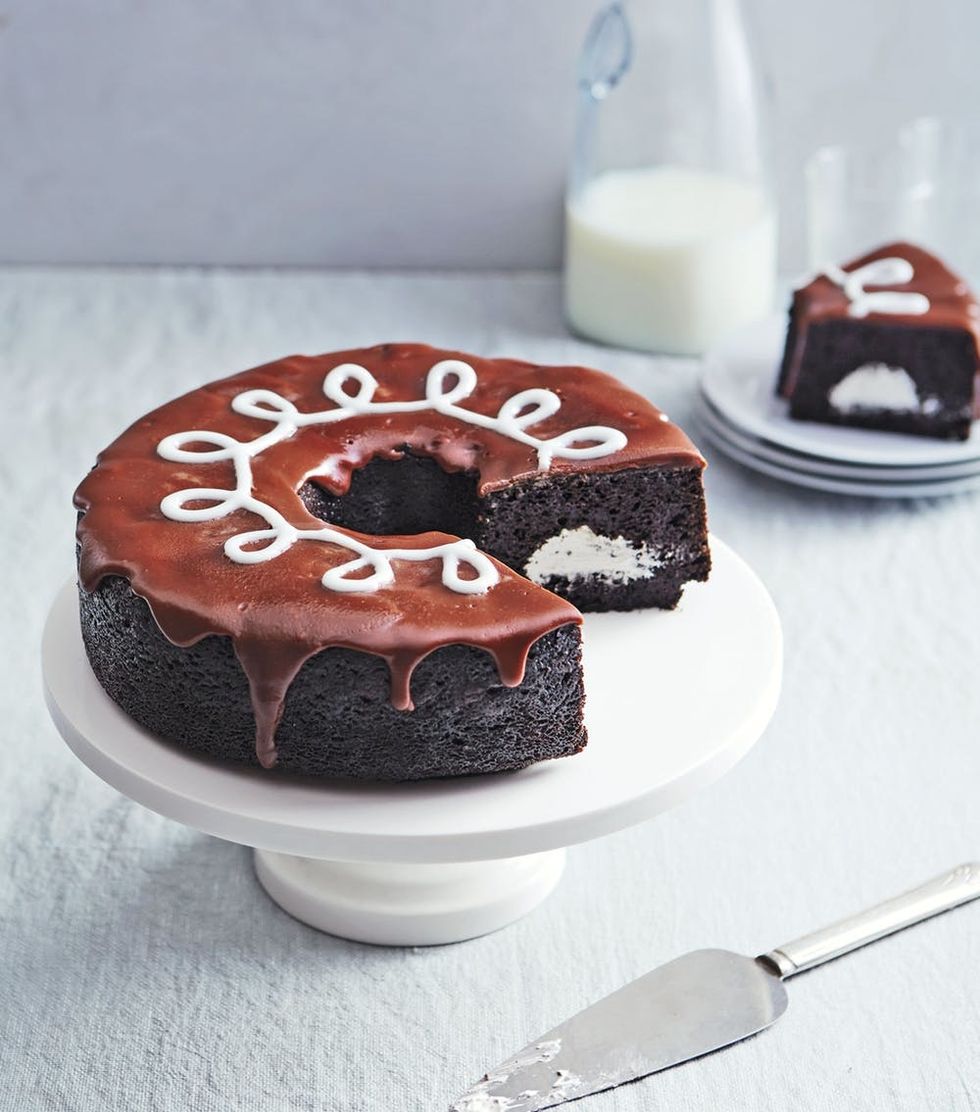
THE NOSTALGIC MARSHMALLOW-FILLED CHOCOLATE Ding Dong CAKE
(Serves 12 out of 1 tube cake)
Nostalgia is a powerful emotion. I’ll be walking down the aisle at the grocery store, minding my own business, looking to buy some kale and maybe a free-range chicken to roast, and then wham! a box of mass-produced cupcakes with the little squiggly white loops are staring me in the face and I get weak in the knees. They’re too sweet for my adult taste buds, and the chocolate cake will be slightly dry and oily at the same time. But I still hesitate and think about buying them because the nostalgia draws me in. The solution is to make a version from scratch. My homemade tube cake version perfectly satisfies that nostalgic itch. Once you get a bite of this cake, you’ll know what I mean.
Cheat Marshmallow Filling Shortcut: Simplify the filling by beating 1/2 cup (115 grams or 1 stick) room temperature salted butter with 2 teaspoons vanilla extract or paste until creamy. Add a 7-ounce jar of store-bought marshmallow creme or fluff and beat until incorporated. Use that as the filling.
Ingredients:
Cake Batter:
- 2 cups (280 grams) all-purpose flour
- 1 cup (100 grams) Dutch-process cocoa powder
- 1 1/2 cups (300 grams) granulated sugar
- 1/2 cup (110 grams) packed dark brown sugar
- 1 3/4 teaspoons baking powder
- 1 teaspoon baking soda
- 1 teaspoon kosher salt
- 3 large eggs
- 1 cup buttermilk
- 1 cup freshly brewed coffee, cooled to lukewarm
- 1/4 cup vegetable oil
- 2 teaspoons vanilla extract
Marshmallow Filling:
- 2 large egg whites
- 1/4 teaspoon cream of tartar
- 3/4 cup (150 grams) granulated sugar
- 1/2 cup (155 grams) light corn syrup
- 1/4 cup water
- 1/2 teaspoon kosher salt
- 1/2 cup (115 grams or 1 stick) unsalted butter, at room temperature
- 1 tablespoon vanilla extract or vanilla paste
Chocolate Frosting:
- 2 cups (230 grams) powdered sugar, sifted
- 1/4 cup whole milk
- 2 teaspoons light corn syrup
- 1 teaspoon vanilla extract
- 3 ounces (85 grams) dark bittersweet chocolate (about 60% cacao)
White Squiggle Icing:
- 1 cup (115 grams) powdered sugar, sifted
- 2 teaspoons whole milk
- 2 teaspoons light corn syrup
Equipment:
- tube pan
- parchment paper
- stand mixer with whisk attachment and paddle attachment
- candy thermometer
- pastry bag
Directions:
1. Make the Cake. Preheat the oven to 350°F. Coat the sides, bottom, and center of a tube pan with a removable bottom (the kind you would use for an angel food cake) with cooking spray. Line the bottom of the pan with a round piece of parchment paper with a hole cut out in the middle. Set the pan on a rimmed baking sheet.
2. Combine the flour, cocoa powder, both sugars, baking powder, baking soda, and salt in a large bowl. Using a balloon whisk, vigorously stir until the ingredients are uniform in color and fully blended.
3. Place the eggs, buttermilk, coffee, oil, and vanilla in another bowl and beat together with a fork.
4. Make a well in the middle of the dry ingredients and pour the liquid into the center. Mix with a large spatula until a batter forms.
5. Pour into the prepared baking pan (it should only come about one-third up the sides of the pan). Bake until a toothpick inserted in the center comes out clean, 50-55 minutes.
6. Let the cake cool in the pan for at least 3 hours, or up to overnight.
7. Make the marshmallow filling. Place the egg whites and cream of tartar in the bowl of a stand mixer fitted with the whisk attachment. Beat until soft peaks form, then stop the mixer.
8. Combine the sugar, corn syrup, water, and salt in a medium saucepan and cook over high heat until the syrup reaches 245°F on a candy thermometer (the firm-ball stage).
9. Remove from the heat and turn the mixer back on to medium speed. Slowly drizzle a little bit of the hot sugar syrup into the egg whites, avoiding the moving whisk (or else the hot syrup will fly everywhere!). Raise the speed to medium-high and continue to drizzle the syrup into the egg whites until it is all added. Don’t rush it — just slowly drizzle. Once it’s all added, continue to beat for an additional 7-10 minutes, until the marshmallow fluff is stiff and glossy white.
10. Scoop the fluff into another bowl and let cool completely.
11. Once the cake is completely cool and ready to assemble, place the butter and vanilla in a clean bowl of the stand mixer fitted with the paddle attachment. Beat until the vanilla is incorporated and the butter becomes creamy and sticks to the side of the bowl. Add the marshmallow fluff and beat until well blended.
12. Fill the cake with marshmallow. Remove the cake from the pan and set it with the rounded side up (the way it baked in the pan). Create a tunnel in the cake for the filling by first making a “moat.” With a small paring knife, cut a curved rectangle, 2 inches long by 1 inch wide, into the top of the cake about halfway between the center hole and the outside edge of the cake, following the curve of the cake. Cut into the cake about two-thirds deep and use the knife to lift the rectangle out from the cake. If the hole isn’t deep enough, just use the knife to cut and scrape out more cake (but don’t cut all the way through to the bottom). Repeat, working around the cake, cutting out rectangular pieces to make a continuous moat. Place the cake pieces right next to where you cut, so you can put them back when the time comes.
13. Once you’ve gone all the way around the cake, spoon the marshmallow filling into the moat, filling it about halfway. You may not use all the fluff, but that’s okay. Save it for another use.
14. Cut off about half of each rectangular piece of cake from the rough side (the inside part). Replace the remaining cake pieces in the moat over the marshmallow filling to plug up the cake. Repeat all the way around the cake. Nibble on the scraps if you want (I do). Turn the cake over so that the “flat” side of the cake is on top and the “plugged” rounded side is on the bottom, and place on a cake stand or serving plate.
15. Make the chocolate frosting. Combine the powdered sugar, milk, corn syrup, and vanilla in a medium pan. Cook over medium heat, stirring constantly, until the sugar dissolves and the mixture starts to bubble on the sides of the pan. Reduce the heat to low and add the chocolate, stirring until the frosting is smooth.
16. Now quickly spoon the warm frosting over the cake. The frosting is a bit finicky and will start to crust immediately as it cools. If this becomes a problem, spoon as much as you can, getting it where you want it, then wet your fingers and use them to smooth out the frosting.
17. Make the white squiggle icing. Mix together the powdered sugar, milk, and corn syrup to form a thick paste. Scrape it into a pastry bag with a small round tip or a zip-top bag with a small part of the corner snipped off. Make some test squiggles on a piece of paper to get the feel of it, then squeeze squiggle loops over the top of the iced cake.
Get busy baking and find fresh inspiration by following us on Pinterest.
Brit + Co may at times use affiliate links to promote products sold by others, but always offers genuine editorial recommendations.
(Recipe and photo of The Nostalgic Marshmallow-Filled Chocolate Cake excerpted from Marbled, Swirled, and Layered © 2016 by Irvin Lin. Photography © 2016 by Linda Xiao. Reproduced by permission of Houghton Mifflin Harcourt. All rights reserved.)


