Follow this tutorial and discover how to re-create Cinderella, Snow White and Ariel’s hairstyles.
How to DIY Easy Disney Princess Hair for Halloween
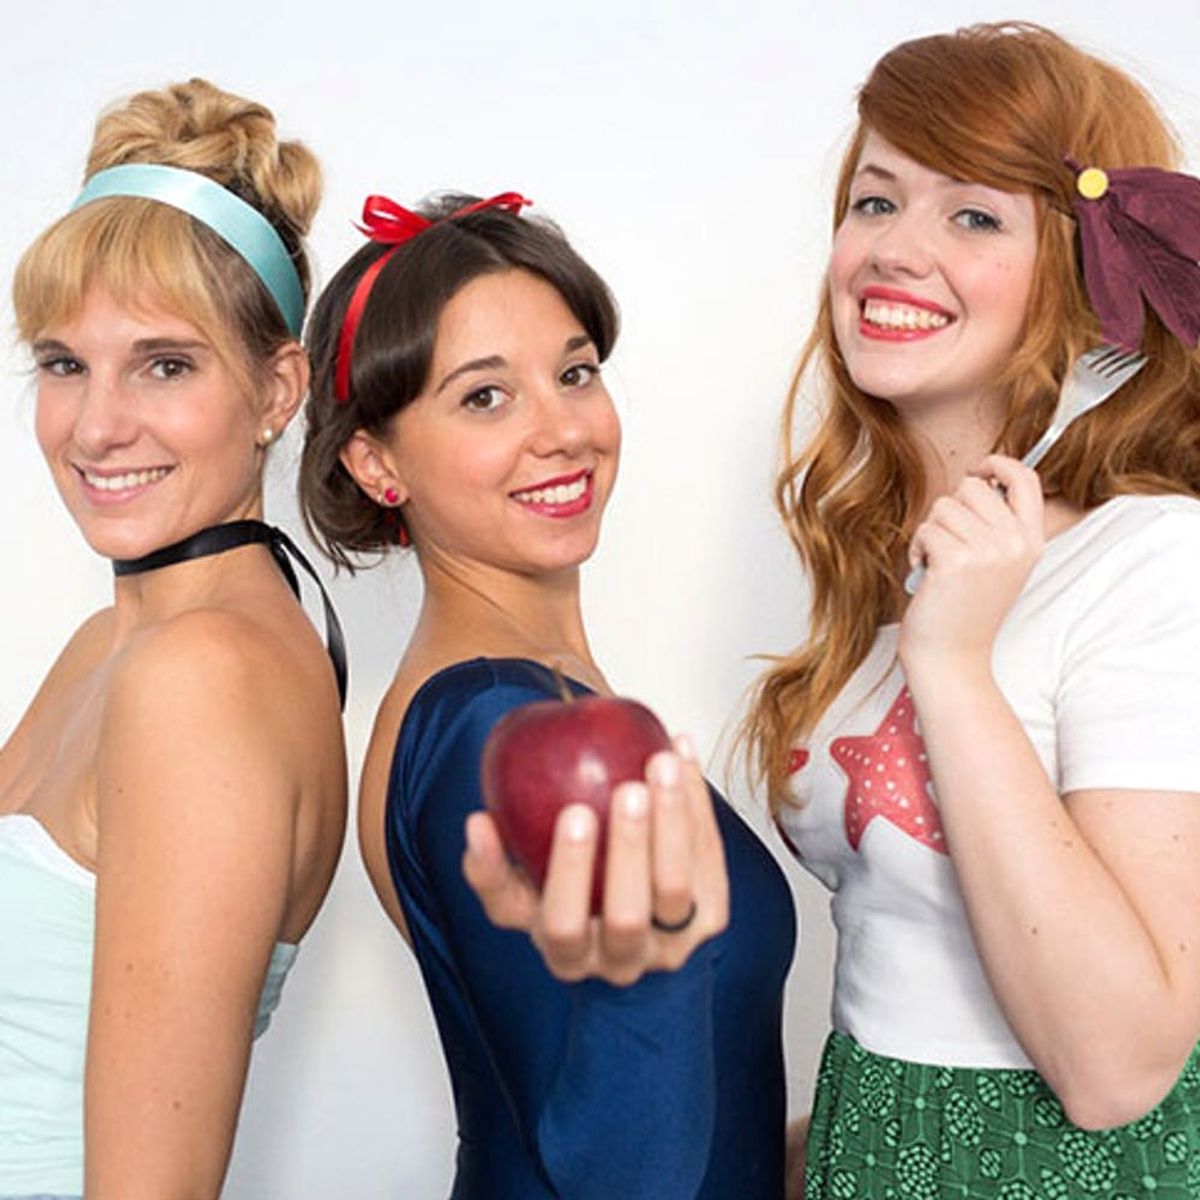
Admit it: You’ve dreamt about having Cinderella’s gorgeous updo, Snow White’s pin-up curls and Ariel’s dreamy hair at least once in your life (or if you’re like us, maybe way more than once). Now that Halloween is just around the corner, we’ve got the perfect excuse to live our childhood/young adult/totally current dream. If you’re planning on dressing up as a Disney Princess for Halloween, or just want to make your everyday ‘do a bit more magical, we’ll show you how to fake three of the most classic Disney Princess hairstyles of all time in less than 15 minutes.
Just grab some bobby pins and other basic hair accessories — and your best DIY Disney Princess attire — and scroll on to the tutorials below.
How to DIY Cinderella Hair for Halloween Step 1: Make Fake Bangs
This style starts off with a hair hack: We’re going to use a ponytail to make fake bangs. Start by brushing your hair to be sure there are no tangles, then use a fine tooth comb to make a V section on the front top of your head. Pull that section of hair together and make a ponytail using a thin elastic. Flip the end of the pony over your eyebrows and pin it in place with bobby pins. Don’t worry to much about the exposed bobby pins or the little bump you have from the pony — you’ll cover that up later. Use a flat iron to style your bangs with a slight curl up top and then down straight.
Step 2: Twist Your Hair into a French Twist
Brush the rest of your hair back, then twist it tightly upward, tucking as you go, and secure it in place with bobby pins, leaving the ends loose.
Step 3: Add Rosettes
Now it’s time to add some rosettes. Take a section of loose hair that is more ore less one inch thick and twist it around your fingers to create the twirled shape. Pin in place just above the bump that we made before. Repeat with all the remaining hair.
Step 4: Add the Dashing Details
Finally, add a light blue headband or ribbon to cover your exposed bobby pins and you’re done! Luckily this magic doesn’t end at midnight ;)
How to DIY Snow White Hair for Halloween Step 1: Prep and Section Your Hair
To recreate Snow’s lovely look, we’re gonna (spoiler alert!) fake her bob. But first, it’s time to prep your hair. Use a fine tooth comb to place a middle part in your hair and apply a heat protector to your strands, like Living Proof Restore Instant Protection Spray ($26). Then, gently comb through your hair to diffuse the product. At this point, comb the front top of your head into a V and clip it in place for now.
Step 2: Add Curls and Twists
There’s no Snow White’s look without a red bow. So, use an apple-red ribbon as a headband and pin it in place so that it’s easier to work with. Then grab your curling iron and add some soft curls to your hair that’s down. Once all of your hair is curled, style your hair into a low updo using the same technique we used for Cinderella’s hair: take a one-inch section of hair, twist it around your fingers up to the base of your neck and pin it in place with bobby pins. Continue until you have no more free hair.
Step 3: Style the Front Section
Once you’ve finished with the low updo, remove the clip from the top of your head and curl your bangs toward your face. Pin both sections above each ear with bobby pins and you’re ready for your closeup — apple optional.
How to DIY Ariel Hair for Halloween Step 1: Prep Your Hair With Dry Shampoo
Since we’re going for the opposite of under-the-sea hair, use dry shampoo to add a bit of volume to your locks — so important considering Ariel’s amazing mane (psst, this is a perfect second-day hairstyle!). We love Drybar’s TripleSec 3-in-1 ($26), which is a volumizer, texturizer and dry shampoo in one.
Step 2: Add Voluminous Curls
Add a deep side part your hair with a fine tooth comb. Then, divide your hair into a top and bottom section. Clip the top part of your hair up and leave it alone for now, then add heat protector to the bottom section of your hair. Use a chunkier curling iron to curl two-inch sections of hair. Repeat until you’ve curled the entire bottom section of your hair, then move on to curling the top section. Once that hair is all curled, gently brush your hair. I love using this technique to mesh my hair and create big, voluminous waves.
Step 3: Add MORE Volume
I have very thin hair, so I decided to add some volume by teasing the top section of my hair near the roots a little bit. Pro tip: Using a brush instead of a comb helps prevent damage, so I really suggest you using this method if your hair is damaged or dyed.
Step 4: Side Bangs + Final Touches
Finally, to get Ariel’s look, use your finger to plump the bangs (for this, the bigger the swoop, the better!) then pin and spray it in place. Then add a tiny bit of seed or Argan oil to add a healthy shine to your bangs and complete with a colorful accessory like a sea star or some colorful seaweeds like this hair pin I DIYed. Ta-da! You’re ready to sing “Under the Sea” all night long and seduce your terrestrial prince.
Halloween #squadgoals = complete.
What’s your fave Disney Princess hairstyle? Let us know in the comments below.


