Your go-to crash course in calligraphy and graphic design.
How to Create Unique Invitations With Calligraphy and Illustrator
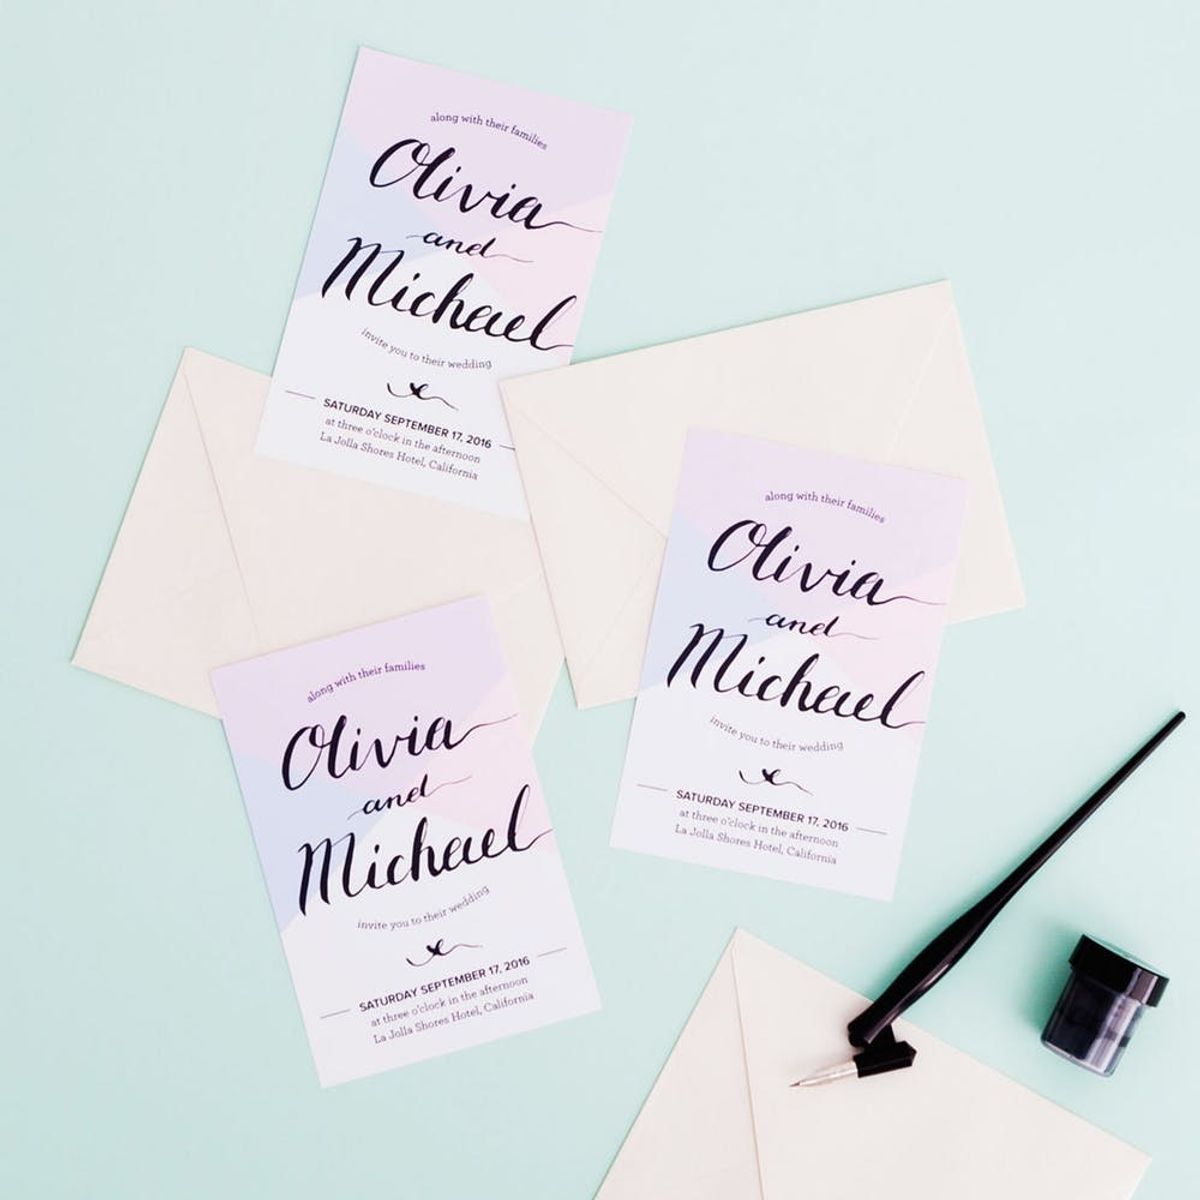
For those currently planning weddings, bridal showers and parties of all kinds, the list of expenses can add up QUICKLY. It’s during times like these that your friendly DIY fairy godmothers at Brit + Co are here to say — STOP and MAKE YOUR OWN invites! Before you tell me I’m crazy, or that you don’t know anything about graphic design, read a little further and see how I put together these simple, budget-friendly wedding invitations using a tiny bit of calligraphy and about 30 minutes of work in Adobe Illustrator (which has a free trial by the way!).
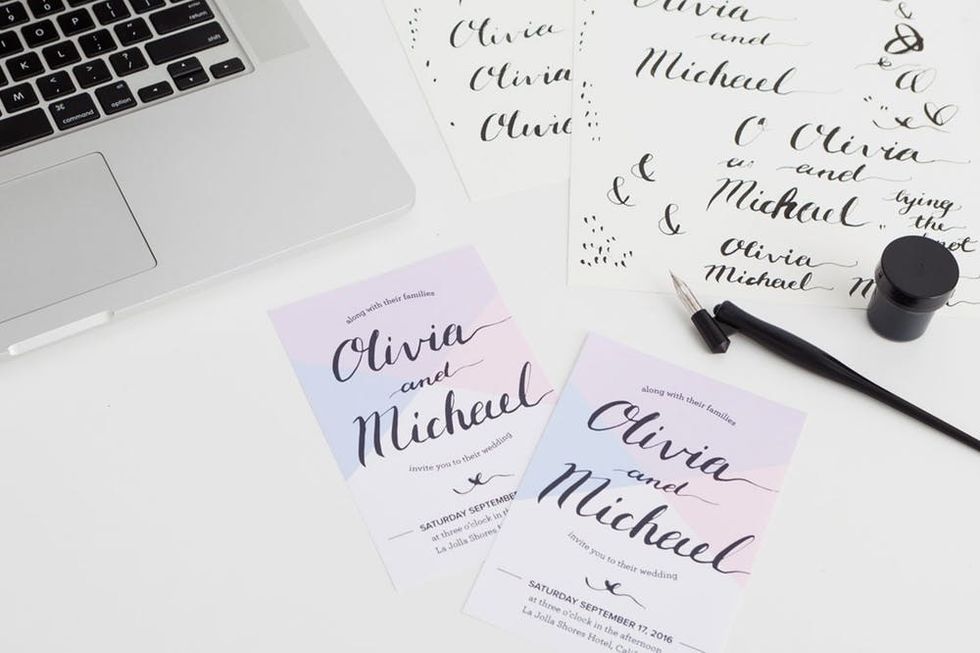
Seeing as hand written calligraphy is the go-to choice for brides of all styles, we put together this beginner-friendly tutorial to break it down so that you really can make them at home yourself! All the techniques we used we learned from our Calligraphy 101 online class and Adobe Illustrator online class, so if you’re not sure where to start, sign up for a class and you’ll be a pro in no time!
Materials:
— calligraphy pen + nib
— black ink
— ink pot
— washi tape
— tracing paper
(included in our Calligraphy 101 Kit)
Additional Tools + Programs:
— Adobe Illustrator downloaded onto your computer (free Adobe Illustrator trial HERE)
— scanner
— white cardstock
Instructions:
1. Dip your pen into the black ink, and practice your calligraphy lettering on tracing paper.
2. Write your names and/or phrases onto card stock, and wait for it to dry completely.
3. Scan in your favorite page of lettering, and save as a .JPEG.
4. Create a new document in Adobe Illustrator, and then open up your scanned .JPEG in Illustrator as well.
5. Image trace and expand your scanned calligraphy, and delete all versions of your names or phrases that you are not going to use.
6. Position and size your chosen lettering onto the new Illustrator document.
7. Add text boxes to your document and fill with the important event details.
8. Add block of color (optional) and save as a .PDF for print.
9. Print out your finished file, and trim down the edges to the crop marks positioned in all four corners.
10. Pop your invites in envelopes, address to your guests and send them out!
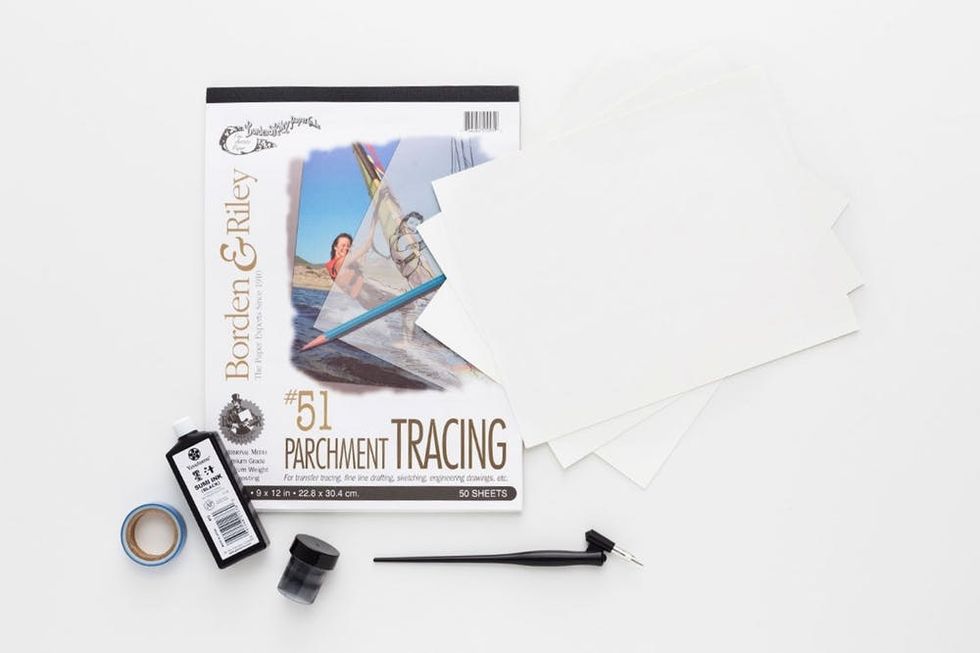
Gather your calligraphy supplies, start downloading your free trial of Adobe Illustrator and you’re ready to go!
Calligraphy

Prep your calligraphy pen by dipping the nib all the way into your ink-filled plastic pot, and tapping the tip against the side of the pot a couple times.
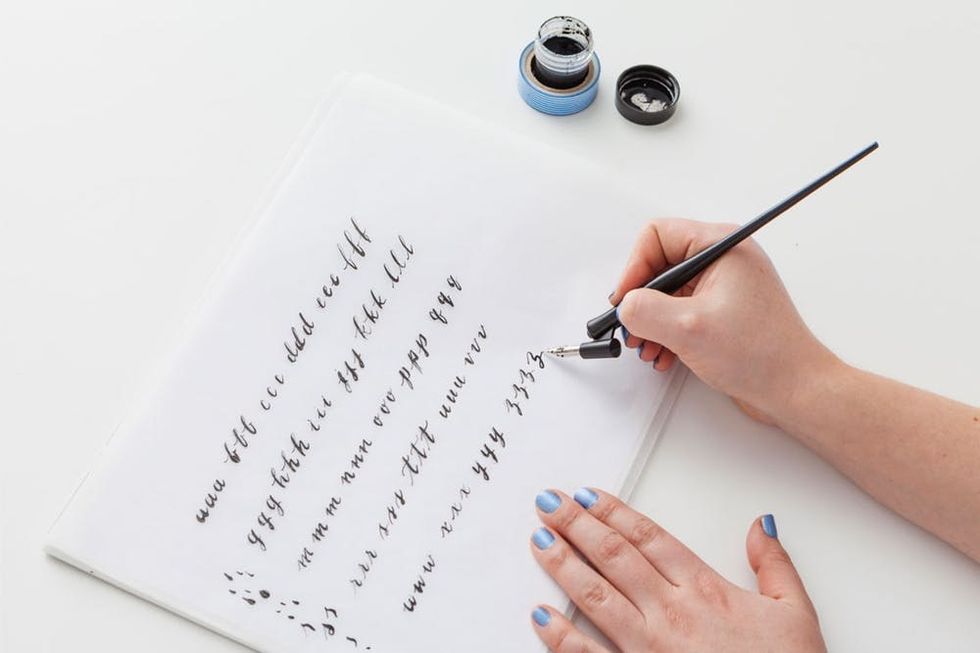
Practice your lower and uppercase letters on tracing paper until you get a good feel for the pen. If you sign up for our Calligraphy 101 online class, you’ll get access to printable templates to trace over to practice your lettering.
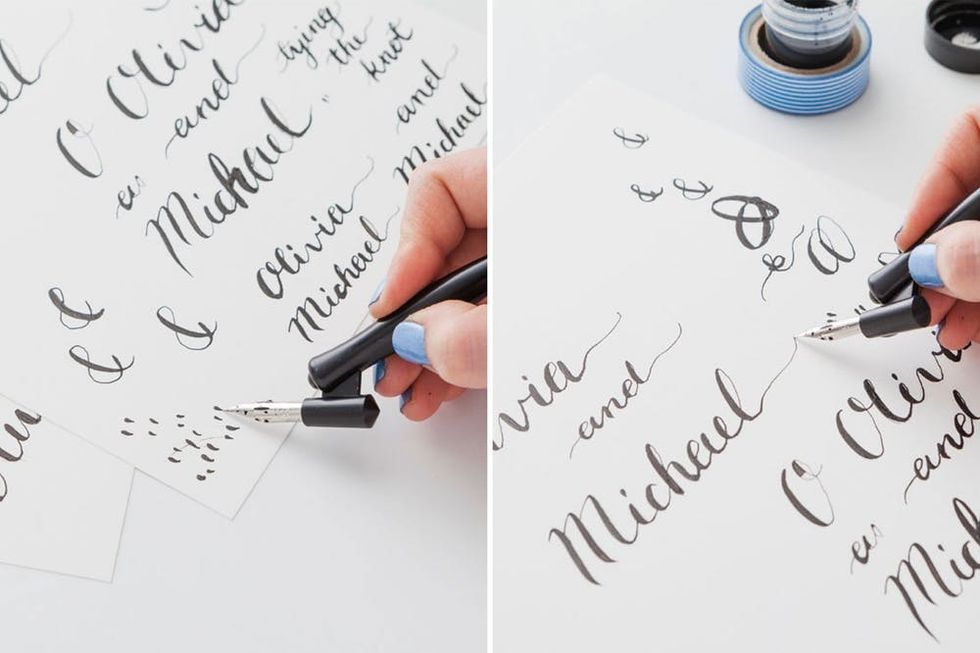
Now take a few sheets of white card stock, and start practicing some names and phrases for the final design. Pro tip: After each time dipping your pen back into the ink pot, you may want to make a few marks on the side to get the excess ink off before writing names and phrases.
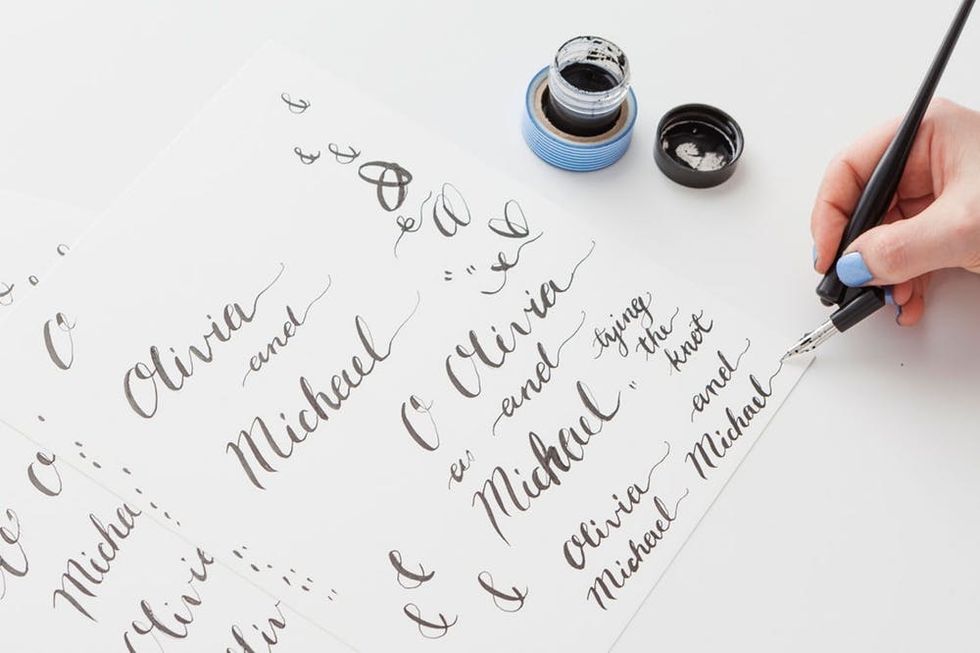
Keep practicing until you’re happy with your results. I used up about three sheets of paper for lettering practice, but you can use as many as you’d like.
Layout in Illustrator
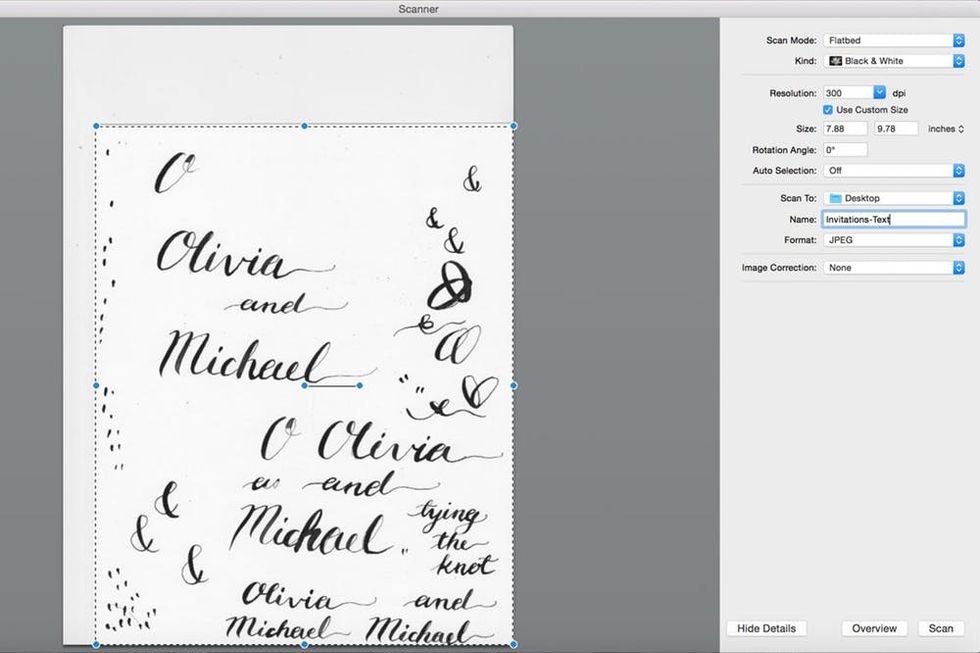
Once all the ink on your favorite sheet is totally dry, go ahead and scan it in. Select “Black & White” and “300 dpi” in your scan settings, and save as a JPEG.
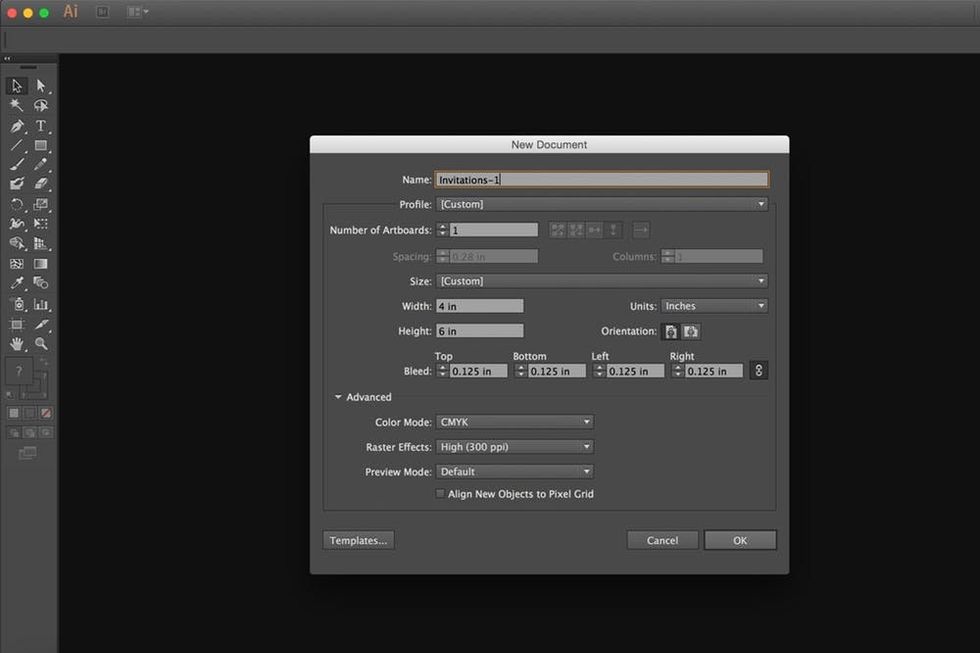
Open up Adobe Illustrator, and start a new document. Set the dimensions to whatever size you’d like (we chose 4×6 inches, standard postcard size) and set your bleed to 0.125 inches on all sides. Lastly, since you’ll be printing this out at the end, set your color mode to “CMYK” and click “OK.”
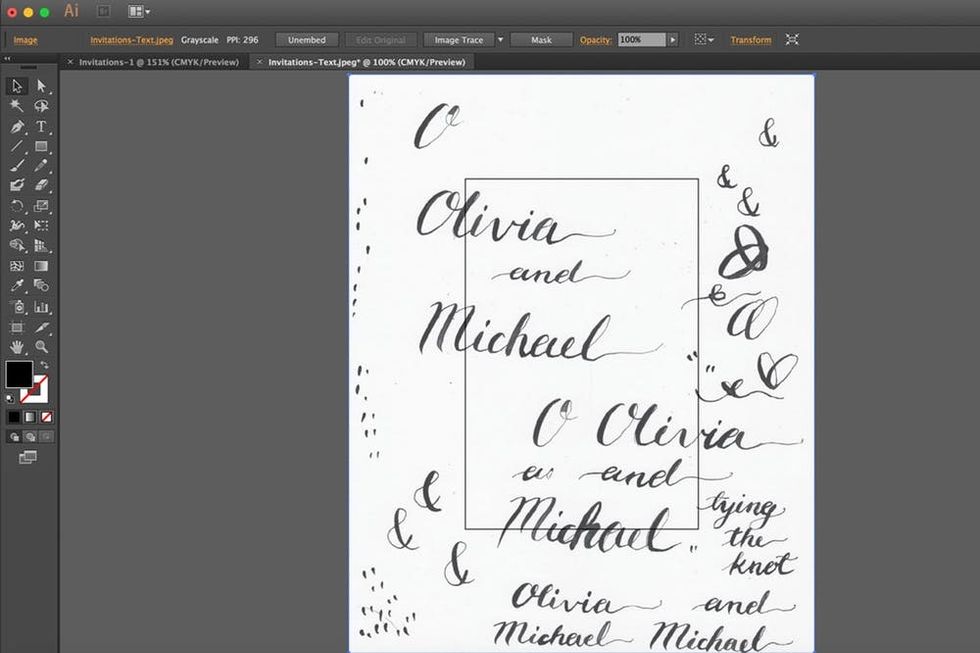
Now, open the scanned-in JPEG of your calligraphy so we can vectorize it. Select the whole page of lettering, then click on “Image Trace.” Next, click “Expand” to create your vector lettering.
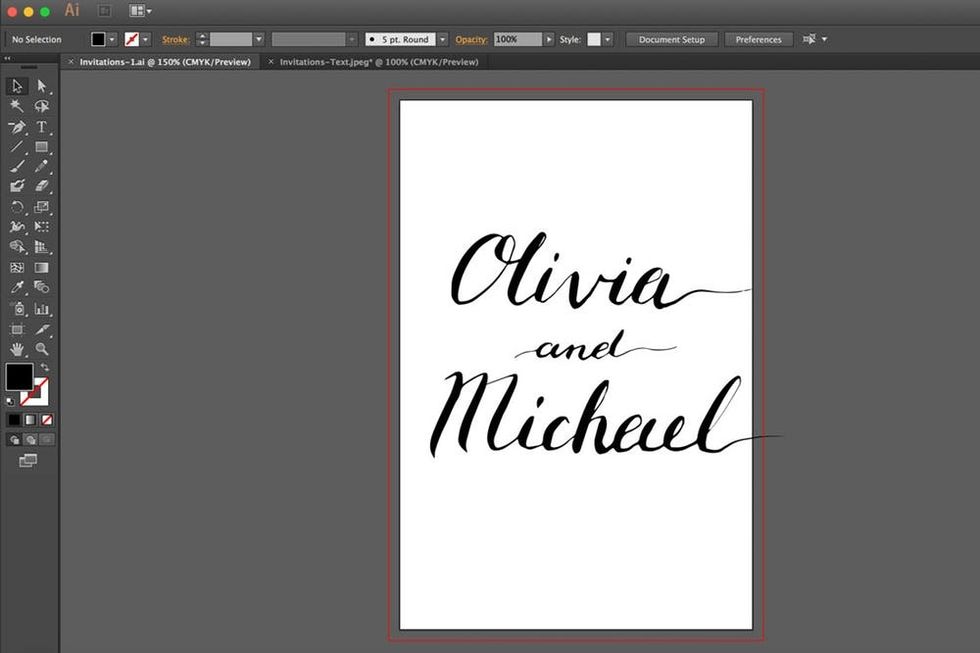
Now it’s time to get rid of the riff raff — pick out your favorite version of your names or phrase and delete all the other versions around it. Select all pieces of your final phrase and click on “Unite” in your “Pathfinder” window to make sure it is all one shape. Once this is done, drag your lettering over onto your 4×6-inch document and size and position to your preference.
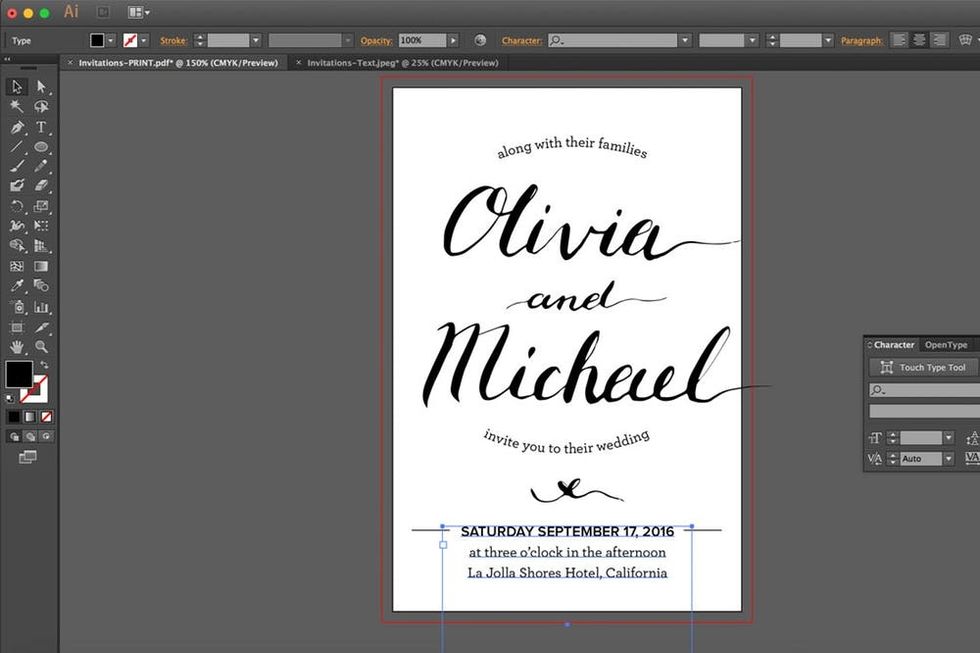
Next up, add a few text boxes onto your layout, and fill in the important details of your invitation. Experiment with a variety of fonts, and see what you like!
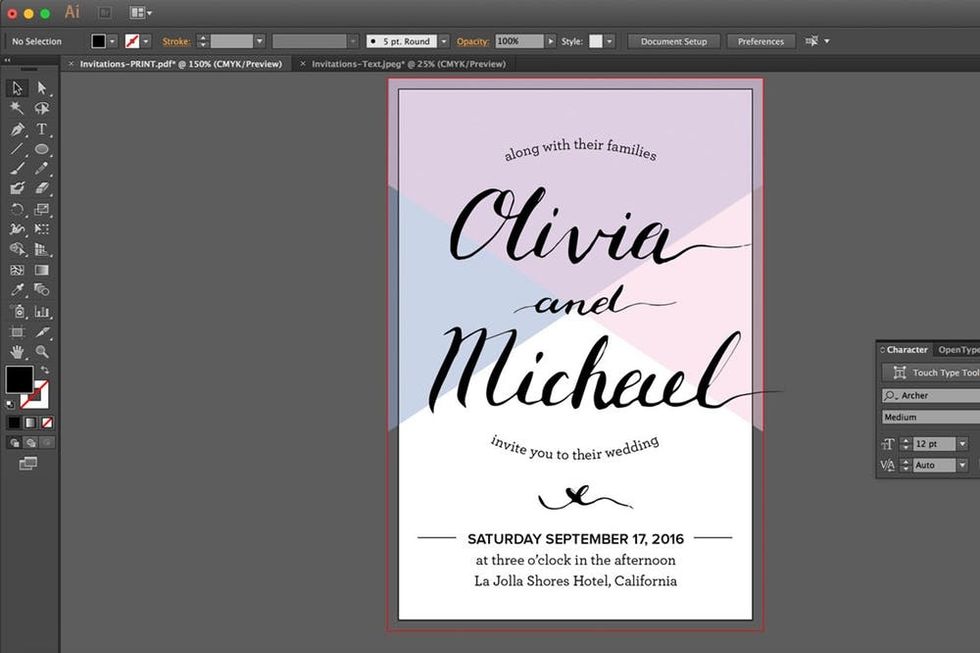
I wanted to add a little color to this layout, so I layered two transparent shapes — one blue and one pink — which blend into purple at the top.
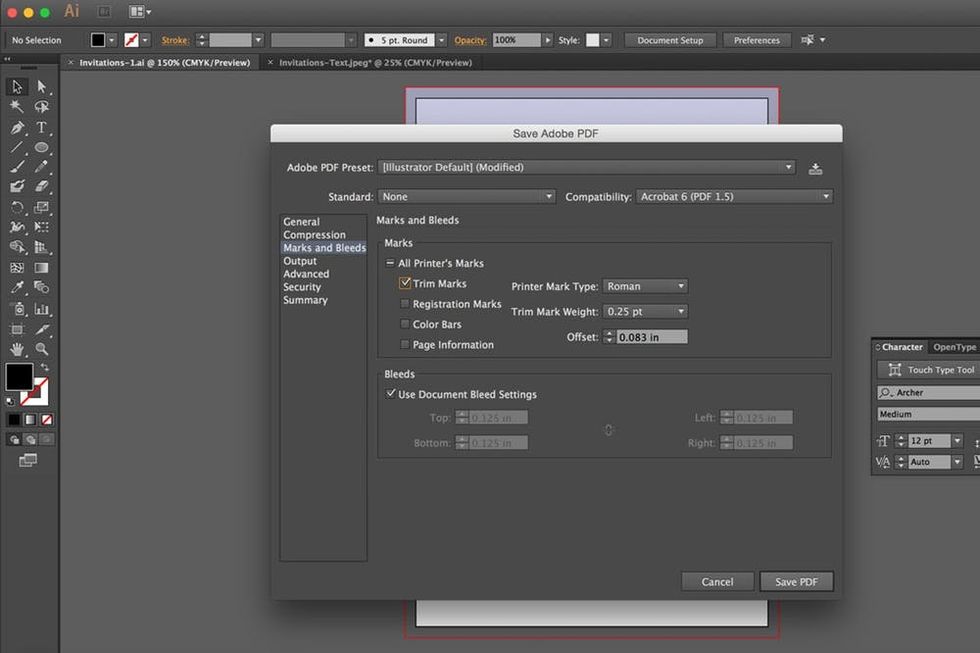
Once you’re happy with your design, it’s time to get your file ready for print. Save your file as a “PDF,” and select “Trim Marks” and “Use Document Bleed Settings” in the “Marks and Bleeds” section. Click on “Save PDF,” and you’re ready to print!
The Final Product
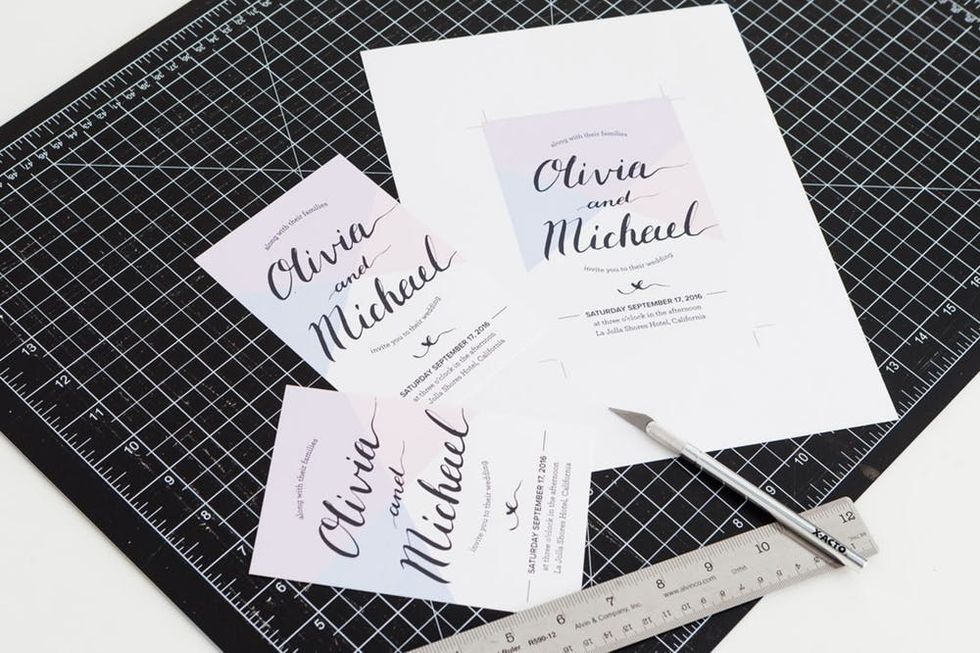
Print out your invites at home on high quality card stock, or take your .PDF file to a professional printer. Be sure to ask them for a printed proof to make sure the colors look right to you before you ask them to print the whole job. Use those little crop marks in the four corners of your print to trim off the 1/8th of an inch color bleed with an X-ACTO knife.
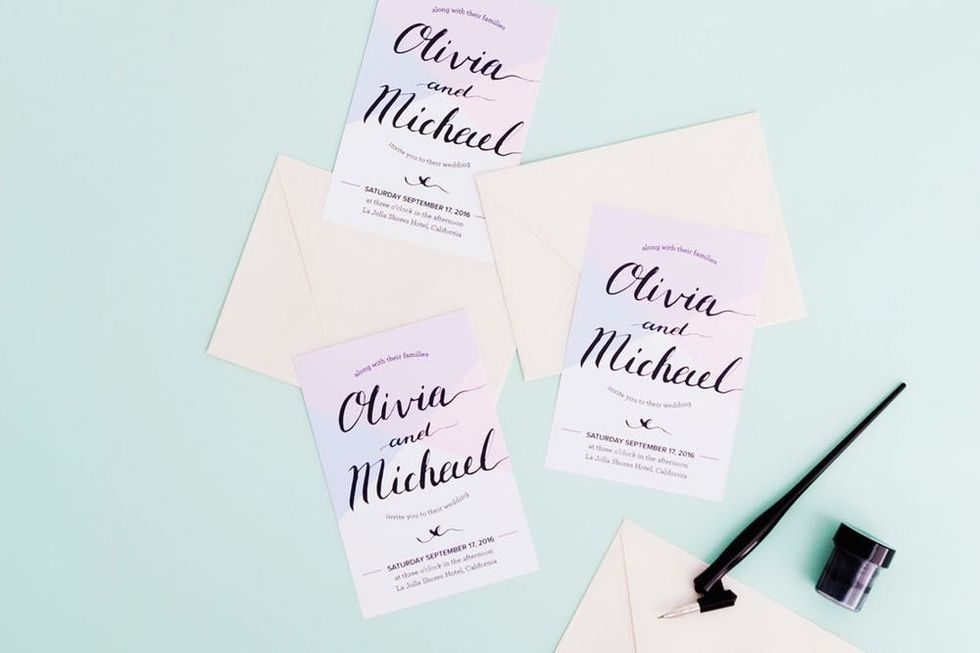
Pick out your envelopes, and send these babies out in the mail. And now that you’re an experienced calligrapher, you can beautifully address those envelopes too!

How will you mix traditional arts and digital design skills to make something unique? Show us your project by tagging us on Instagram and using hashtag #iamcreative!


