After showing you our favorite DIY chandeliers from the web, were you as inspired to make one as we were? We wanted a chic chandelier but didn’t want to spend thousands of dollars to buy one, or spend days threading thousands of beads to make one…..what to do, what to do? Create a chandelier hack of course!
How to Make a Wooden Chandelier

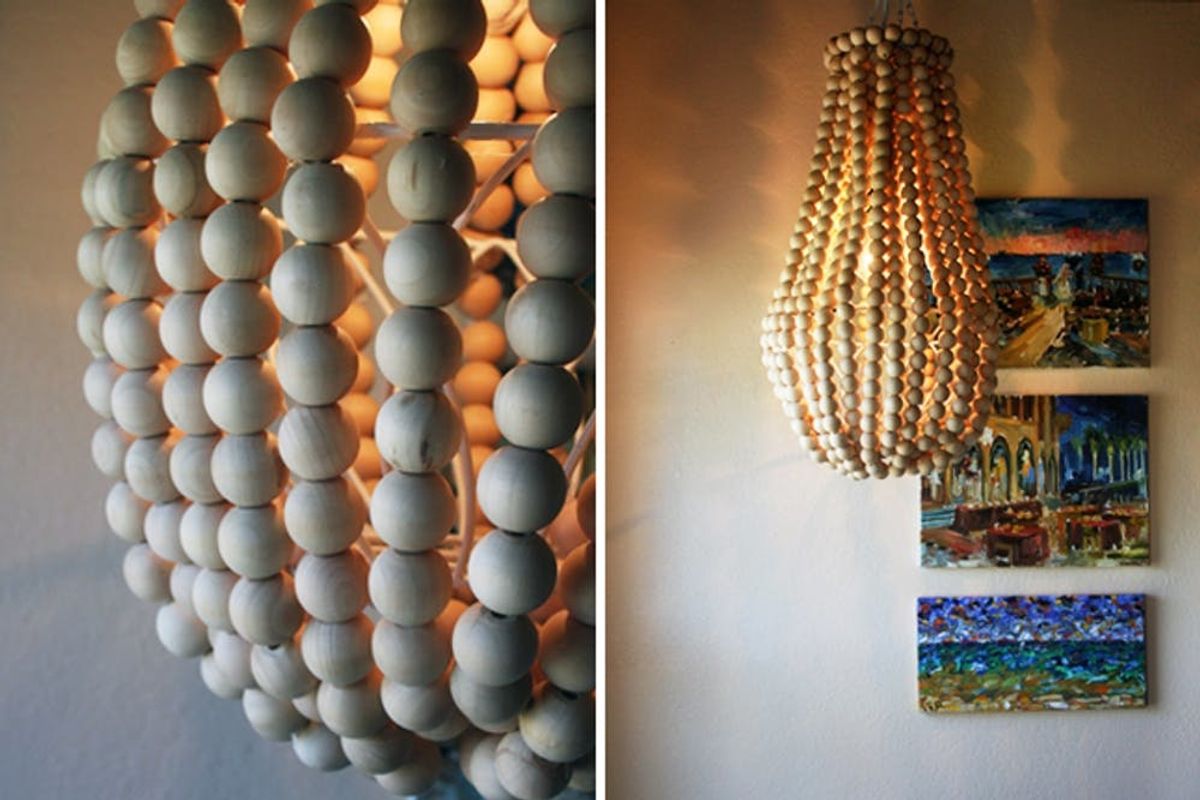
After showing you our favorite DIY chandeliers from the web, were you as inspired to make one as we were? We wanted a chic chandelier but didn’t want to spend thousands of dollars to buy one, or spend days threading thousands of beads to make one… what to do, what to do? Create a chandelier hack of course! And being that it’s wood week here at Brit HQ, we just had to use some big funky wooden beads. Read on to find out how make one for yourself.
Supplies:
– 12 inch hanging plant basket
– white spray paint
– clear monofilament cord 30 lb
– silver steel wire 22 gauge
– 2 steel 5 inch crafting hoops
– 2 Popsicle sticks
– 2 clothespins
– “S” hooks
– decorative hanging hook
– 12 feet of small white chain
– light bulb
– hanging pendant light kit
– 700 1 inch wood beads
– sand colored yarn
– scotch tape
Tools:
– scissors
– metal chain cutter
– hot glue gun
Start by deciding if you want all your chandelier hardware black or white.
If you want all white like us, just spray paint your hanging basket white. Then if you accidentally bought a black pendant light kit like we did but want it white, just wrap the cord with white electrical tape. To create the base of your chandelier, hang the painted basket on the back of a chair or tall ladder. Use the the clothespins to hang the cord above the basket, and wrap the basket chain and pendant cord together with a little steel wire.
Now take your popsicle sticks and cut them to be the same length as the steel craft hoop. Glue them into an X, making the bottom much wider than the top of the X. Poke the pendant light cord through the wider part of the X and lower the hoop all the way to the chain of the basket. Then glue it in place 3 inches above the metal hook of the basket.
Next up, place the hook of the basket into the end of the white chain. Make sure your chain is long enough to hang from your intended ceiling. Place that chain through the steel hoop as well so it follows the path of the pendant light cord. Then start threading beads onto the clear cord. You will need 25 strands that have 27 beads on them. Glue the first bead you put on to the cord and leave the other end untied. Leave at least 8 inches of extra cord on both ends. Then tie the unglued end of the bead strand onto the steel hoop. Secure it with glue. Continue placing on your strands of beads, leaving the bottoms hanging free for now.
Once all your strands are on, grab about third of the strands together at the bottoms so they form a nice round curve at the bottom. Pull individual strands tighter or looser to adjust the curve if needed. Tape the ends together. Now pull that taped group of strands up through the bottom of the basket and secure with glue. At this point, you may want to glue a few of the strands in place along the top rim of the wire basket so they are evenly spaced.
At this point, we realized our chandelier was hanging a little lopsided. Oops! So we just balanced it out by using some of the leftover white chain and steel wire add extra supports. Now to cover your handiwork at the top, wrap your second steel hoop with yarn, securing with hot glue as you go. Then thread the hoop over the pendant cord and chain to place it over the top of the first hoop. Secure it with hot glue. Now make one last strand, this one with 21 beads. Glue it along the rim of the hoops, being sure to glue it low enough to cover the mess.
Now you’re done! Screw in a light bulb, hang in a beautiful place, and enjoy!
One of our fave things about this chandelier is it looks beautiful on or off.
Want to see more cool wood projects? Check out our other awesome wood tutorial on how to make wood vases.
Will you try making this chandelier? Any questions about the tutorial? Talk to us in the comments below!


