
 Recommended for you

Christmas lights are amazing. They can raise the ambiance of any space up ten notches just by being hung on the wall. So why in the world do we pack them away every year after the holidays? Time to change that, ya’ll! Let’s fend off the post-holiday blues by starting a Christmas-lights-all-the-time revolution! We’ll kick off with these easy christmas light marquee signs. We’ve got two ways to get the job done. The first requires a drill and wood, to make a light-up sign for outdoor OR indoor use. And the other is made from canvas and an X-ACTO knife, for indoor use only. Go grab those lights and let’s get started!
Materials:
- 1/2 inch thick wood, 18 x 30 inches
- BAR printable
- 100 Christmas light strand
- white and black paint
- VELCRO® Brand ONE-WRAP® Ties
Tools:
– drill with 5/16 drill bit
– sand paper
– scissors
– hot glue gun
– large and small paint brush
– ruler
– pencil
Instructions:
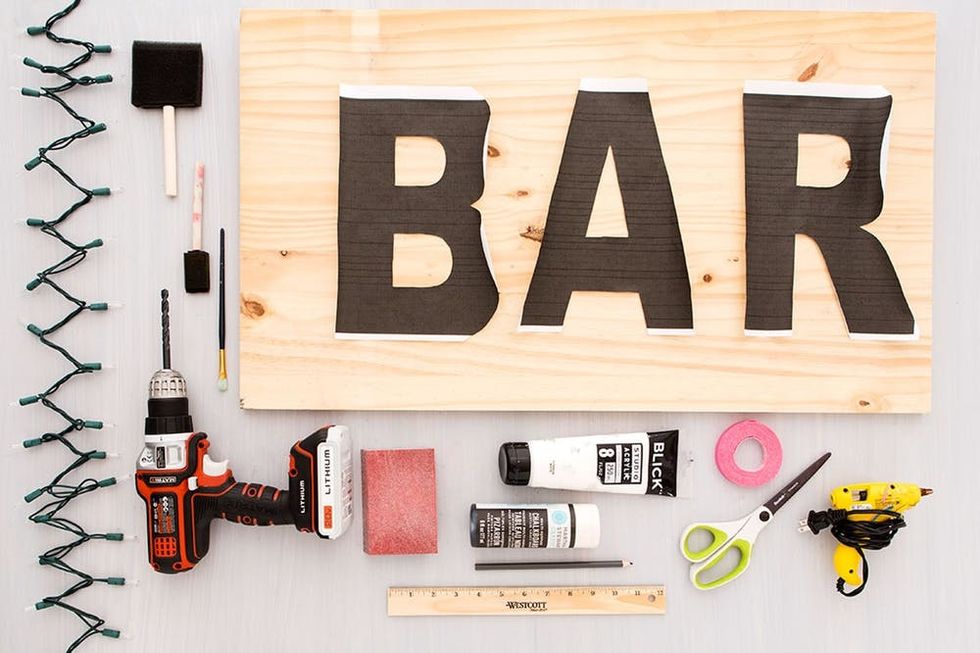
1. Print and cut out the BAR printable. Lay on top of the wood and trace using your pencil.
2. Grab your ruler and mark a dot every 1 1/2 inches along the pencil lines of the letters.
3. Using the 5/16 drill bit, drill holes at every mark along the B, A and R letters. Then sand the wood until it’s smooth.
4. Mix white paint with a little bit of water to create a white wash to cover the surface of the wood.
5. Paint the letters with black paint.
6. Flip the board over and stick one Christmas light bulb in every hole.
7. Cut five-inch pieces of VELCRO® Brand ONE-WRAP® and hot glue onto the back of the wood board. Wrap the string lights into theVELCRO® Brand ONE-WRAP® Ties to hold them in place.
Now this BAR printable is just a guide. Unfortunately, part of the letters will be cut off due to the standard size of printer paper. You’ll need to finish off the curves of the letters when cutting it out. Lay the letters onto the board, spaced evenly, and then trace with a pencil.
Lay the ruler along the pencil lines of the letters and mark a dot every 1 1/2 inches. This will be where you’ll drill holes for the Christmas lights. We did not mark the inner sections of the B, A or R letters, but that is totally your call!
Using the 5/16 drill bit, drill holes at all the marks along the B, A and R letters. Make sure you have a buffer board underneath your wood so you don’t drill straight into the surface you’re working on.
Sand the wood down to make it smooth like a baby’s bottom :)
Mix equal parts water and white paint together to create a white wash for the wood. Use your large brush to apply over the surface of the board.
Once the white wash has dried, paint in the letters with black paint. We used chalkboard paint since it has a matte finish. The matte finish will make the Christmas lights really steal the show.
Time to get those lights in those holes!
Turn the board over and start sticking one light bulb in each hole. We started by stringing the bottom row of lights, then we added lights to the B, then A and finished with the R. You might need to leave one light behind if it doesn’t reach into the next hole — this is okay!
Cut five-inch pieces of VELCRO® Brand ONE-WRAP® and hot glue onto the back of the wood.
Wrap around the cord tightly to really hold the lights in place.
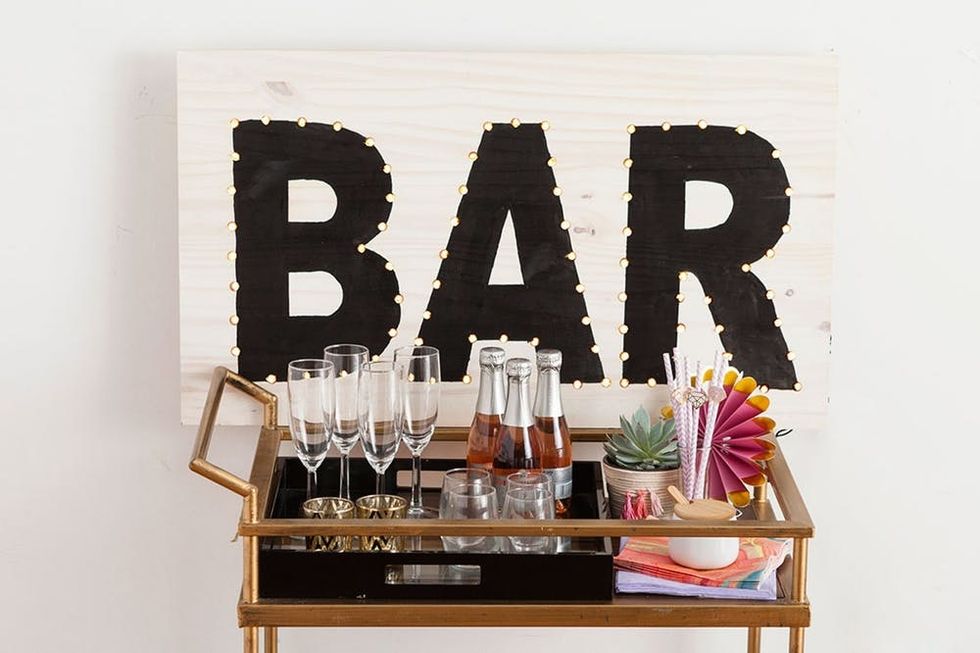
Plug it in, it’s time to shine!
Let your bar sign rest on the edge of a bar cart, or hang it on the wall using picture framing fixtures.
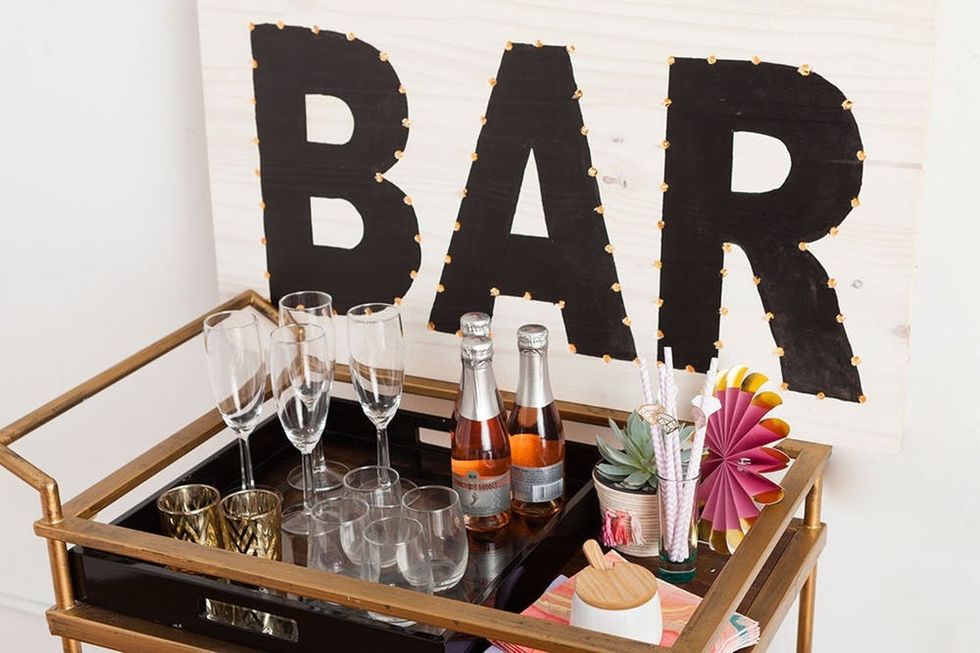
Don’t forget to top off your bar cart with glasses and some bubbly.
Yup, we also made a constellation version. This process was exactly the same, except we used a 10-light Christmas strand that had a battery pack. This makes it easier put up as a wall hanging.

Now for the canvas version! This one has to be one of my favorites because it’s really easy and doesn’t create any mess. (Sorry drills, ILU but you are messy.)
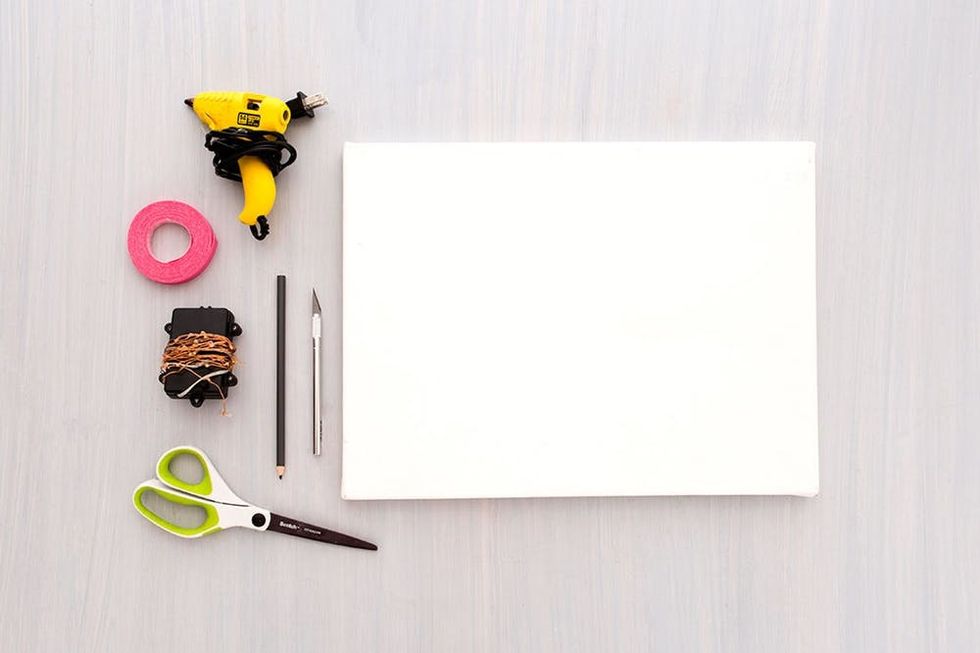
Materials and Tools:
– canvas
– X-ACTO knife
– scissors
– VELCRO® Brand ONE-WRAP®
– LED Christmas lights
– hot glue gun
– pencil
Instructions:
1. Create marks along the outside of your shape that are one inch apart. Then make a small X slit in each one of those marks.
2. Flip the canvas over and stick one LED light through each X mark.
3. Hot glue the VELCRO® Brand ONE-WRAP® to the canvas to hold the battery pack in place.
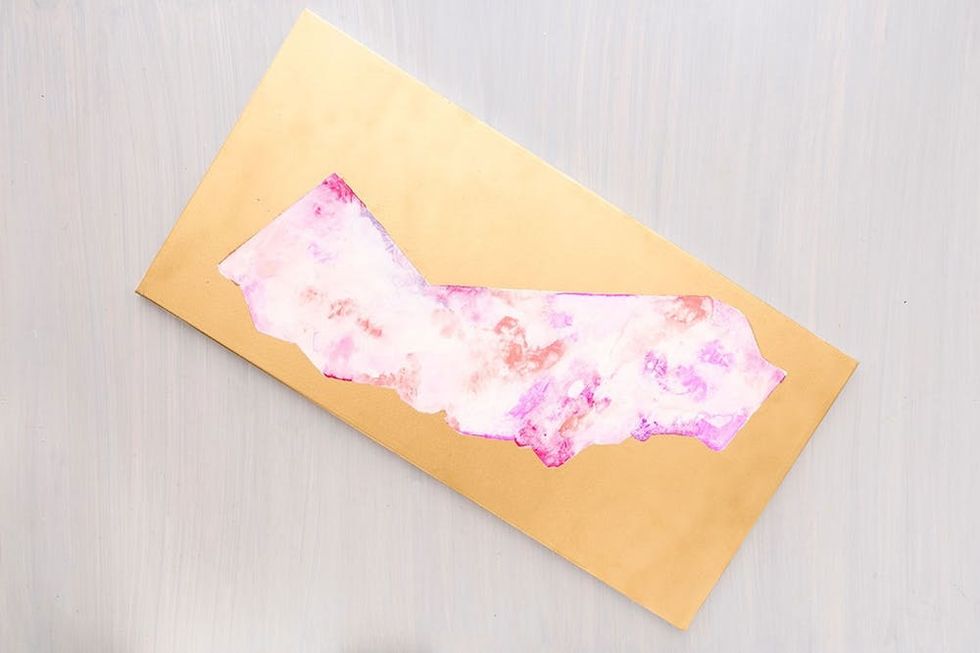
To create this watercolored California, start off by tracing or drawing the state onto a long rectangular canvas. Then tape off the state and spray paint the background gold. Remove the tape and start watercoloring inside. I used acrylic paints and lots of water to make the colors merge. Once I got a spread that I was happy with, I dabbed it with a paper towel to remove the water and to give the painting a bit of a texture. Play around when creating your own watercolored masterpiece.

Use a ruler to create one-inch marks around the perimeter of the shape. Cut small X marks using an X-ACTO knife and then slide one LED bulb through each slot. Use VELCRO® Brand ONE-WRAP® to hold the battery pack in place.

Your friends are going to be mad jealous of this awesome gallery wall ;)
Show us your project by tagging us on Instagram + using hashtag #iamcreative!
DIY Production and Styling: Kelly Bryden
Photography: Brittany Griffin and Kurt Andre