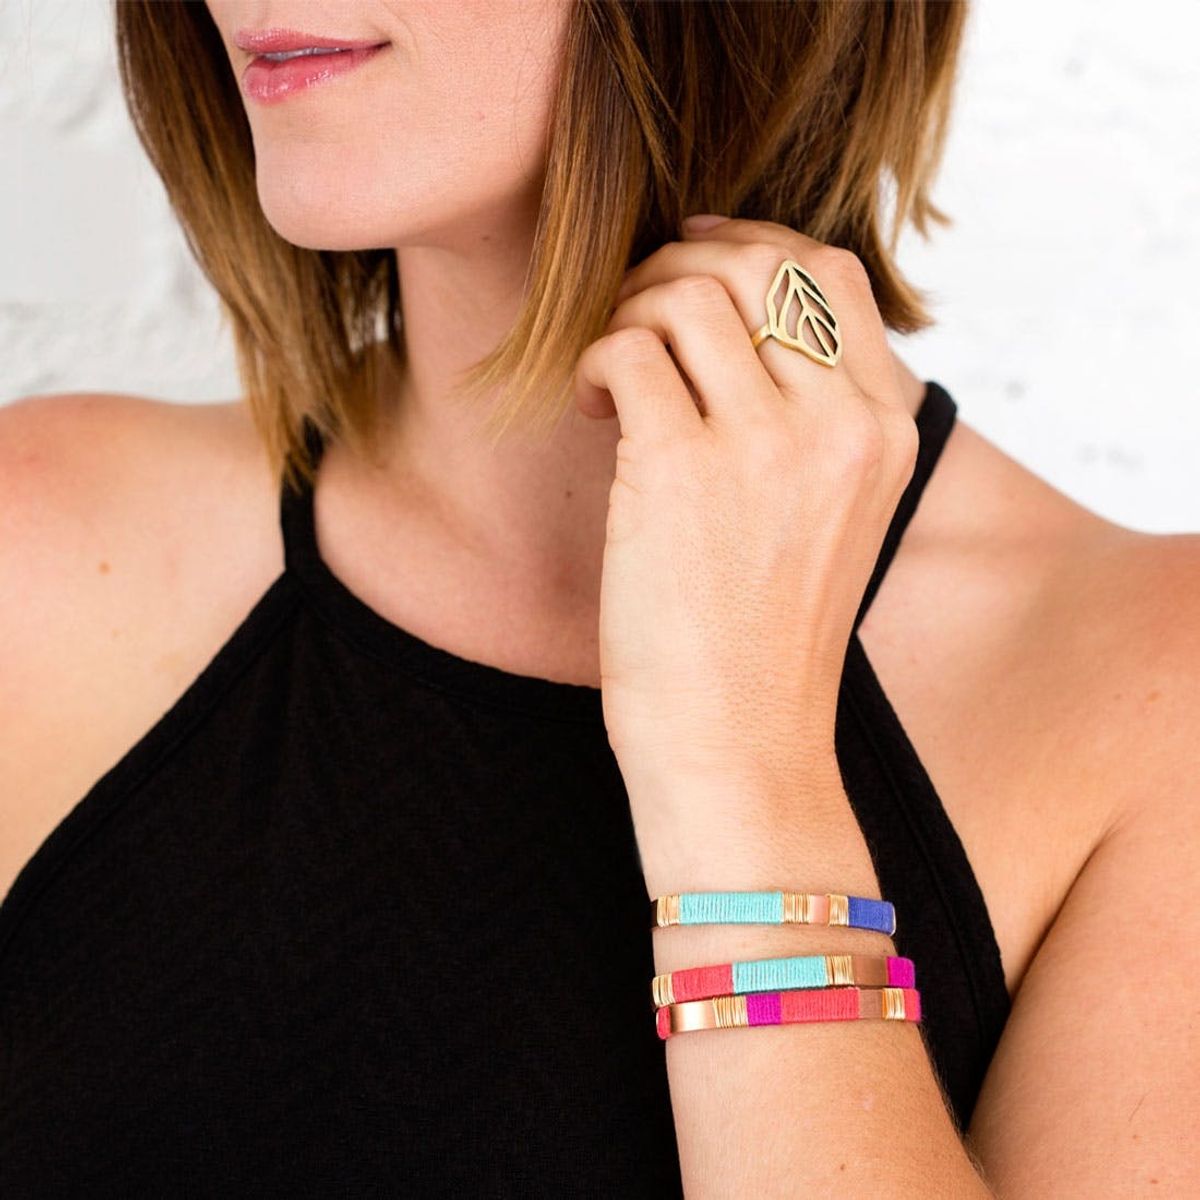
BRB, we’re all wrapped up in this DIY.
How to Make Simple Stacking Bracelets Pop

The 13-year-old in all of us is going nuts over this modern take on the friendship bracelet. We combined oh-so-hot-right-now copper with our old friend embroidery thread to make something fun and stackable yet surprisingly grown up to gift to our favorite ladies (or keep all to ourselves).
Color Wrapped Bracelets Kit
 here, and keep reading to see how incredibly easy these are to make!

Materials:

– copper bracelet blanks
– bracelet bending bar
– embroidery thread
– jewelry wire
– E6000 glue
– 2-in-1 plier/cutter
(or get everything you need in our kit!)
Additional Tools and Materials (not included in the kit):
– scissors
Grab your main materials (pictured left and included in our kit!) and a pair of scissors, and lets get started!

Instructions:
1. Place one end of a bracelet blank into the bending bar crease, and bend forward to create a little tab.
2. Fold the tab down with your pliers so that you create a rounded edge that won’t catch on your skin.
3. Firmly clamp down the folded tab to secure, and repeat this process on the other end of your bracelet.
4. Place your metal strip into the crease, and bend it over the round end of the bending bar to shape.
5. Then curve the opposite side of your metal strip over the bending bar so that it forms a round cuff.
6. Continue to gently form the bracelet with your hands until it fits your wrist comfortably.
7. Tie embroidery thread around your copper bracelet with a knot to start wrapping your first section.
8. Secure the knot with a small dot of glue, and smooth it down onto the backside of your bracelet.
9. Tightly wrap the embroidery thread around your bracelet until you are happy with that section.
10. Tie a small double knot on the backside to finish the section, and trim off any excess thread.
11. Secure the knot with a small dot of glue, and smooth down against the copper strip with your fingers.
12. Add metallic sections by wrapping wire around your bracelet and bending ends inward with pliers.
Place one end of a bracelet blank into the bending bar crease, and bend forward to create a little tab.

Fold the tab down with your pliers, and then firmly clamp it down to secure. Repeat this process on the other end of your bracelet.

Place one of your folded ends into the crease of the bending bar, and bend it over the round end to shape.

Then curve the opposite side of your metal strip over the bending bar so that it forms a round cuff.

It probably won’t fit your wrist perfectly right away, so continue to gently form the bracelet with your hands. You may want to pinch the two sides together into an oval shape to better fit your wrist.

To get this wrapping party started, tie embroidery thread around your copper bracelet with a double knot, trim the ends and secure with a small dot of glue. Then smooth down the glue with your finger in the direction that you plan to wrap.

Tightly wrap the embroidery thread around your bracelet, overlapping the glue.

Finish your color section by tying a small double knot on the backside. We found it helps to hold the knot down with your fingernail while pulling the extra thread tight.

Trim off any excess thread, and secure with a small dot of glue just as you did to start the section.

We wrapped this one up in four colors of embroidery thread to really spice things up.

To add metallic sections to your bracelet, first cut a piece of jewelry wire with your 2-in-1 pliers/cutter.

Tightly wrap the wire around your bracelet, trim off any excess with your 2-in-1 pliers/cutter and bend the loose end inward.

Repeat for a full stack of three bracelets and show off that arm party!

Too easy and too fun! Wrap up a set for yourself or gift to your friends as grown up friendship bracelets.


