Perfect as a centerpiece for your Halloween dinner party or to compliment pumpkins at your front door!
DIY Basics: 5-Step Dia de los Muertos Planters
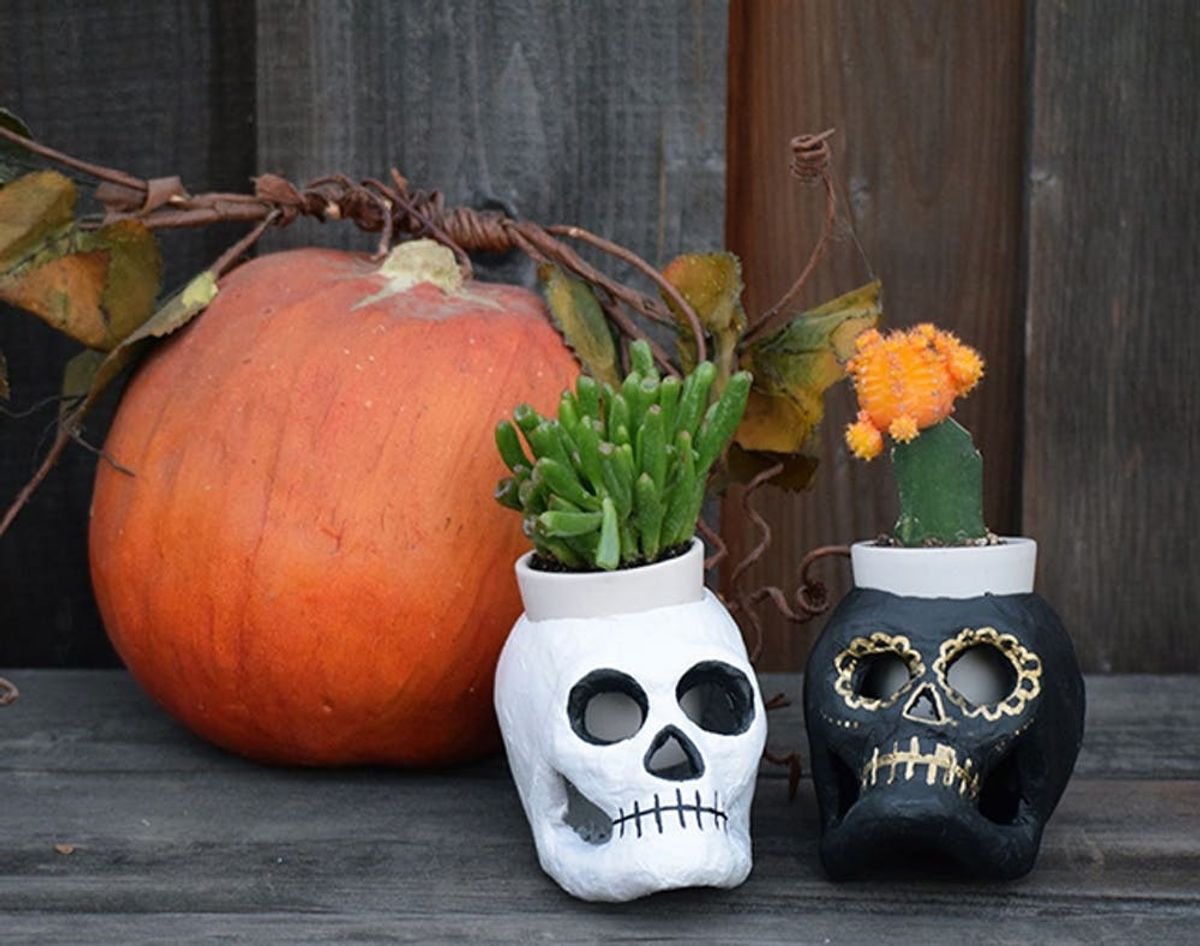
Looking to one-up your Halloween game this year? Add some Dia de los Muertos vibes to your decor with these chic skull planters. Perfect as a centerpiece for your Halloween dinner party or to compliment pumpkins at your front door, this quick and simple DIY project looks spook-tacular in just five steps — that leaves you with plenty of time to perfect your sugar skull makeup for November 1!
Materials:
– paper mâché or plastic skull
– small potted plant (we used succulents)
– white and black acrylic or spray paint
– gold paint pen
Tools:
– pencil
– X-Acto knife
– paint brush (with a long handle to paint inside the skull)
Instructions:
1. Trace a circle onto the top of your skull with a pencil. The top of your pot makes an excellent guide.
2. Using your X-Acto knife, carefully cut out this circle.
3. Paint both the outside and inside of your skull with acrylic or spray paint. Allow to fully dry.
4. Add some spooky Dia de los Muertos details with paint pens, or go for a classic skull by outlining its features with black paint.
5. Once the paint is dry, insert a plant into your new skull planter! Push gently to ensure a snug fit (Note: remove the plant from the planter when watering).
Ready to make these party-ready planters in a flash? Trace a pot-sized circle on the top of the skull and carefully cut it out with an X-Acto knife. Next, paint the skull with your acrylic or spray paint. Go for a traditional white like we did here — or a super chic black — or since Dia de los Muertos is all about color, paint your skulls something bright and vibrant that will stand up to your pumpkin-hued decor. Then add on the details, from a spooky stitched mouth to floral-inspired flourishes, ’cause even skeletons needs good costumes too ;)
Finally, add your plants! We love the way these succulents fit right in with the look — or you could even switch out the green for electronic tea lights to give your skulls a seriously spooky glow.
Place these chic planters next to your pumpkins for a Pinterest-worthy porch scene. Bonus points for stringing papel picado above these noggins to create an extra festive feel.
Oh, and they make great photo booth props too! Not to mention easy-as-ever favors for your Halloween soiree. We don’t think your guests will have any issue carrying these skulls home with them, even if you can’t swing a succulent for every party-goer (hint: stuff ’em with candy!).
What’s the most share-worthy Halloween decor hack you’ve made this year? Tell us about your seasonal DIY projects in the comments below.


