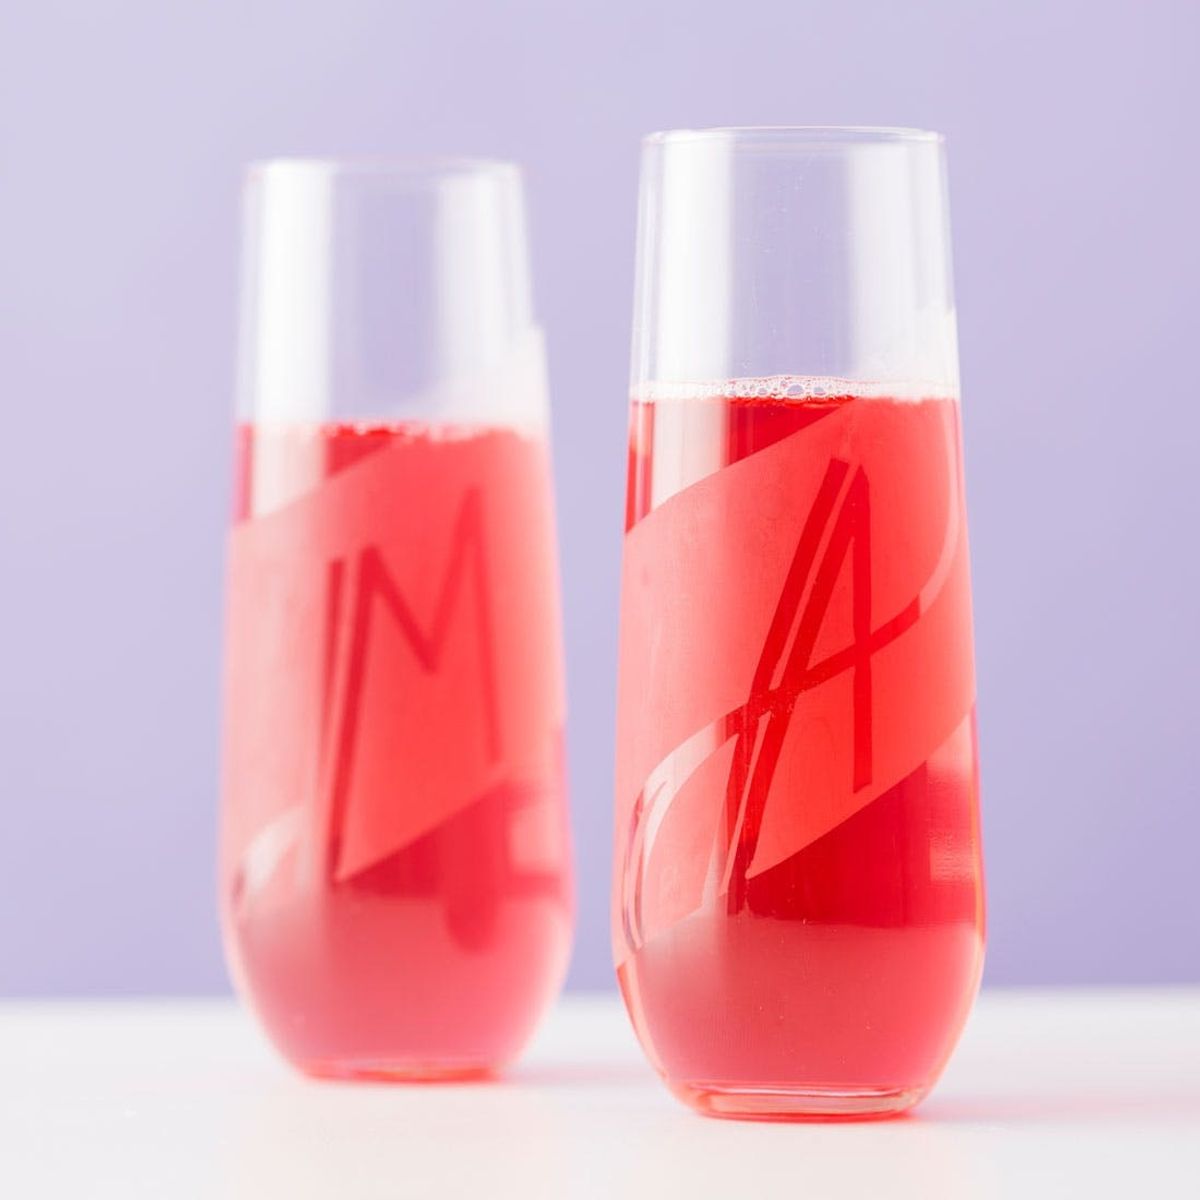
Take your pick of heavy base whiskey tumblers or elegant stemless flutes.
How to Make Etched Glass Whiskey Tumblers and Champagne Flutes

When searching for the perfect gift for someone close, we all want something that just screams their name, personality and taste. Sometimes this is easy, and sometimes this is the most impossible task you’ve ever taken on. At Brit + Co, our answer to this dilemma is always (you guessed it) a DIY, so we whipped up two options — an Etched Whiskey Tumblers Kit and Etched Champagne Flutes Kit — available for $40 in the B+C shop.

Materials:

– 2 whiskey tumblers or 2 stemless champagne flutes
– 3M Vinyl Electrical Tape
– Etching Cream
– Applicator
Additional Tools (not included in kit):
– Scissors
– Paper plate or other disposable surface
Instructions:
1. Section off your glass with thick vinyl tape.
2. Add a more detailed pattern with thin vinyl tape.
3. Apply a thick layer of etching cream over your design.
4. Let sit for 30 minutes on a disposable plate.
5. Carefully wash off etching cream over an empty sink.
6. Peel away vinyl tape and wash thoroughly before use.
Grab a pair of champagne flutes or whiskey tumblers and lets get etching!

Mask off the area that you would like to etch using the thicker vinyl tape. Note: For safe drinking, do not etch near the rim of the glass. Keep your design to the lower half of your glass.

Next, go in with the thinner vinyl tape and create your pattern. For this set we went with a classic stripe all the way around.

Wasn’t that easy? Set this one aside and tape the same (or different) design on the second glass.

Gotta love a good pinstripe. Now let’s check out a few more designs.

For this next example, we wanted to give these glasses an alpine feel with an abstract mountain pattern. Note how we created “mountain peaks” with thicker tape, then used the thinner tape to create lines within those boundaries.

To keep the base clear and un-etched, mask off the bottom of the glass with thick tape, holding the tape with your thumb and stretching the tape around the circular base.

For this third design, we slightly modified the mountain pattern by criss-crossing the thick tape lines and continuing them to the bottom of the glass. Then we added thin parallel and perpendicular lines within the thick tape lines.

For this last design, we got personal with monograms. Note how we masked out the boundaries with thick tape and created the letter “M” with thin tape.

You could stop there with a fully etched square, but we wanted to go a step further and limit the etching to the shape of the “M”. We simply cut the end of the thick tape to a point to outline the top of the M, and then cut a point into the tape to mask the bottom.

Gravity plays a big part in the etching game, as the goopy etching cream has a habit of oozing down the side of the glass. If your design does not run all the way to the bottom of the glass, take the time now to mask off the space below your design to keep it clear.

We masked the same designs onto these stemless champagne flutes, but each with a curvaceous twist!

You can even make script letters with this awesome thin tape! Because it’s made of stretchy vinyl, you can bend and curve it any direction you like. Just hold down one end firmly with your thumb while bending the tape around those curves.

Now for the fun part! We recommend gloves for this step (and included them in our kit). Either way, it’s a good idea to work slowly and carefully with this stuff. Stir the etching cream thoroughly with a popsicle stick and then apply a thick layer over your taped design. It’s best to do this over a paper plate or other disposable surface, as the goopy etching cream can harm your table or countertop if it comes in contact.

The same goes for these flutes. Slather on that etching cream, then let your glasses sit upright on a paper plate for 30 minutes. This gives the etching cream time to do its magic and eat away at the smooth surface of the glass.

Once 30 minutes is up, wash off all of the etching cream over an empty sink (you don’t want to accidentally etch those leftover dishes). Peel away the tape to reveal your etched design.

Give your glasses a good wipe down with a wet paper towel to remove any leftover residue and thoroughly wash them once more with soap before use.

We’re loving this elegant matte effect that’s absolutely dishwasher safe!

We’re in a gifty mood these days, so we wanted to think about the personalities that best fit our designs. Maybe it will get your wheels turning on what to make for all those special people in your life.

1. The Barrel: For the no-nonsense Ron Swanson in your life who samples his or her booze straight from the barrel… and even made the barrel him/herself.

2. The Block Monogram: For the collegiate ones, this will fit right in with their rich mahogany and many leather bound books.
3. The Great Outdoors: Whether they love the mountains in an active outdoorsy kind of way or a theoretical hipster kind of way, these are just what John Denver ordered.
4. The Frank Lloyd Wright: For the structured architect in your life who can appreciate an ode to the greats, let’s all raise this glass.
Cheers to another successful DIY.


