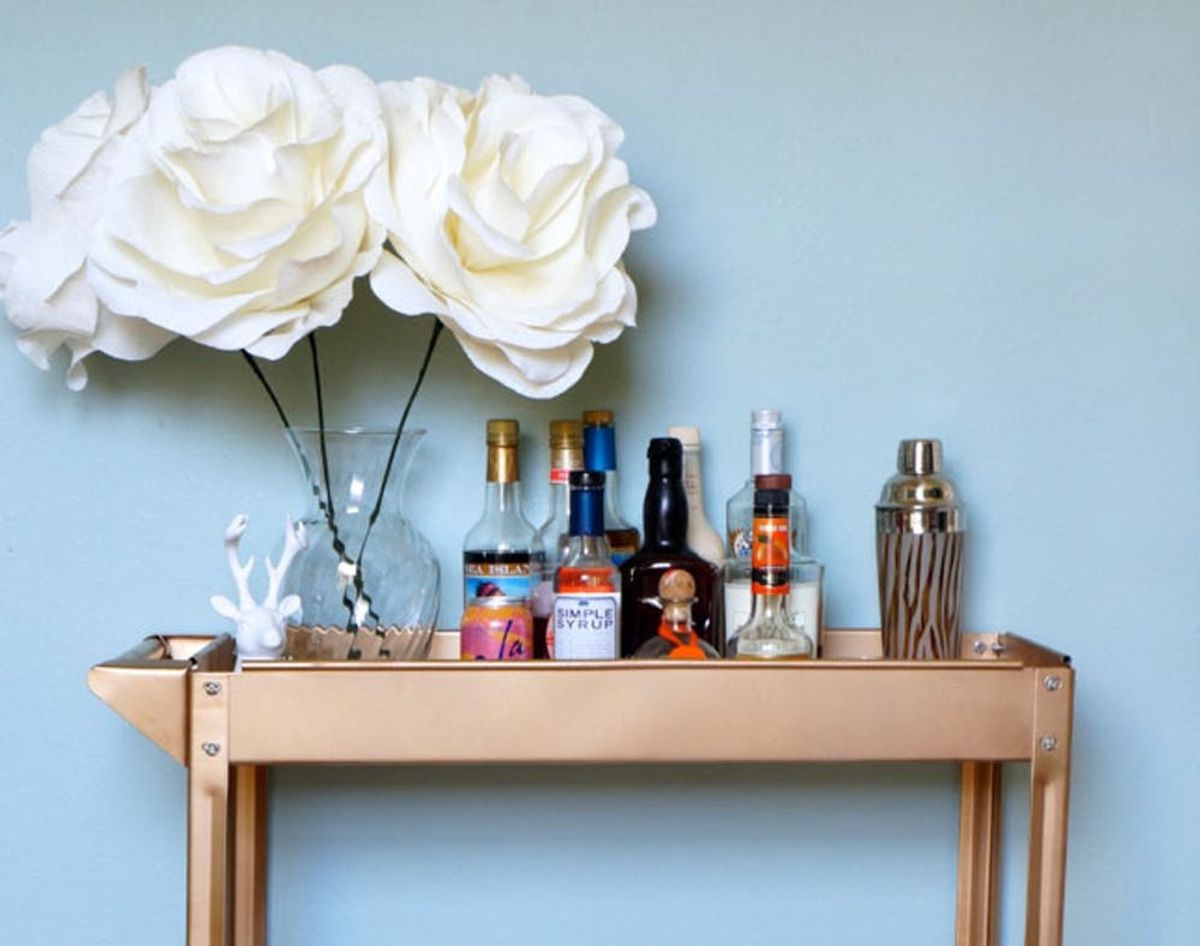
It seems like no modern house or apartment is complete without a hip bar cart (where else will you showcase your dashing decanters?). Since they can get pretty pricey, we were thrilled when we learned of an easy way to turn a $40 tool cart into a luxe bar cart. We decided to put our own Lover.ly spin on it and take it from industrial and masculine to all-out glam. While the shiny red cart is cute as-is, (you definitely don’t need to paint it), we wanted to give it some polish with a few coats of gold spray paint.
Make the Gold Bar Cart of Your Dreams

It seems like no modern house or apartment is complete without a hip bar cart (where else will you showcase your dashing decanters?). Since they can get pretty pricey, we were thrilled when we learned of an easy way to turn a $40 tool cart into a luxe bar cart. We decided to put our own Lover.ly spin on it and take it from industrial and masculine to all-out glam. While the shiny red cart is cute as-is, (you definitely don’t need to paint it), we wanted to give it some polish with a few coats of gold spray paint.
Reserve a long weekend for this project: to upcycle the cart the right way, we recommend taking two days to prime it and two days to paint it. Then by that fourth day, you can reward yourself by making a well-crafted cocktail on your high quality bar cart. Here’s how we did it:
Materials:
– two-shelf tool cart from Harbor Freight
– two cans of gold spray paint (we used Valspar Brilliant Gold)
– two cans of spray primer
– two thin pieces of plywood cut to 29″ x 15.25″ (most hardware stores will do this for you!)
– half-pint of white latex paint (we used Valspar Gloss White)
Tools:
– drop cloth
– sponge brushes
Instructions:
1. Unpack your cart and lay all the pieces on your drop cloth. Spray each piece with 3-4 thin layers of primer, letting them dry for about 10 minutes between each coat. (We recommend priming one side of each piece, letting them dry overnight, and then flipping them over and priming the other side the following day.)
2. Spray each primed piece with 2-3 layers of gold spray paint, letting each piece dry for an hour between each coat. (Again, we recommend doing one side on one day, and the flip side the next day.)
3. Paint two coats of white your paint onto your pieces of plywood. (Another option? Cover it in pretty contact paper!)
4. Once the pieces of your cart are dry, assemble it according to the instructions that came with it. Note: You have to put the wheels on first, and be sure to put the pieces of wood into the shelves before you screw the legs on; they won’t fit in place after the cart has been assembled.
Sunny weekend? Check! Drop cloth? Got it! Now get to priming and painting that bar cart! As we mentioned above, we recommend taking this part slowly so that you get the best (read: long-lasting) results. Prime the font side of each piece one day, then flip and prime the back side the next. Give just as much TLC to the spray paint, too.
While you’re waiting for your cart pieces to dry, don’t forget about the plywood inserts! Once they’re painted, they’ll act as a contrast cover for each of the bar cart’s shelves. We went with a crisp, clean white, but you could always paint ’em something more colorful, or even cover the wood in contact paper (check out these trays for major inspiration).
Once the paint on your cart and plywood inserts is completely dry (finally!), time to assemble the bar cart according to its instructions. Pro tips: add the wheels to the cart first, and be sure to put the wood in place before you screw the drawers together tightly.
Roll it into your pad, and that’s it! Even though it took us the course of a weekend to complete, it’s actually very simple project that yields a super versatile prop . Just think about it: this gilded cart could be used in so many ways beyond just a booze delivery system…
You can use it as an espresso or coffee cart (we dedicated the bottom shelf of ours to this already!) with a variety of coffee beans, syrups, cute mugs, teas, and the K-cups taking over your kitchen—so great for rolling out at the end of a party! You could even swap it out for hot chocolate during the winter (the original red cart would look adorable if you go that route).
Or simply use it as extra storage in your office space (very Mad Men, but without the calls from HR) or to stash necessities and welcome treats for visitors in your guest room. See? So many uses out of one glamorous gold cart!
What items or finds have you customized to fit your style? Tell us in the comments below!


