This piece acts as a killer focal point for any room.
Get the Party Started With This DIY Gold Patterned Tray
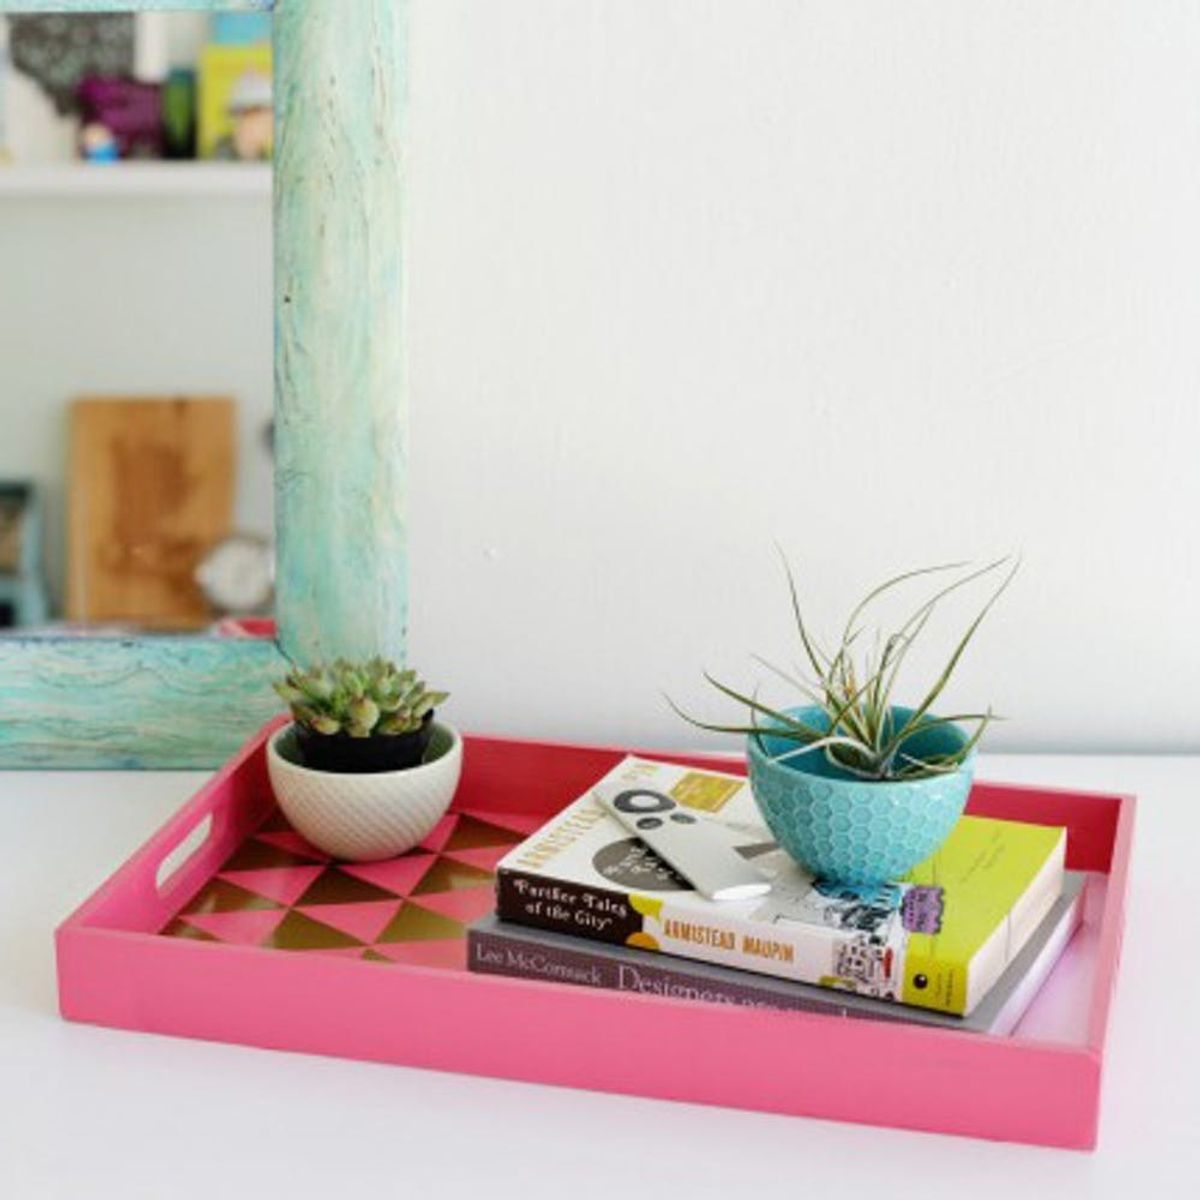
Class is now in session, and we’re jumping back to Geometry 101 to craft this stylish gold-triangle and color-blocked tray. Self-adhesive gold contact paper makes creating the gold triangles a breeze, and a thin coat of lacquer will ensure that this project stands the test of time (and those water rings left behind by your favorite cocktail). Make this tray for any room — style it with your bar, use it for snacks in the kitchen or keep it in the living room for table top storage. This piece can act as a killer focal point for any room — so you might want to make two… or three.
Materials:
— wooden tray
— spray paint
— acrylic paint
— gold self-adhesive contact paper
— high-gloss varnish or lacquer
Tools:
— rotary cutter
— straight edge with measure
— cutting mat
— painter’s tape
— paint brush
Instructions:
1. Paint your tray with a few coats of spray paint in the color of your choice.
2. Cut out your gold triangles from the contact paper and stick them onto half the tray in a linear pattern.
3. Color block the other half of the tray with acrylic paint in a contrasting color.
4. Finish off the project with a thin coat of lacquer to protect the surface of the tray.
5. Invite a few friends over and serve them drinks with your new stylish piece!
Using a can of spray paint, coat the unfinished wooden tray (available online or at your local craft store), with a few coats of spray paint. Apply the paint evenly and allow time to dry between coats based on the dry time indicated on the back of the can.
Measure and cut triangles from the gold contact paper and lay them out on the tray. Here we used a 9 5/8-inch wide tray with five triangles going across width wise. We made each triangle equilateral, with each side measuring out to 1.925 inches (9 5/8 inches divided by five). Adjust measurements accordingly based on the size of your tray. To get perfectly sized triangles, mock up a triangle on your computer and print it out to serve as a template. Otherwise, use your cutting mat and straight edge to make 60 degree angles for each triangle. Once you have one cut out, you can use that to measure the rest. For our project, we created five rows to fill approximately half of the tray.
Once the triangles are laid out in a pattern, remove the paper from the back of the contact sheet and stick the triangles to the tray.
To color block the other side of the tray, use painters tape along the tip of the triangles to create a straight line perpendicular to the long edge of the tray. Fill in the the blocked area with a contrasting acrylic paint (here we used a nice light pink to contrast with our gold and bright pink). Let the acrylic paint dry for about one hour. Apply extra coats as necessary.
To finish off the tray, evenly apply a thin coat of high gloss lacquer with a paint brush and let dry according to the instructions on the back of the can. This will protect your tray from water damage and ensure that the triangle pieces do not peel over time.
Once dry, your project is complete!
Use your tray to serve goodies from the kitchen or to organize coffee table books and remotes.
No matter where or how you use it, it will surely brighten up your space!
Have you glammed up a tray or two in your time? Share your photos with us in the comments below!


