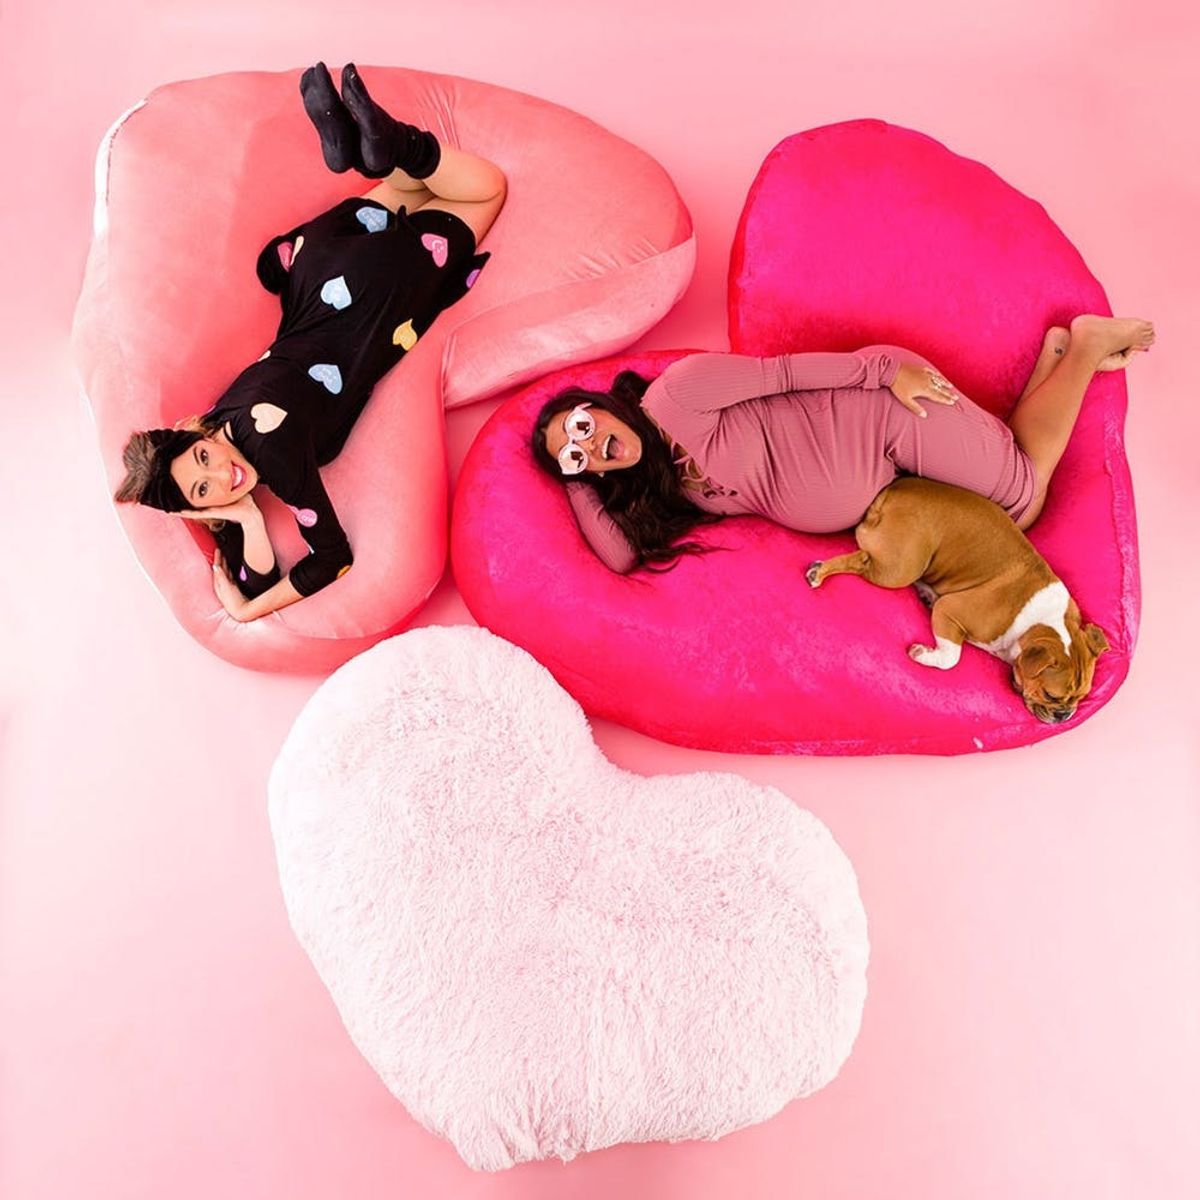
PSA: We tested it and agree that you need huge heart pillows in your life.
Enter the Ultimate Comfort Zone With These DIY Heart Floor Pillows

Forget the chocolate — the two main reasons that I love Valentine’s Day are 1. The amount of hearts everywhere and 2. The amount of pink everywhere. This year I decided to make my dreams come true and create huge heart floor pillows. Take it from us here at B+C: We think these are the perfect, massive addition to any cozy nook or Galentine’s Day fort.

But let’s say you’re not really into cozy floor pillows (uhhh who are you!?). Don’t worry — these are perfect poofs for a dog bed. Overall, these pillows are an investment of about $200, so think long and hard about this heart poof before breaking out the sewing machine.

Materials and Tools:

Instructions:
- Fold your fabric in half and draw out half of your heart shape. Once you’ve created a curve that you’re pleased with, cut it out.
- Trace your heart on velvet to create a second heart.
- Place your heart onto the memory foam and cut out a heart slightly smaller.
- Measure the circumference of your heart and jot it down for reference.
- Cut out long rectangles that measure between 7-10 inches in height. Sew these together until you create one long rectangle that is the length of your heart’s circumference.
- Pin the rectangle to both heart cutouts to create the sides of the heart pillow.
- Sew around both sides of the heart, but make sure to leave an opening that is about 15 inches wide.
- Slide in your mattress topper cutout, and then stuff with fiber fill. You will want to really pack it in there to make the most plush pillow around.
- Use a needle and thread to hand stitch the opening closed.

I folded about 3/4-1 yard of fabric over, and then drew my heart shape. This made a heart pillow that my whole body could fit on, and I’m five-foot-six. Play around with newspaper or leftover fabric to map out how big you really want your floor pillow.

Once you’re satisfied with the shape and size of your heart, go ahead and cut it out.

Trace your heart onto more fabric to create two velvet hearts.

Floor pillows are pretty pointless if they don’t have shape or enough cushion. To combat that, we decided to add in a layer of mattress foam. Lay your heart on top of the foam and cut out a heart that is slightly smaller than your velvet cutout.

Measure the circumference of your heart and jot it down. Mine measured about 194 inches — wowza!

Time to create the band that will give your pillow some depth. You’ll need to do some math for this step — measure your remaining fabric to figure out how wide your band can be in order to get the length to equal the circumference of your heart. My band was about eight inches in width, and I cut four pieces at 60 inches in length to then sew together, creating my one long piece for the circumference of my heart.

Match up the good sides of two strips and sew together. Continue sewing until all strips are connected to create one mega rectangle.

Pin the band to both heart cutouts. Make sure the good sides are facing inward.

Slowly sew around both edges of the heart. Leave about a 15-inch opening on one of the seams, so you’ll be able to stuff the pillow with fiber fill.

Turn the heart right side out and stuff in your foam cutout piece. This part can be tricky, depending on your fabric — just be patient and keep working the fabric ’til you get the foam heart in the right location.

Stuff ’til you can’t stuff anymore.

Grab a sewing needle and whip stitch the opening of your pillow closed.

Heart floor pillows are my dream come true, so I went a little crazy and made a bunch. Valentine’s day fort anyone!?

Valentine’s Day is nothing without my #1 snuggle bug Sir Otis Wellington. He thought the headband was a little too feminine for him, but I insisted that it would get him all the ladies.

Yes, this is the perfect napping pillow or dog bed if your dog is a true princess.

Our pregnant creative director Anj jumped in on the fun. She was very excited to lay down in our comfy cozy set and get off of her feet.

A heart floor pillow big enough for a huge cuddle puddle.


Otie — still not pleased. Lol!
Show us your project by tagging us on Instagram + using hashtag #iamcreative!
DIY Production and Styling: Kelly Bryden
Modeling: Kelly Bryden, Anjelika Temple, Sir Otis Wellington
Photography: Kurt Andre
Brit + Co may at times use affiliate links to promote products sold by others, but always offers genuine editorial recommendations.


