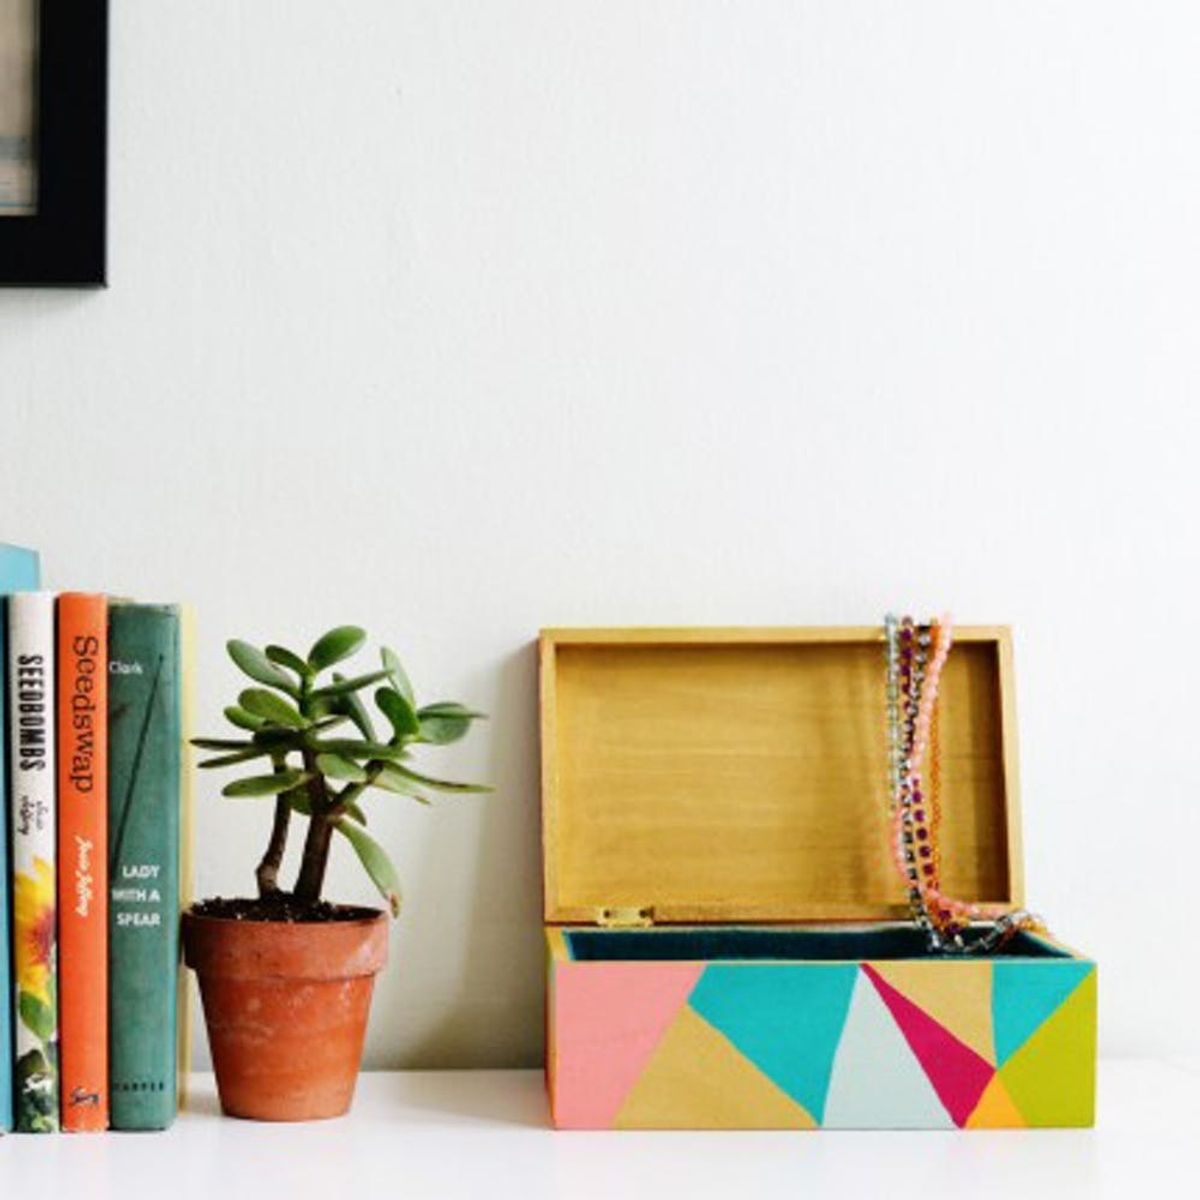
Then fill it to the brim with bling.
Organize Your Jewelry With This Colorful, Geometric DIY

Organizing all your bling isn’t the easiest of tasks to master. At least if you don’t have the right kind of storage, it’s not. But we’ve got the fix — this modern and colorful jewelry box that will house your jewels and brighten up your dresser. Upgrade a simple wooden box with paint, felt, a few pieces of balsa wood and a little creativity. Not feeling the triangular pattern? Go for stripes or a simple color block. Follow these simple instructions to DIY your own.
Materials:
— unfinished wooden jewelry box (we used the regular size from Michaels)
— wood putty
— balsa wood
— acrylic paint in a variety of colors (we used Melon, Magenta, Yellow Citron, Tangerine and Turquoise by FolkArt and Gold by Martha Stewart Crafts)
— super glue
— 3 pieces of 8.5″ by 11″ pieces of felt
— sandpaper
Tools:
— saw
— straight edge
— tape measure
— screw driver
— paint brush
— painter’s tape
— pencil
Instructions:
1. Firstly, remove the exterior hardware from the box and use wood putty to fill in any imperfections or holes from the hardware that you don’t plan to replace. Make sure to leave the holes for the hinges open so that you can replace these at the end.
2. With the box disassembled and the hinges removed, use your painters take to tape off sections into whatever pattern you’d like your jewelry box to carry. Start painting!
3. While your box is drying, create inserts to make smaller compartments by cutting down balsa wood.
4. Once the box is dry (wait 30 minutes), cover the inside bottom of the box and wood inserts with felt.
5. Screw the hinges back in place.
6. Fill your box with your bling and display!
Using your screwdriver, carefully remove the screws at the hinges of the box in order to remove the hardware both inside and outside the box. Once the hardware is off, use wood filler to fill the holes. Let the wood filler dry according to the instructions. You can also fill in any scratches or imperfections in the exterior of the wood. When the filler is dry, use sandpaper to smooth down the surface.
Now it’s time to dress up the exterior of your box. We painted ours in a colorful geometric pattern. We created a the pattern using a straight edge pencil and painter’s tape. Use the straight edge and pencil to draw out your pattern and the tape to paint inside the lines.
To finish off the box, we painted the edges and inside of the top of the box with a solid gold that will help the hinges blend in.
To create smaller compartments within the jewelry box, cut down balsa wood to divide up the large box. Measure the interior of the box and cut your balsa wood down to size. Cut as many dividers as desired (here we used two pieces to create three equal-sized compartments). The wood should fit loosely in the box.
Cover the two wood dividers with felt after measuring and cutting a piece down to size. Glue the felt to the balsa wood with super glue (wood glue or hot glue could also be used). Cut off any excess felt and set these aside.
Cover the interior bottom of the jewelry box with felt by again measuring and cutting felt pieces. Cut the bottom piece first and glue in place. Next, measure and cut felt pieces for the sides and glue down. Once the whole bottom interior of the box is covered, insert the dividers and glue in place.
To finish up your jewelry box, screw the interior hinges back in place to connect the top back to the bottom. Now fill it to the brim with your bling! Keep the box open to display your jewels or put the top down to show off the fun, colorful exterior!
What creative jewelry storage solutions have you come up with? Share with us in the comments below!


