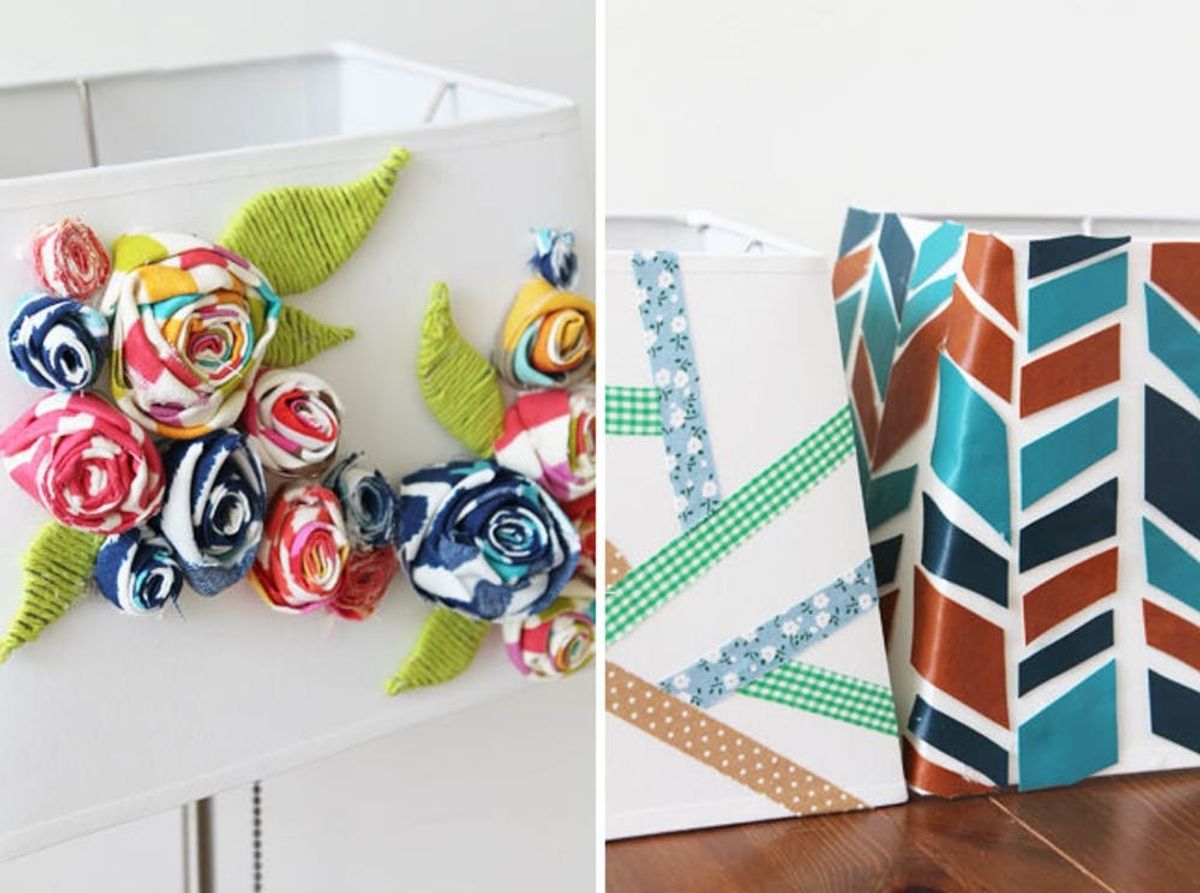
We’ve already shown you 10 different ways to trick out your party lights for outdoor festivities, but what about bringing the party indoors? Maybe your bedside table or nightstand is in need of a lighting upgrade? Armed with a basic lampshade and three simple materials, we’ve created 3 easy ways to create your own fun and bold lampshade, sure to become a new statement piece in your home. Each of these projects is so you simple, anyone can make them – we promise!
3 Creative Ways to Upgrade Your Lampshades

?xml version="1.0" encoding="UTF-8"?
We’ve already shown you 10 different ways to trick out your party lights for outdoor festivities, but what about bringing the party indoors? Maybe your bedside table or nightstand is in need of a lighting upgrade? Armed with a basic lampshade and three simple materials, we’ve created 3 easy ways to create your own fun and bold lampshade, sure to become a new statement piece in your home. Each of these projects is so you simple, anyone can make them – we promise!
Materials:
– lamp and lampshades
– fabric
– leather, fake leather, vinyl, or oilcloth
– green yarn
– thin cardboard or card stock
Tools:
– hot glue gun
– scissors
– pen
1. Blooming Lampshade
Start by making the leaves with leaf shapes cut out of thin cardboard. Vary the size from 1 1/2 inches to 3 inches tall. Cut a length of yarn about 18 inches, and trace the outline of your leaf with hot glue. Wrap the yarn around it until you reach the top. Repeat until you have enough leaves to accent the flowers for all 4 sides of your lampshade.
To create the fabric flowers, cut a strip of fabric that is about 12 inches long and 3 inches wide. Fold it in half and secure with glue. Next, roll it up tightly like a cinnamon roll. When your roll gets to be about the size of a dime, secure it with hot glue again and then twist the fabric occasionally as you continue rolling it up. Fold the end under the rosette and secure with glue. Practice arranging your flowers and leaves on your lampshade and glue them down when you find a design you like.
You can make your rosettes bigger by using a longer length of fabric, or smaller by using a shorter and thinner length of fabric.
Now you can have a springy bouquet every day of the year!
2. Leather Mosaic Lampshade
We went with a mosaic-style pattern, inspired by geometric and chevron designs. Begin by cutting strips of material about 2 inches wide and 8 inches long of each of your desired colors. Cut half the strips of each color diagonally from the top right to the bottom left corner, and the other half of the strips from the top left to the bottom right corner. Then glue them on to your lampshade, alternating colors as you go. Trim any access off the top and bottom for clean edges.
This would be perfect in a cozy basement den, surrounded by good books.
3. Fabric Tape Lampshade
Before we get started on how to make this little darling, let us tell you about how awesome fabric tape is! It’s basically like washi tape but way more durable, stickier, and, because it’s made of fabric, it is way softer. It’s a great material for gift packaging, decorating your workspace, and the like. Now, about this shade…!
Start by selecting 3 patterned fabric tape rolls. Start with a few longer strips that stretch across at least 2 sides – these will act as the base of your pattern. Trim any excess ends off to give your lampshade clean edges. Continue placing strips of fabric tapes in various directions and lengths until you are happy with your design.
We love the mix of different patterns and shapes that come out of this fabric tape design.
Which of these lampshades do you like best? We’ve got it bad for the blooming one!
What other ways have you created your own lighting? Will you try making any of these? Talk to us in the comments below.


