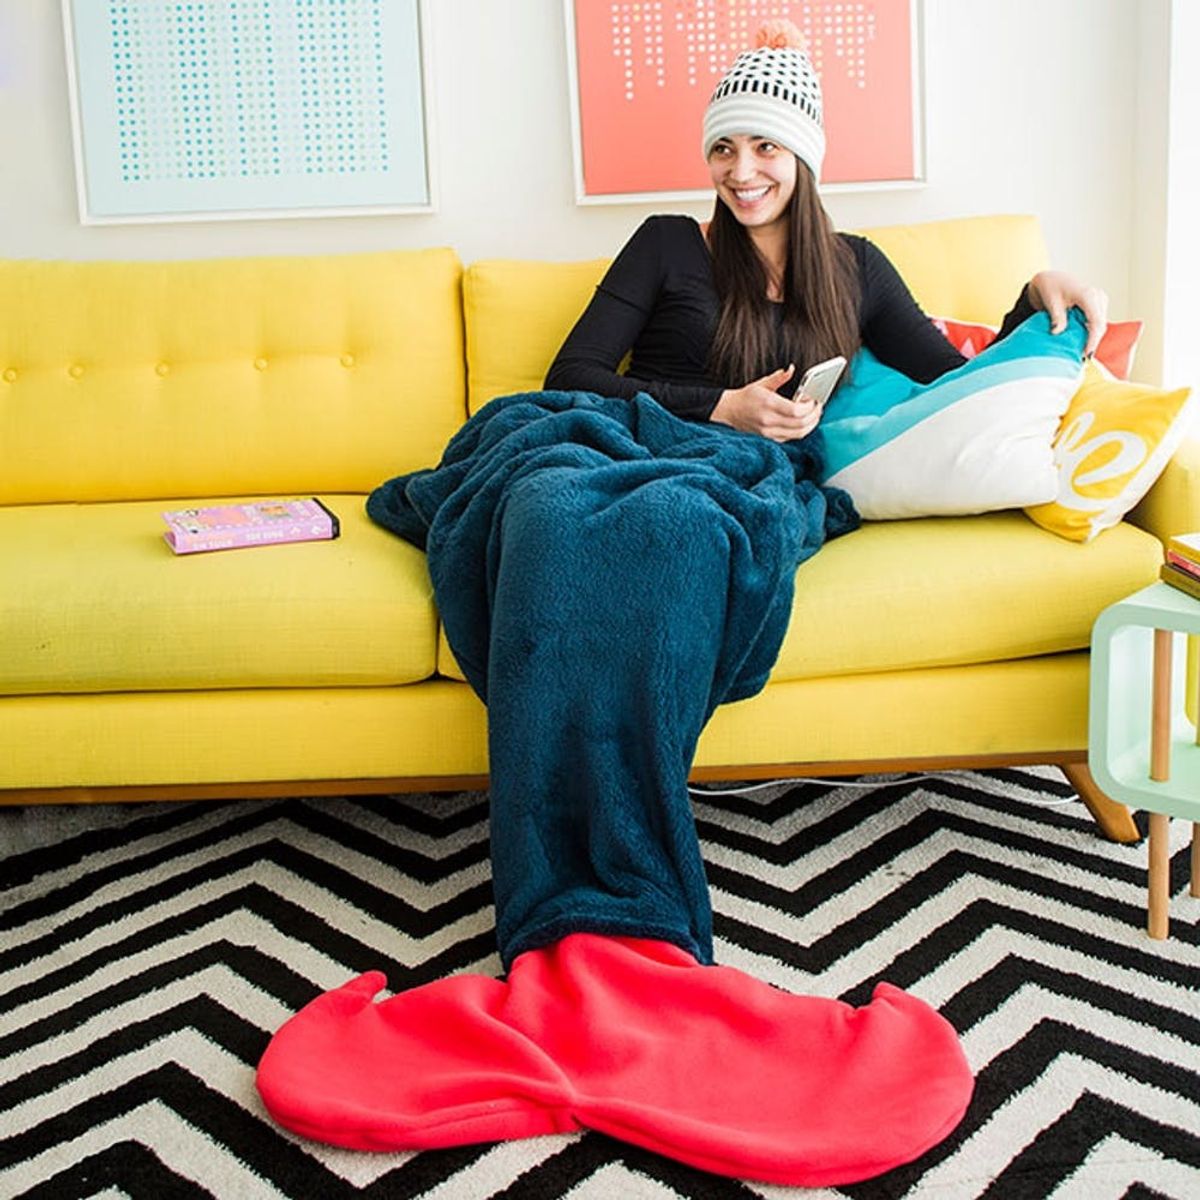
Become the mermaid you have always wanted to be in this blanket.
Turn Your Legs into a Tail With This Mermaid Blanket

Now I’m not going to lie, in the past few years I have made some drastic changes in my life to get closer and closer to being a mermaid. It first started off with dyeing my hair purple, which then turned into mermaid hues of purples, pinks and teals. Next, I picked up my east coast life and permanently moved myself to San Francisco, where the beach is about a 10-minute drive away from my apartment. Finally, I nearly completed my mermaid transformation when I got an extremely cute wetsuit from my parents for Christmas. (All that’s missing from my aquatic life transformation is surfing lessons — surfers HMU.)
Now for all of you other mermaid lovers out there, we’ve created the cutest mermaid tail blanket hack for cozying up during these cold winter months. One of the many things trending on Pinterest has been a crochet mermaid tail blanket pattern, but if you’re short on time you can use the tutorial below to hack a pre-existing blanket into a mermaid tail. Break out the sewing machine because it’s time to get cozy.


Materials + Tools:
- blanket
- 2 yards of fleece
- sewing machine
- sewing pins
- fabric scissors
- measuring tape
- markers

Instructions:
1. Fold your blanket in half the long way. On the bottom edge, measure 15 inches from the fold and make a mark. Next, measure 35 inches up the open edge of the blanket and make a mark. Connect the two marks with a diagonal line.
2. Pin the blanket together (to prevent the layers from moving) and cut the diagonal line.
3. Fold your fleece fabric in half to form a rectangle that measures about 40 x 21 inches and then fold in half again. Draw half of the mermaid tail on the fleece leaving a seven-inch tab on the top, which you will use to connect the tail to the blanket.
4. Separate the two mermaid tail cut outs and pin one onto the front fold of the blanket and the other onto the bottom fold of the blanket. Then sew.
5. Fold the blanket back in half and match up the two copies of the mermaid tail. Pin all the way around the blanket and tail. Start sewing at the diagonal edge of the blanket, following the curves of the mermaid tail and ending at the folded edge of the blanket.
6. Turn the blanket right side out and crawl in!

Blankets come in all shapes and sizes, so keep in mind that these measurements are just a guide. Fold the blanket in half the long way and measure 15 inches on the bottom edge away from the fold, then make a mark. Measure 35 inches up the open edge of the blanket and make another mark. Connect these two marks with a diagonal line.

Pin the blanket together to prevent the layers from shifting, then cut the diagonal line with fabric scissors. *Warning* — cutting a fuzzy blanket like this will cause a fuzzy attack. Make sure you have a lint roller and a dust buster on hand.

Fold your fleece fabric in half to form a rectangle that measures about 40 x 21 inches. Then fold again to form a smaller rectangle, making sure that the folds are on the bottom and right edge of your rectangle. Draw half of the mermaid tail on the fleece, leaving a seven-inch tab on the top which you will use to connect the tail to the blanket.

Cut it out and unfold to reveal the tail shape. (Yes I know, it kind of looks like the Lyft mustache.)

Pin one tail cut out to the top fold of the blanket and the other mermaid tail to the bottom fold of the blanket. Sew the fleece to the blanket.

Fold the blanket back in half and match up the two copies of the mermaid tail. Pin all the way around the blanket and tail.

Start sewing at the diagonal opening of the blanket and then all the way around the tail ending at the folded edge of the blanket.

Turn the blanket right side out and prepare to get cozy.

Dreams of being a real mermaid are coming true.

We called this the mermaid blanket and whale tail. Definitely practice drawing your mermaid tail before drawing and cutting.

Cozy up on the couch with your new mermaid blanket and a good book.

What we love about this blanket is that you actually can put your little feeties into the two sections of the mermaid tail! #mermaidlifeisreallife
Show us your project by tagging us on Instagram + using hashtag #iamcreative!
DIY Production and Styling: Kelly Bryden
Photography: Chris Andre


