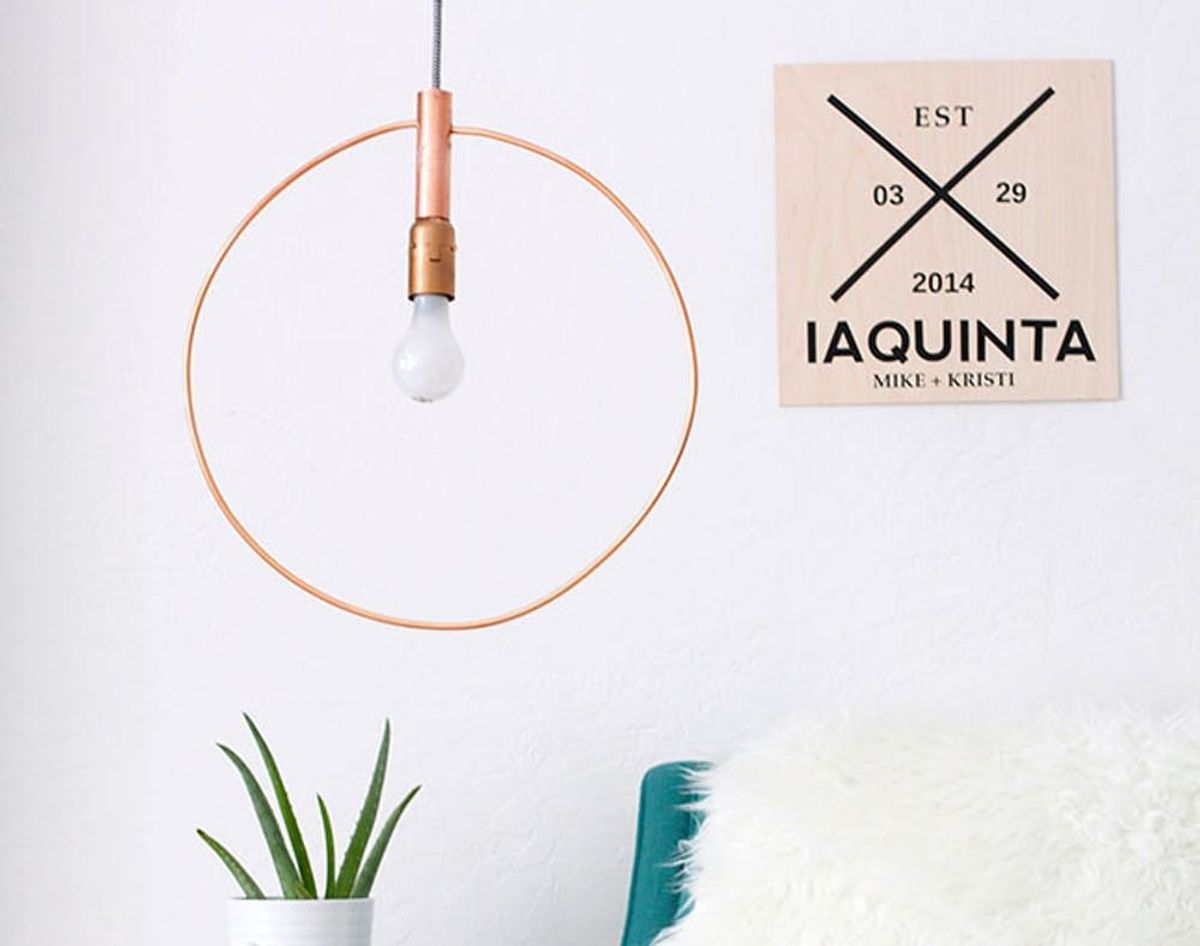
Lighting is one of the most important details of interior design: it sets the entire tone for a room — that’s pretty major. But why splurge on a killer fixture when you can totally DIY one that’s just as chic for next to nothing? Case in point: these geometric pendant lights. Sold for $375 on the left, MADE for less than $60 on the right! Want in on the secret to this home decor hack? Read on to stay in the glow ;)
DIY Copycat: Make This $375 Hoop Light for Just $60

Lighting is one of the most important details of interior design: it sets the entire tone for a room — that’s pretty major. But why splurge on a killer fixture when you can totally DIY one that’s just as chic for next to nothing? Case in point: these geometric pendant lights. Sold for $375 on the left, MADE for less than $60 on the right! Want in on the secret to this home decor hack? Read on to stay in the glow ;)
Materials:
– light bulb
– Minimalist Pendant Light
– copper glue
– copper spray paint
– 1 inch copper pipe
– 1/4 inch copper coil + rubber ends
Tools:
– pipe cutter
– drill
– 5/16 inch metal drill bit
– vise (optional)
Instructions:
1. Cut off any extraneous parts around the bulb of your pendant light and spray paint the fixture copper.
2. Cut your copper pipe to your desired length using your pipe cutter.
3. Thread your light cord through the copper pipe.
4. Measure how big you want your circle and cut your copper coil to size using your pipe cutter.
5. Drill holes in the copper pipe where you want your hoop to hang.
6. Insert the ends of the coils into the holes.
7. Push or glue rubber ends onto the coil ends.
8. Hang light according to directions.
First, you will want to cut off any extraneous parts around the bulb of your pendant light. If you are using the IKEA pendant light like I purchased, break off the pendant holders and cut the tip off using your pipe cutter. Then spray paint the fixture with the copper spray paint and let dry for two hours.
Next, cut your 1 inch copper pipe to your desired length using your pipe cutter (I cut ours to about 5 inches long). The pipe cutter works by circling around the pipe with intermittent tightenings until the pipe is cut through. Note, this is much easier than it seems. Then thread your light through the copper pipe. FYI: You may need to remove the canopy to do this.
Eyeball how large you want your circle embellishment to be and cut your copper coil to size using your pipe cutter. Be sure to keep the circle shape intact! Then mark where you want your copper coil to enter the copper pipe — just try to keep your light bulb in the center of the hoop.
Using your 5/16 inch metal drill bit, drill two holes at that mark (use a vise to drill or press down firmly with your hand to stabilize the pipe. Be careful if you use the latter method! And be sure to use a slower drill speed).
Insert the ends of the coil into the copper pipe and secure them with the rubber stops that came on the end of your copper coil. You might need to cut them to fit.
Before you hang your pendant according to the directions on your light, remember: safety first. PLEASE don’t forget to turn off the power to your room and watch a how-to video from a credible home improvement company to learn how to hang it right. If you’re still uncertain, don’t hesitate to call a licensed electrician for help!
When it’s up, you’re done! So flip the switch and…let there be light!
Would you give this illuminating DIY a try? Let us know in the comments below.


