Couples that build together, stay together.
The Perfect Date Night DIY Project for You and Your Better Half

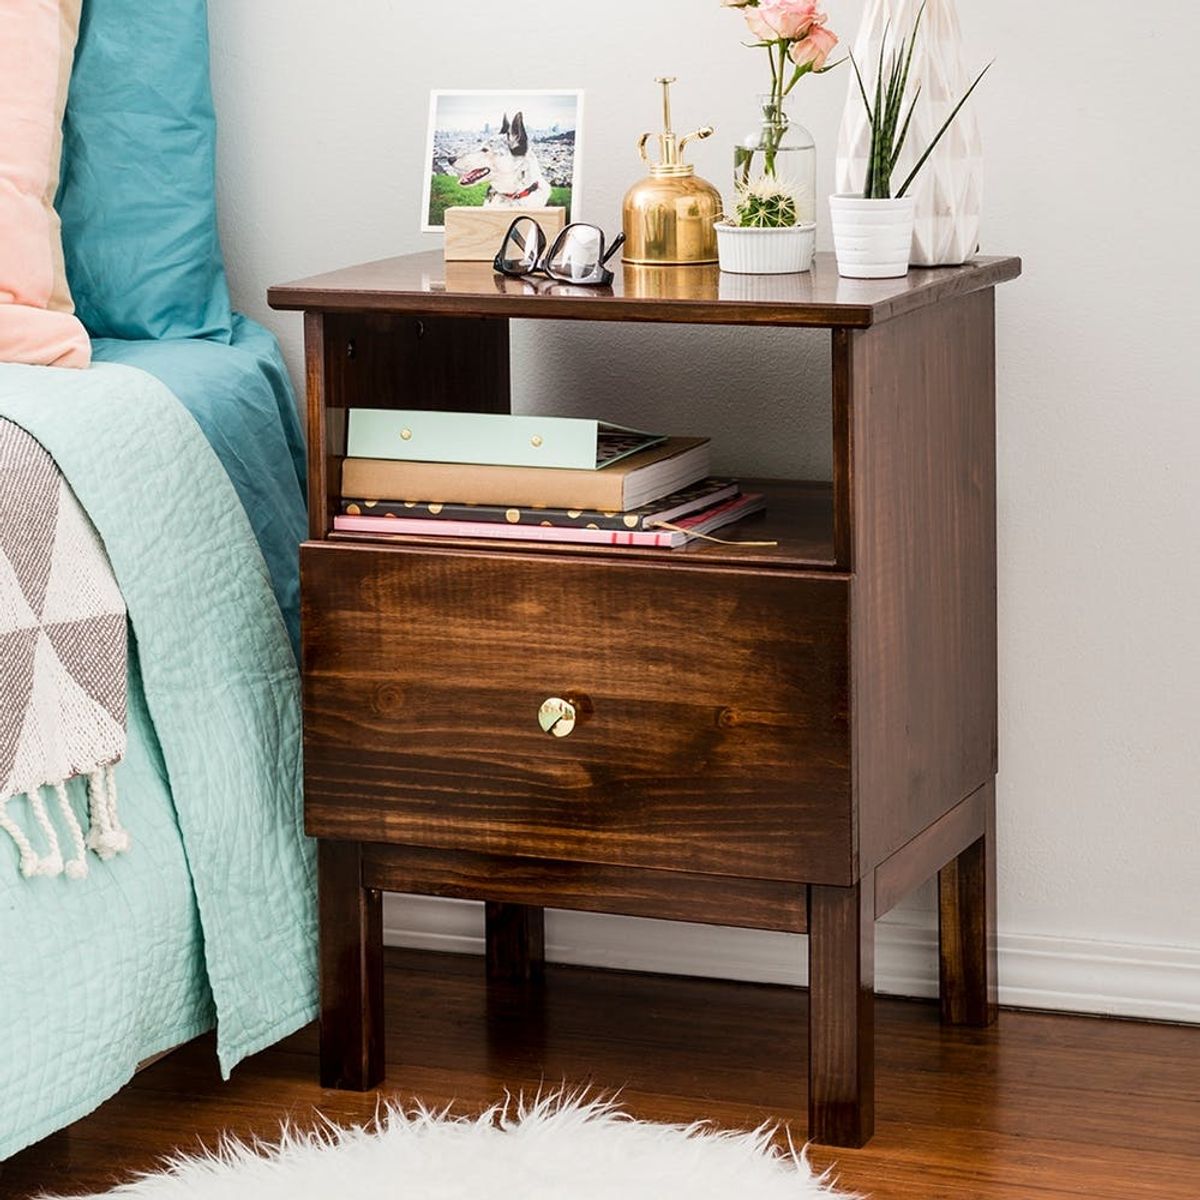
The time has come, and you’re moving in with your partner. No doubt, it’s a big step and you want nothing more than to be set up for long-lasting success, but combining aesthetics and tastes can be somewhat of a challenge. (Time to say “bye” to those neon beer signs… sorry, not sorry!) It’s also the perfect time to create something new together. That’s why we’re partnering with Minwax® to help you bond with your significant other through giving new life to an old piece. We’re going to show you how to refurbish a nightstand with a mid-century modern flair that you’ll both adore. You and your partner can invest time and love into decor you’ll enjoy for years to come. Couples that build together, stay together. Scroll on!

How to Refurbish a Nightstand
To find the perfect nightstand, keep your eyes peeled when cruising through your local thrift store or even your grandparent’s basement. Or go for the intentional hunt – we found an unfinished nightstand at a local woodshop. After all, you want to make sure the final piece is something that you enjoy for a long time.

Materials and Tools:
- Minwax® Gel Stain in Hickory
- Minwax® Helmsman® Spar Urethane
- nightstand
- rubber gloves
- protective glasses
- 220 grit sandpaper
- clean rags
- drop cloth
- good quality natural bristle brush
- bronze or gold drawer pull

Instructions:
Step 1: Stain
Note: Surface must be dry, clean, and free of dirt, grease, glue, and existing coatings before staining. If you are working on soft woods, like pine, use Minwax® Pre-Stain Wood Conditioner to minimize blotchiness and ensure even stain color.
- Sand the wood in the direction of the grain using a fine-grade sandpaper (#220) until smooth. Remove all sanding dust.
- Stir Minwax® Gel Stain until creamy before and occasionally during use. Do not thin.
- Always test stain on a scrap piece or hidden area of the wood to verify desired color.
- Apply a liberal amount of stain evenly with a brush or clean cloth.
- Wait 3 minutes and remove the excess stain with a clean cloth, wiping in the direction of the grain. Allow to dry 8-10 hours.
- To darken the color, apply additional coats of Minwax® Gel Stain, repeating directions for application of first coat. Allow the stain to dry 8-10 hours between coats. Do not sand between coats.
Step 2: Protect
- Protect your piece by applying a thin coat of Helmsman® Spar Urethane using a high quality natural bristle brush.
- Let dry at least 4 hours, then sand the entire surface lightly with very fine sandpaper (220 grit) to ensure an even finish and proper adhesion of additional coats.
- Apply a second coat. If a third coat is desired, repeat Step 2 before applying.
- After the final coat, allow 24 hours before normal use.
Step 3: Accessorize
- Once dry, screw in the new drawer pull and you’re ready to go.

Before you begin any staining project, you’ll want to sand down your surface to remove any mill glaze and open the wood pores — this helps your piece accept the stain. Using 220 grit paper, smooth over all areas and then wipe down with a clean rag to remove any excess dust.

Get the Minwax® Gel Stain to be an even mixture by first thoroughly stirring. You’ll also want to occasionally mix during use. Using a clean cloth or brush, apply a generous amount of the stain. Wait three minutes and use a clean cloth to remove any excess stain going in the direction of the woodgrain. Let dry for eight to 10 hours. To deepen the color, apply a second coat.

Next, to protect your beautiful piece, apply a thin coat of Helmsman® Spar Urethane using a good quality natural bristle brush. Let dry at least four hours, then sand the entire surface lightly to ensure an even finish and proper adhesion of additional coats. Apply a second coat, following the same instructions. Wait at least 24 hours before normal use. That’s it! You’re done.

Once completely dry, add some bling by way of a bright, shiny drawer pull.

Teamwork makes the dream work! Now all you have to do is make sure you put your beautiful new piece in the right place.

And fill it with all of your goodies.

Ta-da! Now you have a piece you and your better half will both love.
What projects have you worked on with your S.O.? Need some inspiration? Check out our favorite DIYs on our Pinterest page.
DIY Production + Styling: Lindsay Saito
Photography: Chris Andre
Models: Maddie Bachelder + Cody Towner


