A jewelry organizer disguised as a notebook? Sneaky — we love it!
This DIY Jewelry Organizer Looks like a Notebook
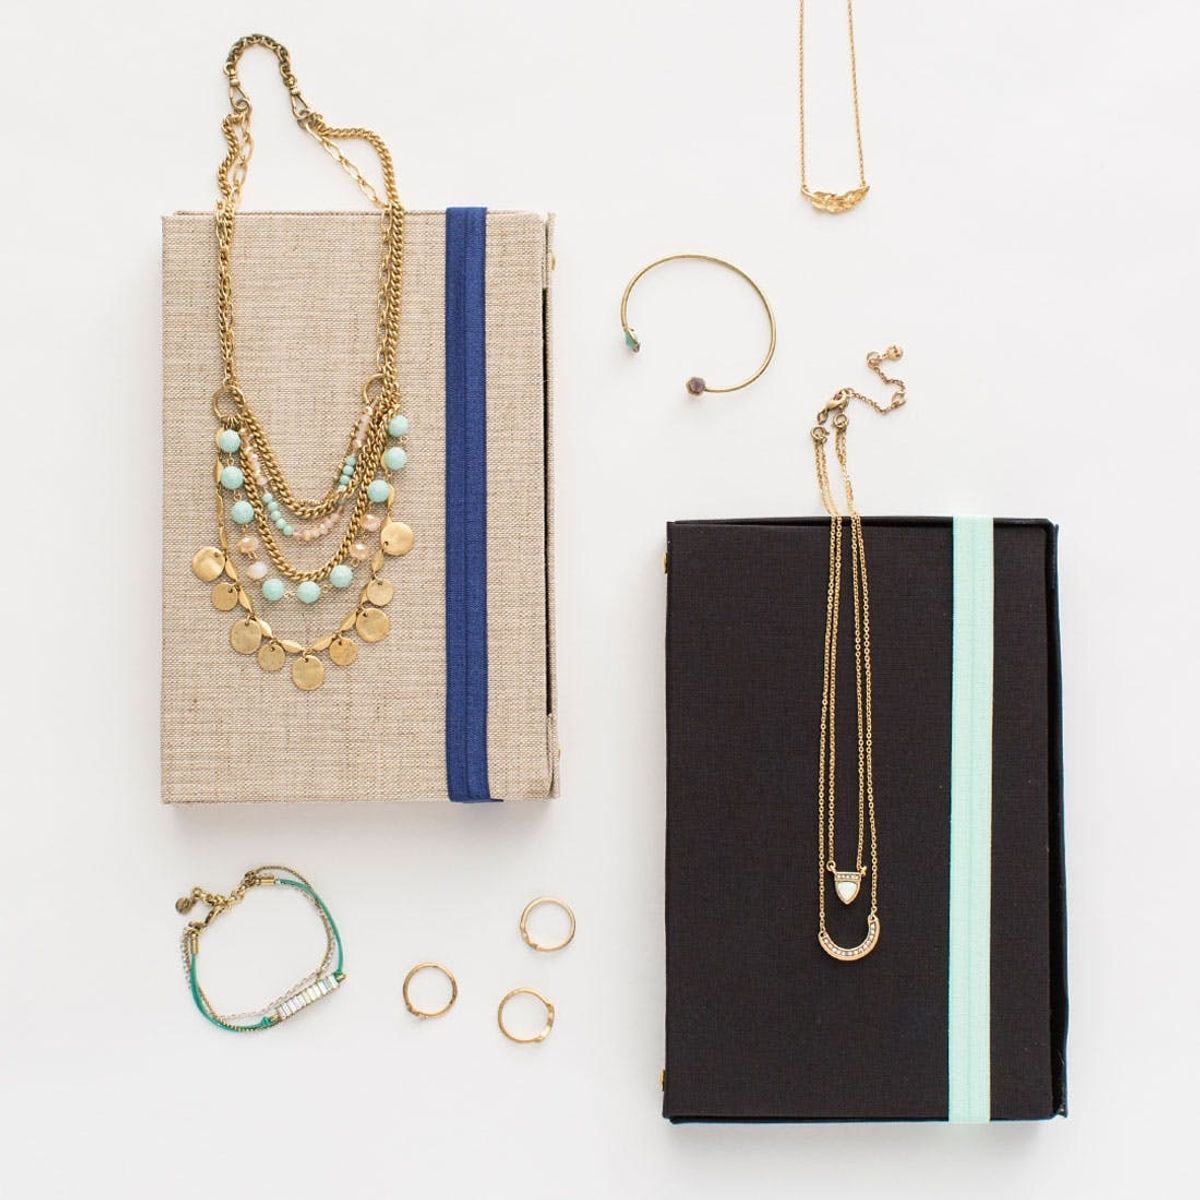
Being the busy #girlbosses we are, finding a way to keep up with our packed schedules in style is a daily concern. In order to take our favorite jewels from the office to drinks to business trips and vacations, we made these DIY organizers disguised as notebooks that pop right into a tote, weekend bag or suitcase!
Chloe + Isabel
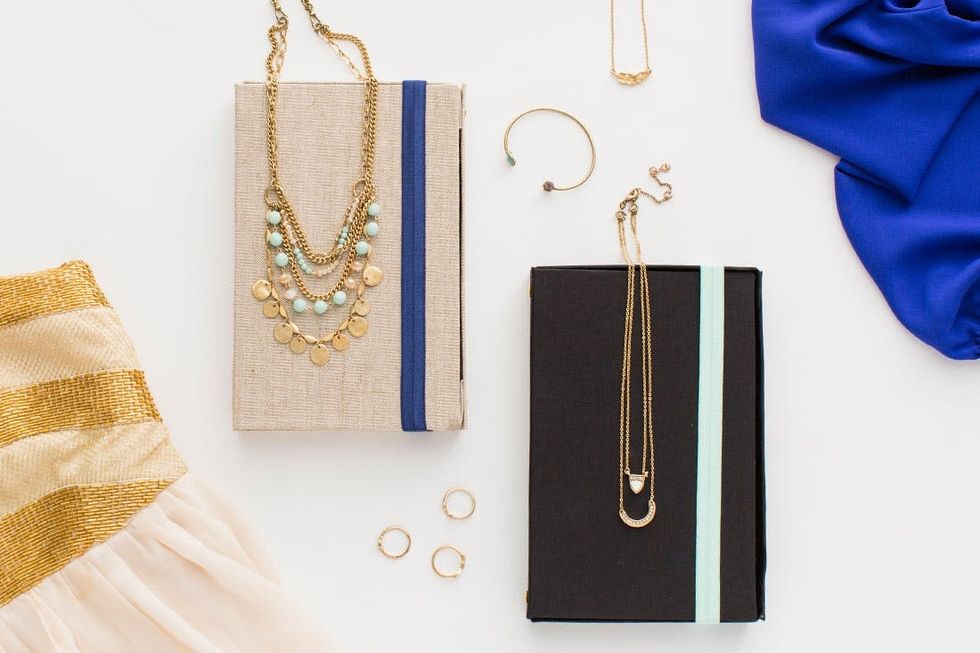 Travel Jewelry Organizer Kit in natural linen or black color options. As a serious BONUS, this kit also comes with 20% off Chloe + Isabel jewelry to fill it up!
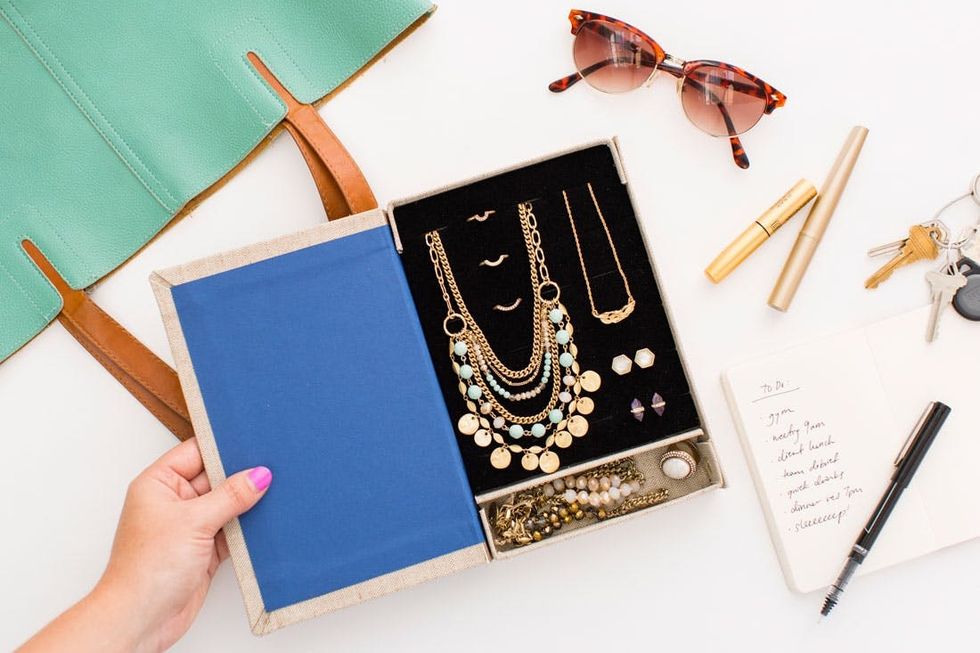
This DIY kit uses similar techniques applied in traditional bookbinding to create a hardcover “book” with added walls to contain your jewelry. Keep scrolling for detailed instructions!
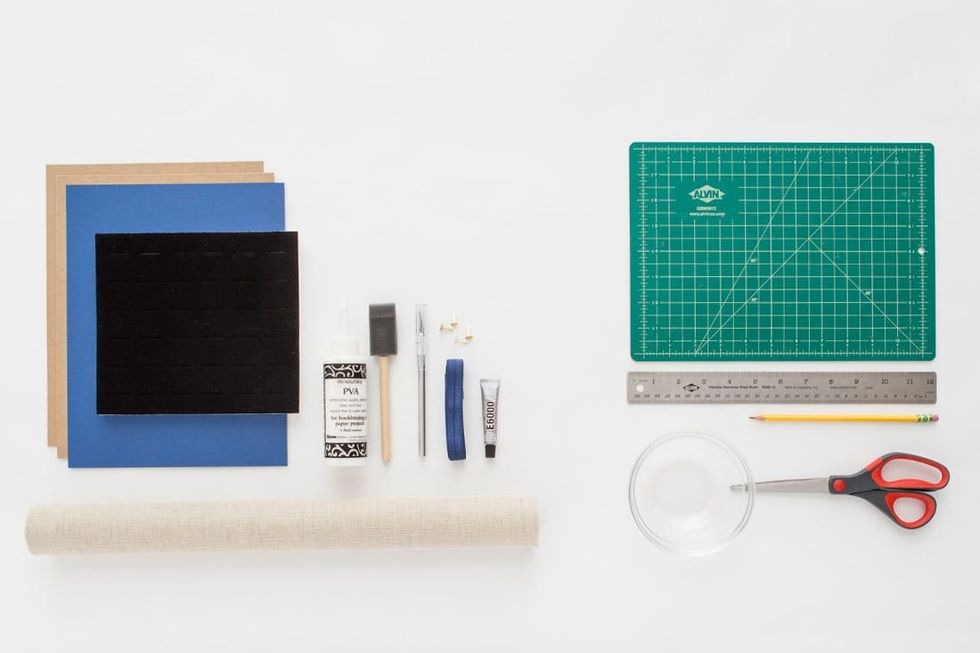
Materials (included in our kit!):
– book cloth roll
– chipboard sheets
– card stock
– PVA glue
– E6000 glue
– foam brush
– black velvet foam insert
– elastic
– X-ACTO knife
– brass brads
Additional Supplies (not included in kit):
– cutting mat
– steel ruler
– scissors
– pencil
– small bowl or other container (for glue)
Instructions:
1. Cut your chipboard into two 8.5 x 5.5-inch pieces, two 8.5 x 1-inch strips, two 5.5 x 1-inch strips and four 1 x 1-inch squares, using your X-ACTO knife.
2. Place your chipboard pieces onto the paper side of your book cloth, trace around in pencil and cut out using scissors.
3. Brush PVA glue onto your book cloth using your foam brush and then start folding your exposed book cloth over your chipboard.
4. Add more PVA glue to your 1-inch chipboard strips and tightly fold the book cloth down on top of them — these will be your walls.
5. Fold up your 1-inch walls to match up with your 1 x 1-inch tabs, and cut a small vertical slit into each of them so that you can fit a brad through both.
6. Fold up these walls again and glue down the remaining book cloth onto the back cover, folding your 1 x 1-inch tabs inward at the same time.
7. Once your three walls are up, cut your card stock to 8 x 11 inches and glue down with PVA glue to cover the exposed chipboard.
8. Fasten the four 1 x 1-inch tabs to their corresponding walls by pushing a brad into your pre-cut slits and securing from the inside.
9. Cut your foam insert down to 5.5 inches wide, making sure that the ring slits run horizontally. Then trace below the insert in pencil.
10. Glue leftover book cloth onto a 5.5 x 0.75-inch chipboard strip and glue onto to the line you traced to create a dividing wall.
11. Let dry for 15 minutes or so and then place your foam insert back into the organizer. It should fit snugly against your dividing wall.
12. Add an elastic strap by glueing the two ends to the back cover of your organizer with E6000 glue, and let dry overnight under a heavy object.
13. Pop in your jewelry and hit the road knowing your favorite pieces are safe!
Grab your main materials pictured on the left (and included in our kit!), some additional household supplies (pictured right) and let’s get started!
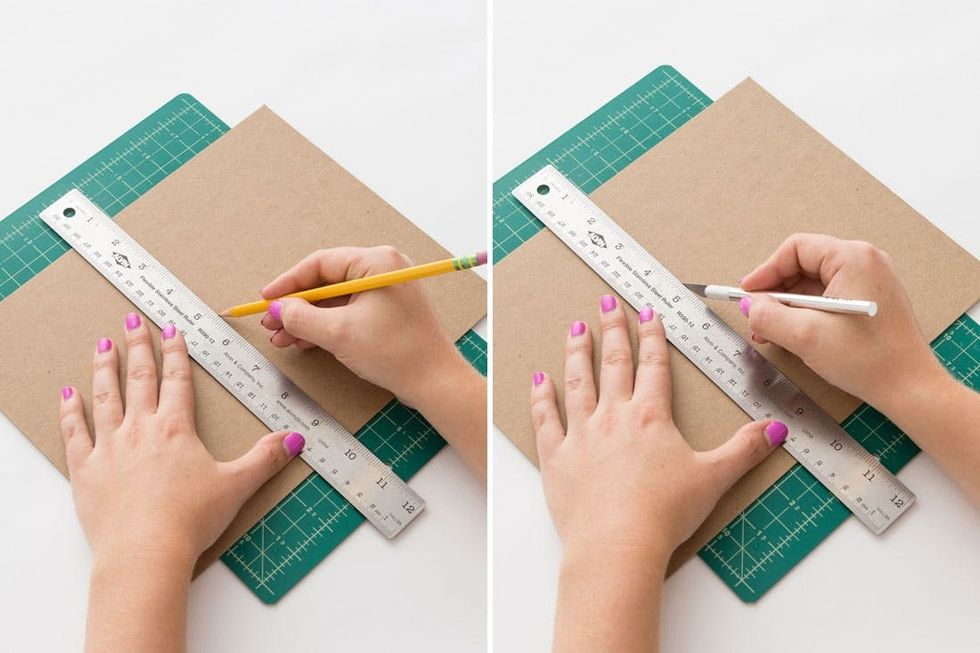
Cut your first sheet of chipboard directly in half with your X-ACTO knife, so that you have two rectangles measuring 5.5 x 8.5 inches.
BUILDING THE BOOK COVER
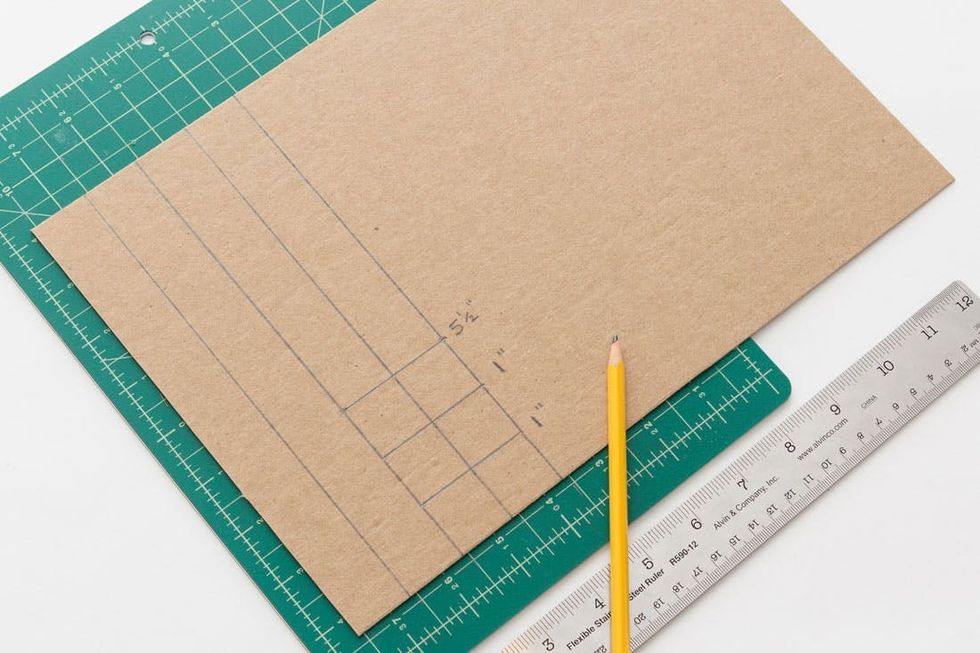
Then, cut your second sheet of chipboard into two 8.5 x 1-inch strips, two 5.5 x 1-inch strips, and four 1 x 1-inch squares. It may help to first draw this out in pencil before cutting with your X-ACTO.
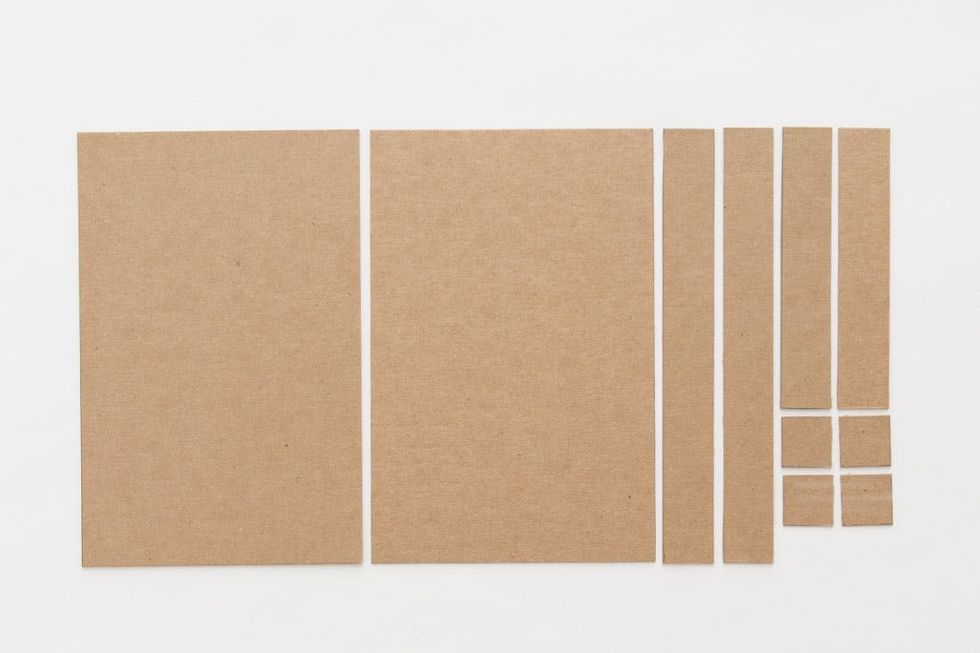
Double check that you have all the pieces pictured above cut out and ready to go!
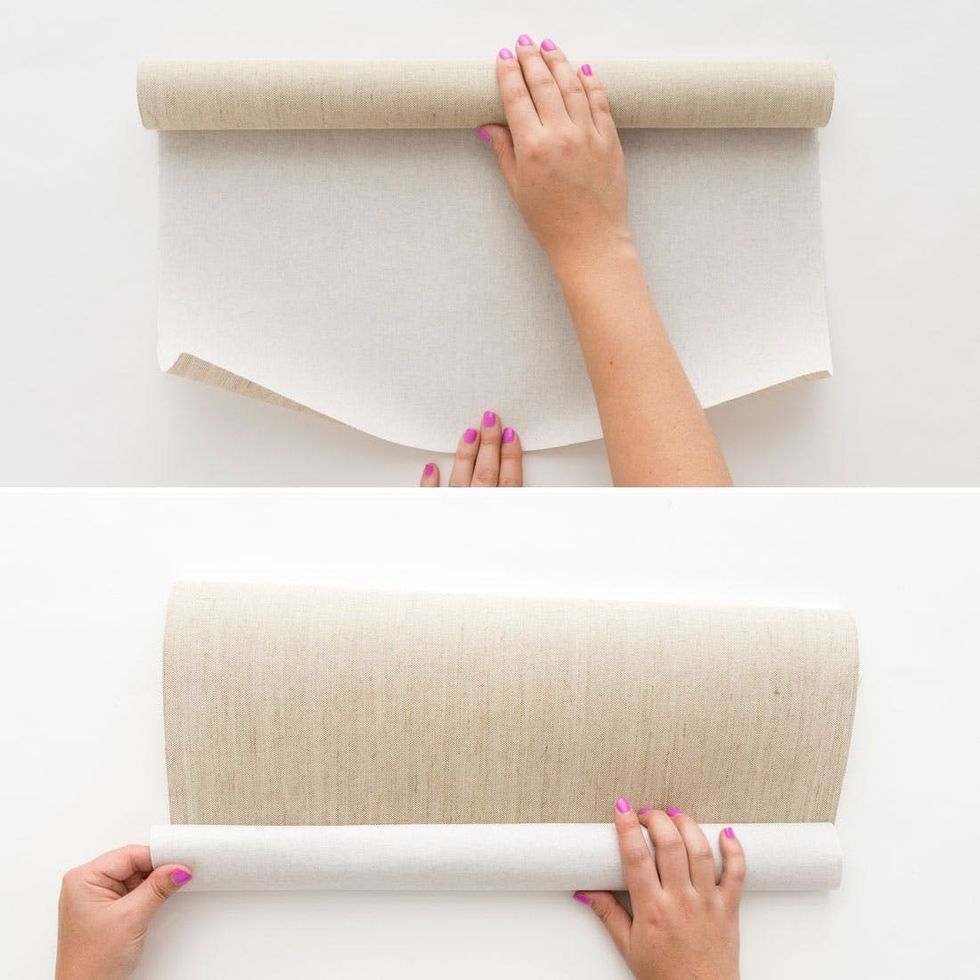
Next, unroll your book cloth and then roll it paper-side out so that it will lay flat when unrolled.
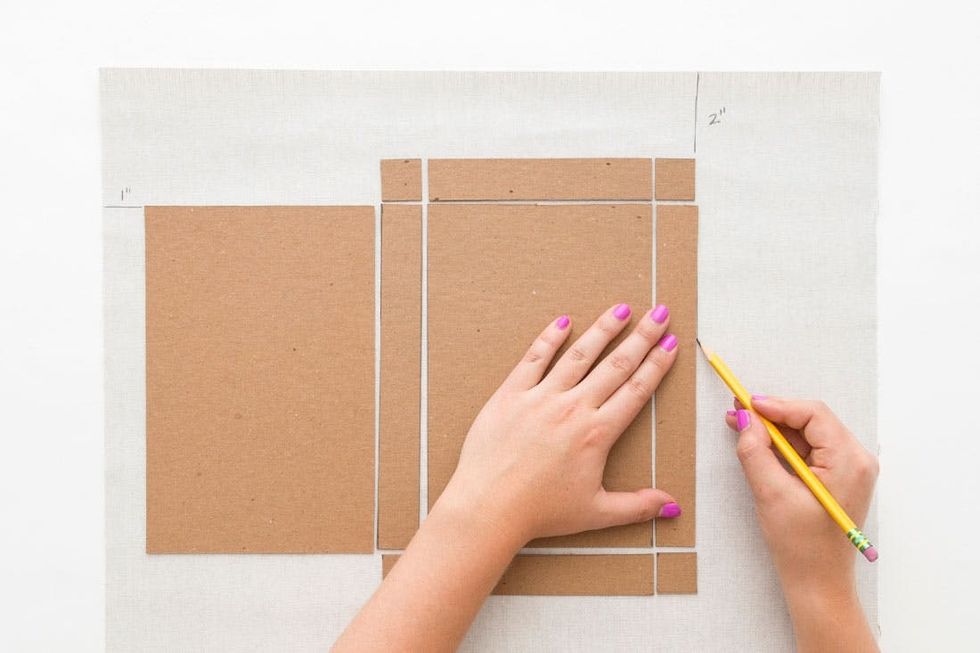
Arrange your chipboard pieces onto the paper side of your book cloth, leaving small 1/8-inch gaps between all of your pieces. Make sure your whole arrangement is two inches from the top edge and one inch from the left edge. Temporarily tape or hold down the pieces with your hand, and carefully trace around the perimeter of your chipboard in pencil.
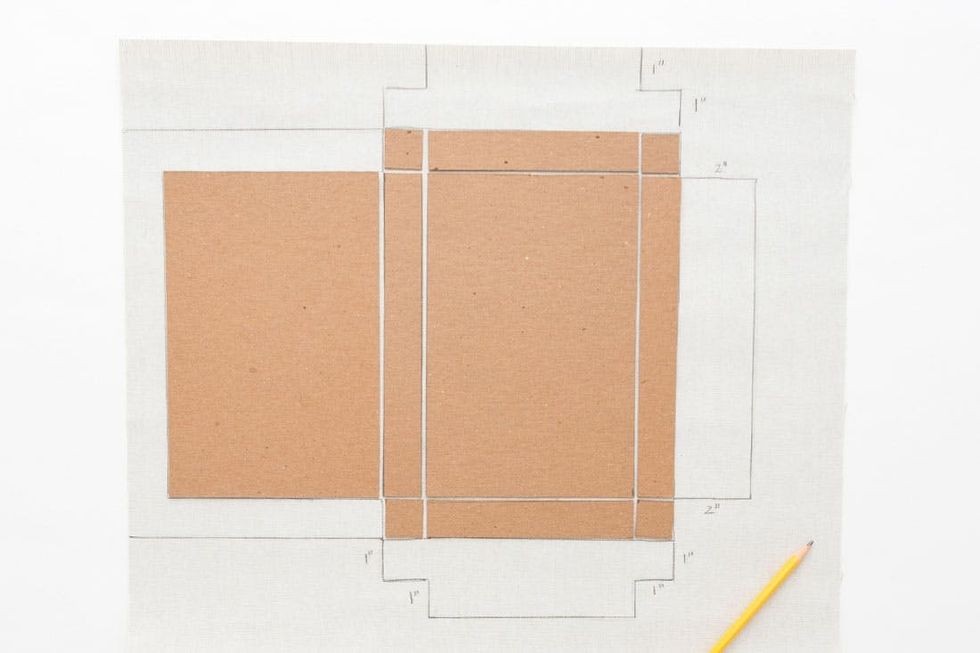
Draw a one- to two-inch border around your pieces so that it matches the drawing above and then cut along that same border with scissors. Take a minute to make sure that your border looks like this – your careful measurements here are the key to the success of your case later!
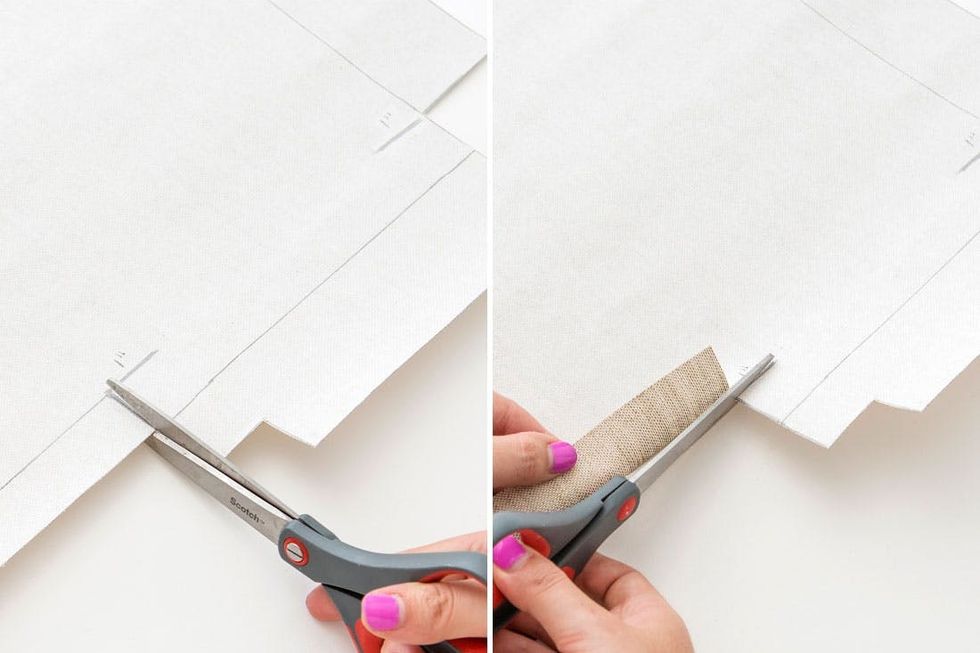
Put your chipboard pieces to the side and then cut two slits at the four corners where your 1 x 1-inch chipboard tabs were previously placed. This will allow your 1-inch tabs to fold inward later.
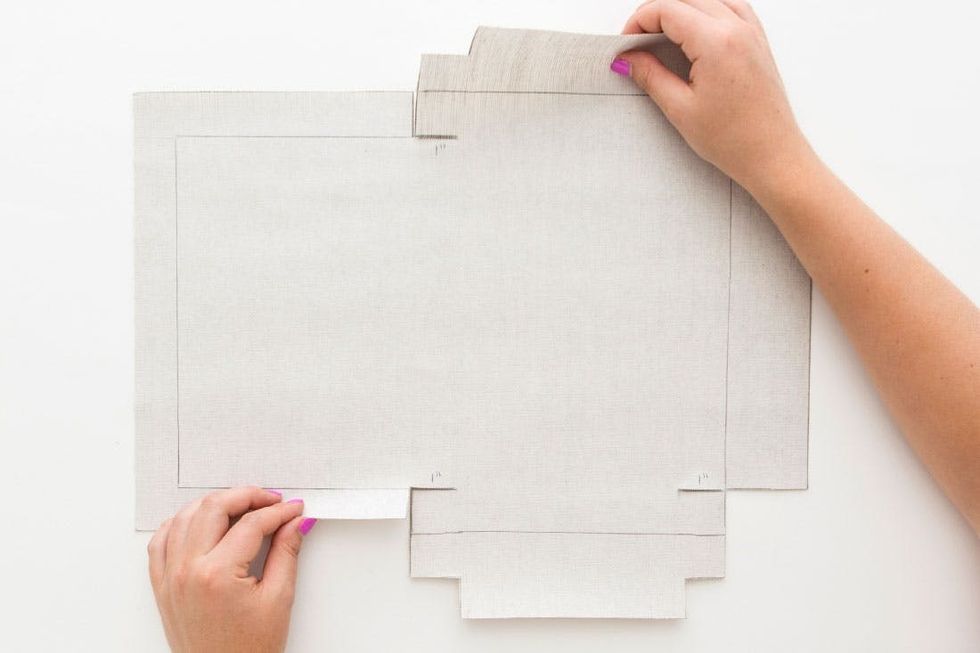
When you’ve cut slits in all four corners, your book cloth should look like this.
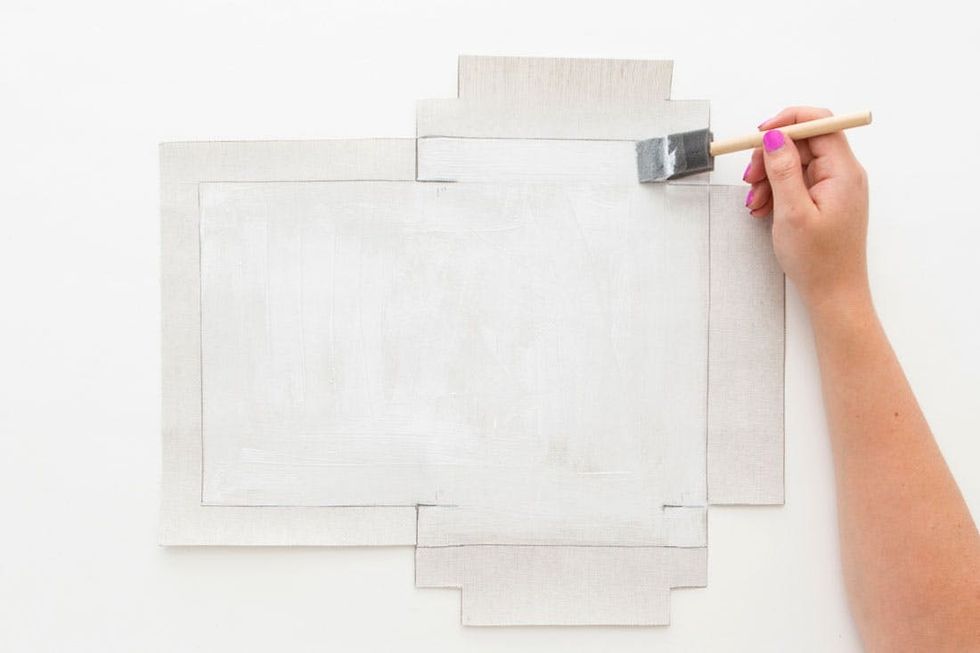
Brush an even layer of PVA glue onto your book cloth using your foam brush while staying inside the lines that you traced around your chipboard pieces.
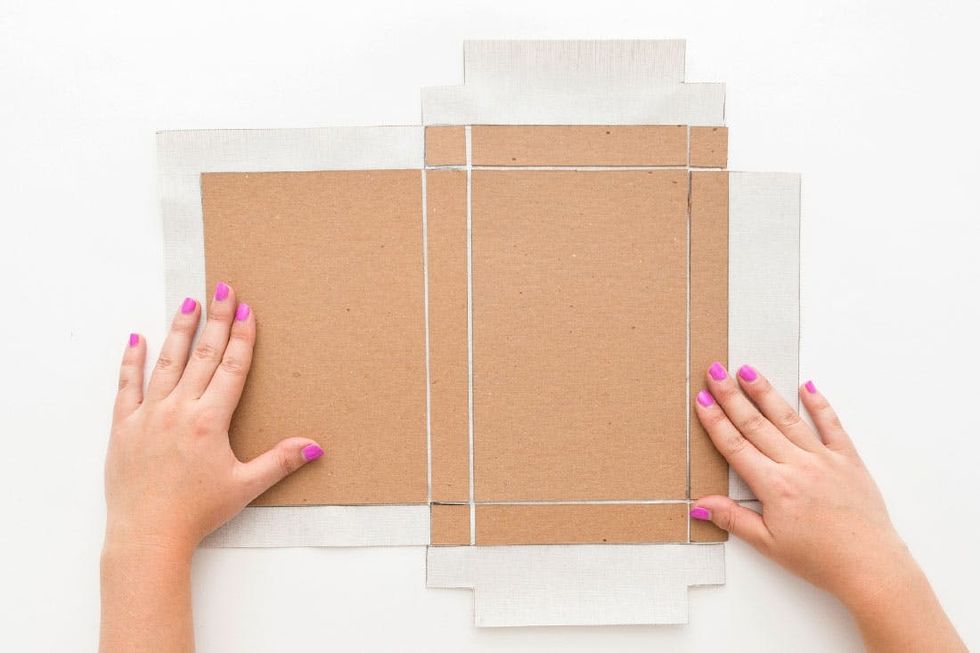
Carefully place your chipboard pieces back onto the glued book cloth in the same arrangement that you traced before, leaving an approximately 1/8-inch gap in between all your pieces.
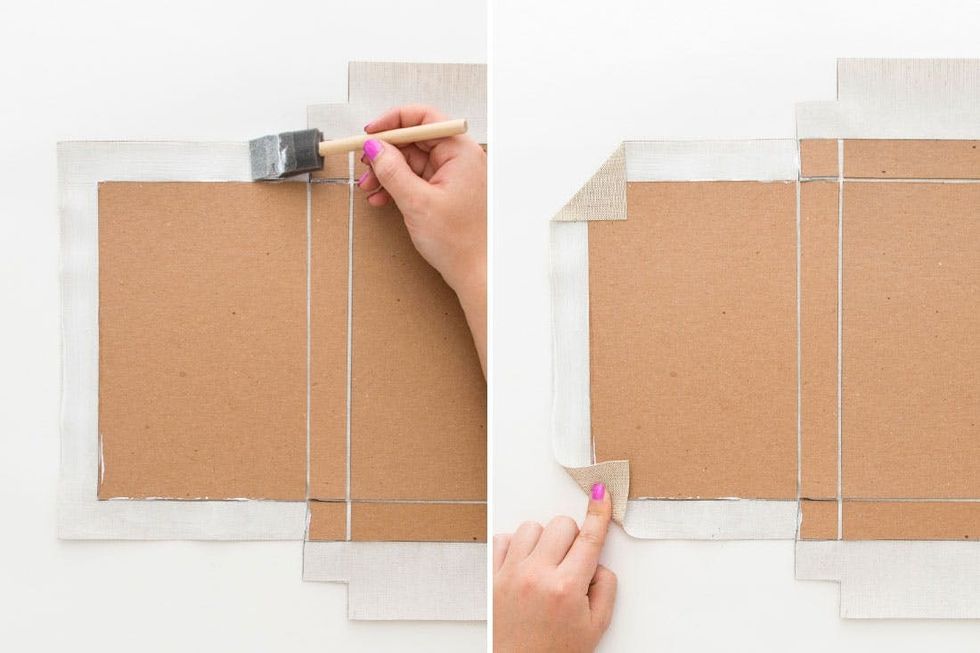
Brush a thin layer of PVA glue onto the book cloth surrounding the left side of your chipboard (this will be your front cover when you’re done), tightly fold the two corners over onto the chipboard and smooth down.
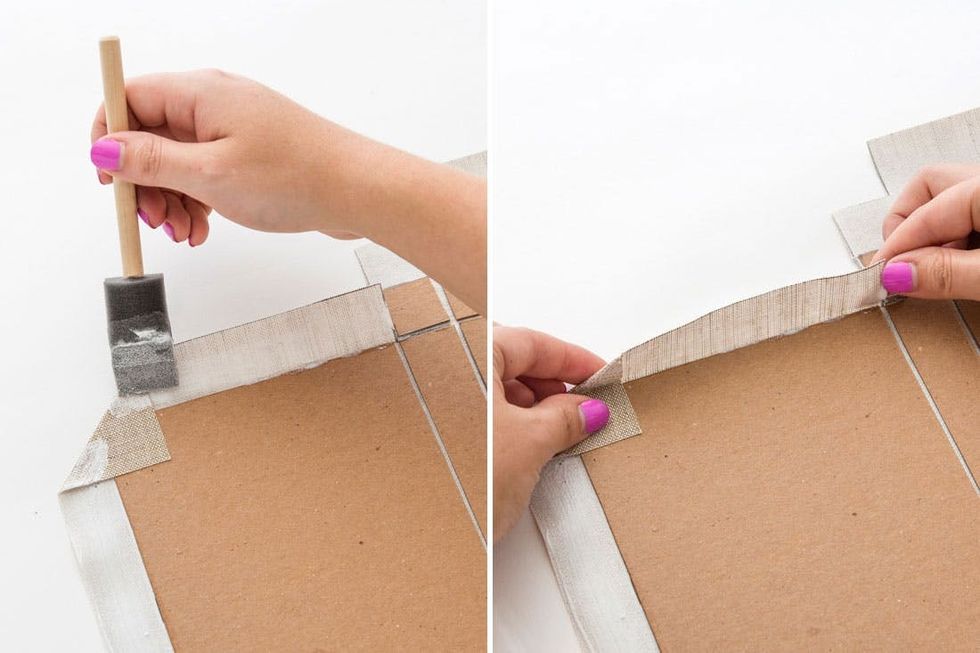
Brush a little extra glue onto the corners before tightly folding the top, bottom and left-side flaps onto the chipboard.
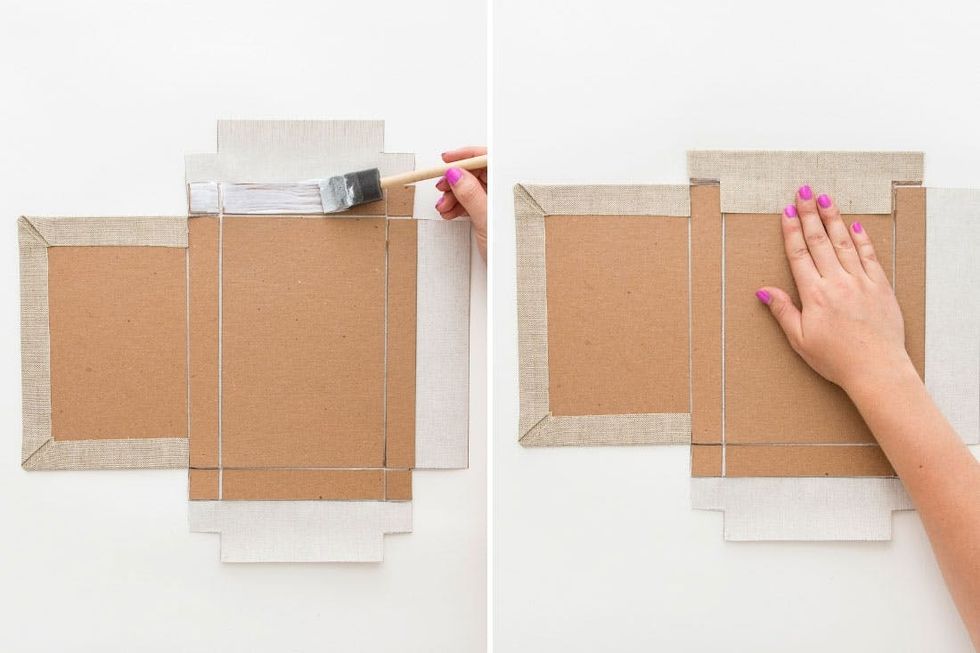
This time, brush PVA glue onto just your 1-inch-wide chipboard strips and tightly fold the book cloth over the glue. This will leave the bottom inch of your book cloth free of glue so that you can fold up the walls of your organizer later.
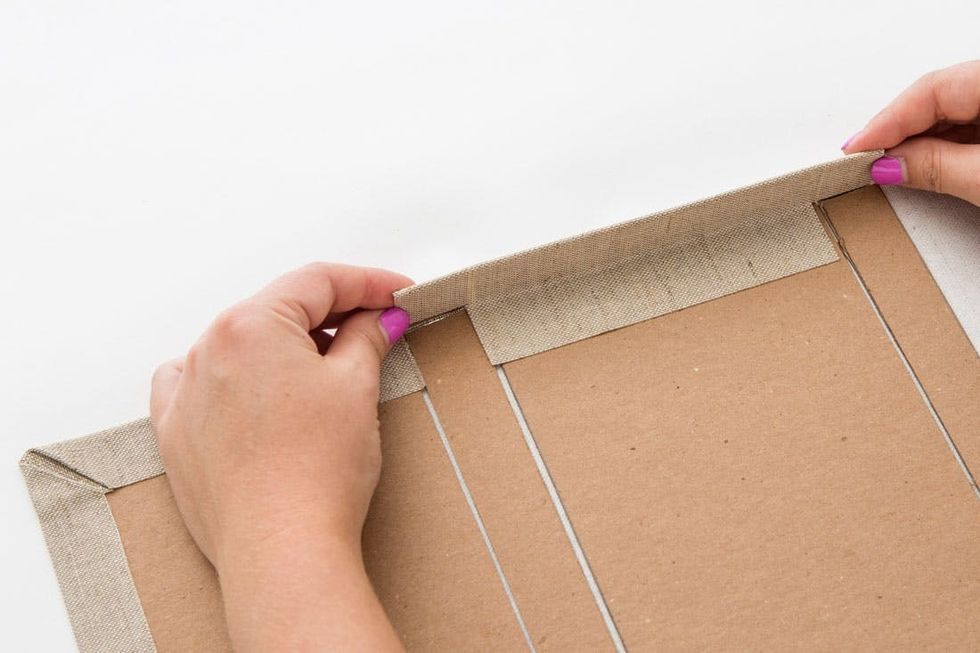
Fold up this first wall so that it stands straight up. This just stretches out the book cloth to allow you to fold up all three walls later when the glue has dried.
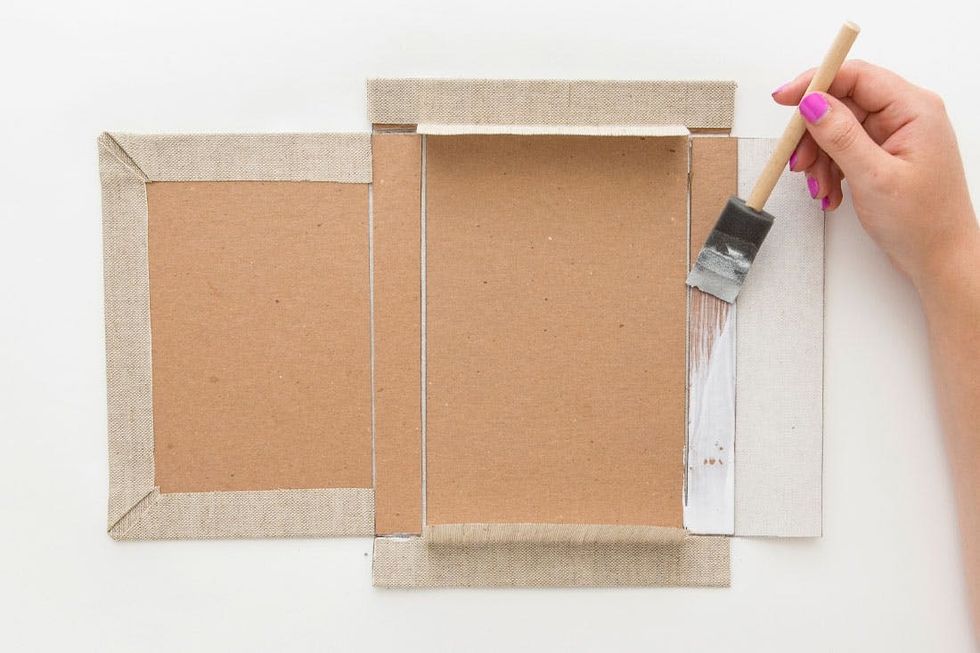
Repeat this process with the bottom and right edges, remembering to only apply glue to the chipboard strips.
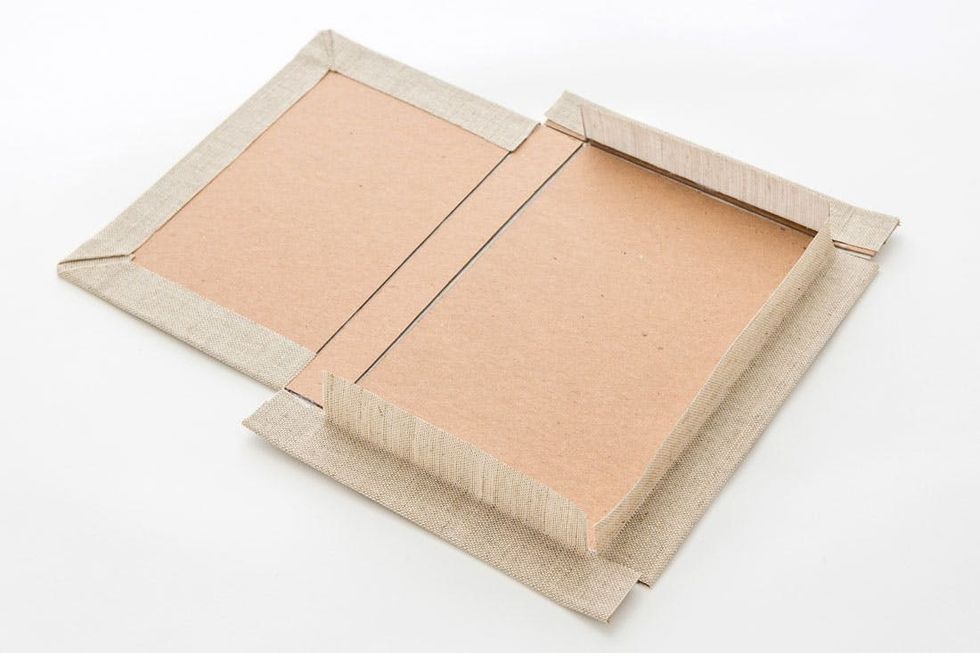
When you’ve glued and folded all three edges, your covered chipboard should look like this.
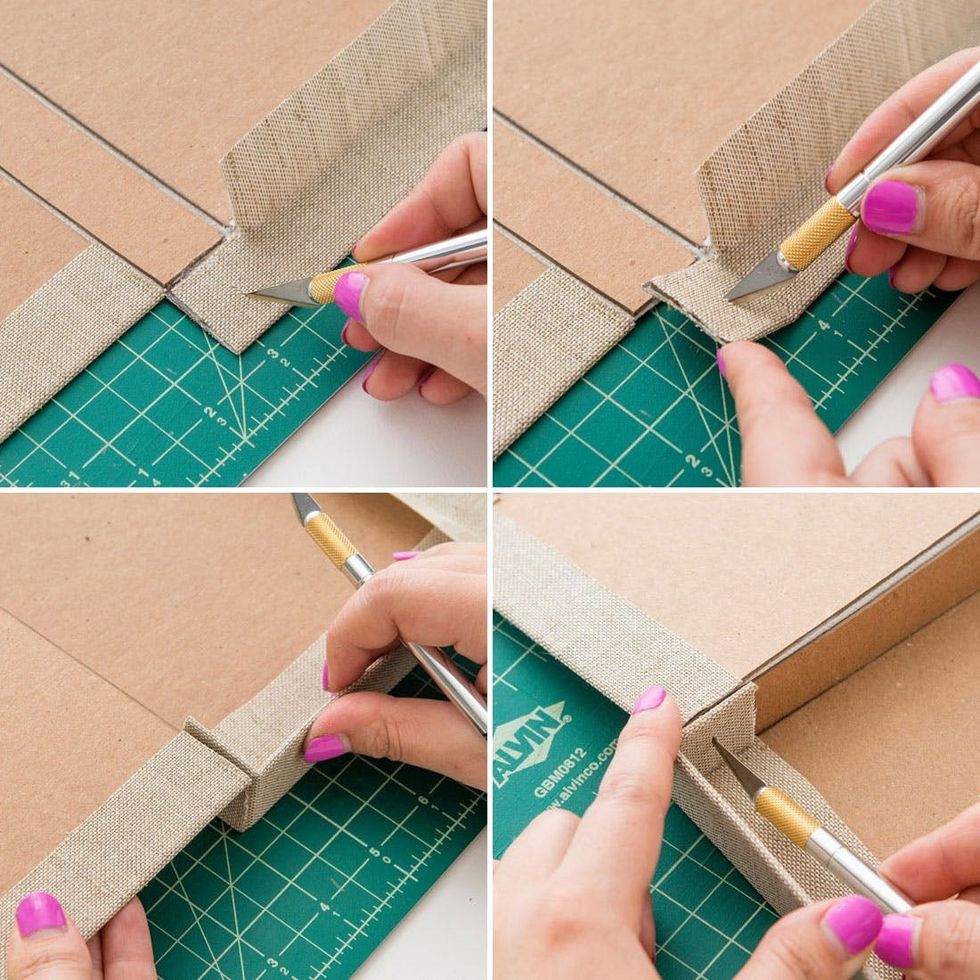
While your arrangement is still flat, cut a small vertical slit into the middle of your 1 x 1-inch tabs using your X-ACTO knife. Make sure the knife can go all the way through before folding up your “book” spine and poking your knife through the slit to reach the second piece of chipboard. This will make a small mark on the spine for you to cut a matching slit.

Cut a horizontal slit in the spine where you previously made a small mark through the 1 x 1-inch tab. Repeat this process for all four 1 x 1-inch tabs and their corresponding walls.
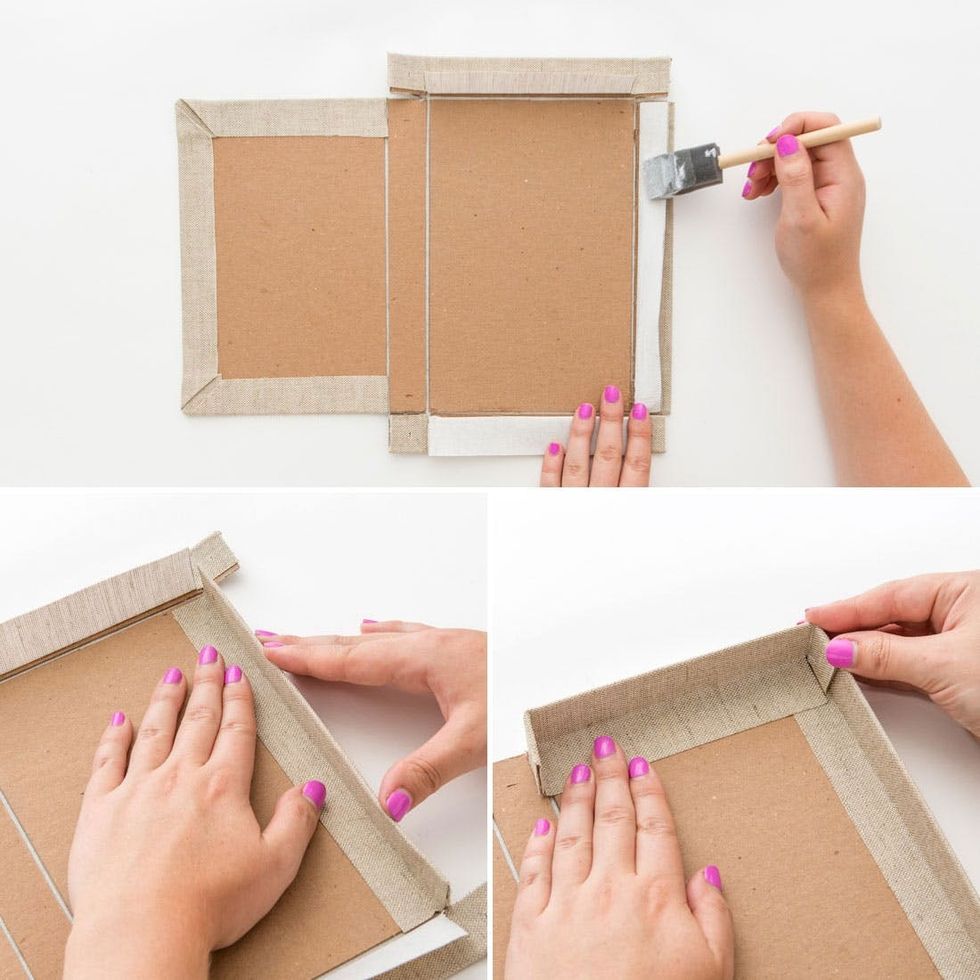
Now it’s time to raise those walls! Brush PVA glue onto your three remaining strips of book cloth, fold up your three walls at a right angle and smooth down the glued cloth onto the chipboard with your hands. Make sure your 1-inch tabs fold inside your right-hand wall when you fold up the top and bottom walls.
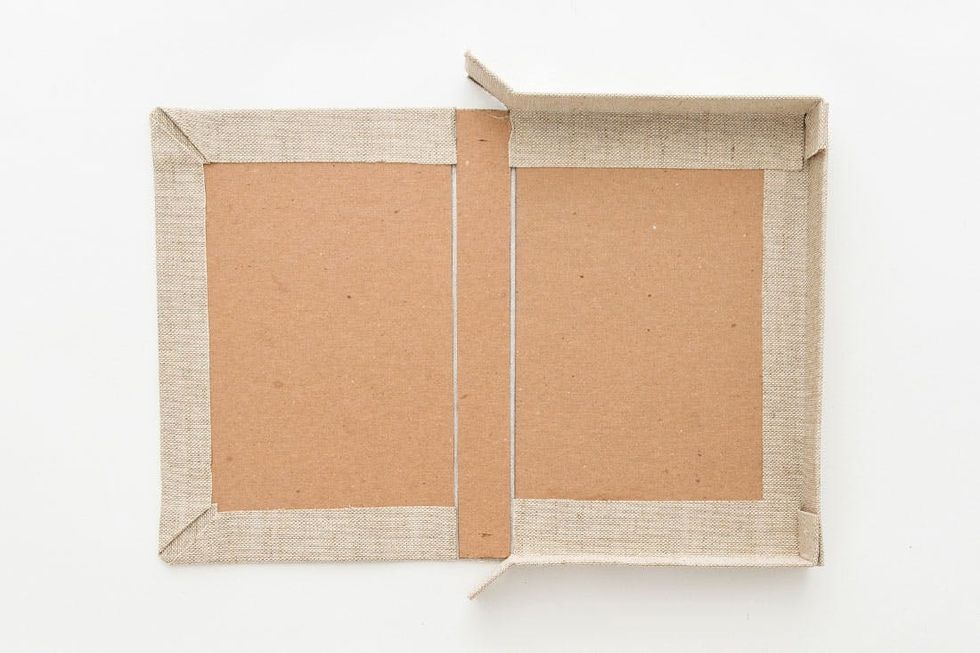
Your soon-to-be organizer should now look something like this!
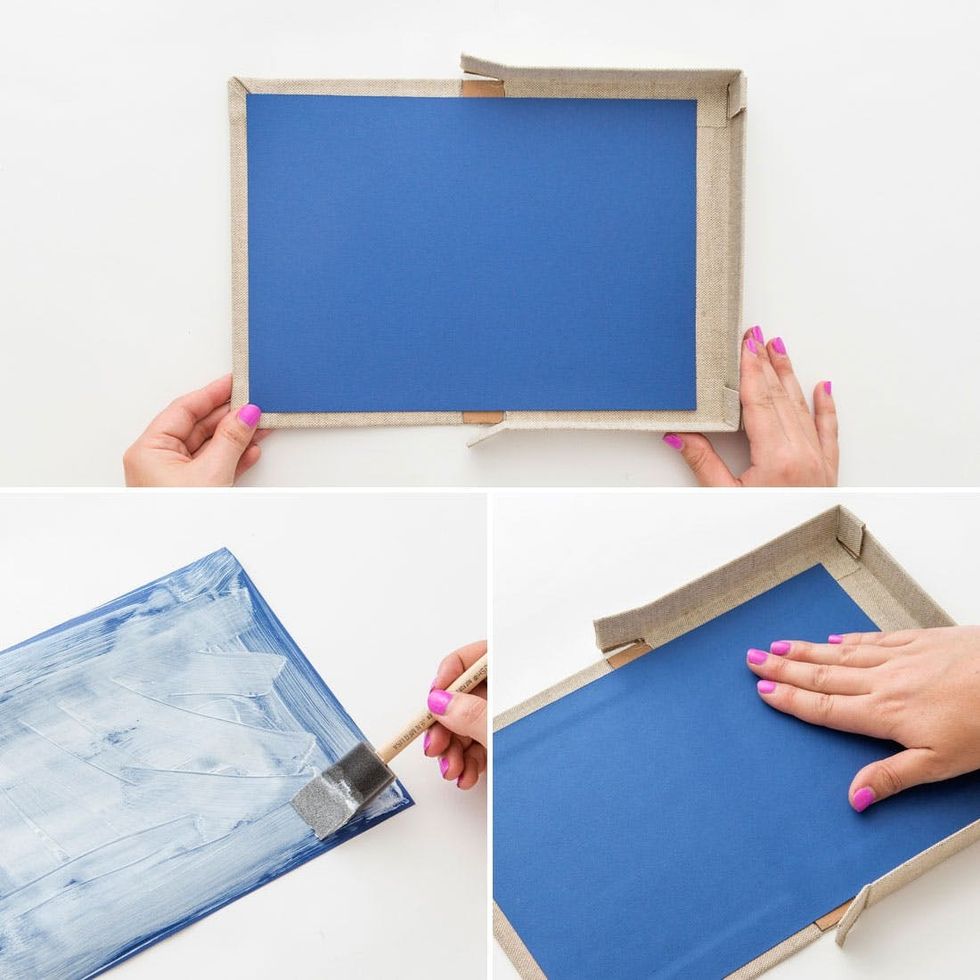
To cover up the exposed chipboard, trim your card stock down to 8 x 11 inches with your X-ACTO knife. Then glue the card stock down with PVA glue, leaving a small, even border of book cloth showing.
COVERING THE INTERIOR
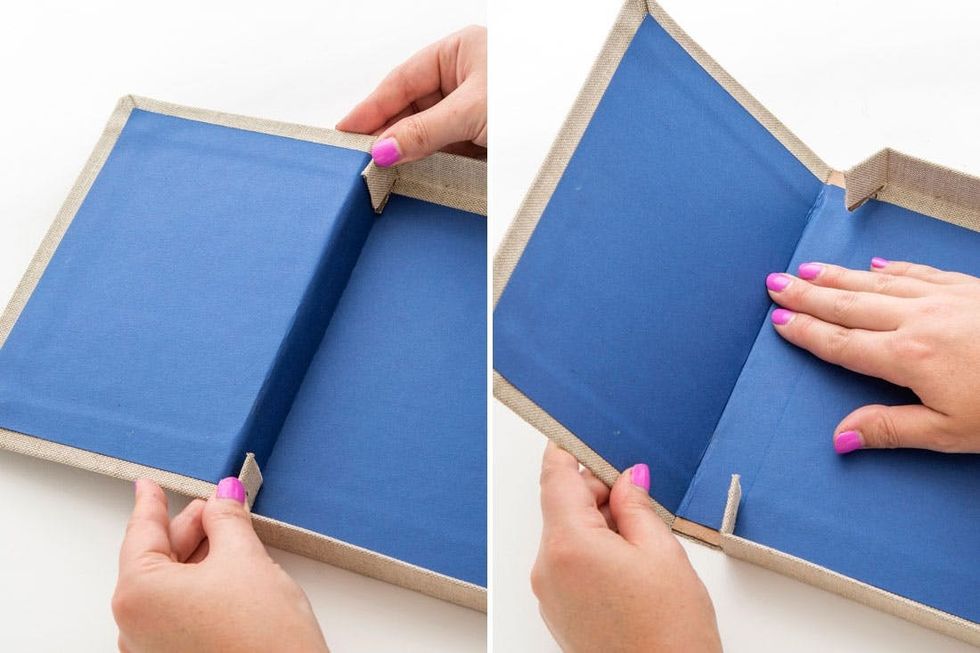
Carefully fold up the spine of your “book” and then fold just the front cover upward, creasing the cardstock with your fingernail so that it can easily fold open and closed.
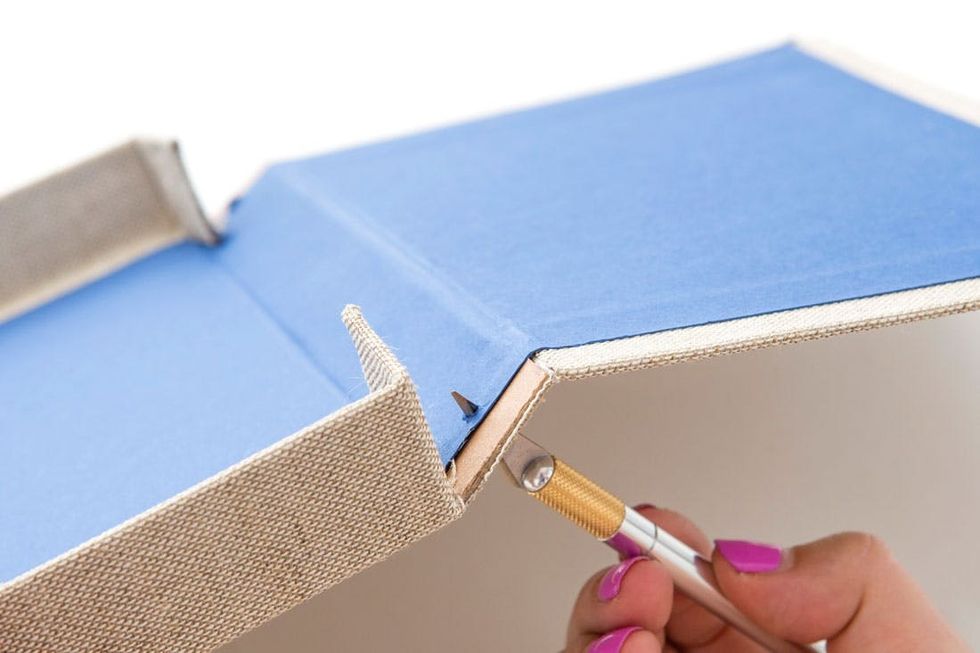
Now that you’ve covered your chipboard, carefully poke the X-ACTO through the slits you cut earlier so that it also cuts through the card stock.
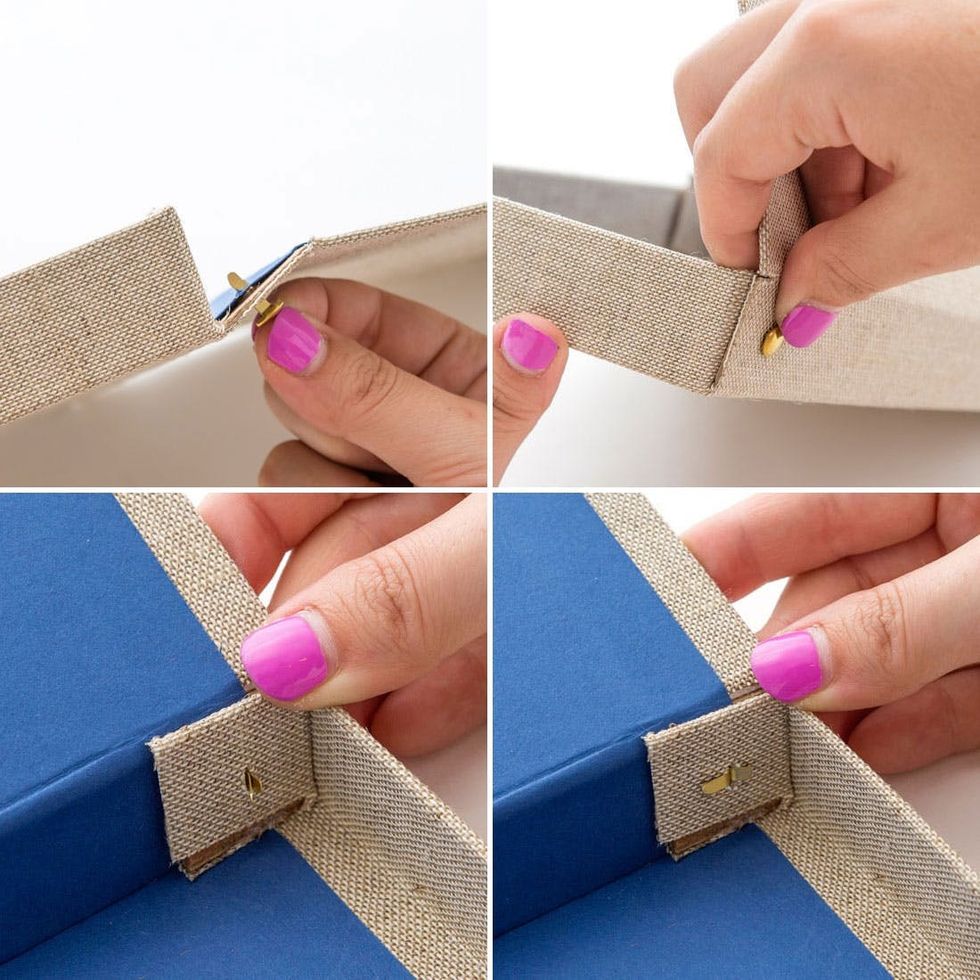
Then fold up the spine and fasten it to your 1 x 1-inch tabs by pushing a brad through the matching slits in the spine and tabs. Open up the two wings of the brad to hold everything together.
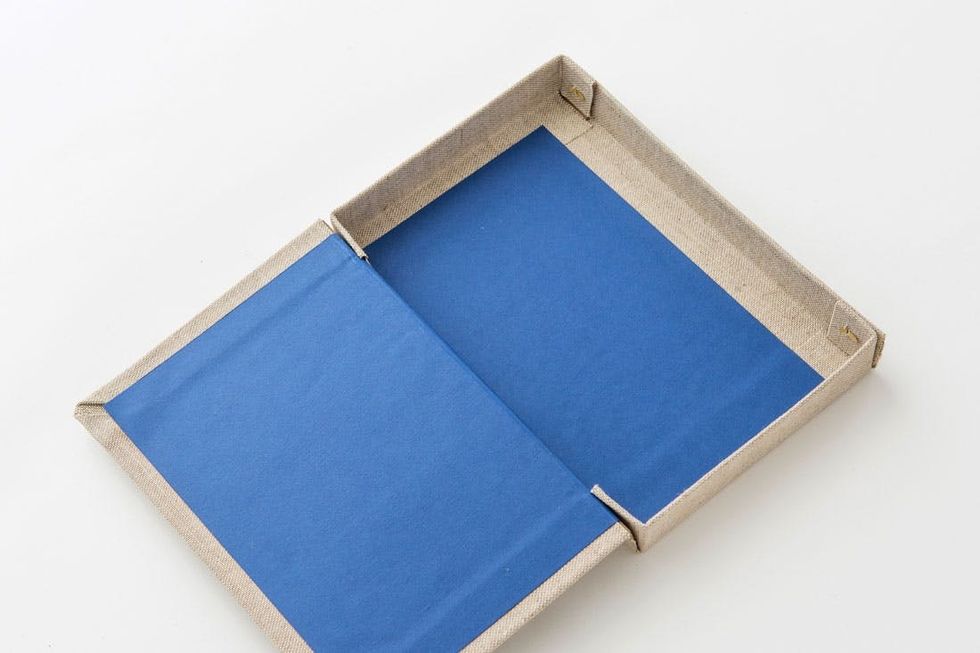
Almost done, we promise! Your “notebook” organizer should look like this!
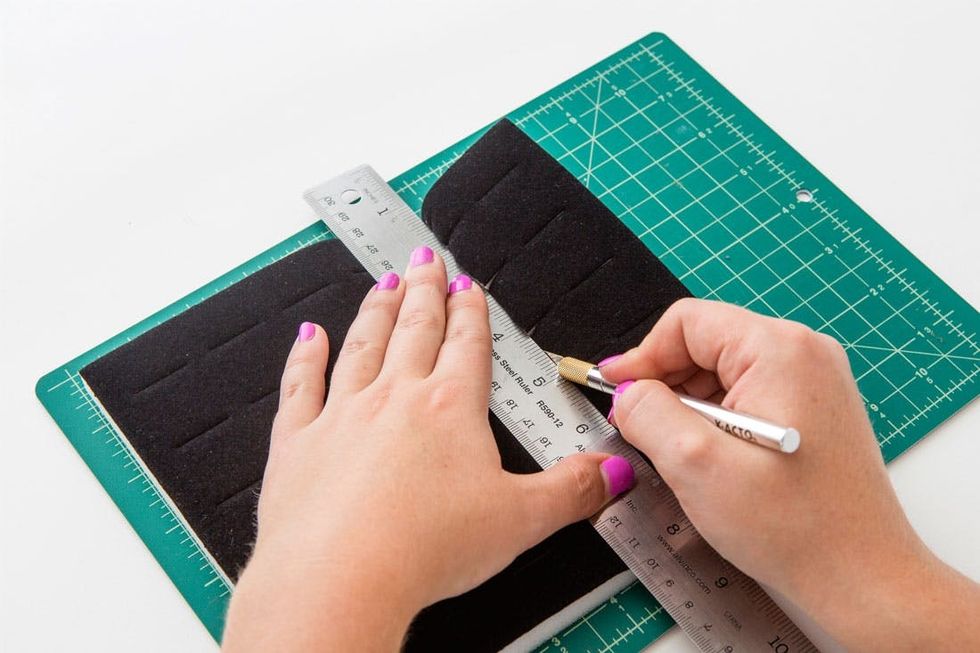
Trim the foam insert down to 5.5 inches wide by pressing down firmly with your ruler and cutting with your X-ACTO knife. Make sure that the ring slits are running horizontally while you do this.
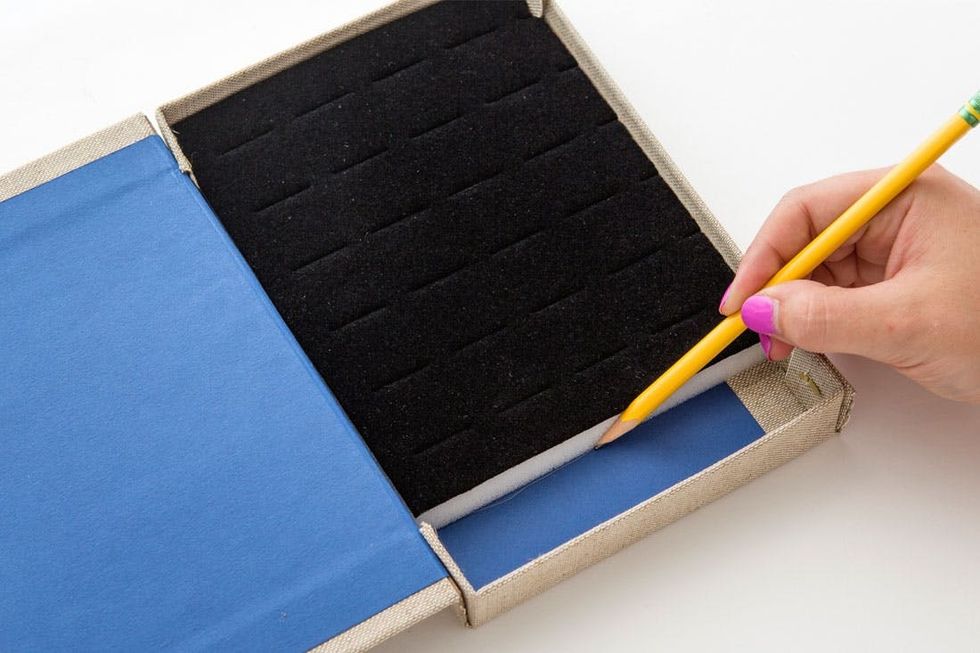
Place the trimmed foam insert into your organizer so that it fits snugly on the top and sides, and trace a line underneath it in pencil. This is where we will create a divider wall separating the foam section and a bottom section for chunkier jewelry pieces.
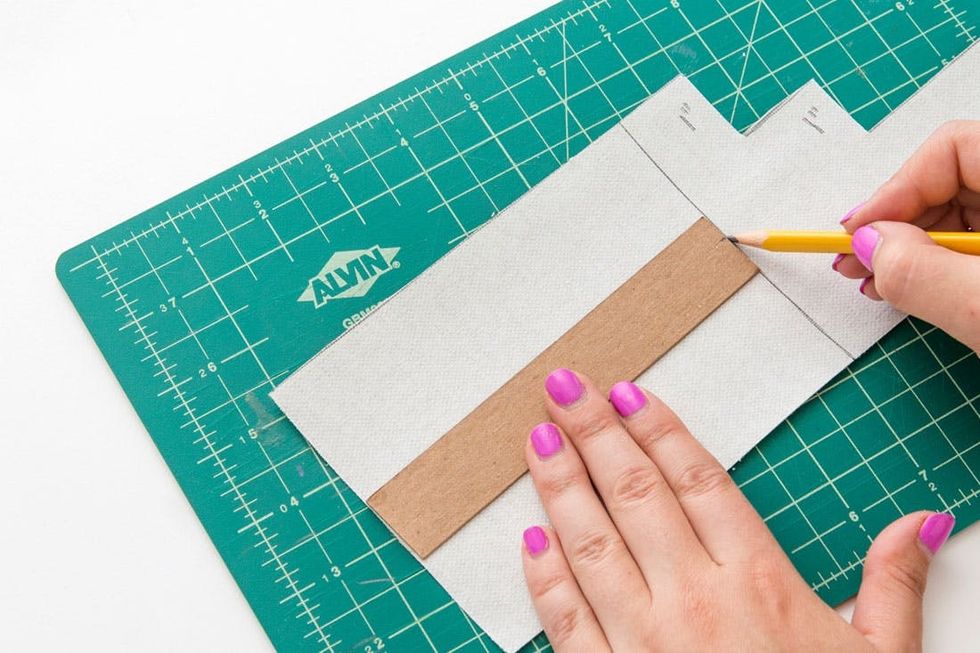
Cut a 5.5 x 0.75-inch strip of chipboard and a 5.5 x 4-inch piece of book cloth from your leftover materials.

Brush PVA glue onto your piece of book cloth, 0.5 inches from the top and 1.5 inches from the bottom.
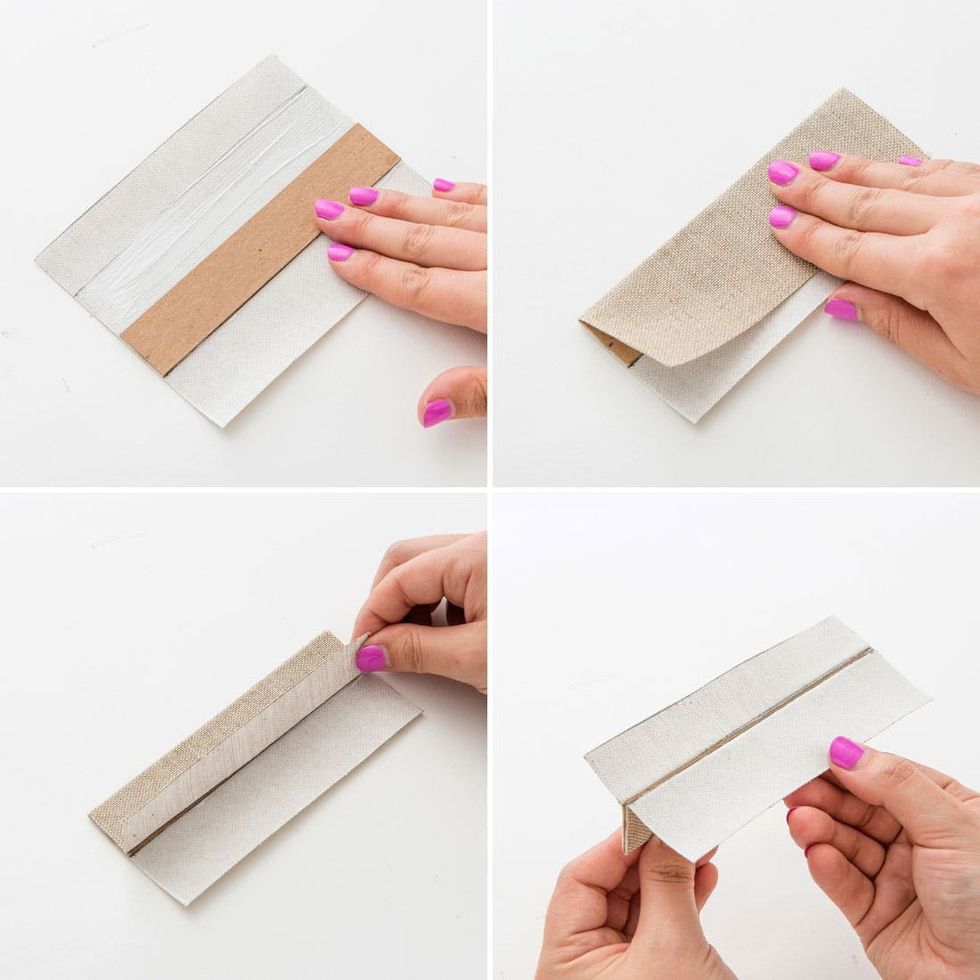
Place your chipboard strip onto the glue and tightly fold the book cloth over it. Then fold back the two un-glued strips and cover with more PVA glue.

Carefully place this piece, glue side down, onto the pencil line you traced earlier and smooth down to create a dividing wall.
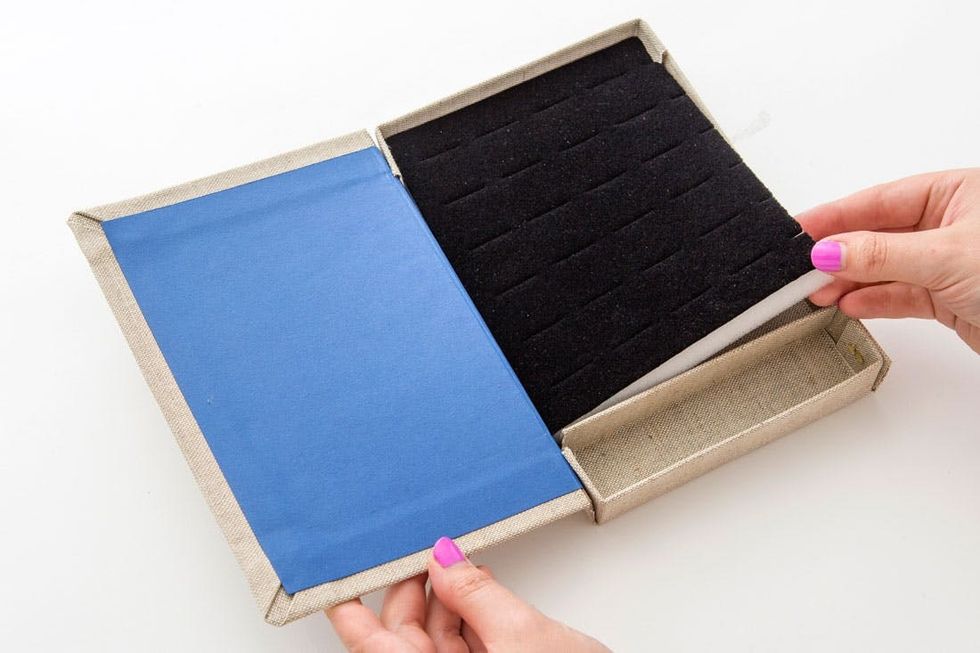
Pop in your foam insert and your inner structure is done!
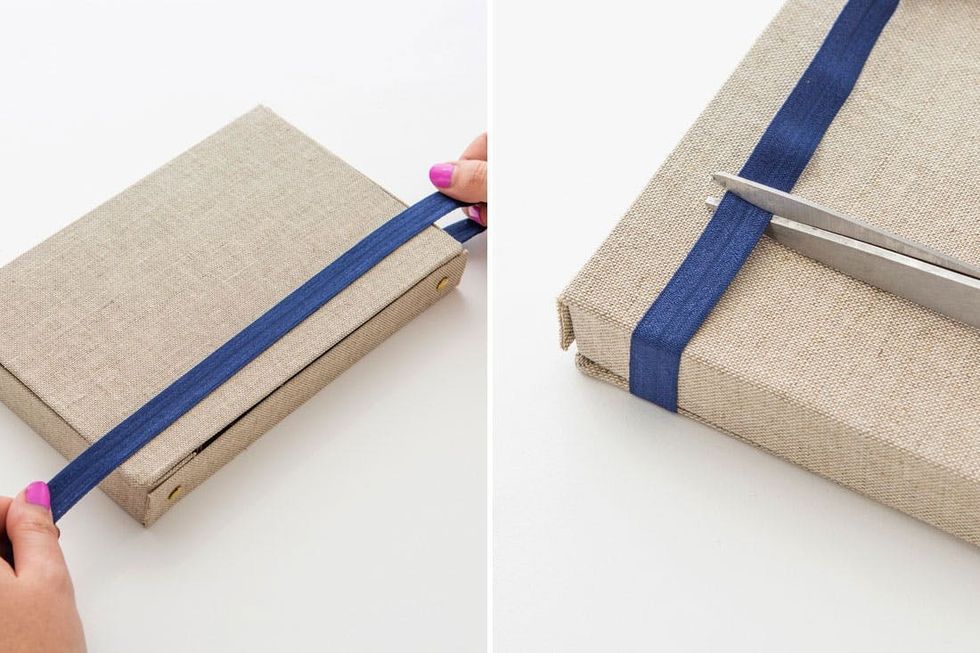
To add an elastic strap closure, wrap the elastic around the front and back of your organizer and trim the ends two inches from the edge on the backside.
ADDING THE ELASTIC STRAP
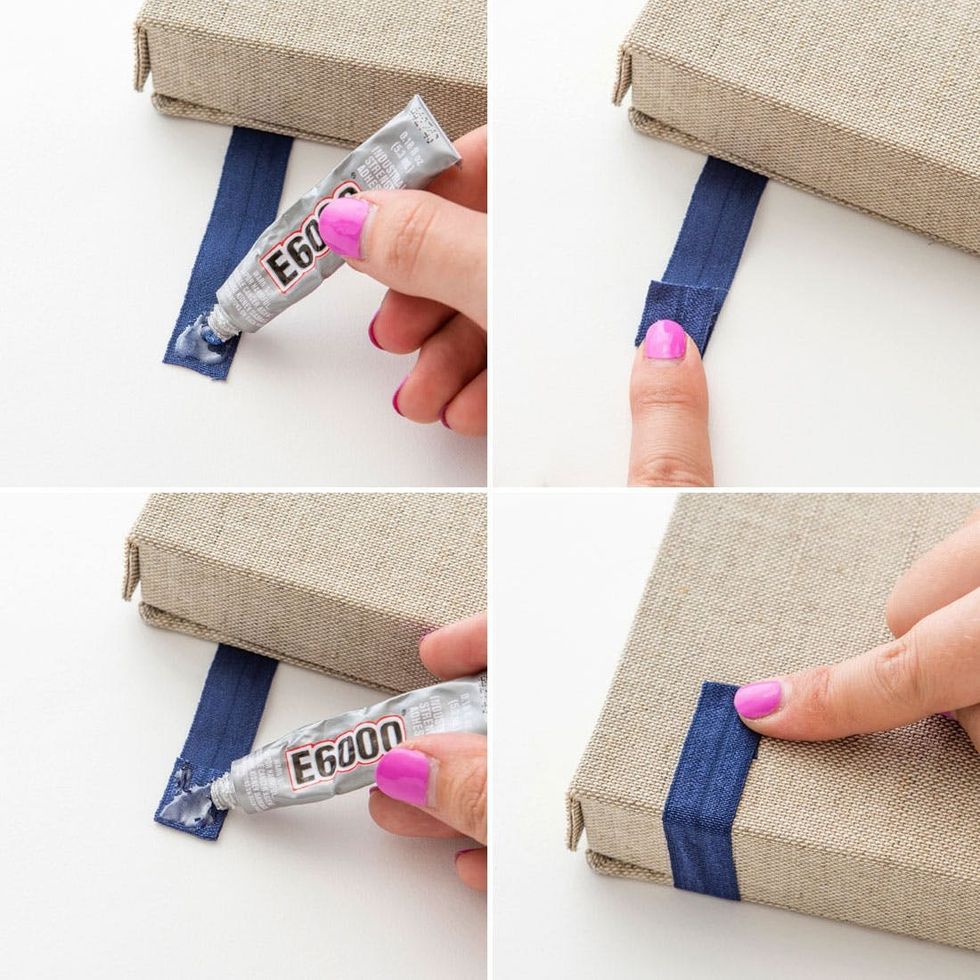
Put a dab of E6000 glue onto the end of your elastic and fold it over onto itself. Then glue this folded over edge onto the backside of your organizer. Repeat on the other end of the elastic and place a heavy object on both sides while the glue dries overnight.
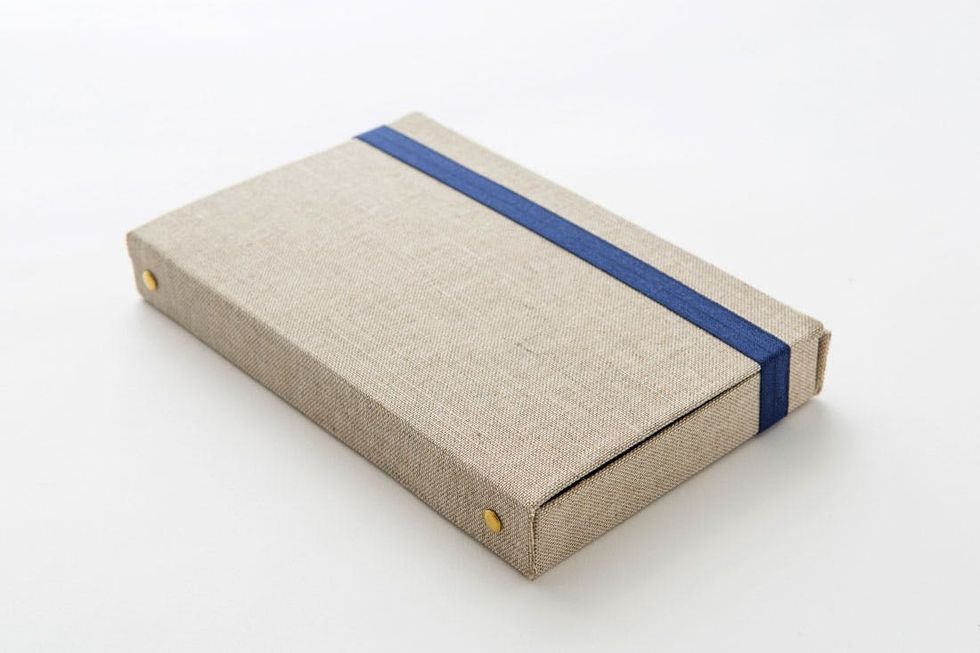
Look at that clever jewelry case in disguise! Hide it in a stack of books and no one will ever know.
this kit
 20% off any purchase of Chloe + Isabel’s beautifully crafted jewelry + accessories.
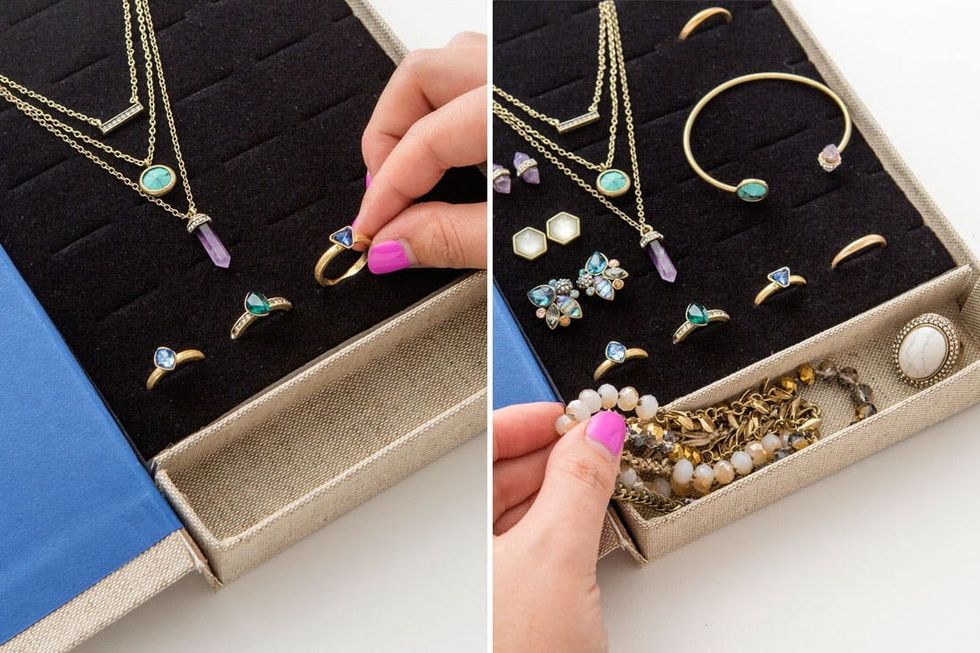
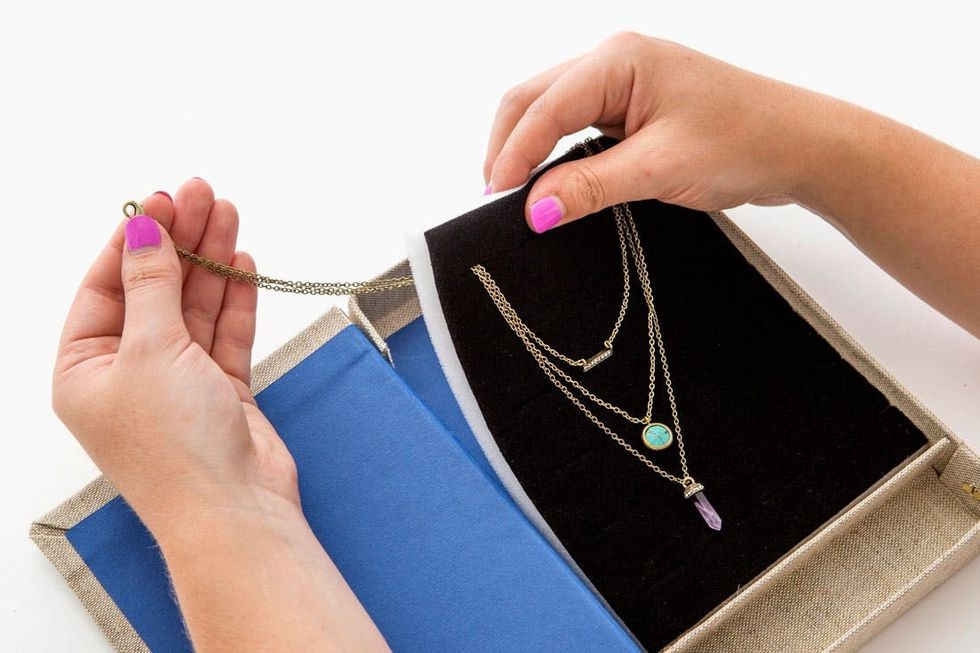
Pop in rings and earrings, and thread necklace chains through the slits in the foam insert. And don’t forget that bottom compartment you made is perfect for chunkier bracelets and cocktail rings!
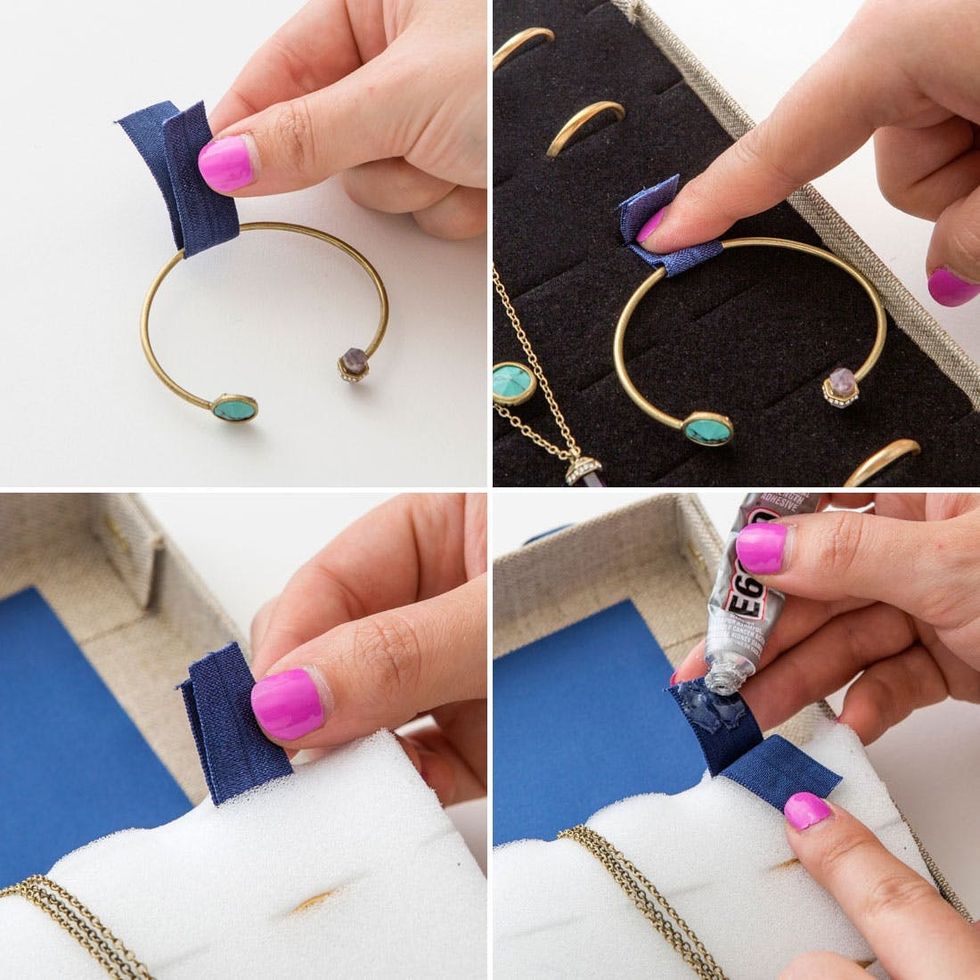
For cuffs and bracelets with clasps, fold a small strip of elastic around your bracelet, push through a slit in the insert and glue the ends together on the other side.
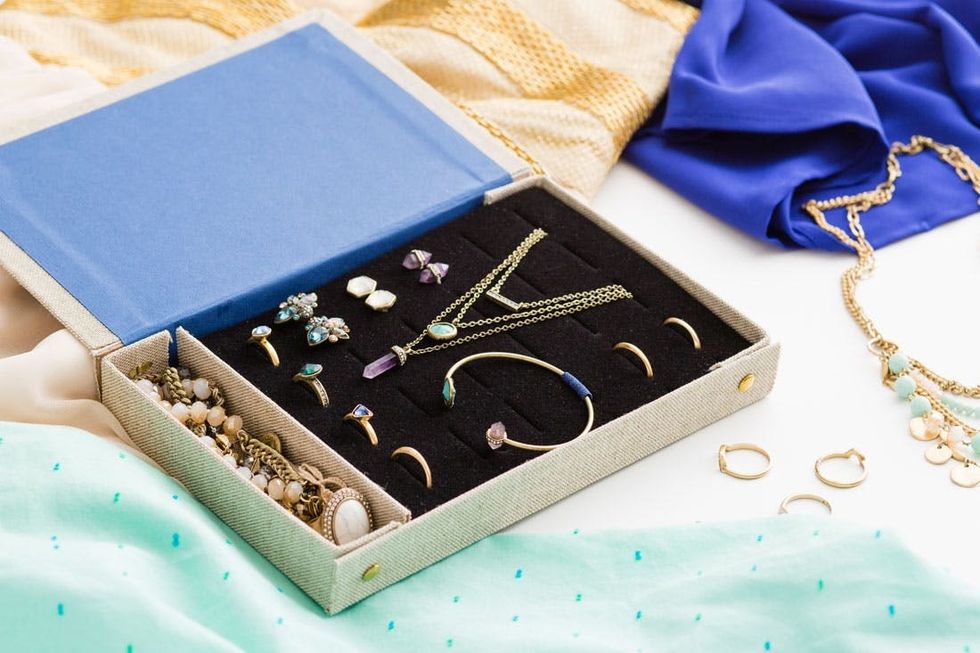
A place for everything, and everything in its place! We’re taking this jewelry case on our next getaway for sure.
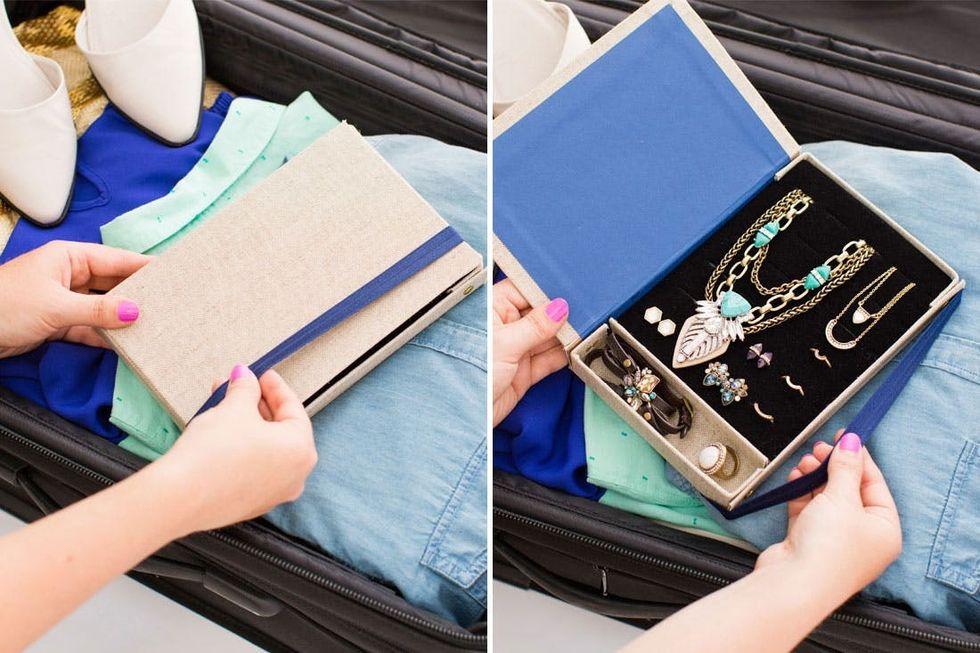
Arrange your must-have pieces for your trip and throw it in a suitcase to protect your jewelry during the ride.
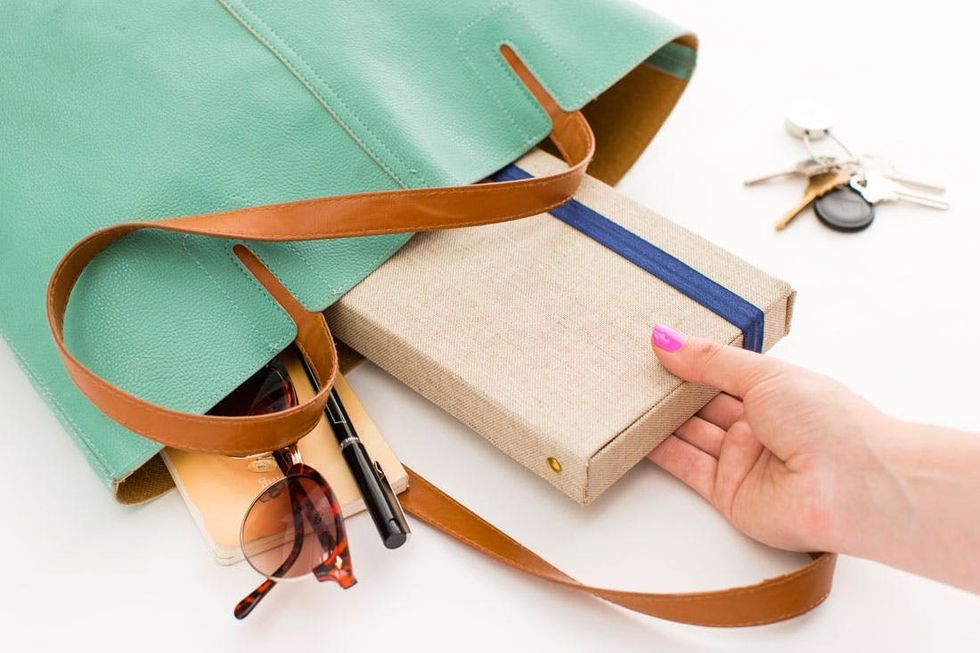
Or if you’re just carrying jewelry for the day, stash your organizer in your bag to keep everything safe and untangled while you transition from a morning gym session to office to drinks!
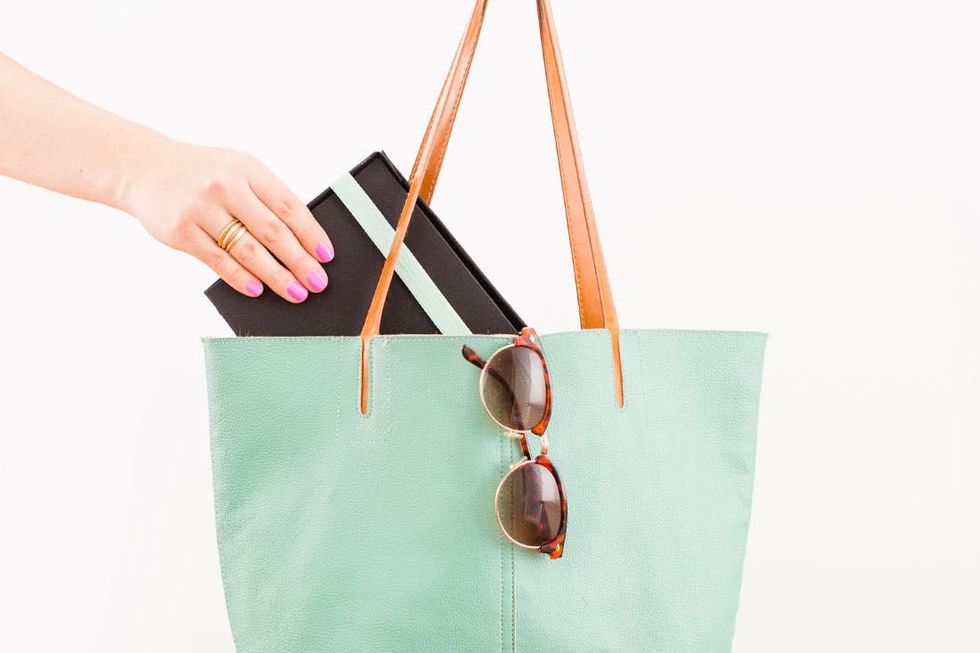
Grab a Travel Jewelry Organizer Kit in your choice of linen and navy or black and mint, and make one of these oh-so-versatile cases for yourself!


