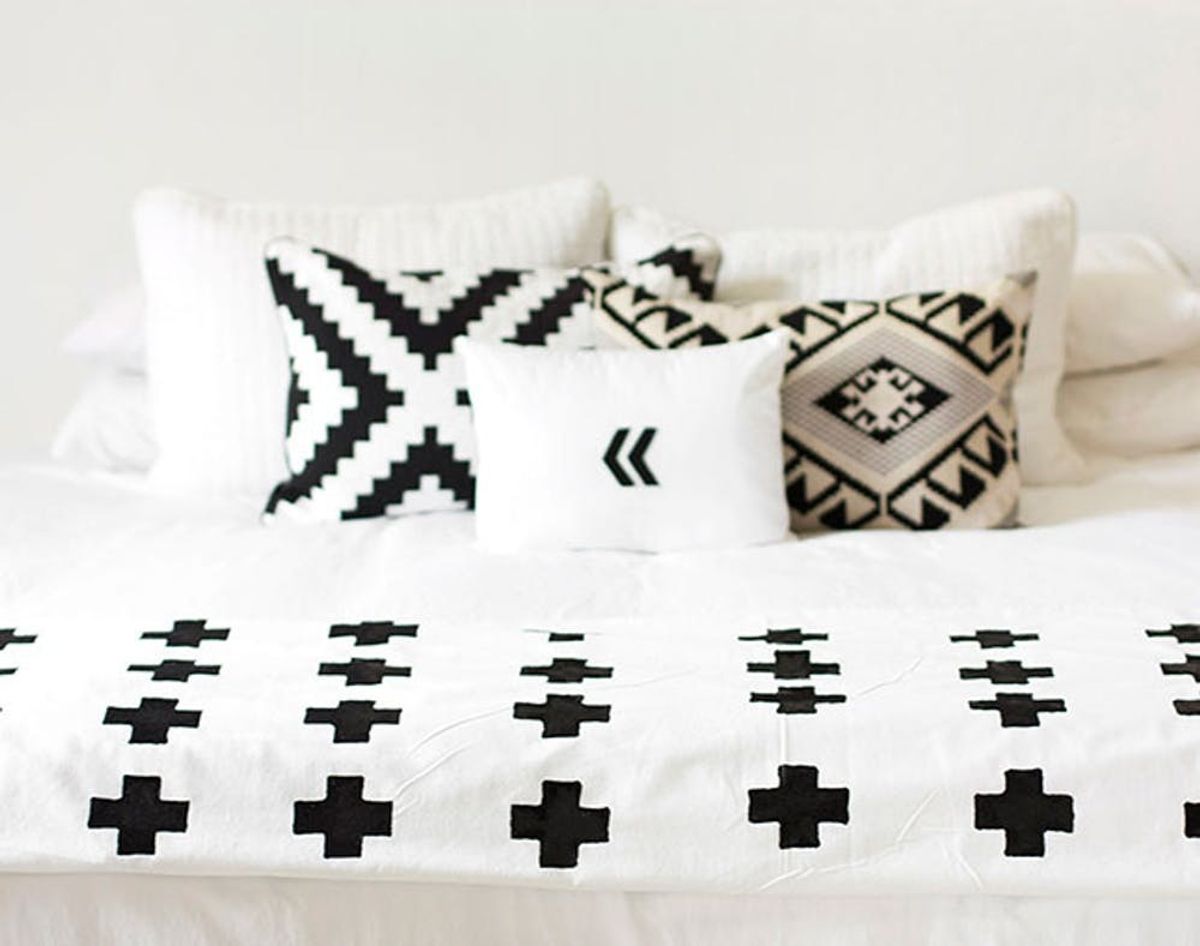
Even with a really cool bed frame, we would argue that bedding is what people will notice first about the place you rest your head. But finding a throw blanket that’s easy on the eyes isn’t always easy on the wallet, so we’re always looking for amazing bedding inspo that we can turn into a budget-friendly DIY. That’s why when we clicked on this $178 plus sign patterned pattern throw from the swoon-worthy site Leif, we knew we had found The One! See how we made our bedroom pop with this pattern for just $20, and in just four easy steps.
DIY This Chic Plus Sign Throw Blanket for Just $20

Even with a really cool bed frame, we would argue that bedding is what people will notice first about the place you rest your head. But finding a throw blanket that’s easy on the eyes isn’t always easy on the wallet, so we’re always looking for amazing bedding inspo that we can turn into a budget-friendly DIY. That’s why when we clicked on this $178 plus sign patterned pattern throw from the swoon-worthy site Leif, we knew we had found The One! See how we made our bedroom pop with this pattern for just $20, and in just four easy steps.
Materials:
– 4 yards of white flannel (for a King size bed)
– 4 2 oz black satin acrylic paints that can be used on fabric
– paper maché cross box
Tools:
– paint brush
– throw away tray
– glue gun + glue
– box cutter
– garbage bags
Instructions:
1. Cut the long end off of the cross box so that all sides are even, like a plus sign.
2. Glue the top and base of the box together to create a makeshift stamp.
3. Dab your stamp into your fabric paint and stamp it firmly onto your fabric. (We recommend stamping on a piece of paper first to get used to how the cross will stamp).
4. Fill in any spotty areas with your paint brush.
5. Let it dry overnight. Spot clean if needed.
The first of our four easy steps is to cut the long end of your cross box so that all the sides are even like a plus sign — just be careful when cutting! Make sure you have a smooth and straight edge before you glue the top and bottom pieces together. And whyyy, you ask, are you gluing them together rather than using just the top or the bottom of the box for the stamp? It’s so you have a bigger surface to hold onto while stamping. We like to make things as easy as possible around here :)
Cover your work surface with garbage bags (the paint will seep through the flannel and onto whatever is underneath), then place your flannel on top. Squeeze out some paint onto a tossable dish and dip your stamp into a generous amount of paint. Once you’ve removed any excess paint, stamp your plus signs evenly across the fabric. Use a medium to firm amount of pressure when stamping down. Fill in any white spots or touch up any spotty areas with your paint brush and let it dry overnight before wrapping yourself up in all of its minimalistic glory.
Do we have to tell you that we’re obsessed with this black and white bedding? One side is so snugly, and the other so graphic and crisp. We can’t take our eyes off of it!
If you don’t have your bed on 24/7 display in a studio or super loft place, you can still show off this stunner elsewhere in your pad. Use it as a throw on your couch or armchair, or even as a cozy foot cover-up on your ottoman. Or just spoil the place you sleep with matching geo printed pillows. Go DIY to keep things on the cheap!
Have you ever DIY-ed your own bedding or pillows? What techniques work best? What projects have become true statement pieces in your home? Tell us in the comments below.


