 Recommended for you
Growing up in New Jersey, I learned a lot about dressing to fit the weather. Thirty degrees and wind — going to put leggings under my jeans; 85 degrees and humid — let’s pull out the breeziest dress that doesn’t show sweat marks. Here in California, it’s much different — a couple of layers and you can get through almost any calendar day. One of my favorite pieces to layer with on the weekends is my Patagonia vest. When I was recently in the fabric store, I noticed this puffer vest material and instantly thought, “Wow, making a Patagonia-inspired vest is probably not that hard.” And guess what: I was right! Follow along with the steps below to learn how to make your own puffer vest.


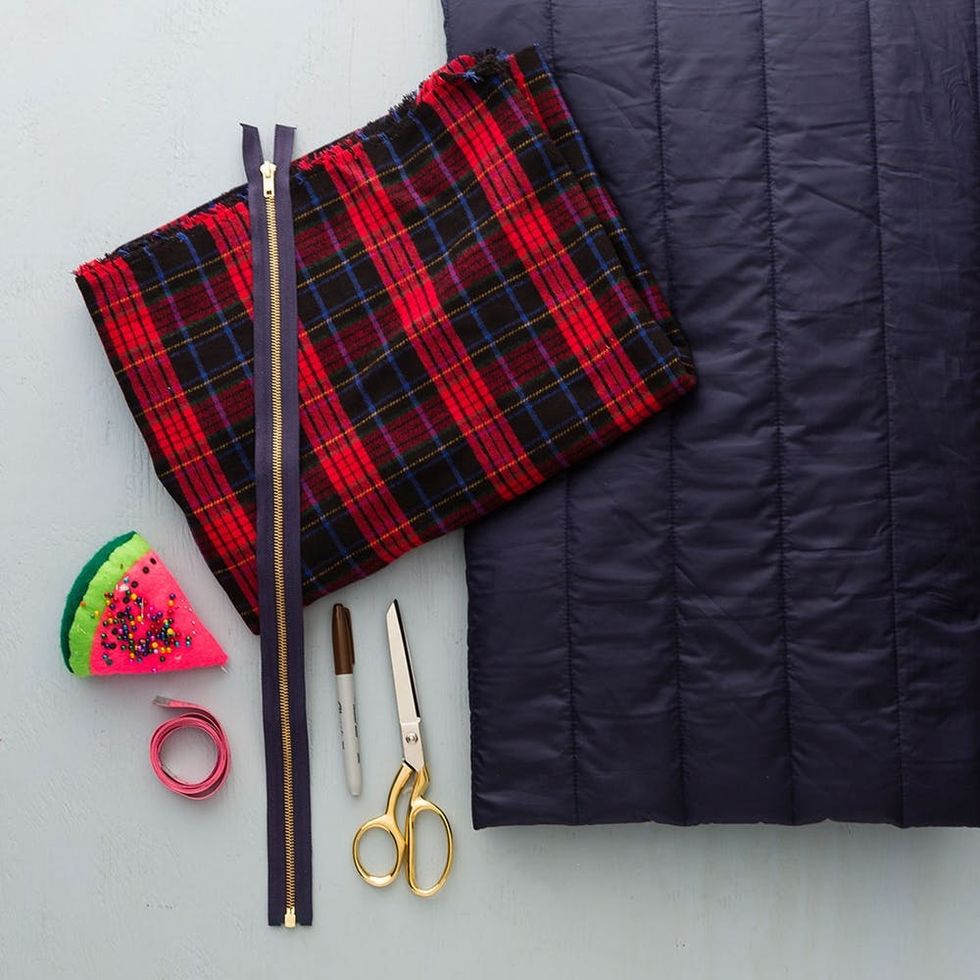
Materials and Tools:
- 1 yard puffer fabric (found at Jo Ann stores)
- 1 yard flannel fabric
- 22-inch zipper
- sewing pins
- marker
- fabric scissors
- sewing machine
Instructions:
- Measure your torso, waist and length of underarms. Jot down a vest-like drawing to reference while making your vest.
- Cut a rectangle out of your flannel fabric that measures the height of your torso + 5 inches by the length of your waist + 5 inches.
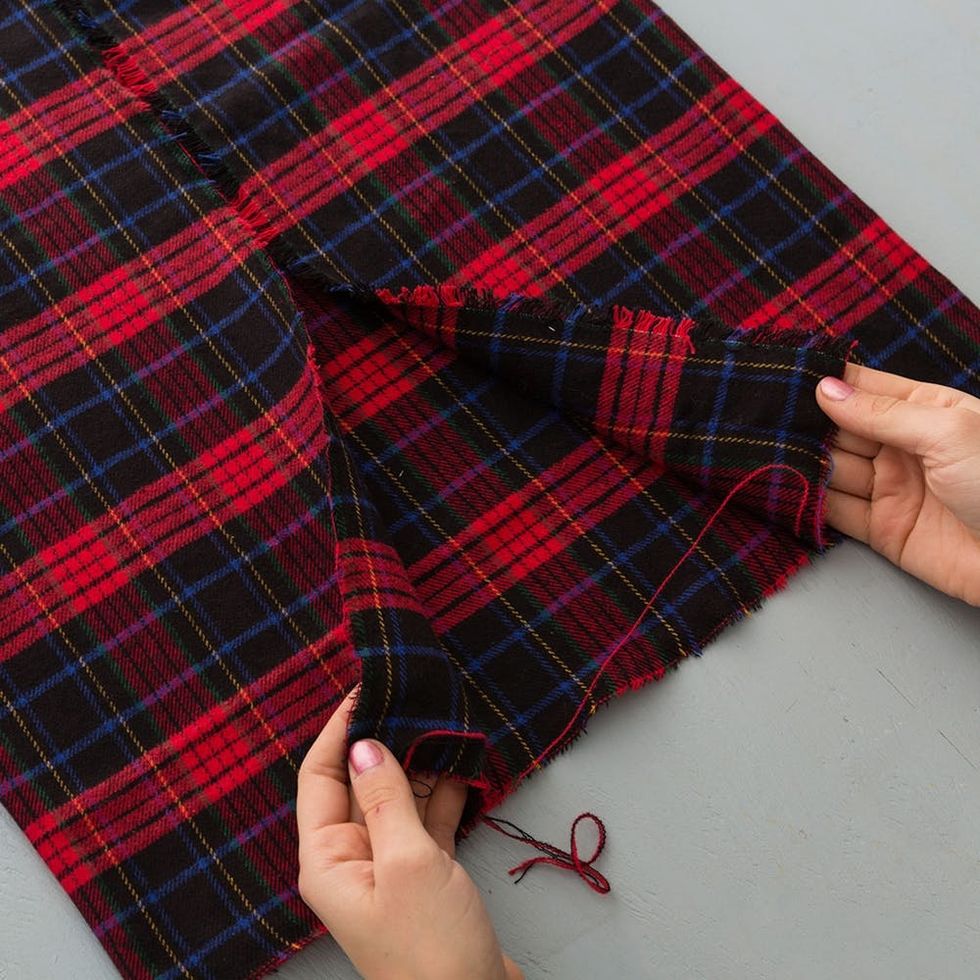
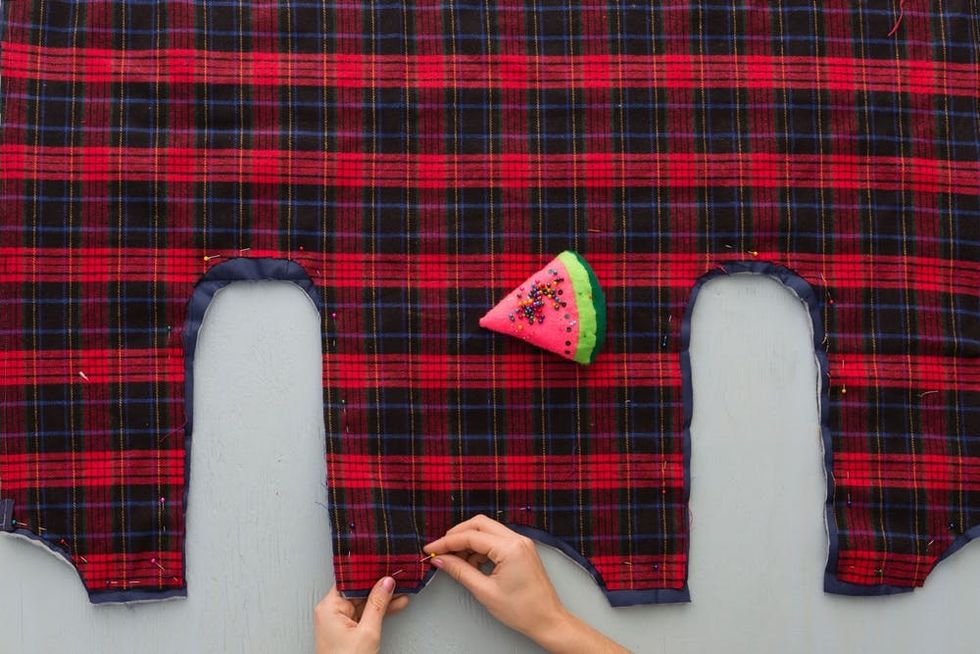
- Fold the outer edges inward to meet in the middle. Along the outer two folds, measure the length of your underarm. Draw a backwards J shape and then cut out.
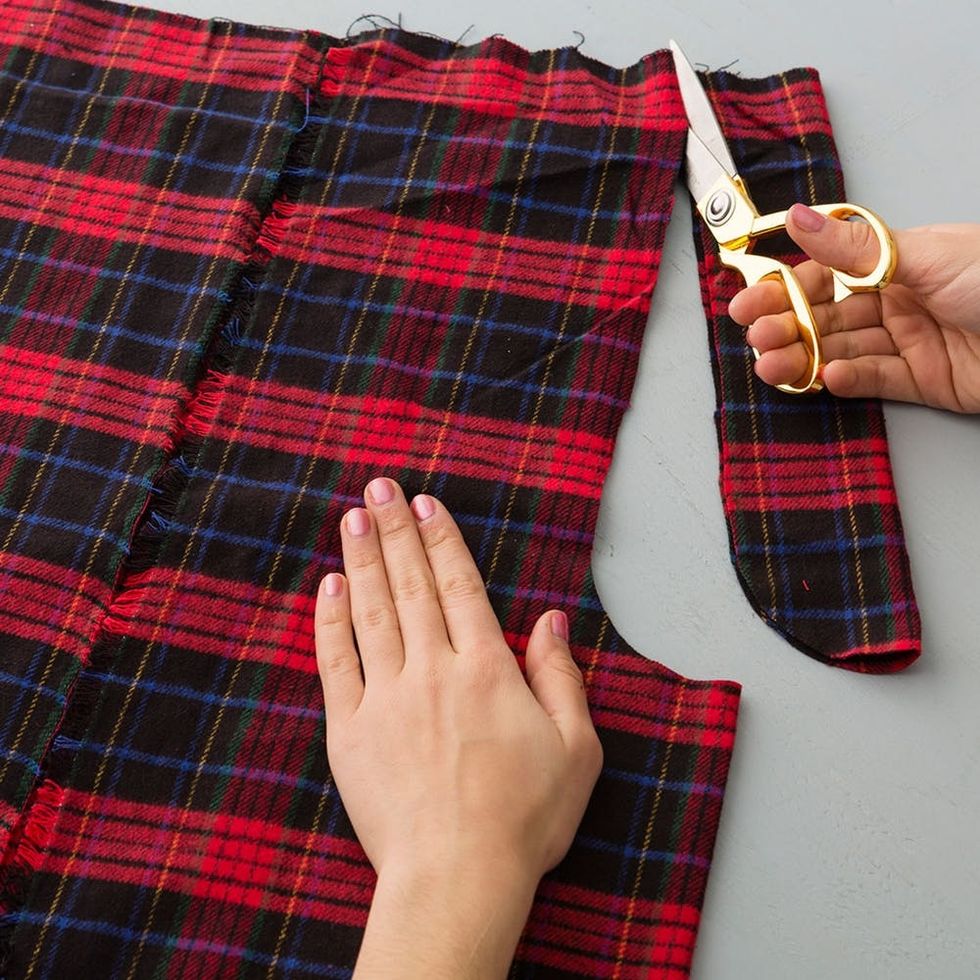
- Fold the fabric in half to have the two arm measurements meet up and then trim a small circle for your neckline.
- Unfold the fabric and place onto your puffer material. Trace the flannel shape onto the puffer material and then cut out.
- Sandwich the zipper in between the flannel and puffer vest material. Pin in place and then sew. Repeat for the other side of the zipper.
- Pin the outer edges of the fabric together and then sew around the top curved edges. Leave the bottom edge un-sewn.
- Flip the vest right side out and pin the bottom edge of the vest closed, then sew.
- Match the shoulder pieces together and then sew.
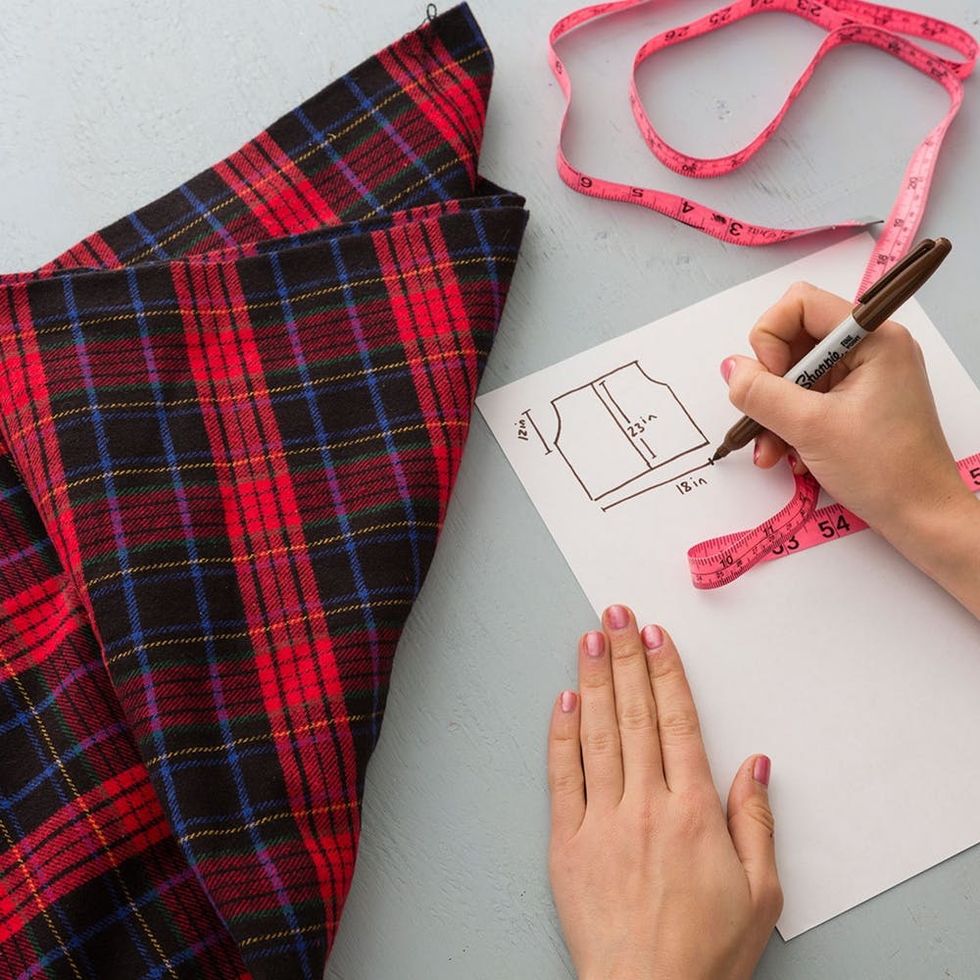
Grab your measuring tape and jot down your torso length, underarm length and waist measurement. Draw into a vest diagram for reference.
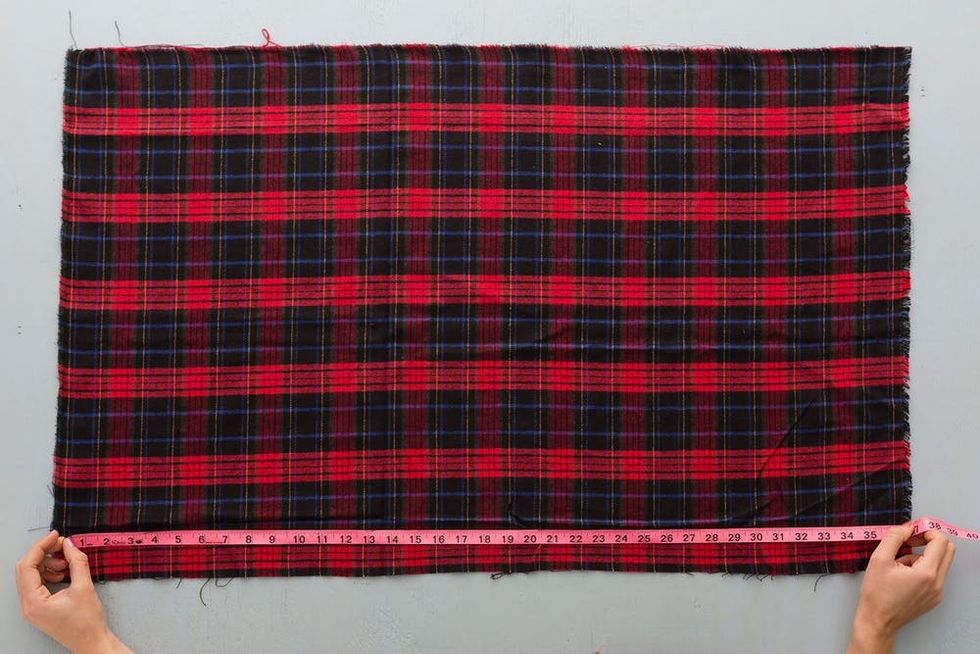
Grab your flannel fabric and cut out a square that measures your torso height + five inches by the length of your waist + five inches.
Fold the outer edges of your fabric and have them meet in the middle. This should make your fabric (vaguely) begin to look like a vest.
Measure the length of your underarms along the outer fold of your fabric. Draw a backwards J shape that is about two inches wide and then cut out. Do this for both sides.

Match up your J curves and cut out a curve for your neckline.
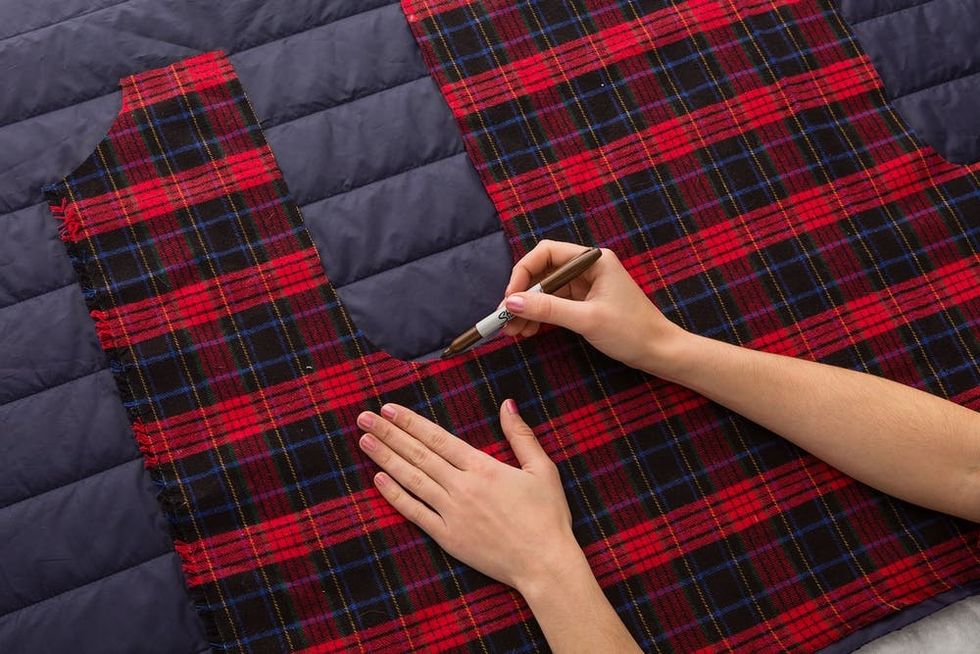
Unfold your flannel fabric and place onto your puffer fabric. Trace the curves and then cut out.

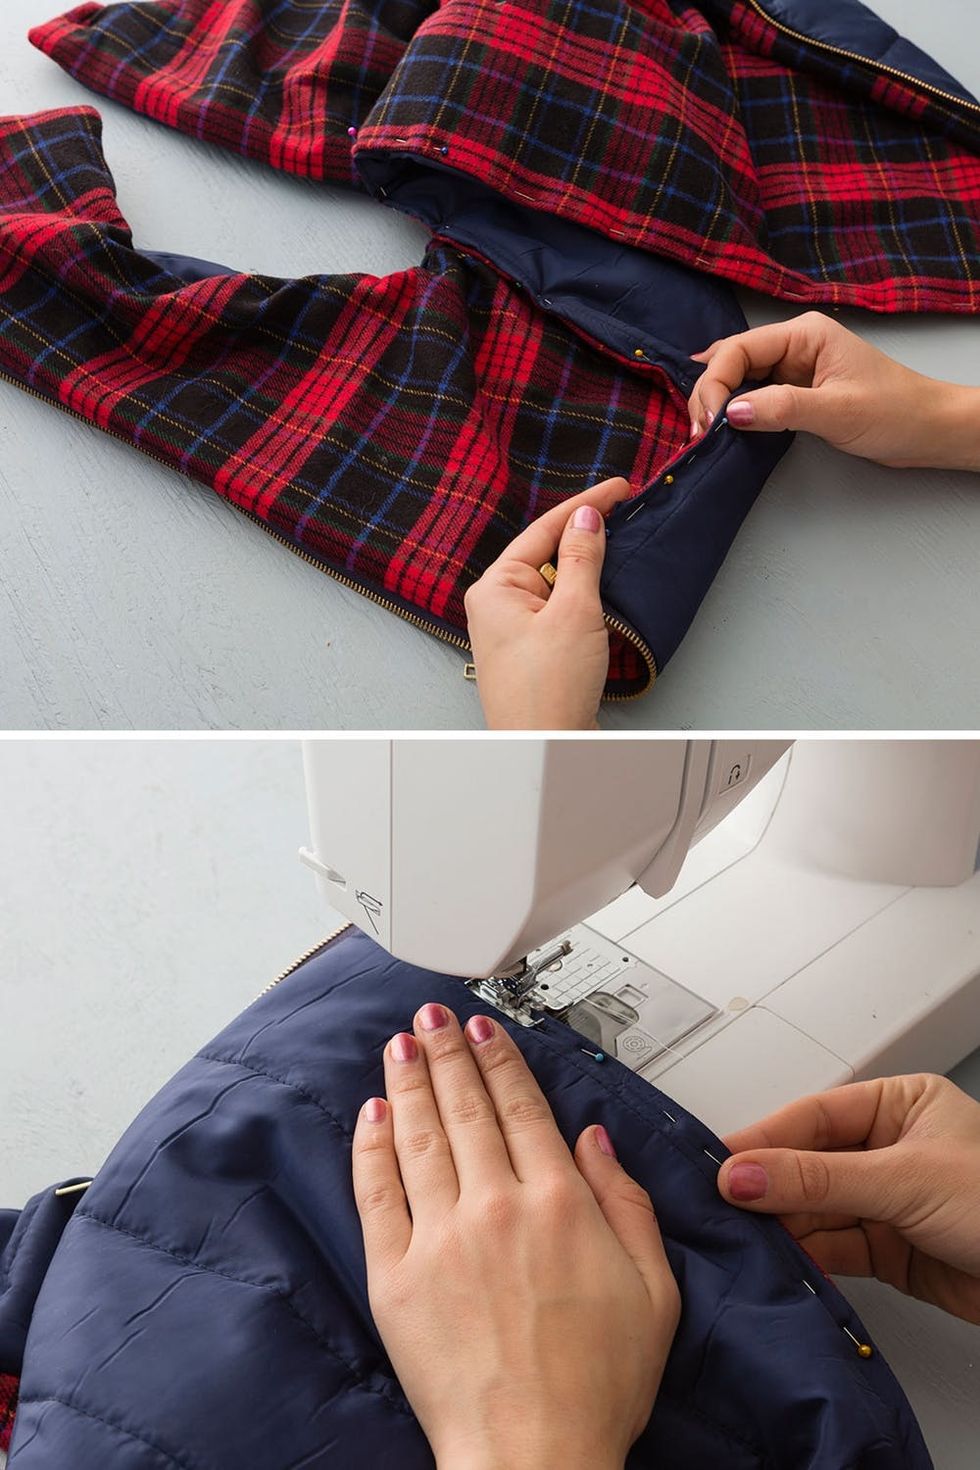
Place your flannel fabric down and then lay your zipper on top, facing up. Place the puffer vest on top of the zipper and then pin in place.
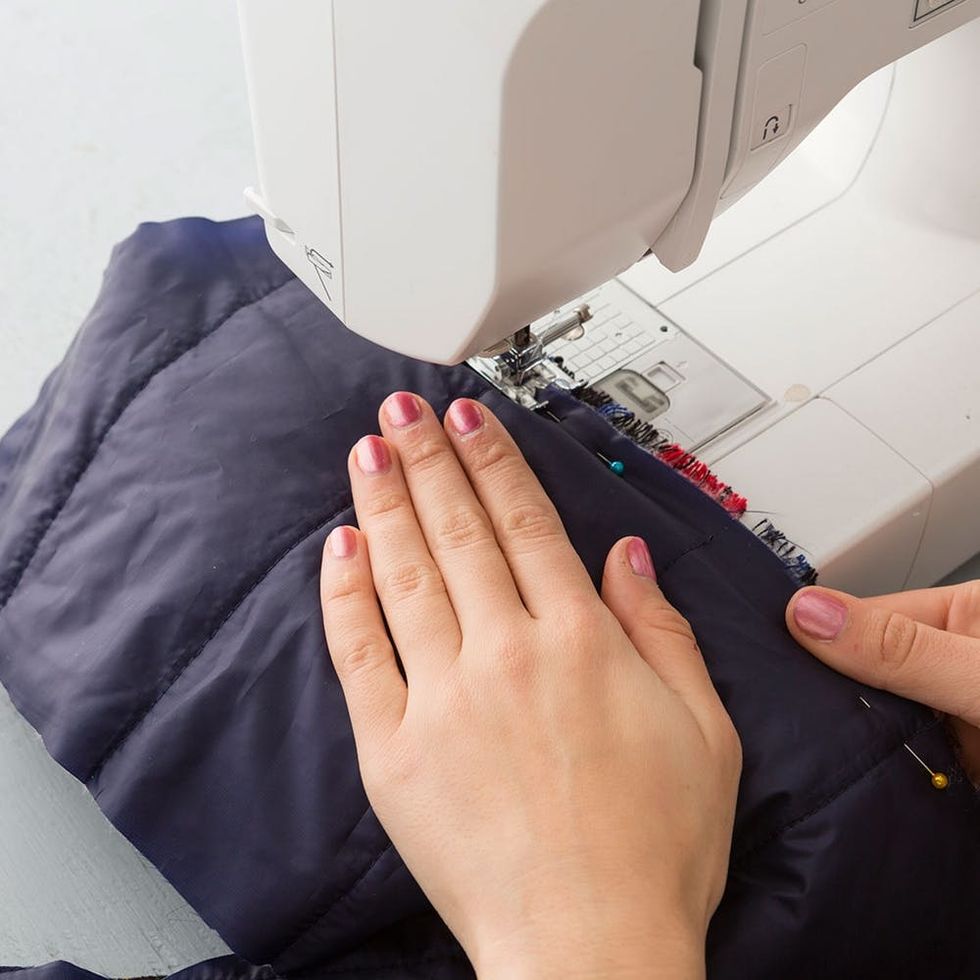
Slowly sew the zipper in place.
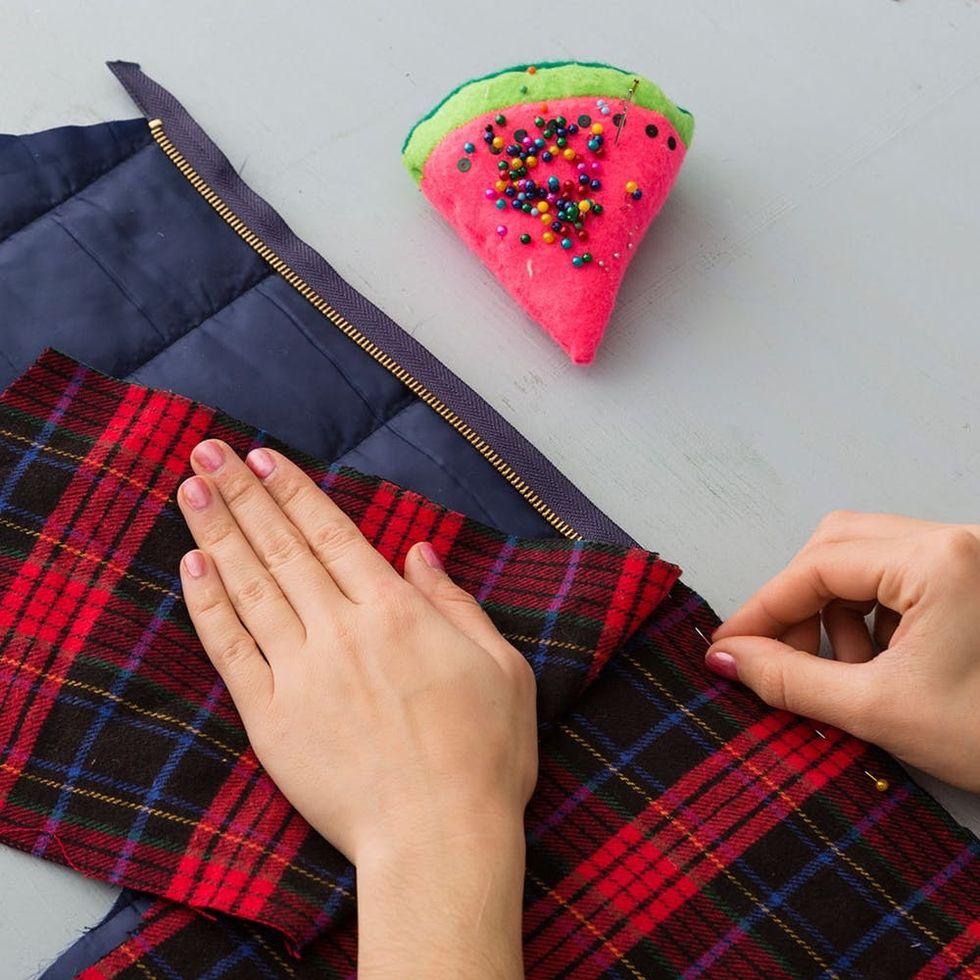
Unzip the zipper to attach on the other side of the vest. Sandwich the zipper in-between the fabrics, pin in place and then sew.
Time to start turning this fabric into a vest! Pin the top curved edge together and then sew.
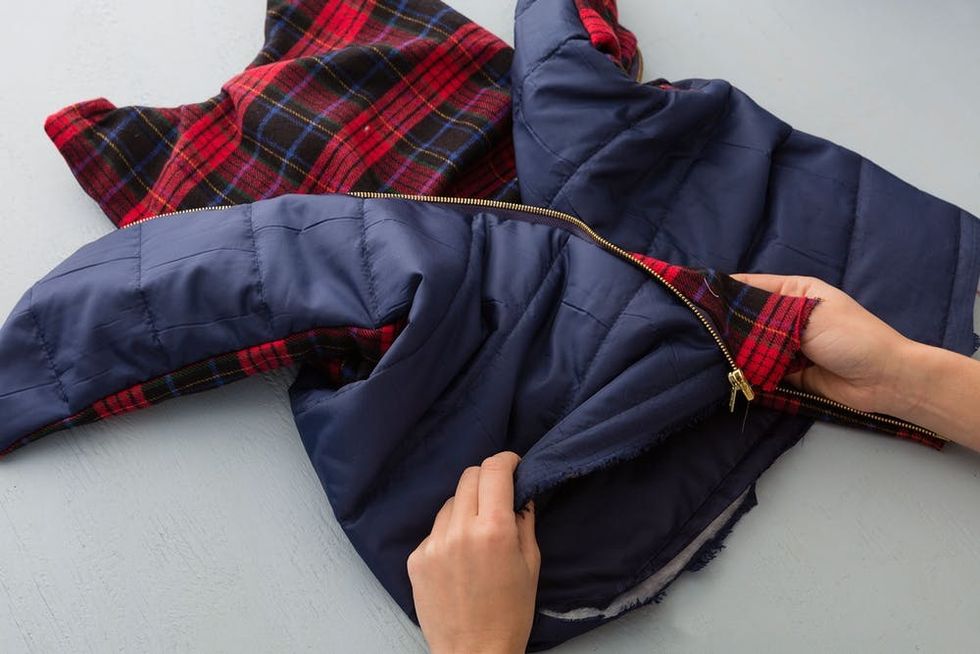
Flip your vest right side out — voila! Almost there!
Tuck the ragged edge of the fabric inward, pin and then sew.
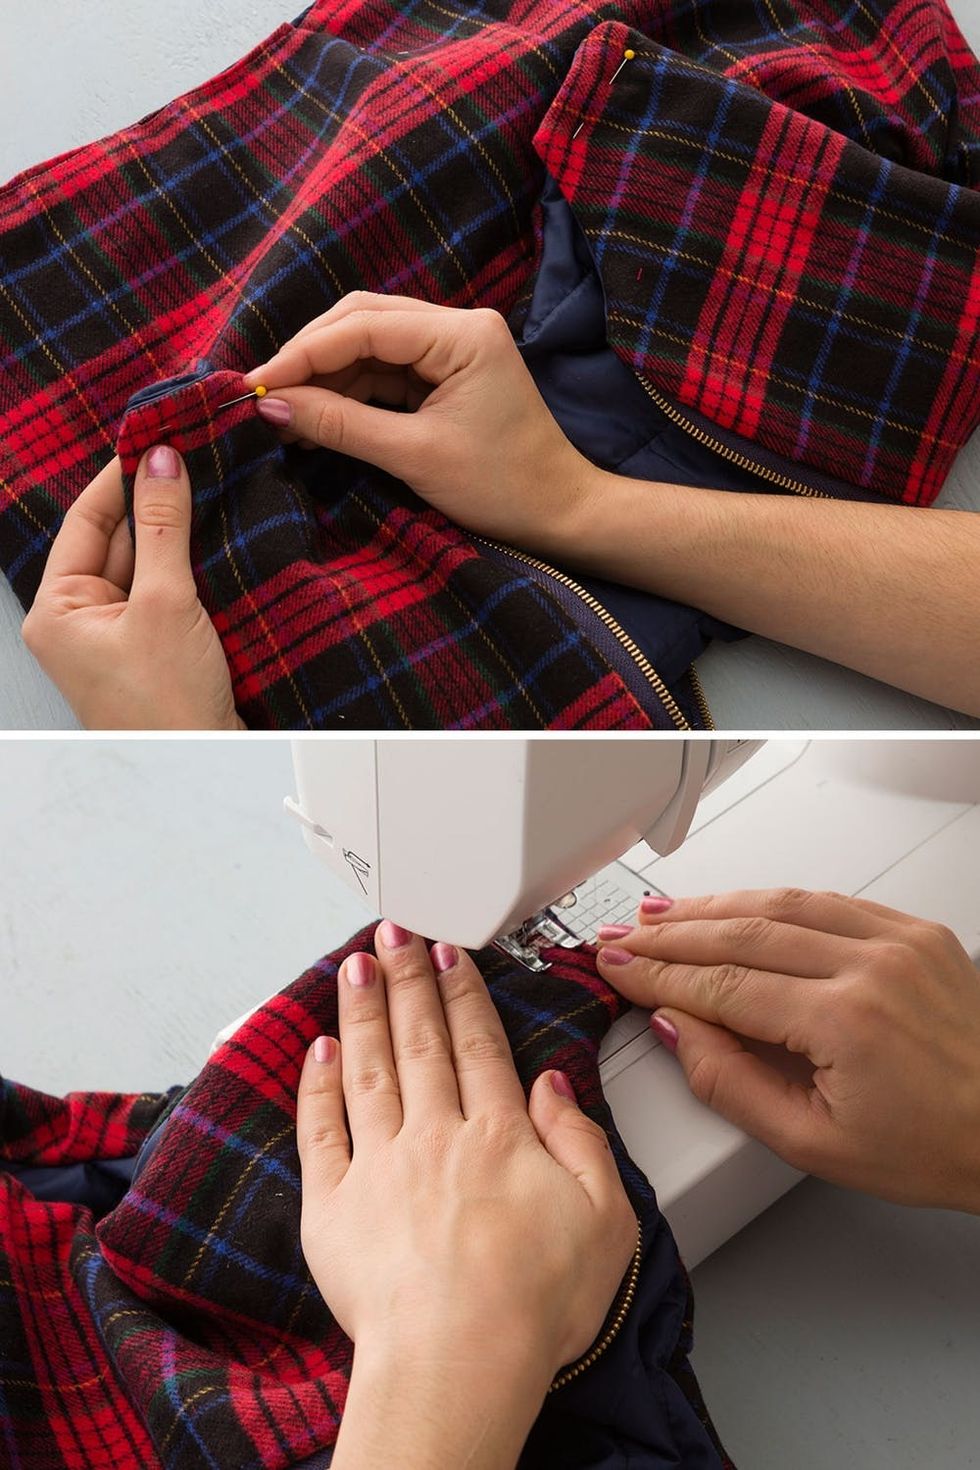
Match up the shoulder straps, then pin and sew together. Vest complete!

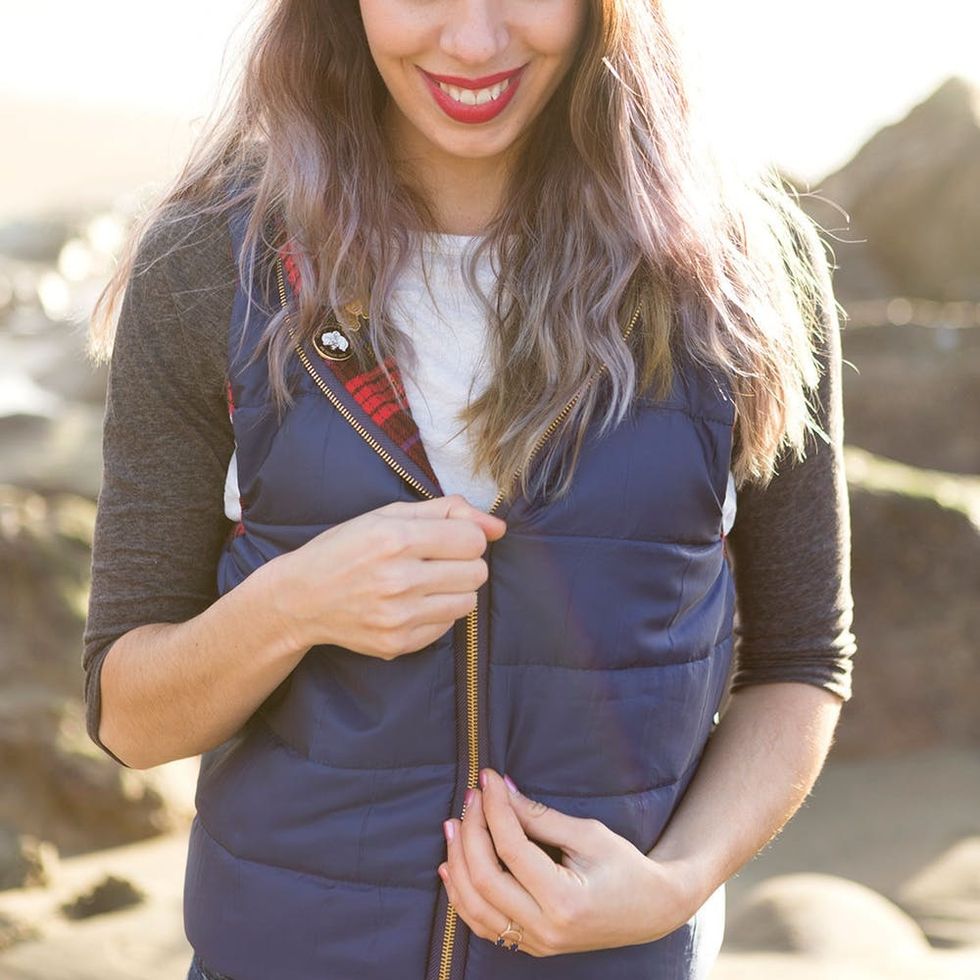
This vest was the perfect opportunity to decorate with flair pins. On one side I added my Beyoncé pins and on the other side my emoji dancers.
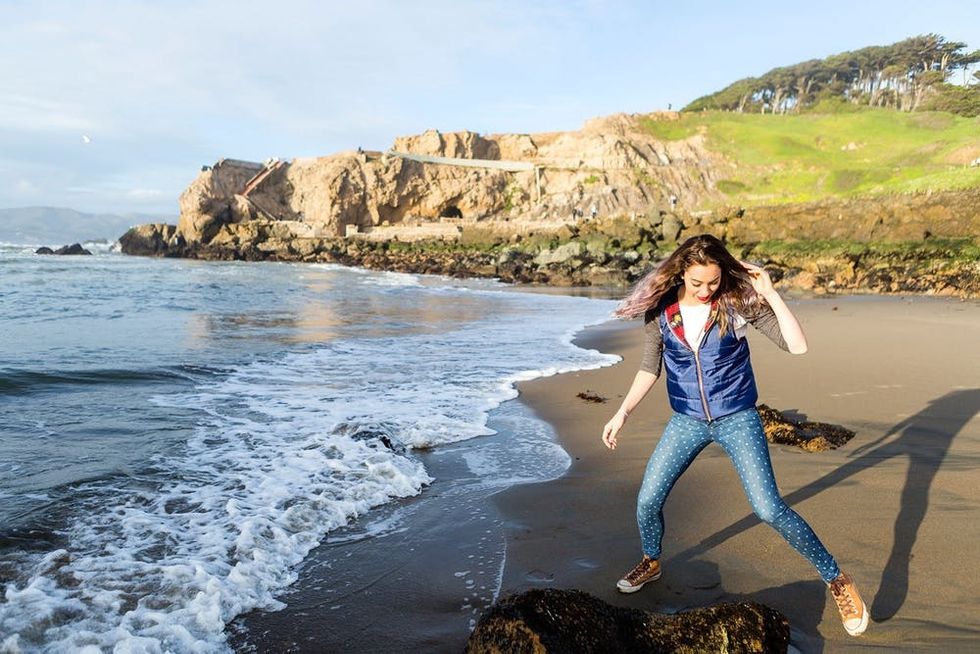
Add this vest on top of your outfit for an extra layer of warmth at beach bonfires or breezy campfire mornings.

PSA: Always gaze toward the ocean to look out for cute surfer boys.
Whoops!
Show us your project by tagging us on Instagram + using the hashtag #iamcreative!
DIY Production and Styling: Kelly Bryden
Photography: Brittany Griffin and Kurt Andre
Brit + Co may at times use affiliate links to promote products sold by others, but always offers genuine editorial recommendations.