 Recommended for you

Materials:
– cotton tank top
– cotton shorts
– ribbon
– trim and ribbon embellishments (optional)
– jersey material
– thread
Tools:
– sewing machine
– scissors
– needle
– pins

Instructions:
When buying your cotton shorts and tank buy them one to two sizes bigger than normal. I wear a size small and I purchased a medium tank and large bottoms. You can find cotton basics at Forever21, American Apparel, Target, or Kohl's. Cut off the elastic waist from your cotton shorts. This will make the waist seem really large but don't worry, we will shrink it down to your waist size later.
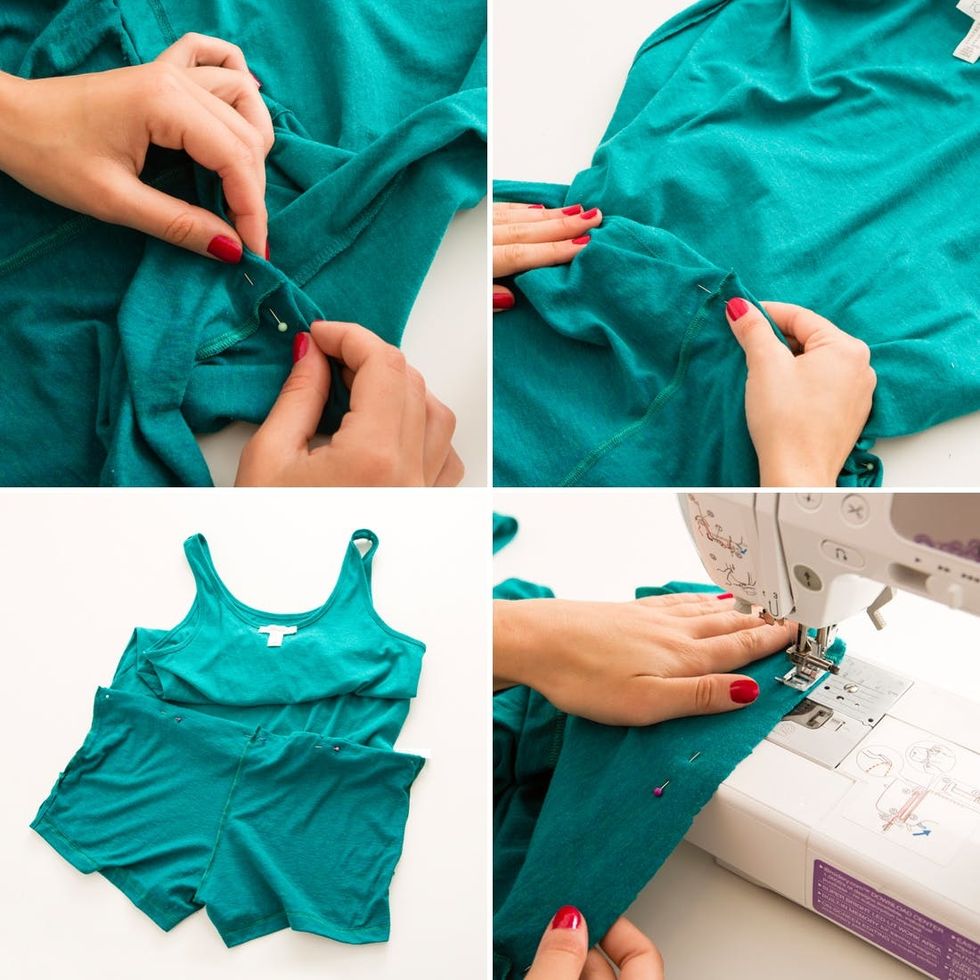
Turn the shorts and tank inside out and pin together. Start by matching the side seams and then pin together. Find the middle of the tank and pin to the middle seam of the shorts. Finish pinning around the waist line and then sew together.
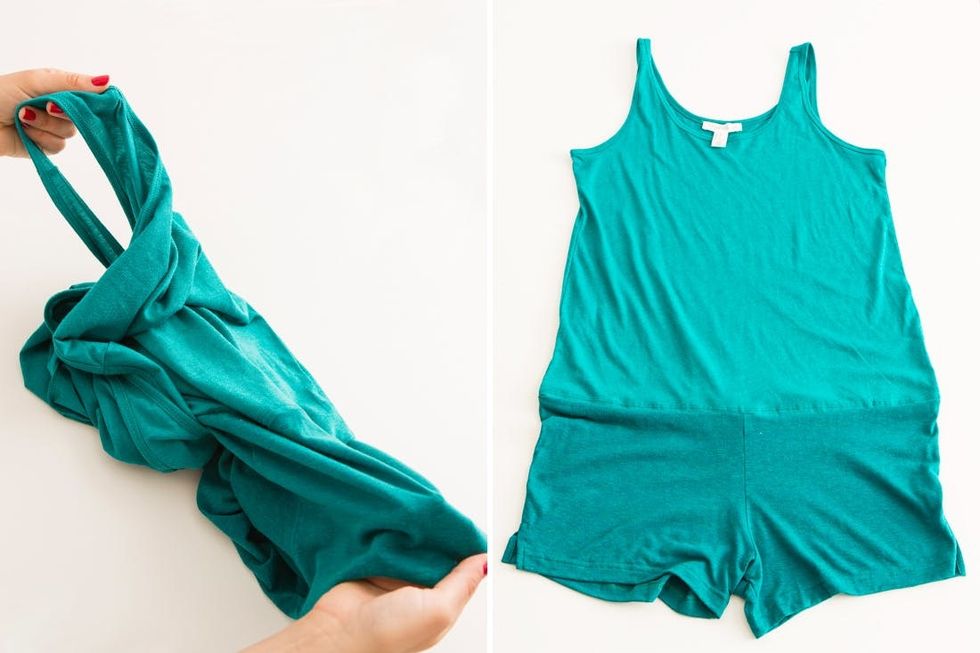
Turn your romper right side out. It looks a bit frumpy now, but just wait.

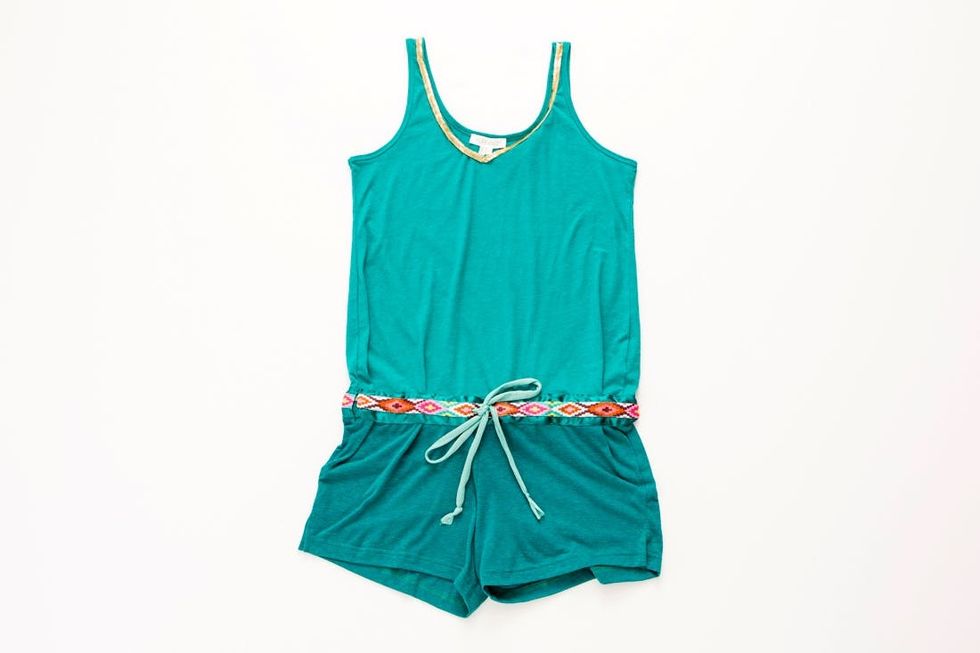
For the waist band you will want a ribbon that is about 1.5 – 2 inches in width. We fell in love with this aztec patterned ribbon but it wasn’t thick enough! Simple solution – sew to a piece of ribbon that is thick enough!
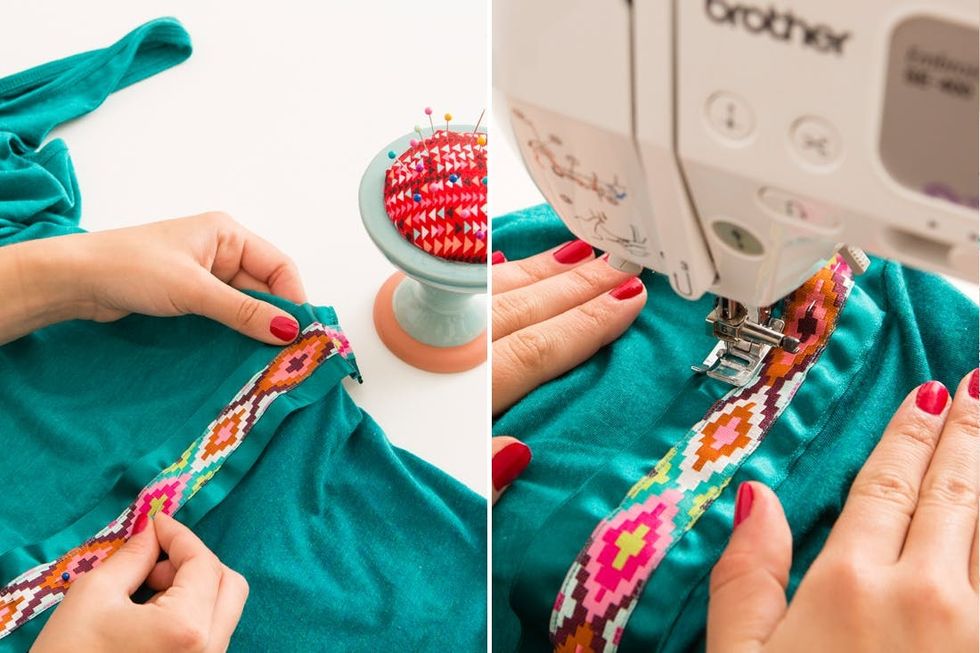
Pin your ribbon to the waistband of your romper. Sew both sides to create a pocket for your drawstring. *Tip – Don’t sew the ribbon vertical or you will cut off the loop for your drawstring.
Almost there, but let’s make it cuter.
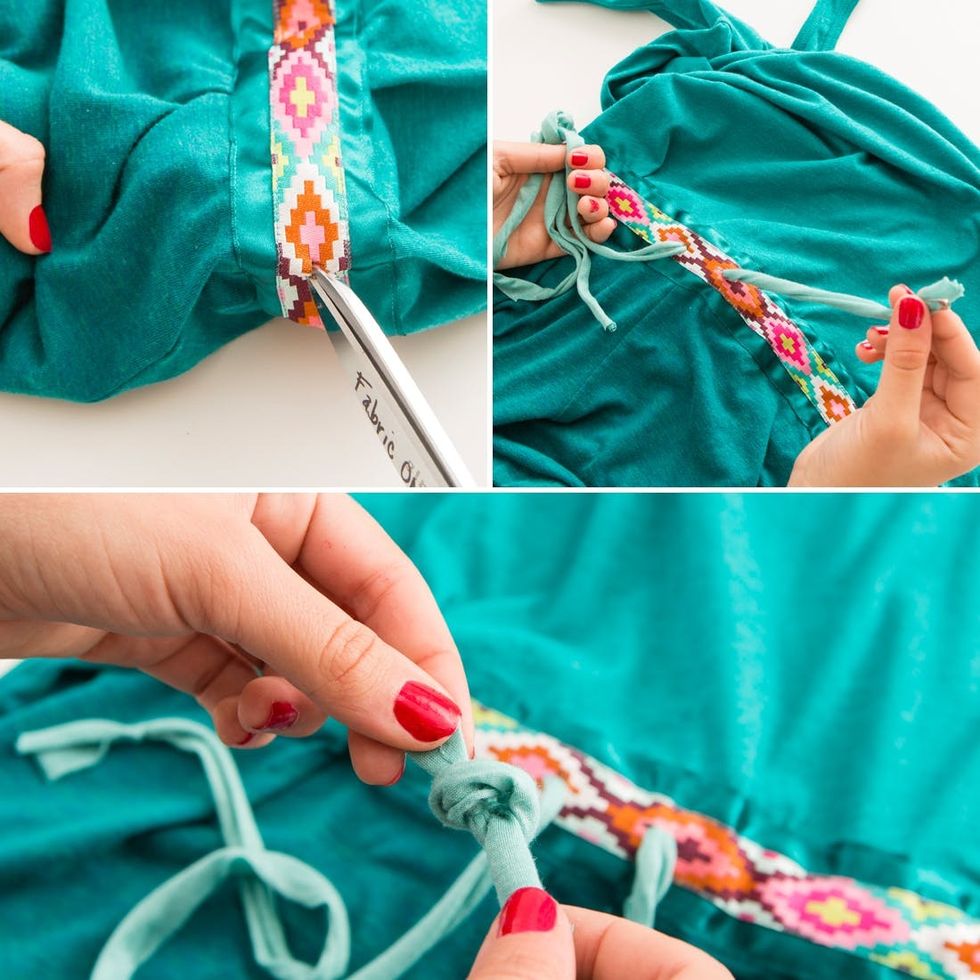
Snip two holes in the center of the ribbon for the drawstring. Cut the jersey fabric in a thin strip for it to resemble a thin rope. Use a safety pin to snake the jersey fabric through the ribbon.

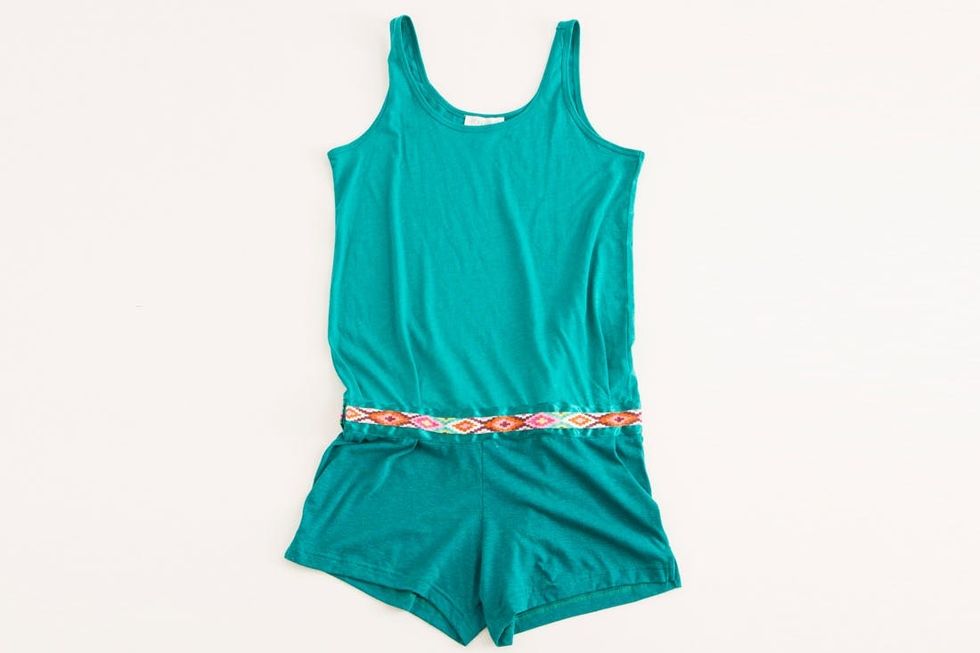
We can’t get over this aztec ribbon! Such a fun touch for a summer romper.
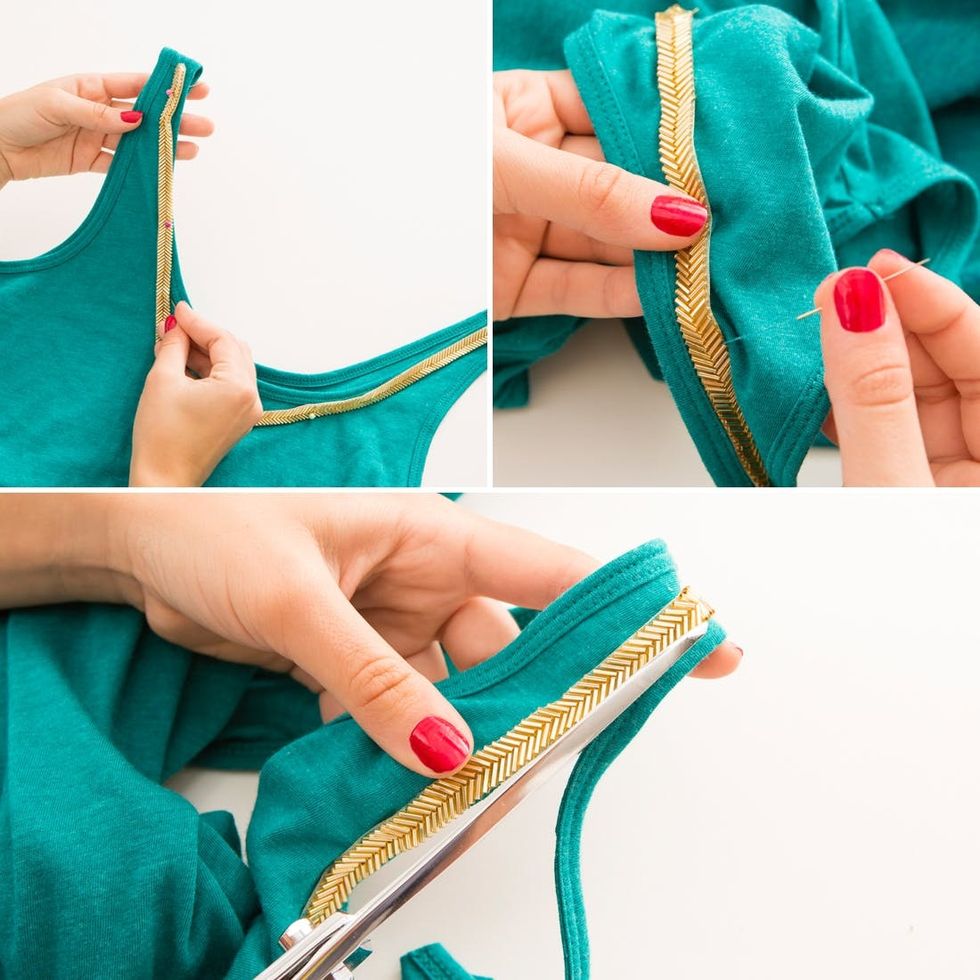
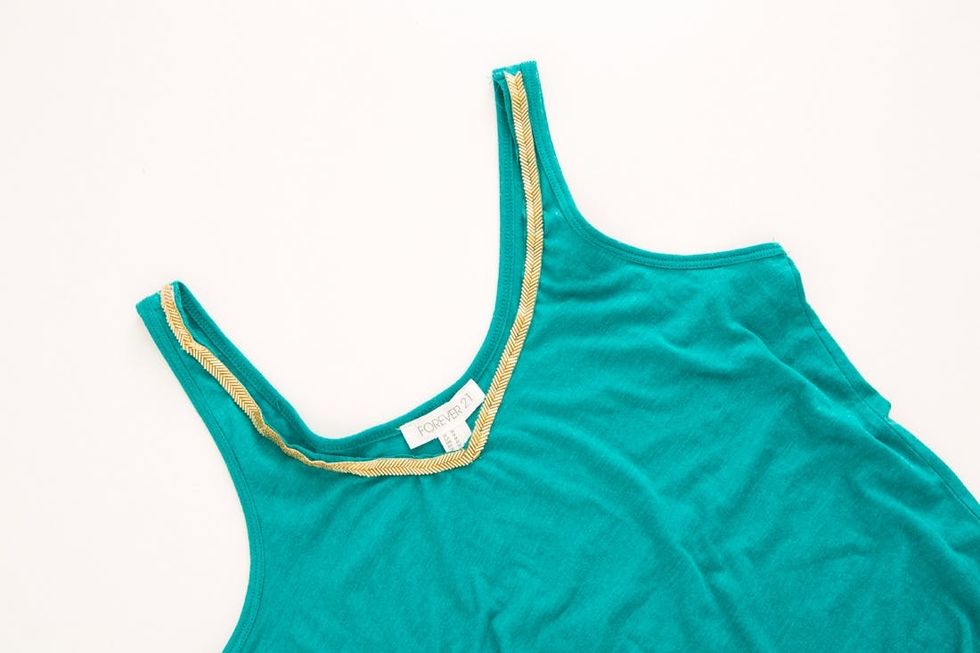
When we laid our eyes on this chevron gold beading we just knew that it was perfect for this romper. Pin the beading in place and hand sew onto the collar of your tank. We used the beads to turn our scoop neck into a v-neck. Trim away the extra fabric. We suggest skipping this step if you are a beginner because it is very tedious.
Yess x 1,000,000.
You’re friends will be SHOCKED when they find out that you made this romper.

Perfect colors for beachy summer days or a picnic in the park.

I’ll be honest. The beading was finicky, but definitely worth it.

Will you be making this romper for summer? Share with us @BritandCo!
This article was updated from a previous post.