Sometimes we see a technique that looks so cool and easy that we just have to try it ourselves. On today’s docket: re-making Radical Possibility’s “zero-effort” watercolor-inspired pillows using tools you can find lying around your home. Open your medicine cabinet to find cotton swabs and rubbing alcohol, which will act as our brushes and water, and peek in your desk drawer for your favorite colored Sharpies—those will be our paint. How easy is that?
DIY Basics: Watercolor-Inspired Throw Pillows

Sometimes we see a technique that looks so cool and easy that we just have to try it ourselves. On today’s docket: re-making Radical Possibility’s “zero-effort” watercolor-inspired pillows using tools you can find lying around your home. Open your medicine cabinet to find cotton swabs and rubbing alcohol, which will act as our brushes and water, and peek in your desk drawer for your favorite colored Sharpies—those will be our paint. How easy is that?
Mastering the watercolor effect is almost as simple as gathering your tools for prep. There’s no science to nailing it: just know it works best when you mix a few complementary colors in your design before the rubbing alcohol even comes into play. This way, dabbing and dragging your saturated swab over every stroke will especially make the colors blend beautifully. You’ll have trouble deciding whether to place them on your couch, your bed, or your favorite comfy chair… so why not make three?
Materials:
– three white cotton throw/toss pillows (we used two 20-inch decorative toss pillows and one oblong toss pillow)
Tools:
– Sharpies in a variety of colors
– rubbing alcohol
– cotton swabs
Instructions:
1. Draw your design on your pillow. For best results, make sure the colors are blended within your design.
2. Saturate a cotton swab with rubbing alcohol, and dab it on your design. Drag the swab across your design to further blend colors.
3. Once colors are well blended, trace an outline around your shape with the cotton swab.
4. Toss in the drier for 10-15 minutes to set the dye, then deck out your sitting space!
You just might already have ALL of these materials in your home. Home hack win!
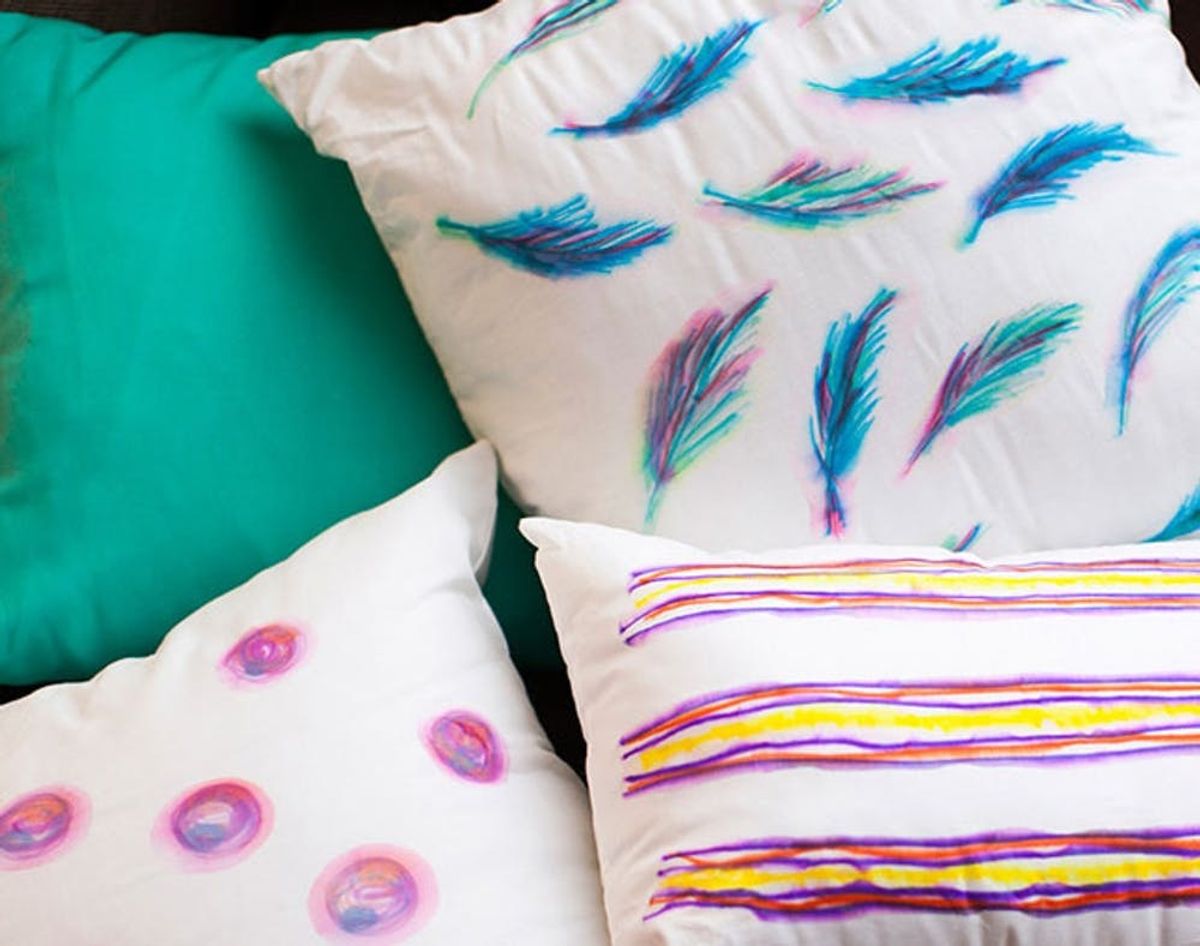
Polka dots get a cool, cosmic makeover with this DIY…and we love it! To make these cosmic dots, start by drawing a swirling circle in your base color—we used this lavender. Then, draw two smaller circles inside—we think tangerine and powder blue look mighty nice—and trace around the edge of the circle once or twice. You can already see the colors blending at this point, and they’re about to look even more stellar.
Now dip that tip in your rubbing alcohol! Once it’s completely saturated, start dabbing your dots so the colors really blend. When we placed our swab right on the edge of our circle, the rubbing alcohol soaked up the lavender, blue, and orange, spilling out into hot pink ring that looks like a luminous aura. Far out!
Those dots look out of this world!
It’s easy to draw these feathers: use quick strokes of blue to draw the base, then highlight with green and red. We switched up the base and used green for every other feather, which totally changed the way the colors merged.
Don’t be afraid to really drag the cotton swab across your design. The more you drag it, the more the colors will mix and develop. Be sure to let it dry completely to see the full effect—good news is this stuff dries fast!
This delicate design was a favorite around the office, and it’s easy to see why. The sky blue, sea foam green, and classic red colors created heavenly-colored halos.
You know you want it! And it’s super easy to get this look since—let’s face it—you pretty much can’t mess up drawing a line! We liked the contrast of thin purple and orange stripes divided by a chunk of yellow. As you can see, this isn’t a pattern for perfectionists: you can rely on the rubbing alcohol to take this design to a whole new level. We’re swooning over those purple edges.
Even the cotton swabs got a colorful makeover!
This repetitive pattern is all that. Be sure to toss this trio in the drier to set the dye, then plop them (and yourself!) down on something comfy.
That’s more like it! These whimsical patterns make a great set, adding a splash of visual intrigue to a neutral-toned living space.
This especially goes when they’re paired with colorful accent pillows! You’ll definitely want to get up close to see the stunning detail of your work (See that hint of yellow and pink surrounding those feathers? Incredible!) Now that’s what we call lounging in style.
Have you tried any watercolor-inspired DIYs? What materials and tools have you used? Talk to us about your projects in the comments below!


