You’ve got your photo book hanging on the coffee table, you’ve finally put all your fave picks up on Facebook and now, well, now what?
5 DIY Ways to Turn Your Wedding Photos into Decor

You’ve got your photo book hanging on the coffee table, you’ve finally put all your fave picks up on Facebook and now, well, now what? What’s a newlywed to do with all those wedding photos? You want to display them in your home but don’t exactly want to wallpaper every room with scenes from your wedding.
We teamed up with Target Wedding Registry to create five DIY ways to turn your wedding photos into decor for your home.
We love party decor, especially if we can use it all year round. We took a tried and true method from the Brit + Co archives and recreated it using wedding photos.
Create a Garland
Tools + Materials:
– Black & Decker White Steam Iron ($11)
– Iron-on Fabric Transfer Paper ($11)
– white fabric
– satin ribbon
– Hot Glue Gun + Glue Sticks ($5)
– HP Deskjet Color Inkjet Printer ($34)
– fabric scissors
Choose your favorite photos — we went with about 10 to make this garland. Open them up in photo editing software (you can do this in iPhoto, Preview, Photoshop or a number of other programs) and crop them to 3 inches x 4 inches. Print your photos on iron-on transfer paper. Then, cut ’em out!
Iron photos onto white cotton fabric. If you like, cut triangles out from the bottom of each transferred photo to create a flag shape. Lay out your design and cut ribbon to size. Then use a hot glue gun to attach your fabric photo pieces to ribbon.
Hang on your wall and you can stroll down memory lane anytime you like.
Next, to the wall! Instead of tons of frames on dressers, nightstands and mantels, make more of a statement by creating a mini gallery wall using your wedding photos. This is especially handy if you don’t want to choose just one or two big prints and prefer a little bit of everything.
Design a Gallery Wall
We ordered this Linear Wood 10 Piece Frame Set ($27) and that’s all we needed to get the job done! Simple print your photos based on the sizes of each frame, frame them and voila.
Create a little cluster on a wall that needs some love.
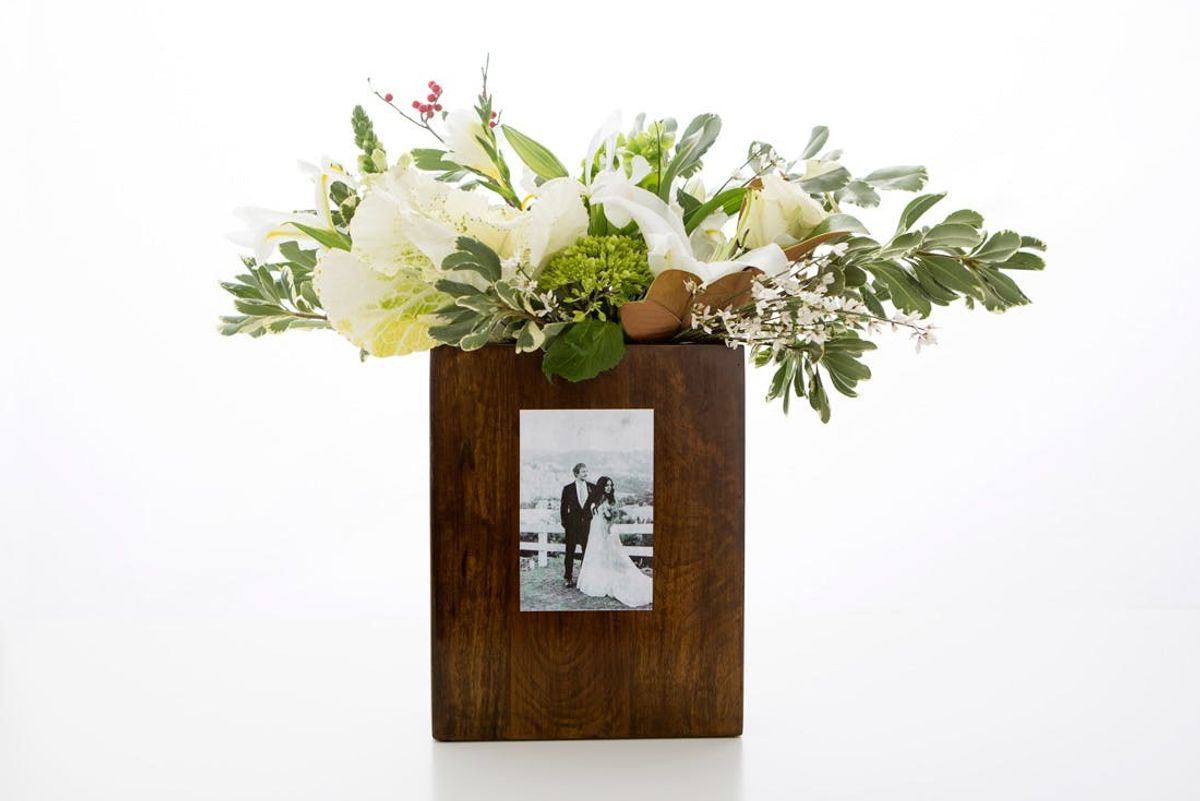
This unconventional project turns your photo into a piece of decor you can change up weekly with a new batch of flowers. You could even display a dried bouquet from your wedding to really take things to the next level.
Adorn a Wooden Vase
Tools + Materials:
– Wooden Table Vase ($18)
– Mod Podge Gloss Glue ($9)
– Plaid Foam Brush Set ($2)
Size your photos based on the dimensions of your vase, and print on regular printer paper. Cut them out and determine where your photo will fit on your vase. Add Mod Podge to the back of your photo and press onto your vase. Cover the photo with Mod Podge. Make sure to get the corners, as that’s where photos tend to curl.
Paint the entirety of your vase so that the texture is the same as where the photo has been attached. Let dry.
Fill with flowers and you’ve got the ultimate two-in-one!
Scrambling for gift wrap? This is one ridiculously easy way to personalize all of your gifts.
Turn Them Into Gift Tags
Tools + Materials:
– Neenah Paper White Card Stock ($10)
– HP Deskjet Color Inkjet Printer ($34)
– scissors
– baker’s twine
– hole punch
Open your photos up in photo editing software and resize to 2 1/2 inches x 4 inches, or smaller if you’ve got smaller gifts to tag. Print them on card stock. Punch a hole and string a piece of baker’s twine through, and attach to your gifts.
Simple as that.
Add a little personalization to your fridge or magnetic bulletin board with these sweet little magnets.
Make Magnets
Tools + Materials:
– White Round Magnets ($2)
– Mod Podge Gloss Glue ($9)
– Plaid Foam Brush Set ($2)
– scissors
Again, you’ll start by opening your photos up on your computer and resizing. This time, resize and crop to 1 1/2 inches x 1 1/2 inches. Print out your photo and cut it. Place a magnet on top and trace, then cut out the circle. Cut a small snip on each side of your circle — this will allow your photo to wrap around the edges of the magnet.
Paint the back of your photo print with Mod Podge, then place on top of the magnet and overlap the cut pieces. Brush Mod Podge over the entire magnet and let dry. Done and done!
And there you have it: Five DIY ways to turn your wedding photos into home decor!


