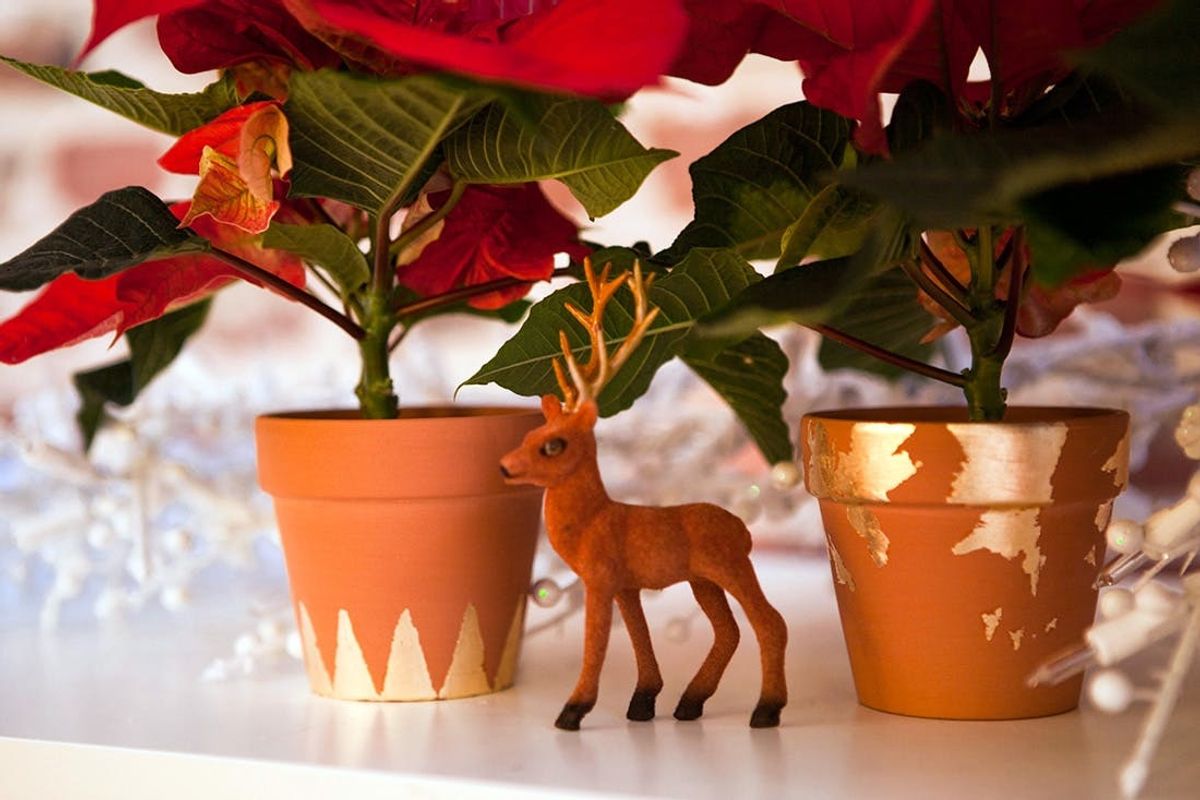
The holidays are in full swing here at Brit + Co.: carols are blaring at Brit + Co SF, glitzy garland is hanging from just about every empty surface, and twinkling lights are strung over our office’s front door. Since poinsettias are starting to taking over the entryway to every grocery store, we couldn’t pass up a chance to add them to our own holiday decor by planting them in gold leaf pots, tricked out by yours truly.
Put Those Poinsettias in DIY Gold Leaf Flower Pots!

The holidays are in full swing here at Brit + Co: carols are blaring at Brit + Co SF, glitzy garland is hanging from just about every empty surface, and twinkling lights are strung over our office’s front door. Since poinsettias are starting to taking over the entryway to every grocery store, we couldn’t pass up a chance to add them to our own holiday decor by planting them in gold leaf pots, tricked out by yours truly.

Head to your local nursery to source the pots—we used terracotta clay pots for a more traditional Christmas vibe. Keep in mind that you might want to bring your poinsettias along for the ride so that you get the right size pot. Before you start, be sure to clean the outside of the pots—the gold won’t stick well to a dirty surface.

Materials:
– gold leaf
– gold leaf adhesive
– gold leaf sealer
– terracotta flower pots
– poinsettias
Tools:
– paint brush
– sponge brush
Instructions:

1. Clean the surface of your flower pot.
2. Paint a thin layer of gold leaf adhesive on the pot in the design you want. Let the adhesive dry for 20 minutes or until it becomes tacky.
3. Tear off some gold leaf and press it onto the adhesive.
4. Using cloth or a dry sponge brush, wipe away the remaining gold leaf.
5. Paint sealer over the gold. Make sure to stay on the gold as you will be able to see any sealer that gets on the pot.
6. Let dry, then plant your flowers in the pot.
First, decide on a few different golf leaf designs. We painted uneven lines on one, triangles on another (no surprise there—we love our geo prints!), and for our last one, we made the pot look weathered, as if it was antique with peeling gold. Once that’s settled, paint the adhesive in those shapes on the pot. For the more precise designs we used a thin paintbrush, and for the weathered look, we used a sponge brush since it should look a little splotchy. The instructions say to make a very thin layer, but we found that a slightly thicker layer worked better and created cleaner lines. Don’t let it pool or drip, but you should paint on at least two to three layers for maximum stickiness.

Let the adhesive dry for about 20 minutes. It should be tacky to the touch. Then it’s time to add some gold bling. Gently tear a piece of gold leaf and press it firmly onto the adhesive. It doesn’t need to be an exact fit since you’ll be brushing off the excess gold. When the gold has adhered to the pot, take a cloth or sponge brush and wipe away the extra gold. Save all the pieces that come off because you can still use it. It’s gold after all! Well, not really. But it’s gold colored, so it’s in high demand over here!

Now paint the sealer over the gold so that it doesn’t come off. Even though the sealer dries clear, it is visible on the terracotta, so make sure you keep it on the gold—use those skills you learned in kindergarten and stay in the lines ;)
Repeat that process for your two remaining designs.

Ta-dah! We’re glad we decided to go for the gold with this DIY. These rustic clay pots have never looked so glam! How regal does that triangle/crown design look?

Once the sealer is dry, plant your poinsettias in each pot and water them every few days to keep them happy. Our friends at the nursery gave us some pointers about watering the plants that we thought we’d share: poinsettias like water but not on their petals—you can place them in pan of water so their roots can soak, for about 10 minutes until the soil is damp. Then, bring ’em into the holiday mix.

These gilded pots are so pretty. They’d make great gifts, porch decorations, or centerpieces. Happy planting!

What holiday decorations are you DIY-ing this year? Share your plans and projects with us in the comments below!


