We read a few weeks back that grommets are the new studs, and whenever there’s a style declaration that dramatic, that bold, we just have to try it out for ourselves. We did, and we absolutely loved the results: what struck us was that while equally as edgy, the circular metal eyelets are much more refined than their pointy counterparts (think modern Gwen Stefani versus any era Avril Lavigne), so this trend is just as much about being chic and streamlined as it is about standing out from the crowd. Obviously, we’re on board with that.
Are Grommets the New Studs? We Tried It

We read a few weeks back that grommets are the new studs, and whenever there’s a style declaration that dramatic, that bold, we just have to try it out for ourselves. We did, and we absolutely loved the results: what struck us was that while equally as edgy, the circular metal eyelets are much more refined than their pointy counterparts (think modern Gwen Stefani versus any era Avril Lavigne), so this trend is just as much about being chic and streamlined as it is about standing out from the crowd. Obviously, we’re on board with that.
But—there is a “but”—while grommets look like an easy substitute, they aren’t the most DIY-friendly embellishment. See, there are about six standard sizes of grommets to choose from, and if you want to keep things relatively on the cheap, you need a separate tool to fasten each size properly. While you can find these tools pretty easily at high end fabric stores, they’ll run you between $25-$30 each—that’s a bit more of an investment than say, a tub of Mod Podge or a tube of E6000. So let us be your street style guinea pig today: get familiar with grommets through this tutorial that shows you how to add them to everyday accessories. Then you can decide if you’d seriously invest in the tools you need to tackle this trend. Just know that as style-obsessed DIY-ers, we’re super happy we indulged.
Materials:
– leather coin purse and faux leather clutch
– size 00 grommets (grommet and washer)
– size 4 grommets (grommet and washer)
Tools:
– size 00 grommet tool (setter and anvil)
– size 4 grommet tool (setter and anvil)
– chalk pen
– ruler
– exacto knife
– hammer
Instructions:
1. Decide on your grommet layout (use a ruler if necessary), then mark location of grommets on chosen accessory with a chalk pen.
2. Using an exacto knife, slice an opening large enough for your grommet to fit through.
3. Slide the grommet through the hole and slide the anvil tool underneath until it’s in place. Then, place the washer over the grommet on the back of the fabric and use your setter tool to hold it in place. Remember the order: anvil, grommet, fabric, washer, setter.
4. Hit grommet tool with a hammer until grommet is securely set.
5. Repeat until pattern is complete.
We nabbed this adorable leather Baggu coin purse from Urban Outfitters, and deemed it perfect for this DIY. We kept things on a small scale by adding tiny 00-sized grommets in an all-over pattern that we eyeballed onto the bag and marked with a chalk pen. Then, onto the slicing. We inserted a cardboard scrap to make sure we didn’t cut through both sides of the purse—a small “x marks the spot” will do with material this soft.
Next, insert your grommets: make sure the grommet is pushed through the front of the fabric, and that the washer is cinching the back of the fabric—we turned our bag inside out to make things easy. Then, slide your grommet tools into place—remember the order: anvil, grommet, fabric, washer, setter—and smash it together with a hammer. You have to hammer really hard. So now’s the time to unleash those pent up emotions. It’s pretty darn therapeutic.
Note: the grommet tool instructions said “do not use a steel hammer,” but who the heck has a wooden mallet on hand? So we added a protective pad onto the end of our setter to keep the clashing as civil as possible (it worked really well!).
Then turn your bag right side out and voilà! You just tricked out that basic coin purse with grommets in under 10 minutes.
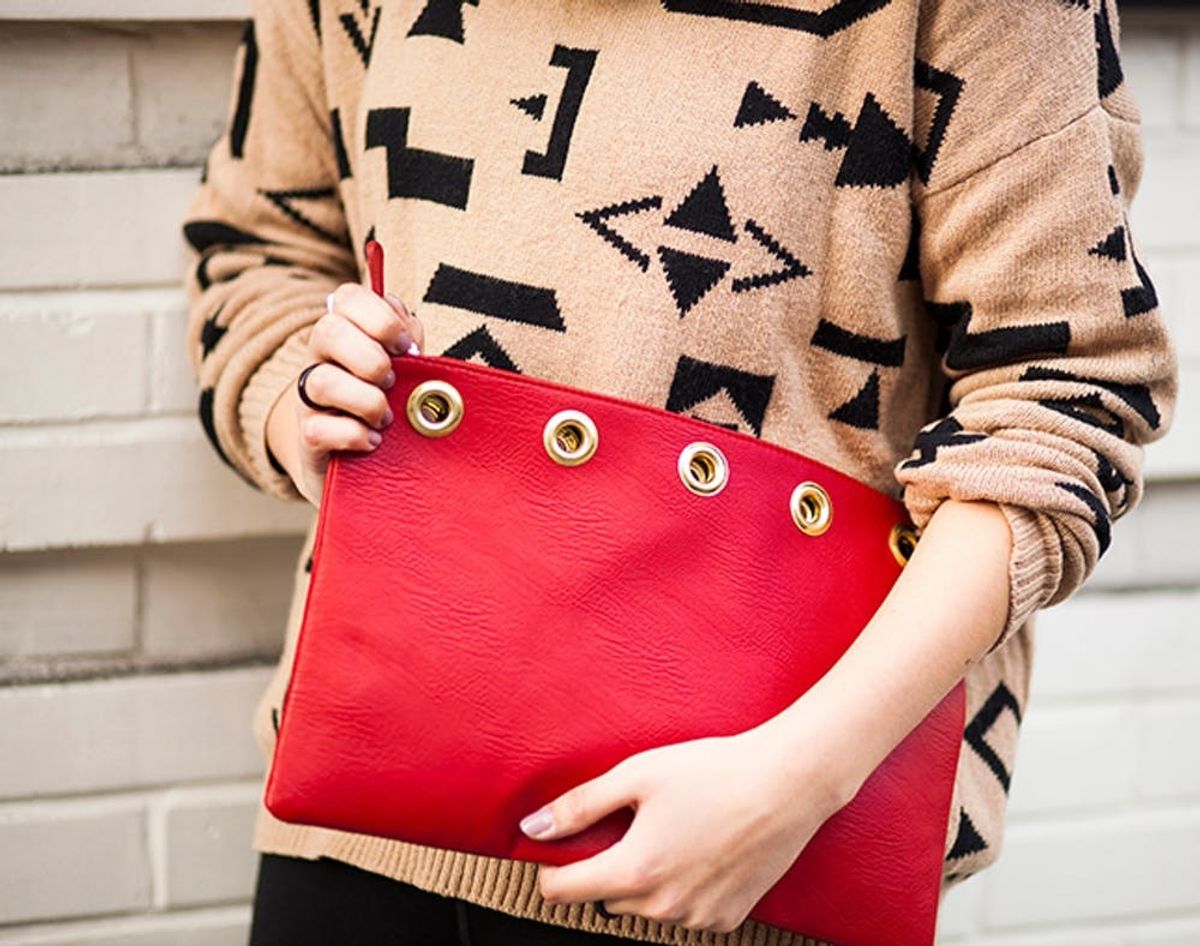
Larger purse? Larger grommets! We were fairly certain that this classy red clutch wouldn’t be overwhelmed by mondo size 4 grommets, especially when lined up neatly near the top of the bag. Since the pattern is more precise than our previous design, we used a ruler to plot our grommets, about half an inch from the top of the bag and about an inch and a half in between. Then, mark their placement on the bag and slice the fabric so that the grommets will slide through—a sizable square cutout was necessary for these giants.
After that, the process is exactly the same: insert, align with the proper tools, and smash away. If you thought you had to hit hard with those size 00 grommets, just wait till you try smashing these size 4’s into place. Hulking out is definitely required.
Once your grommets are in place on one side of the purse, turn the bag over and feel for each grommet through the material. Mark where you feel the center of each grommet in order to mirror the design. Then grab that exacto knife and repeat the steps.
How cool did this purse turn out? It’s a head turning accessory that’s still quite polished in its appearance. We love that the large grommets are lined up so perfectly that you can see completely through the purse, which is so spacious that we’re pretty sure you could slide a small laptop into it. Wait, a grommet embellished laptop bag? So high class!
What’s even better is that the two accessories look like a dream together. Because the grommet sizes are different, the embellishments don’t clash in the slightest.
Are grommets the new studs? Aesthetically, we say bring it on! But from a DIY perspective, we say no, simply because of the high cost of each setting tool (Kickstarter, we’re looking at you for our all-in-one grommet setting fix!). That being said, if you flat out adore this look, invest in a grommet setting tool. Since we’re smitten with these results, it’s a monetary hit we’re fine with taking. Now we just have to decide what to grommet up next!
What on trend DIYs have you done lately? Tell us about your projects in the comments below?


