 Recommended for you
Remember when we taught you how to marbleize your workspace in our #31daysofDIY? Well we are bringing back this technique for an Easter egg edition. What we love most about this idea is that it creates crazy, colorful designs in under ten minutes! Just watch out for your mani — your fingers will get a bit messy.

Materials Needed to Decorate Your Easter Eggs:
– multiple colors of nail polish
Tools:
– toothpick
– plastic tub

Instructions:
1. Fill tub with water and pour in nail polish.
2. Swirl nail polish colors together using a toothpick.
3. Let the egg touch the surface of the water and then lift.
4. Let dry in the egg carton or in an egg crate.
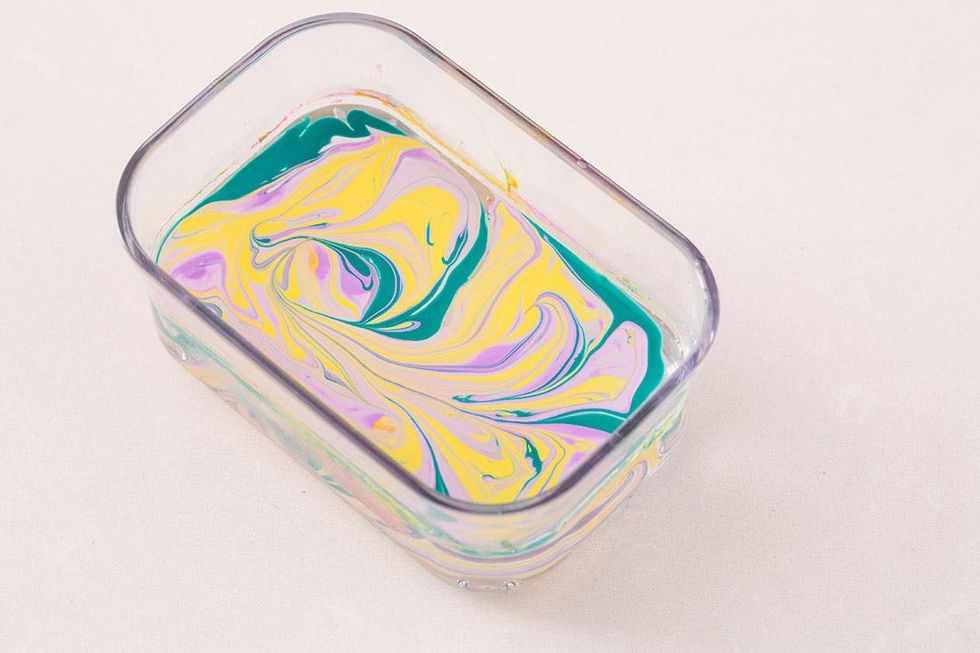
5. Fill your tub with water and pour in your favorite nail polish colors. We are loving the mix of these trendy spring hues.
6. Let them swirl together. Crazy psychedelic design or beautiful iris flower petals?
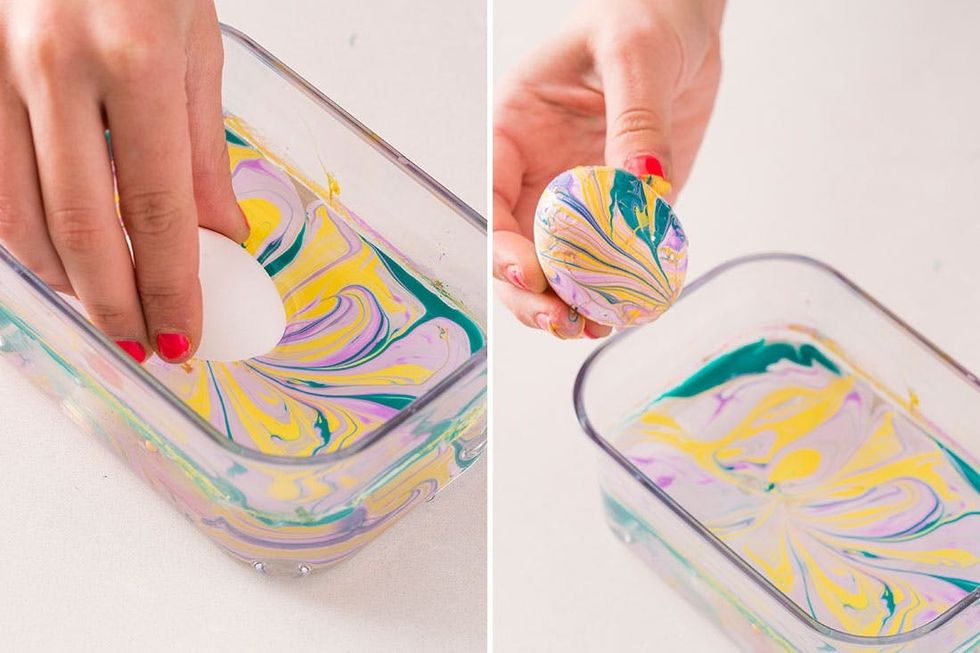
7. Choose your favorite part of the swirl and then gently dip your egg into the mixture.
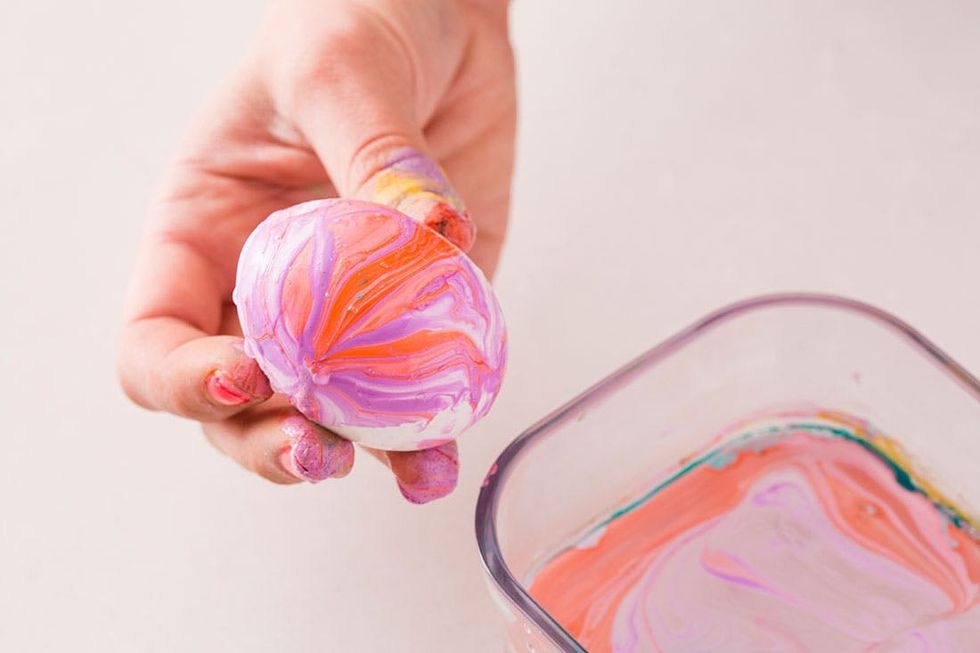
Beware! Your fingers will get messy.
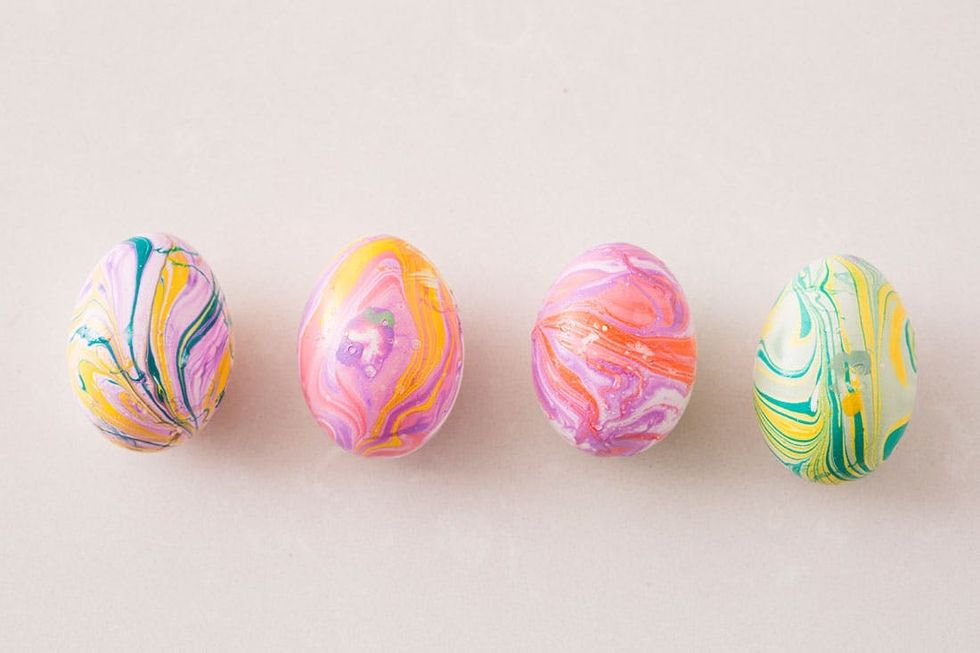
You can also try different color combinations for some extremely funky marbled designs!
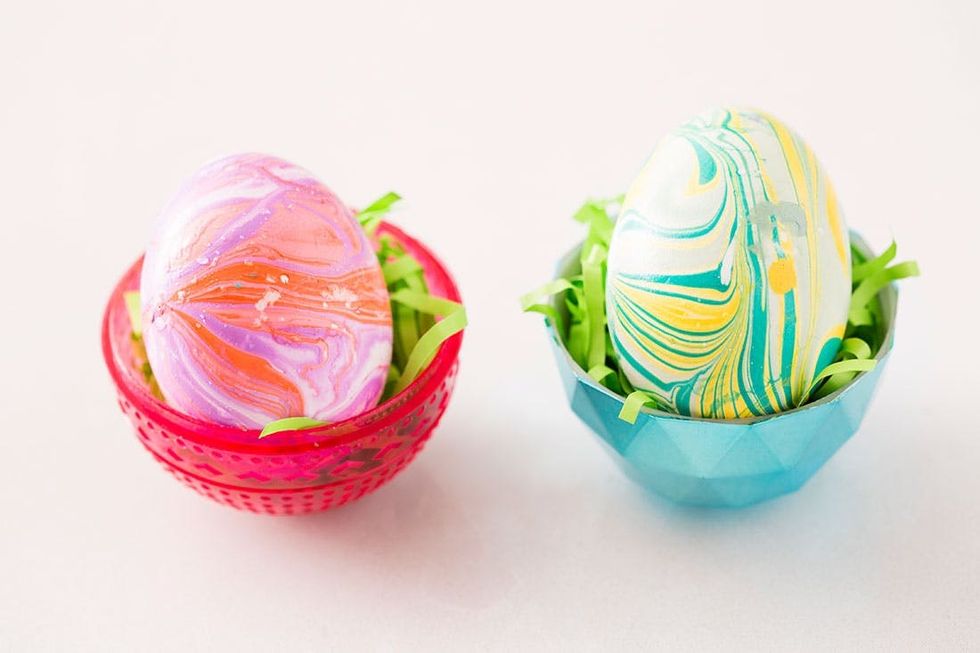
Be sure to place your freshly painted eggs in a lush bed of green 'grass' so they can dry properly.
Have you tried this nail polish marble technique? What type of projects have you made? Let us know @BritandCo!
This post has been updated.