Knock, knock. Who’s there? Ok, so we’ll resist the urge to make a whole slew of cheesy knock knock jokes, but we do have a great tutorial for you highlighting the first thing people often see before they “knock knock” on your front door: a wreath. Since it’s your home’s first impression, we’ve created an easy way for you keep it fun and fresh and just might knock your guests off their feet!
How to Create a Wreath for All Seasons

Knock, knock. Who’s there? Ok, so we’ll resist the urge to make a whole slew of cheesy knock knock jokes, but we do have a great tutorial for you highlighting the first thing people often see before they “knock knock” on your front door: a wreath. Since it’s your home’s first impression, we’ve created an easy way for you keep it fun and fresh and just might knock your guests off their feet!
Materials:
– a wreath
– 1/2 yard – 1 yard of fabric (depending on the size of your wreath)
– felt
– alligator clips
– basic sewing pins
– hot glue gun
– your favorite decorative embellishments
The key to creating this easily interchangeable wreath lies in these two materials: Pins and alligator clips. Make sure you have these on hand!
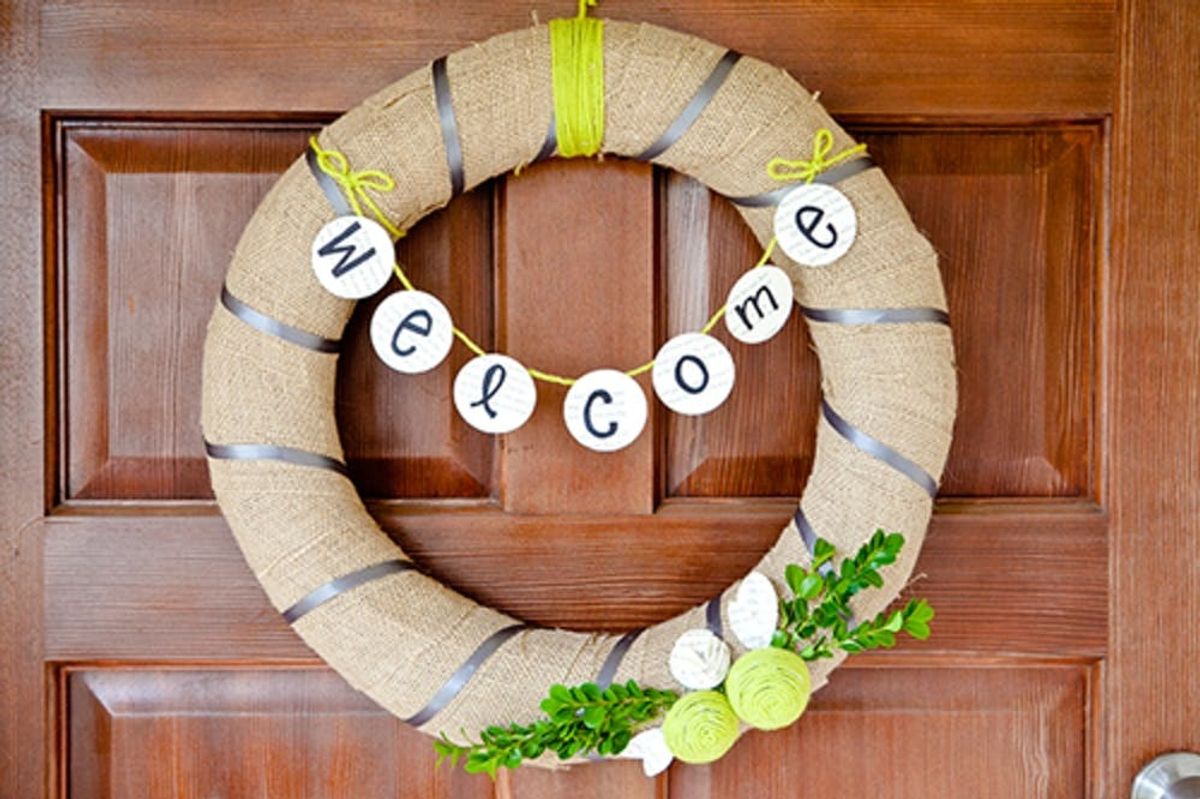
First, cut your fabric into 3 to 4 inch wide strips. We chose to use burlap as a classic, neutral base, but feel free to get crazy and use a bright print or a wide ribbon. Start at the top of the wreath and begin to wrap your fabric strips around the wreath.
Secure your strips with hot glue or the tiny pins pictured earlier that will hold your fabric in place. If you want to be able to change out your fabric in the future, be sure to use the pins for easy removal.
Now, decide how you would like to embellish your wreath and prep those items. We wanted to use different textures, as well as a few items that most people already have around their house, but the beauty of this project is that you can use anything from pom poms to bakers twine to mason jar lids to duct tape, and easily change it out! Here is what we used – ribbon, yarn, styrofoam balls, greenery from the front yard, and a couple of pages from an old book. We created yarn balls, using a styrofoam ball and hot glue, and a paper flower from the book pages.
Cut out a piece of felt that outlines the general shape of your embellishments and hot glue them on to the felt, thus creating one unit instead of three separate pieces.
Now hot glue your alligator clip onto the felt.
By using the strips of fabric along with the alligator clip, you now have the freedom to clip your embellishments on and off easily.
We polished up our wreath by winding a ribbon around it, again, securing it with a pin so that is can easily be interchanged. We also pinned the greenery to the wreath and added a couple leaves cut out of the book pages.
We finished off the look by adding a welcome banner using our book pages and yarn, secured by pins.
It’s simple enough to use during the end of the winter months, and has just enough green in it for luck of the Irish in time for St. Paddy’s Day! And come April, we can easily switch out our greens for some hot spring colors and a whole new look in just minutes!
Sada Lewis is a professional photographer and DIY expert. Check out more of her projects on her personal blog, Casa de Lewis and her photography website, Sada Lewis Photography.


