 Recommended for you
It is time to step up your sewing game and your wardrobe for the summer season. Let’s do it with a DIY skort. Don’t be intimidated — this skort is actually quite simple to make. We suggest reading through the steps below a couple of times and even creating a tester skort with old fabric before you make the real deal. And if you’re worried that you don’t even know how to thread your sewing machine, we have an amazing Sewing 101 class that will take you through all the basics. Once you have mastered the art of the maxi skirt, head back here to take a stab at the summer skort!

Materials:
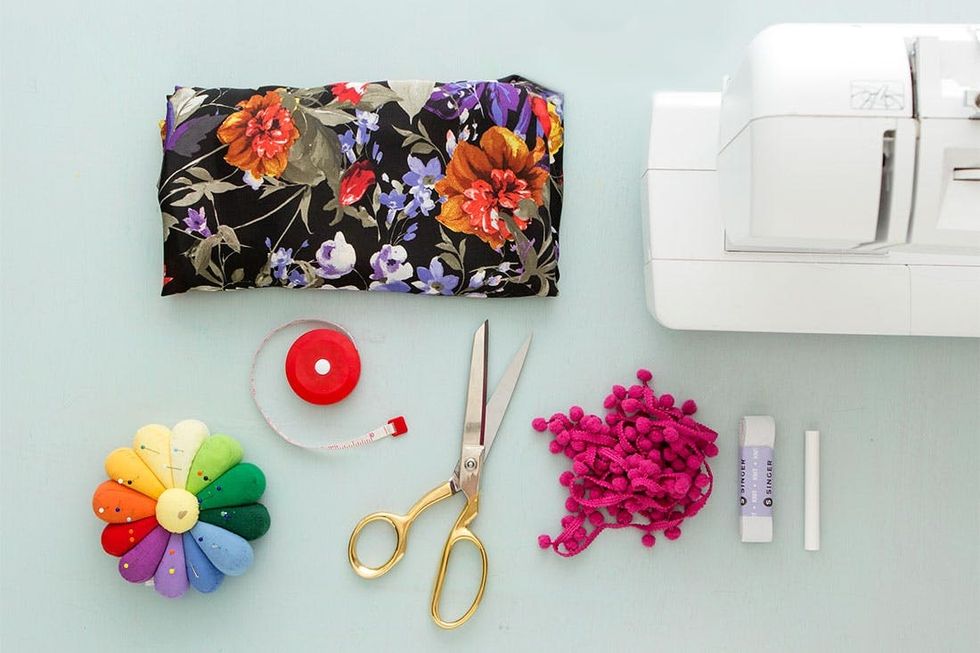
– 2 yards silky or jersey fabric
– 1 yard pom-pom trim
– elastic
Tools:
– sewing machine
– fabric scissors
– chalk
– pins
– measuring tape
Instructions:
1. Measure your body. First measure your waist, then the desired length of your skort, and finally the length of your inseam.
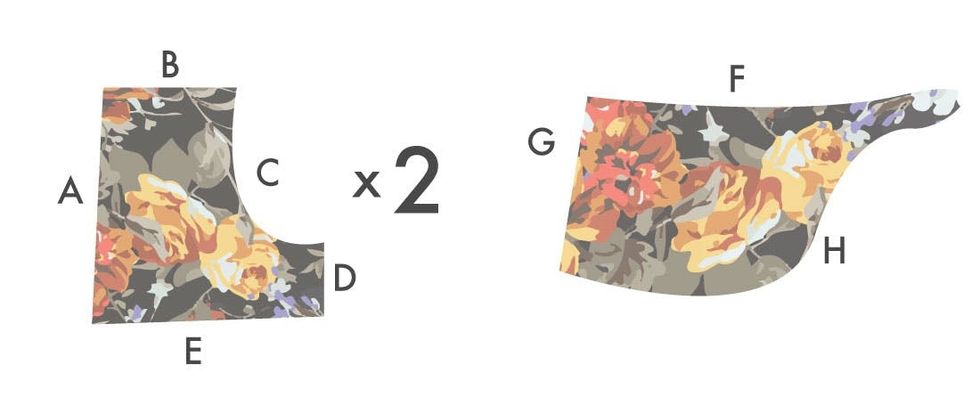
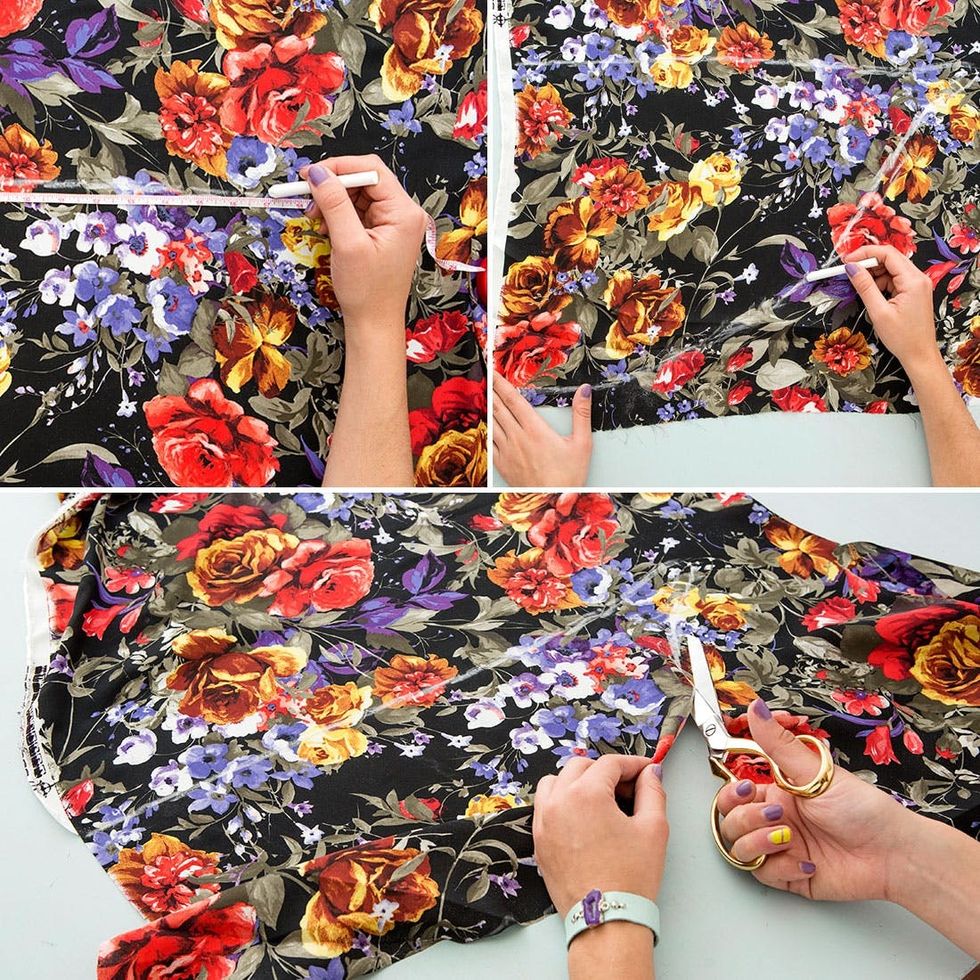
2. Now construct the shape of one side of the skort. It will look like a parallelogram with a backward J cut inside. Fold the fabric in half, mark the length of the shorts + 3 inches against the fold — this is measurement A. Multiply your waist measurement by 1/3 — this will be the measurement B. Measurement E will be your waist measurement multiplied by 1/2. Mark these lines.
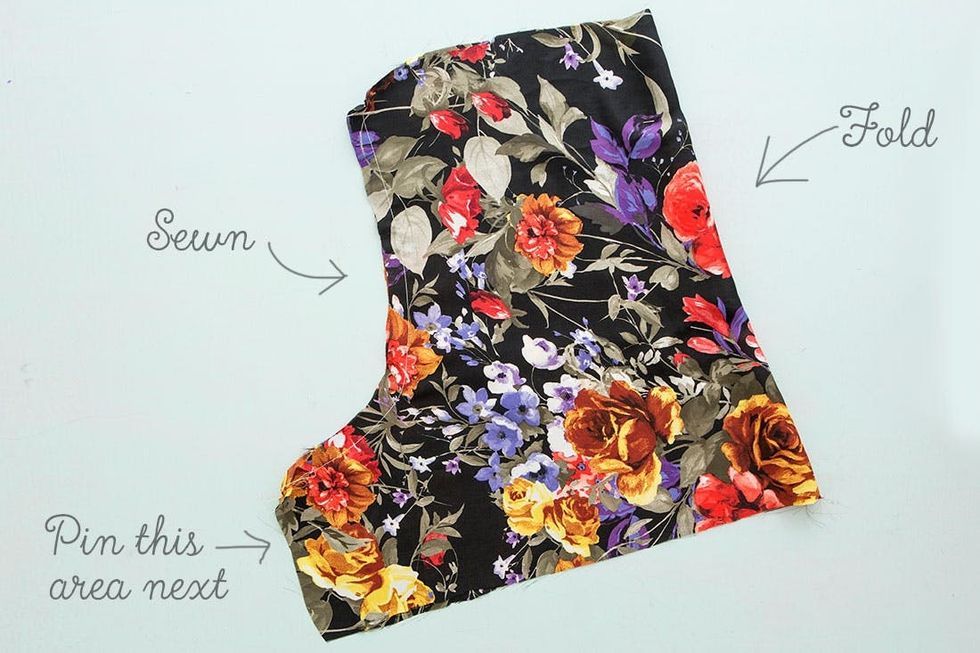
3. Mark your inseam measurement perpendicular to the end of line B. Use this line to help create the letter J to connect the smaller top line to the longer bottom line. This will form the line of measurement C. Cut out two of these shapes.
4. Now you’ll need to cut out the wrap part of the skort. Line F should equal half of your waist measurement + a tail to tie. Line G should measure the desired length of your skort. From there, create curve H to connect these two lines. Cut out a small rectangle — this will be sewn into the other side so you can tie the flap closed.
5. Time to sew! Sew line C on both pieces of the skort. Open section D and pin together and sew.
6. Grab your scissors and cut line A. Pin G and the other half of the tail in between the two sides of the skort. Sew line A.
7. Cut elastic for your shorts. Measure it around your waist and subtract about 4 inches.
8. Fold down section B to create a 1-inch gap for the elastic. Sew almost all the way around but leave room to snake the elastic in. Once the elastic is in place, sew the ends together to create a loop and then close up the gap in the waist hem.
9. Pin and hem section E of the shorts. If you are working with jersey fabric you can skip this step.
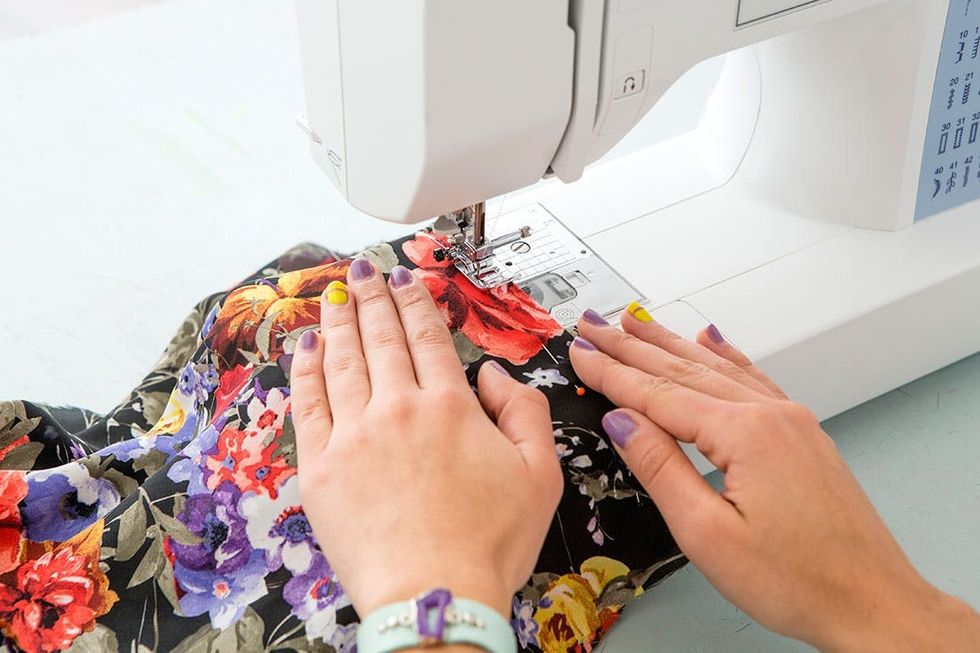
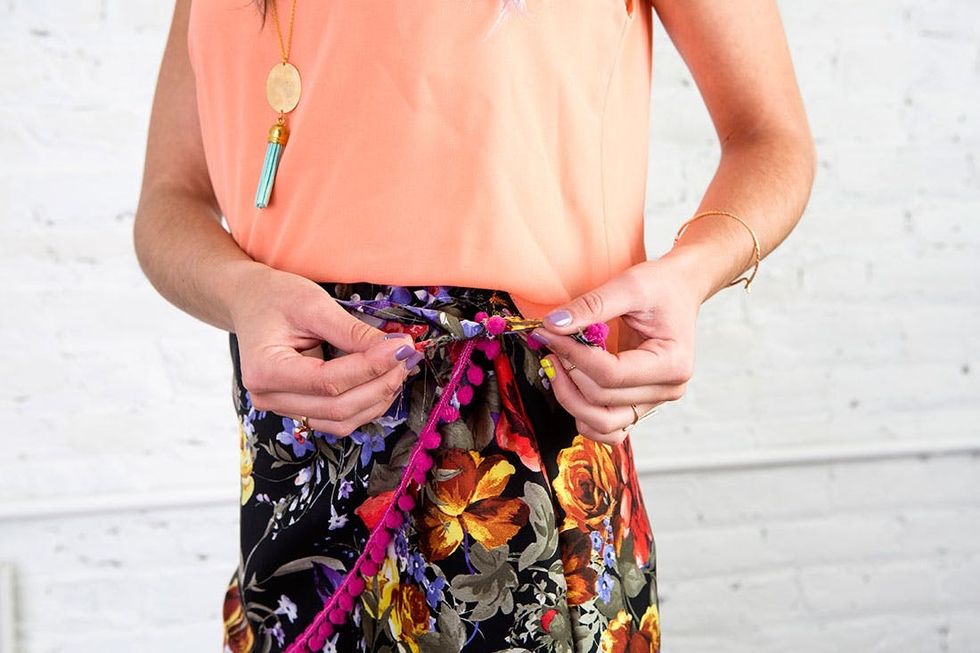
10. Pin the pom-pom trim along section H and then sew. This part is tricky — take your time!
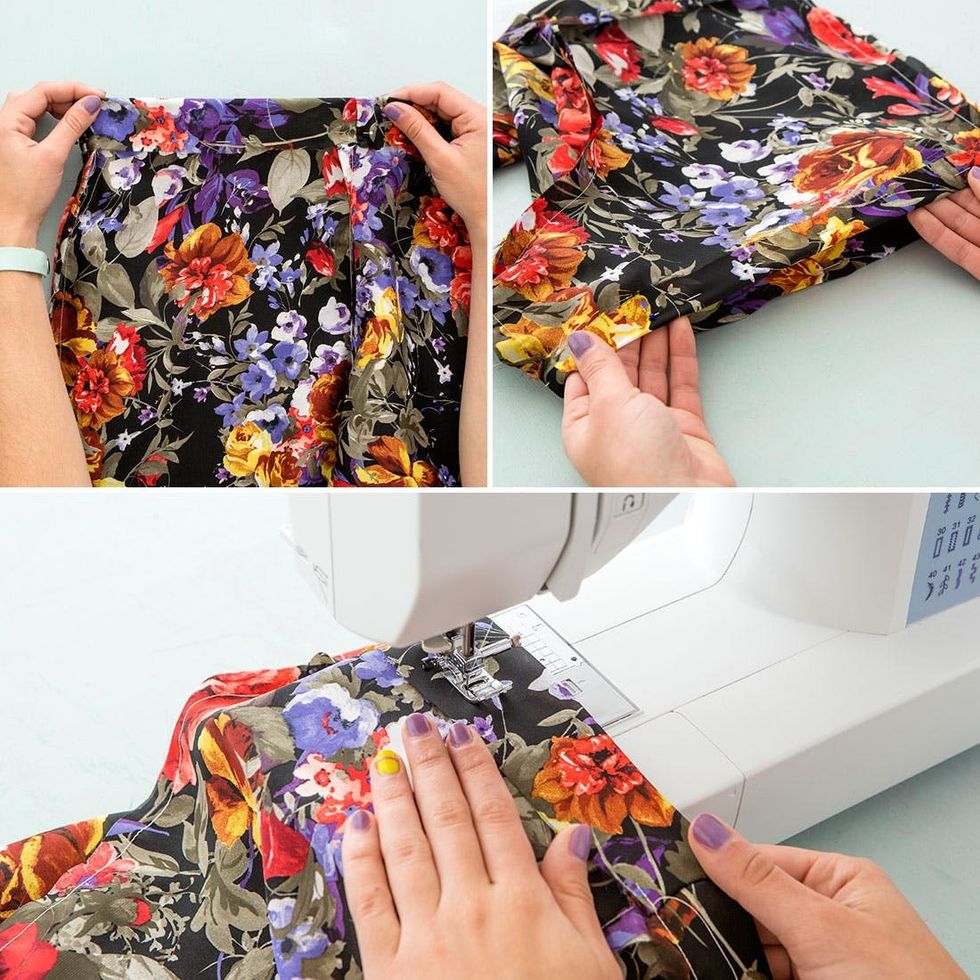
Grab your tape measure and start measuring. You are going to want to write these numbers down to reference throughout the tutorial. Let’s start constructing the shape! Fold the fabric in half, mark the length of the shorts measurement + 3 inches against the fold — this is measurement A. The +3 inches will be useful for the bottom and top hems. Multiply your waist measurement by 1/3— this will be measurement B (the top of the parallelogram) and measurement E will be your waist measurement multiplied by 1/2 (bottom of the parallelogram).
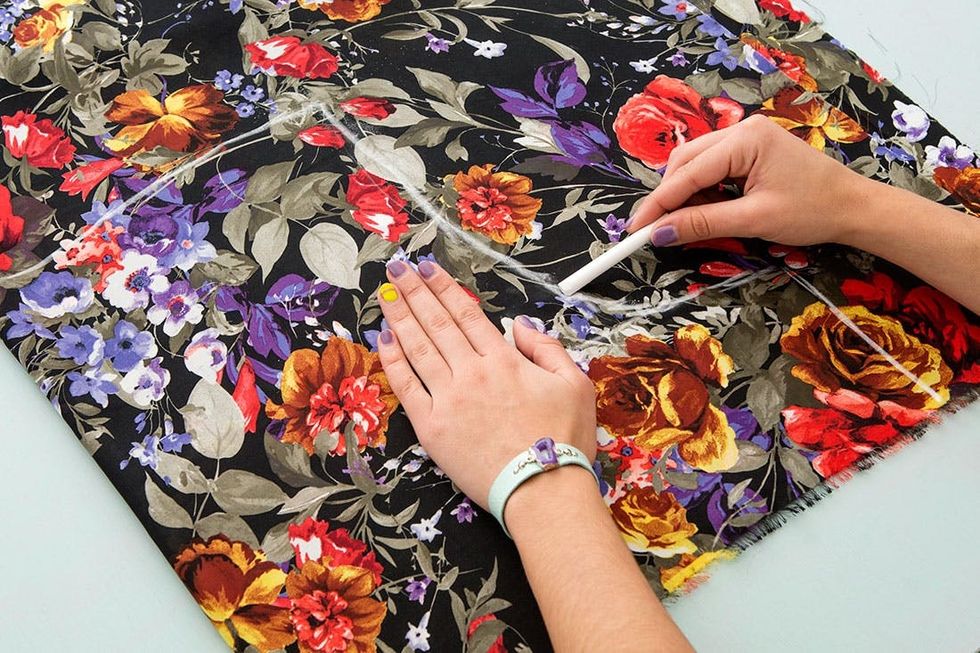
Mark the inseam measurement from the end of line B. Create a backwards J curve to connect the two lines.
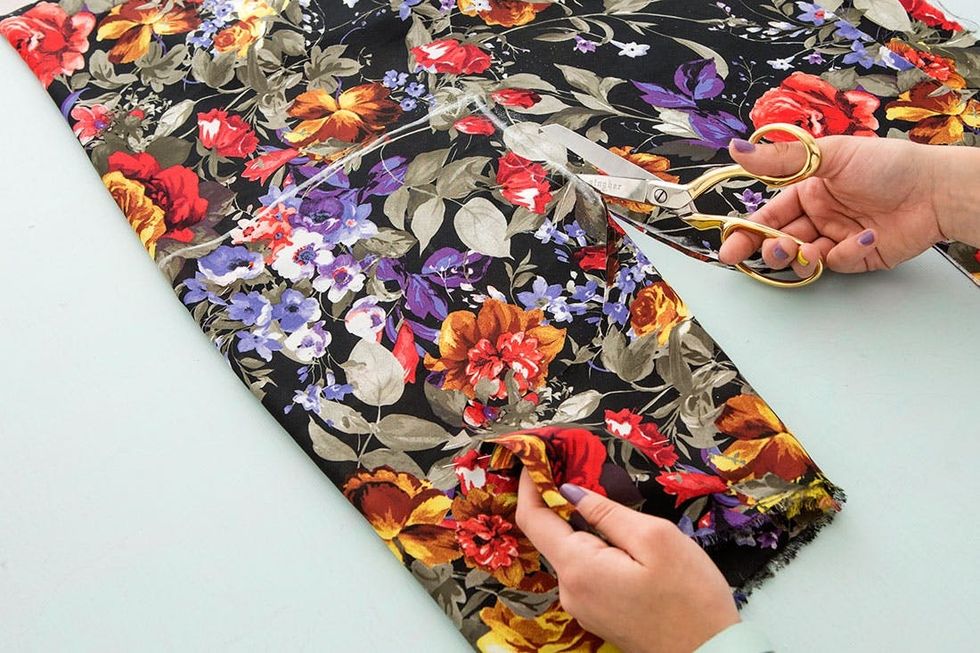
Snip snip snip! Fabric scissors make everything easier.
Time to create the wrap! Line F should equal half of your waist measurement + a tail to tie. Line G should measure the desired length of your skort. From there, create curve H to connect these two lines. You also need to cut out a small rounded rectangular piece — this will be sewn into the other side of the skort so you can tie the flap closed.
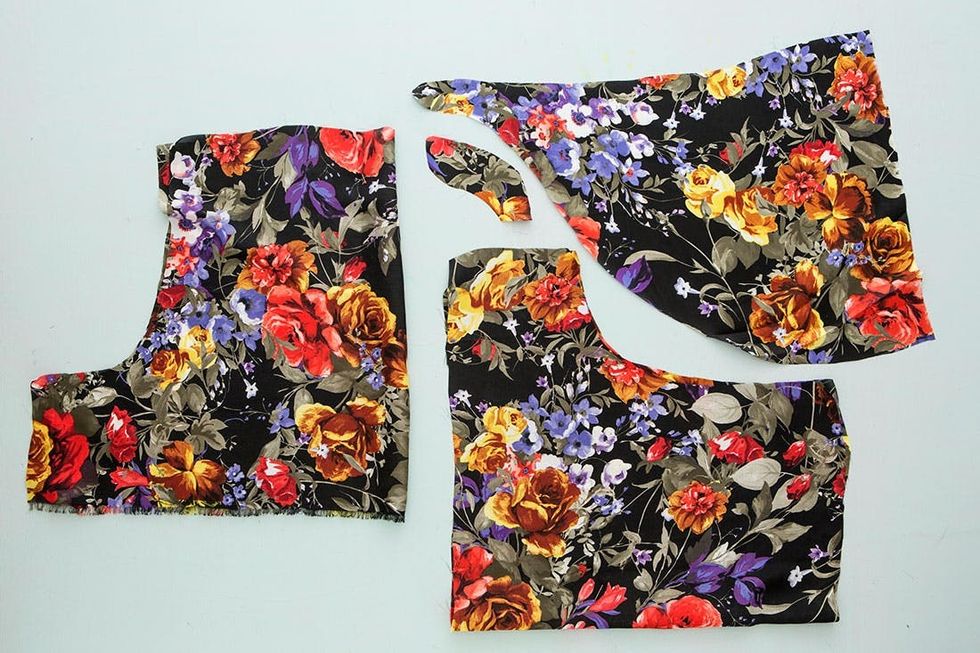
Two sides of the skort + flap + small rounded rectangle to tie = time to start sewing!
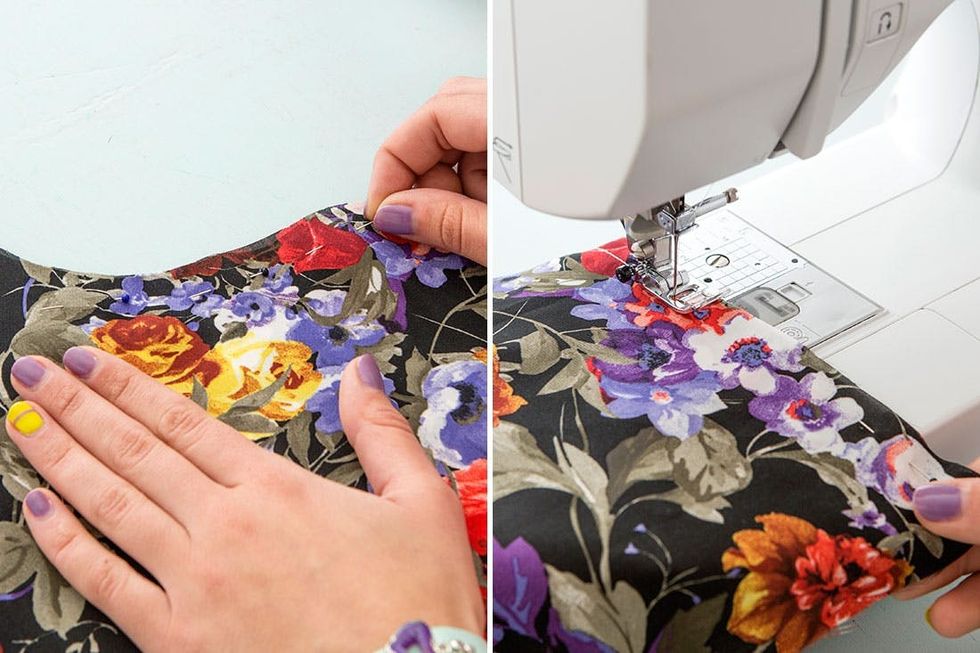
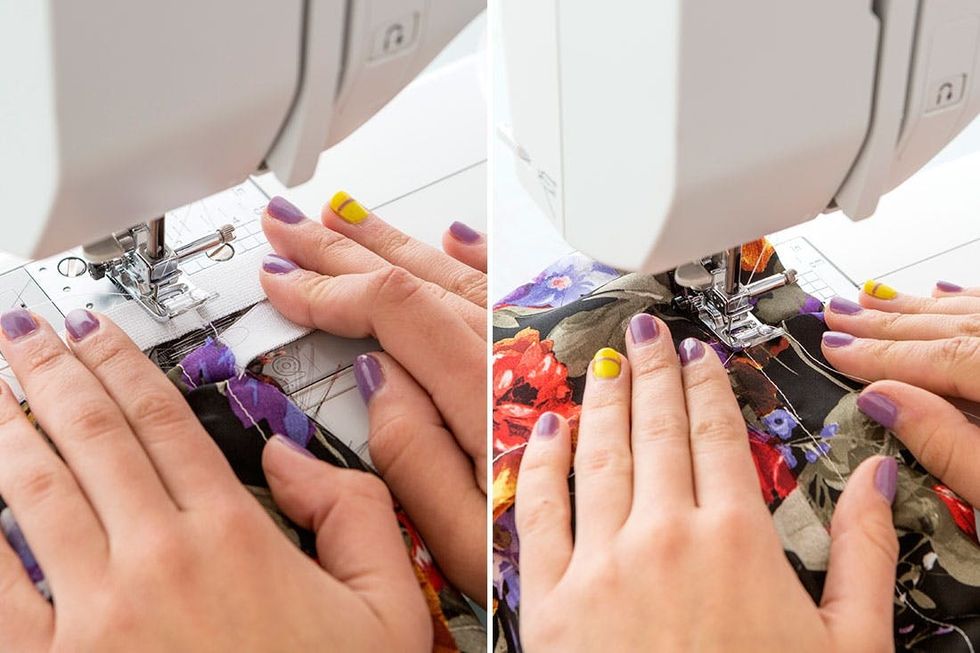
Pin section C together and sew. Once sewn, the fold and seam should create a loop. Since you have two sides of the shorts, you should have two loops. Seems strange, but this is correct!
Now we are going to attach the sides of the skort together. Open section D, pin together, and sew. Remember to face the front sides of the fabric toward each other so you don’t sew your shorts inside out.
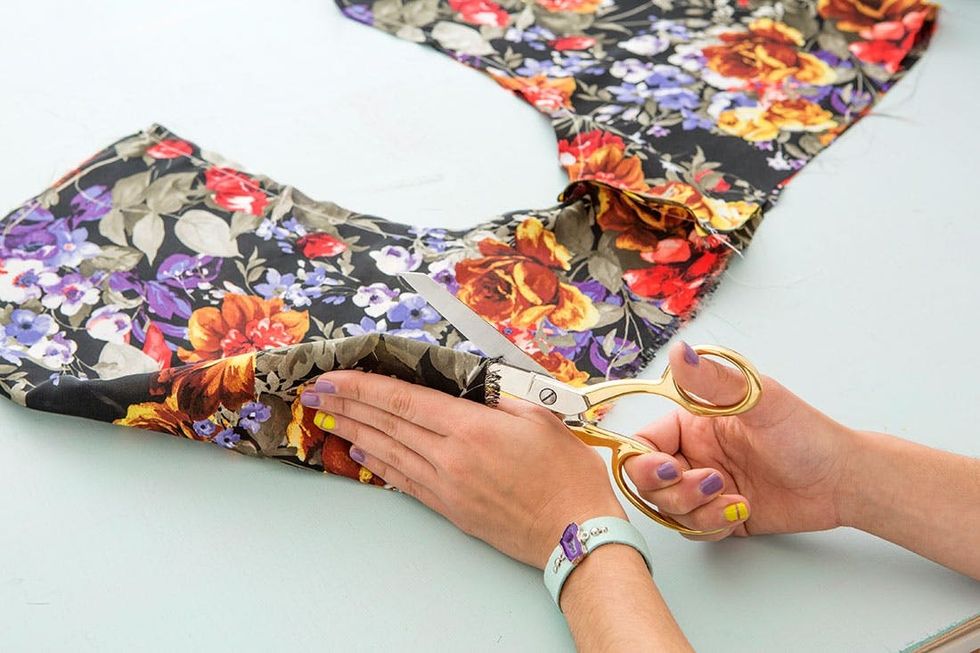
Your piece should be a strange U shape. Grab your scissors and cut down line A.
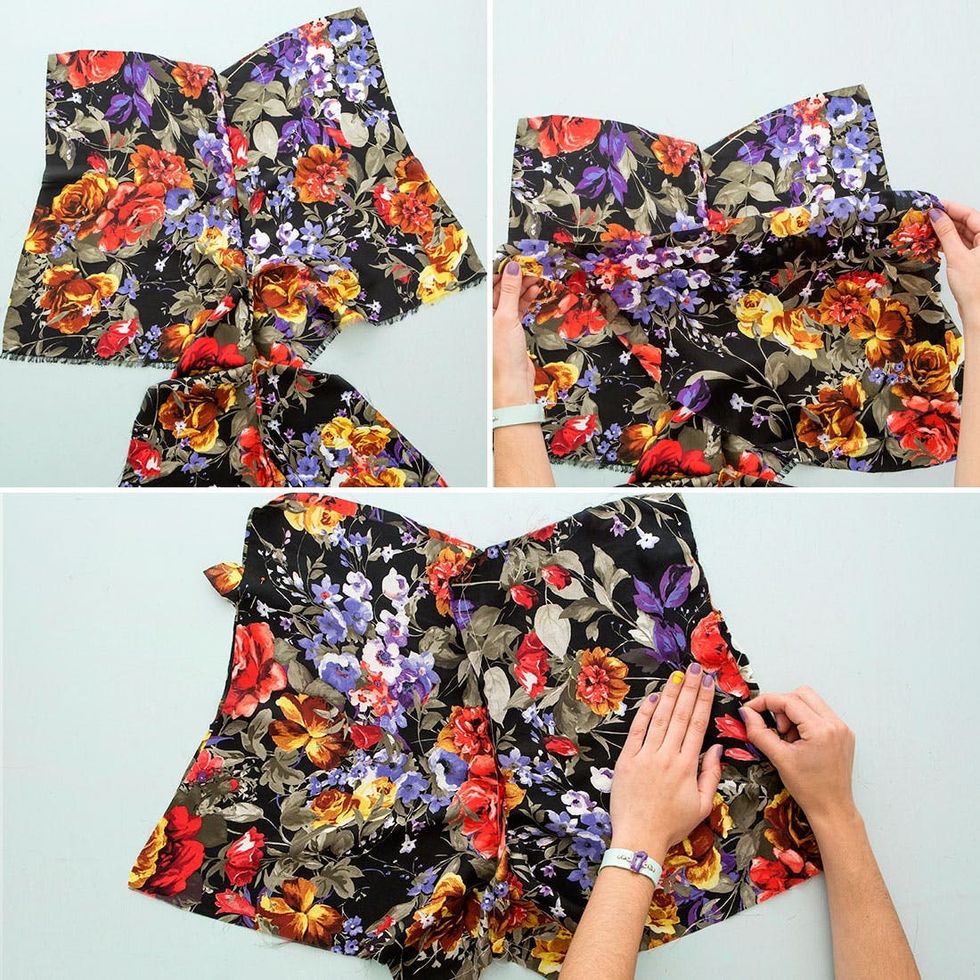
Open the skort. Section C should now be in the middle. Place your flap cut-out in between the front and back half of the skort. Line up the flap with the bottom edge of the short and the small rectangle with the top edge of the flap. Lay the front half of the skort back on top of the wrap flap and pin. Make sure you still have 3 free inches on top. This will be folded down for the waist band. You do not want your flap or your small rectangle to interfere with this seam.
Sew seam A on both sides.
Almost there! Fold down the section B to create a 1-inch pocket for the elastic. Pin in place and sew, but remember to leave a gap to snake the elastic through! Then fold in section E for a bottom hem — pin in place and sew.

When measuring with elastic, remember to give it room to stretch. You want the elastic to be 3-4 inches smaller than your waist measurement.
After the elastic is through, sew it together to create a loop. Then sew the gap in the waist hem closed.
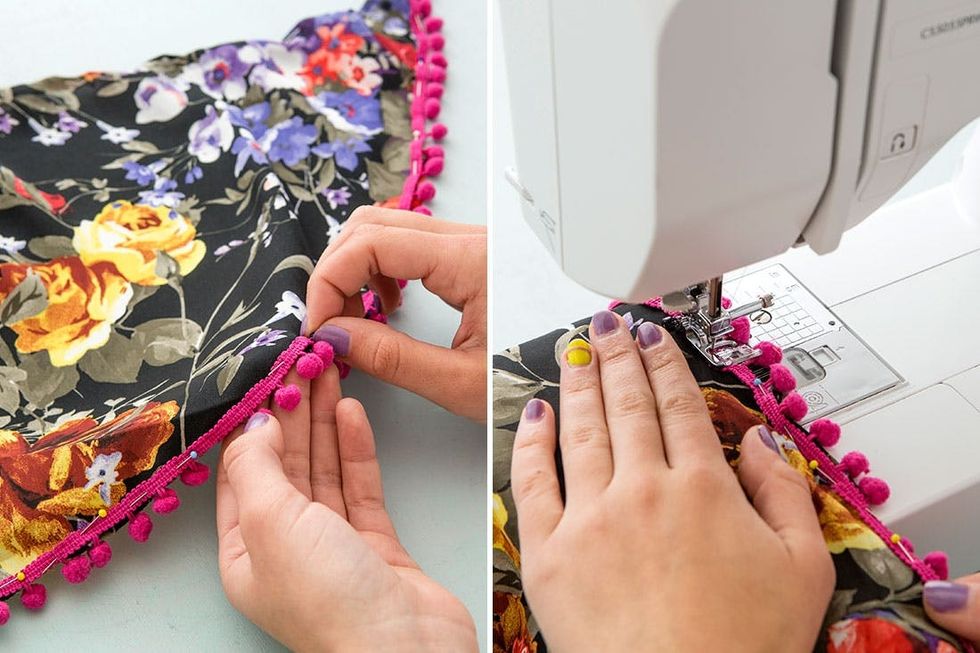
Whimsical pom-poms are definitely the answer to this DIY summer skort. Pin it to line H and then sew. Take your time — this part was difficult.
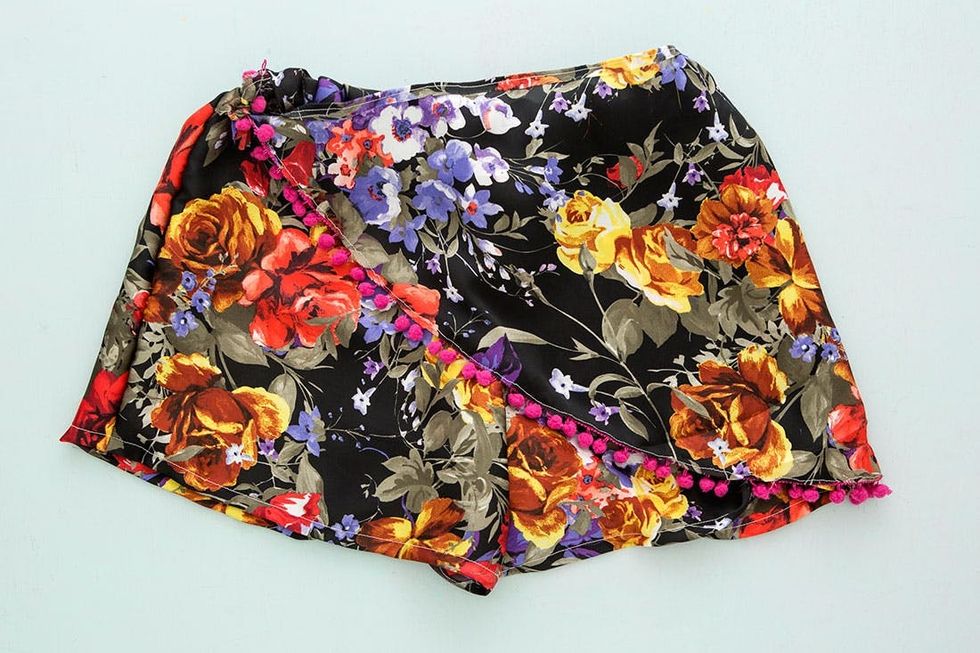
Ta-da! Summer skort FTW!

All the steps definitely make this project look intimidating, but trust me, it is not! Read through them a couple times and even use scrap fabric to make a mini or full-size test version. You’ll fall into a rhythm and then will want to make summer skorts for all of your girlfriends!
Bringing the wrap back.

Patterned bottoms call for a solid top and bright jewelry!

Hehe! Fooled you!
What other summer trends would you like to see tutorials for? Share with us in the comments below!