 Recommended for you

You may have noticed that lately we’ve been getting into DIY furniture. From reupholstering ottomans to building vertical gardens, we are having a bit of a romance with all things furniture. Today we’re taking that one step further and making a bench from scratch. Jury is out on its weight-bearing ability, but it’s perfect for a five-foot gal like myself. Keep reading for the step-by-step.
Materials:
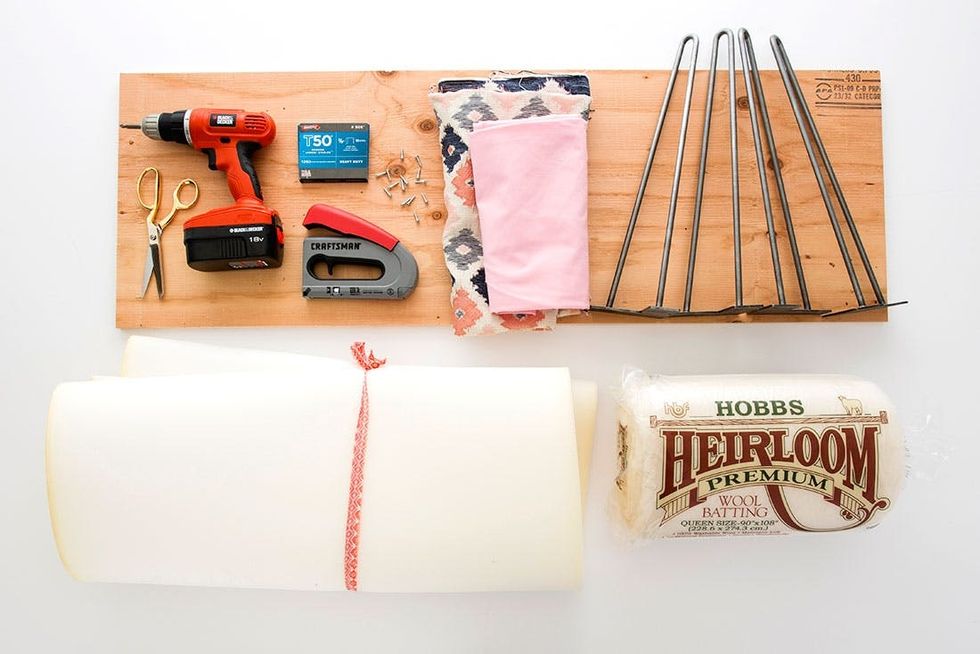
– 1-inch plywood (48 x 16 inches)
– upholstery fabric
– cotton fabric
– batting and foam
Tools:
– drill
– staple gun
– staples
– screws
– fabric scissors
Instructions:

Head to the hardware store and get a piece of 1-inch plywood. Ask someone there to cut it to 48 x 16 inches (or the size you want your bench). Once you’re back home and settled, cut out 2-3 layers of foam the same size as your wood. We used two layers for an extra cushy seat.
- Go to a hardware store that cuts wood and buy a piece of 1-inch plywood cut to 48 x 16 inches (or whatever size you prefer).
- Cut out 2-3 layers of foam the same measurement as your wood.
- Measure and cut enough batting to wrap around both the wood and foam. Use as many layers as you want for maximum cushioning. We used two.
- Place your wood on top of your upholstery fabric to determine the appropriate amount. The fabric needs to wrap around the bench and cushions.
- Cut a piece of cotton fabric that will cover the visible part of the wood (underneath the bench) once the upholstery fabric is stapled. It should be slightly smaller than the measurement of the wood.
- Place the batting on your work surface, then put the foam in the middle, and stack the wood on top. Wrap the batting around the wood, and staple in place starting at the middle and working your way around, leaving the corners until the end. Fold and staple the corners in place.
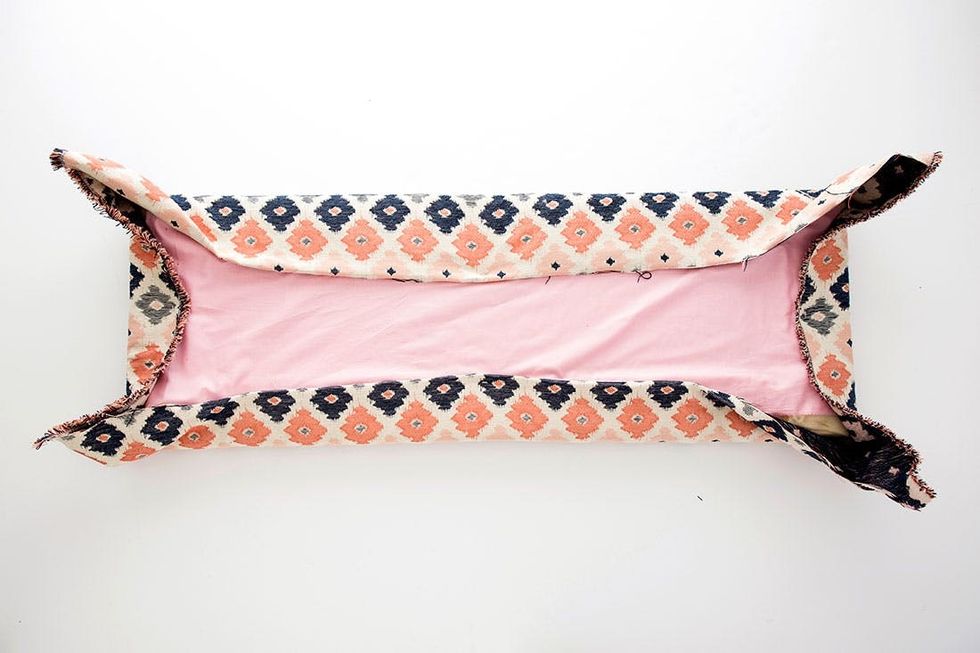
- Lay your upholstery fabric on your work surface with the back side facing you. Place the wood on top of the upholstery fabric, cushion side down. Place the cotton fabric on top. Wrap the fabric around the wood, and then staple it in place using the same method as the batting — start in the middle, and work your way out to the corners. Then smooth and fold the corners down, and staple them in place.
- Add your hairpin legs by drilling screws through the fabric and wood. Keep in mind the screws need to get through the fabric, so you might want to puncture it with an awl. Also, make sure your screws are long enough to get through the foam and fabric, and then securely make it into the wood.
- Flip it over and enjoy!

Measure and cut enough batting to wrap around both the wood and foam. Use as many layers as you want for maximum cushioning. We used two. Place your wood on top of your upholstery fabric to determine the appropriate amount. The fabric needs to wrap around the bench and cushions. Next, cut a piece of cotton fabric that will cover the visible part of the wood (underneath the bench) once the upholstery fabric is stapled. It should be slightly smaller than the measurement of the wood.
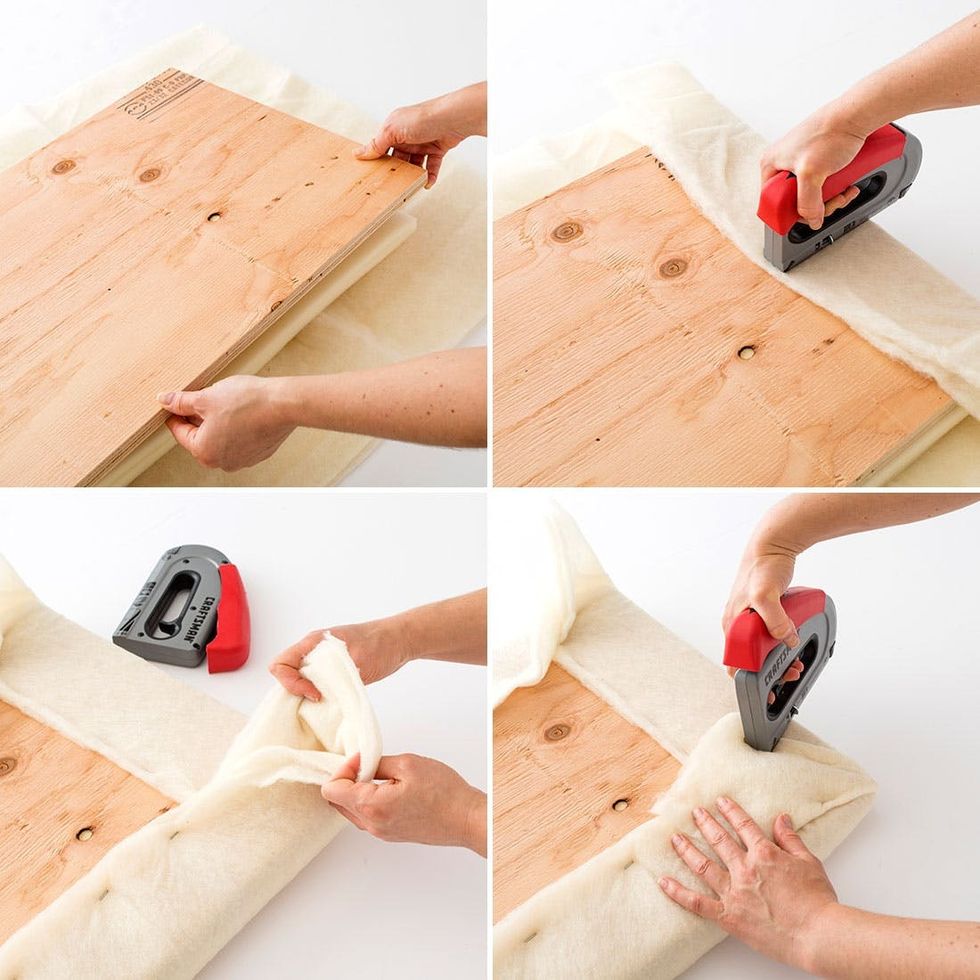
Place the batting on your work surface, then put the foam in the middle and stack the wood on top. Wrap the batting around the wood, and staple in place starting in the middle and working your way out. Leave the corners until the end. Fold and staple the corners in place.
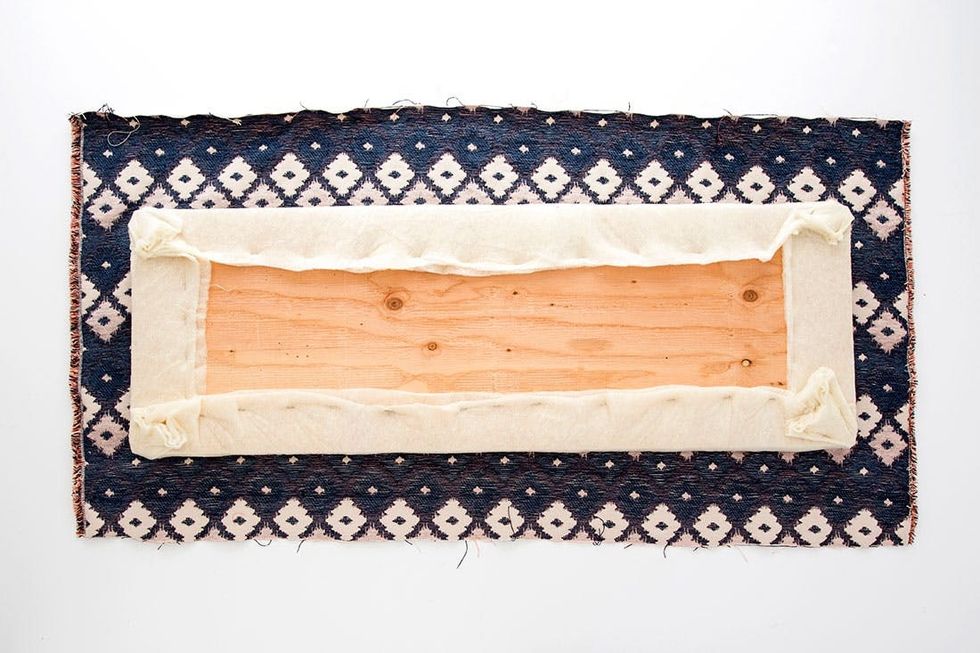
Lay your upholstery fabric on your work surface with the back side facing you. Place the wood on top of the upholstery fabric, cushion side down.
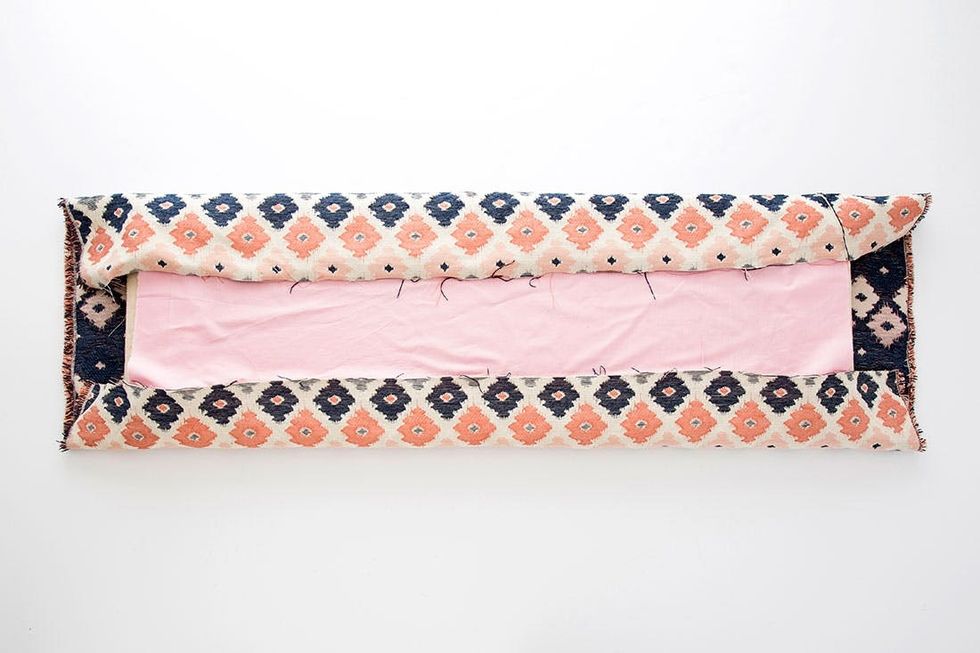
Wrap the fabric around the wood and add your piece of cotton.

Then staple it in place using the same method as the batting — start in the middle, and work your way out to the corners.
Then smooth and fold the corners down, and staple them in place.
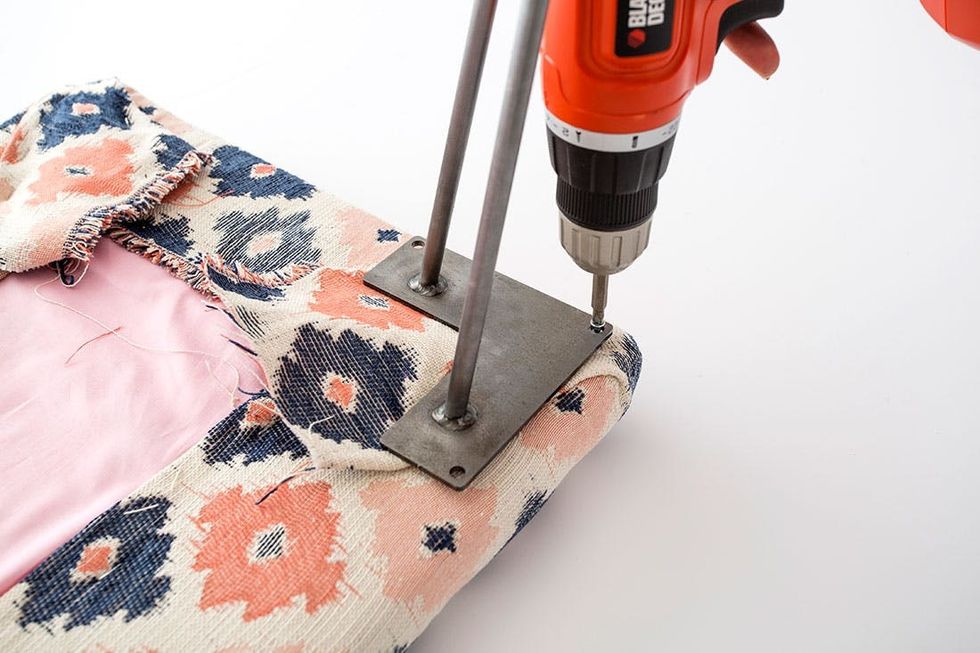
Add your hairpin legs by drilling screws through the fabric and wood. Keep in mind the screws need to get through the fabric, so you might want to puncture it with an awl. Also, make sure your screws are long enough to get through the foam and fabric, and then securely make it into the wood.
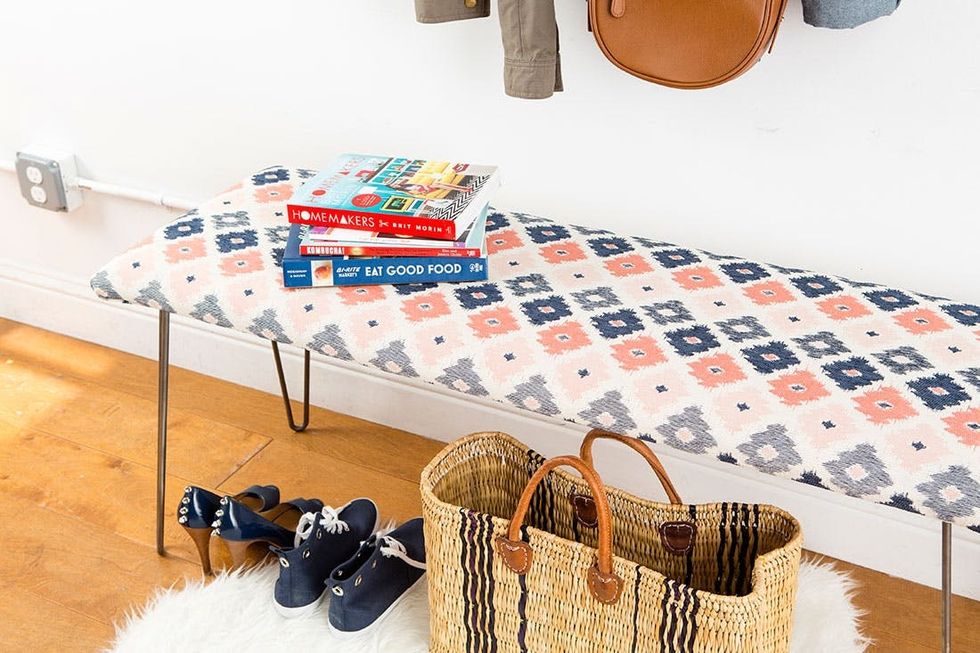
Flip it over and enjoy!
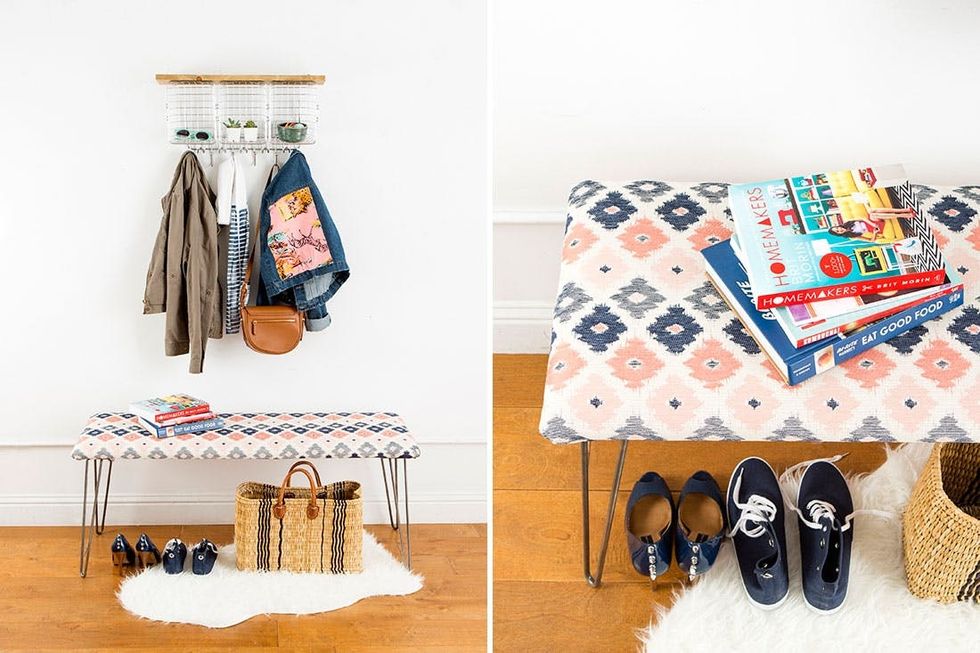
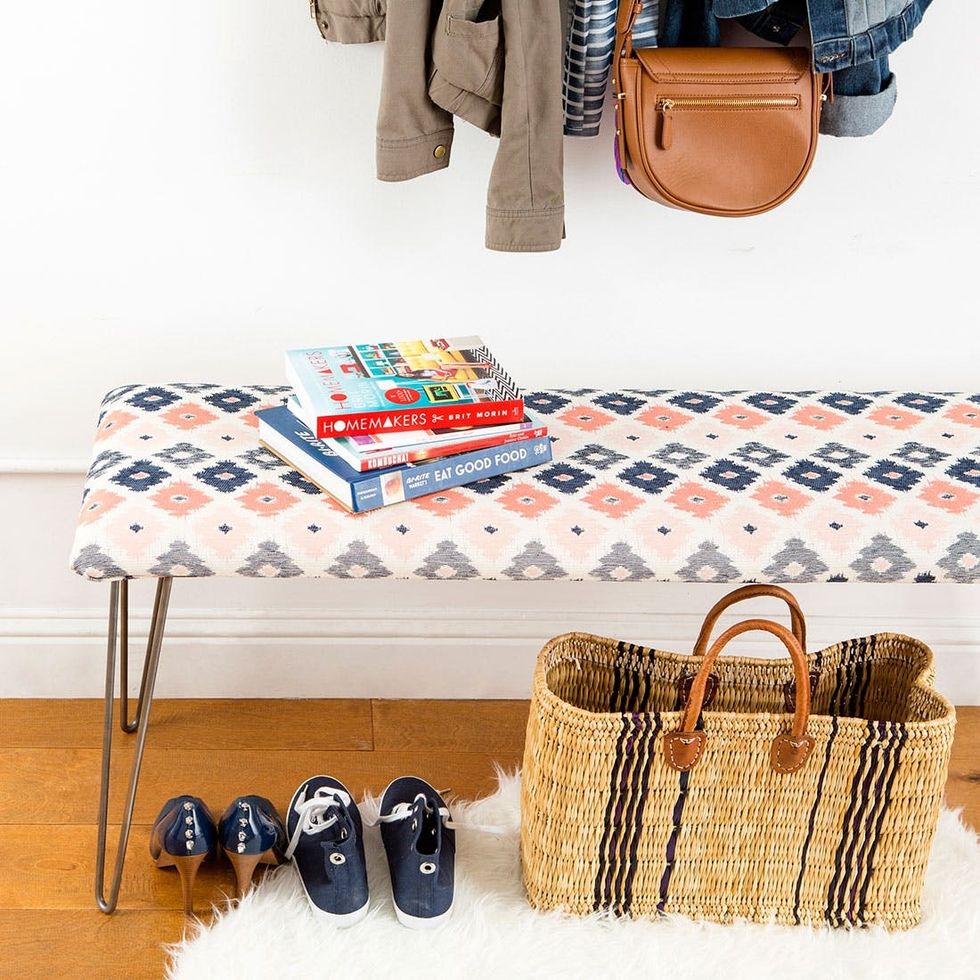
It’s the perfect bench for your entryway. Pop a squat and put on your heels!