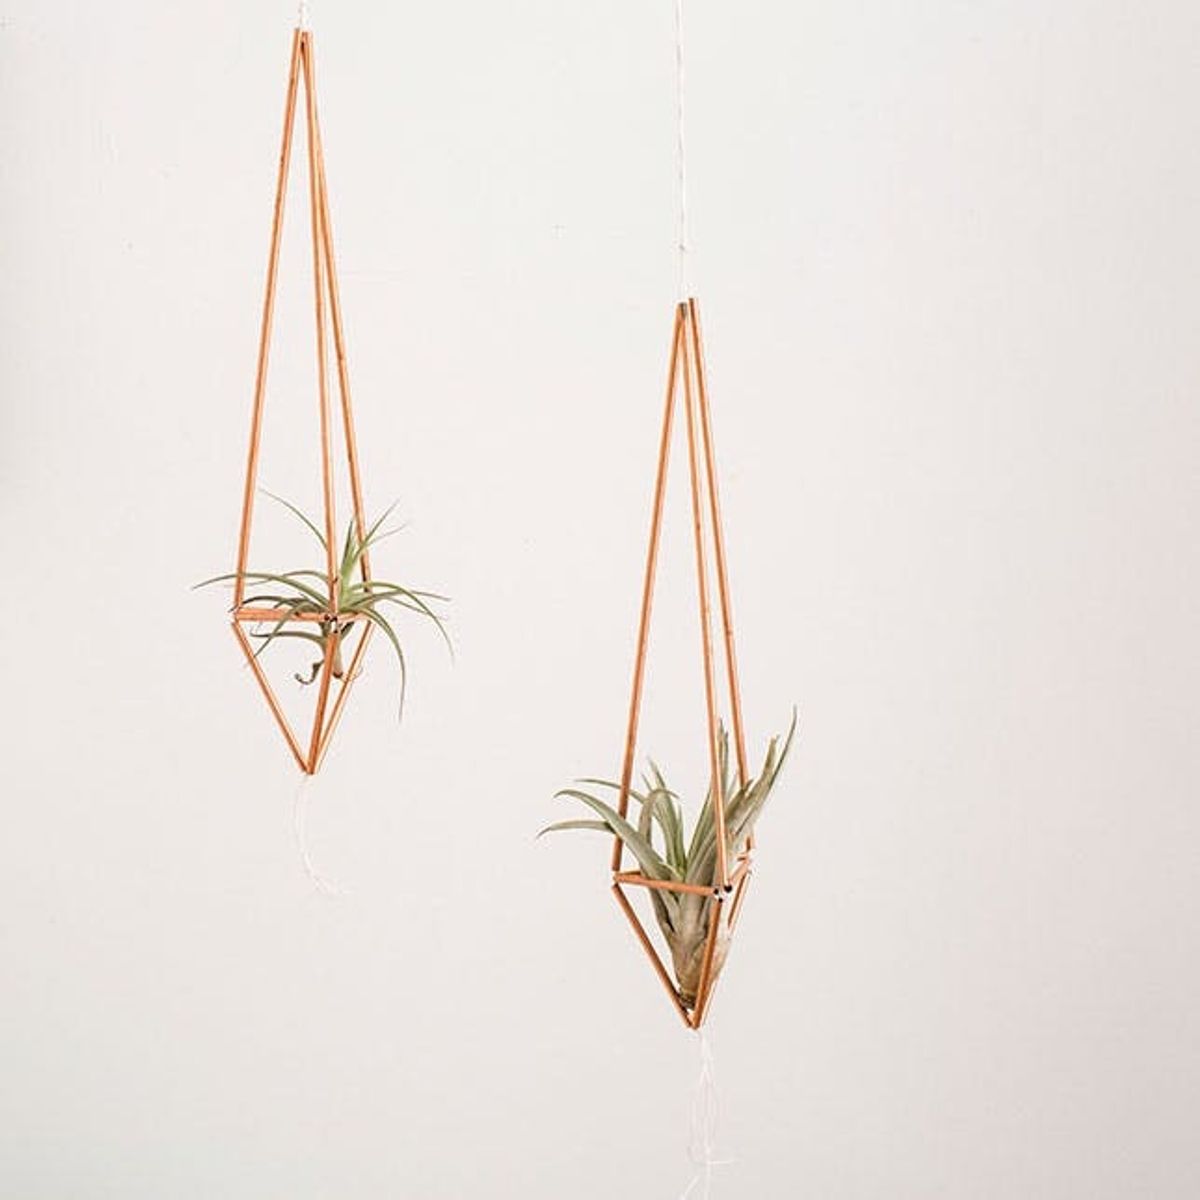
A quick trip to the hardware store and you’ll have what you need for these plant holders.
How to Make Gorg Copper Pipe Plant Hangers in 10 Minutes

‘Tis the season for gardening and reviving all of those plants that got a little crunchy over the winter months. Oops! Who ever said we had a green thumb? For those of us who are serial over-and under-watering plant moms, air plants are the way to go (except when we forget to water those too!) Spring is also a great season to revamp your house, so switch out some of your decor for these sleek copper hanging air plant holders. They only take ten minutes to construct! And don’t worry too much about the plants. Even if you don’t water them for a couple of weeks, they’ll be okay :)

Materials:

– copper pipes
– string
– jewelry wire
Tools:
– hack saw (with a fine blade)
– miter box
– ruler
– scissors
– wire cutters
– embroidery needle
Instructions:

We adore copper pipe. Every time we go to the hardware store we dream about all of the projects we’d like to make with it. Today we’re making our dreams come to life with these minimalist plant hangers.
First cut three pieces of pipe. Measure 12 inches and then place your pipe in the miter box. Slide your hacksaw into the crevices so your cut is straight. This tool will also help you avoid pinching the end of the pipe together.
- Measure and cut nine pieces of copper pipe — three 12-inch pieces, three 3-inch pieces and three 3 ½ – inch pieces.
- Cut three pieces of string, about two feet each.
- Thread your needle with one piece of string. File the string through three pipes — first the 12-inch pipe, then the 3-inch and finally the 3 ½ inch. Do this with all three pieces of string.
- Cut a small piece of wire. Thread it through the 3-inch pieces of pipe, connecting them in a triangle shape. Twist the ends together.
- Tie a knot with the bottom pieces of string and then another one with the top pieces of string.
- Tuck the excess wire into one of the pipes and trim any extra string.

Next, cut three pieces that are three inches. Finally, cut three pieces that are three and a half inches. You should have a total of nine pipes.

Now cut three two-foot pieces of string. Thread your needle with the string. Make sure you have a big needle that actually fits the thread. Put the needle in the longest pipe first. If you hold the string up and gently bang the pipe on a flat surface, the needle will make its way down to the other end. Pull it through and then string the three-inch piece. The three and a half inch pipe comes after that. Set this down and add pipes to the other two strings.

You could probably figure out a way to string these so that you don’t need wire, but we decided to make this easy on ourselves (and more importantly, YOU). Snip a piece of wire and feed it through one of the three-inch pipes. Then put it through the other two three-inch pieces. Be sure that there is one 12-inch piece on each corner to get that triangular shape. Twist the wire to secure it.

Tie a knot in the strings coming out of the three and a half-inch pipes and then tie another one in the top. Make sure you pull the strings nice and tight so that your shape is even. Tuck the twisted wire up into one of the pipes and cut the ends of the string to finish it off.

Add air plants to your planters and get them up in your house!

These would look great in a mid-century inspired room.

Soak your air plants in water for about two hours every two weeks or so.

Where do you keep your air plants? What kinds of holders have you made? Let us know in the comments!


