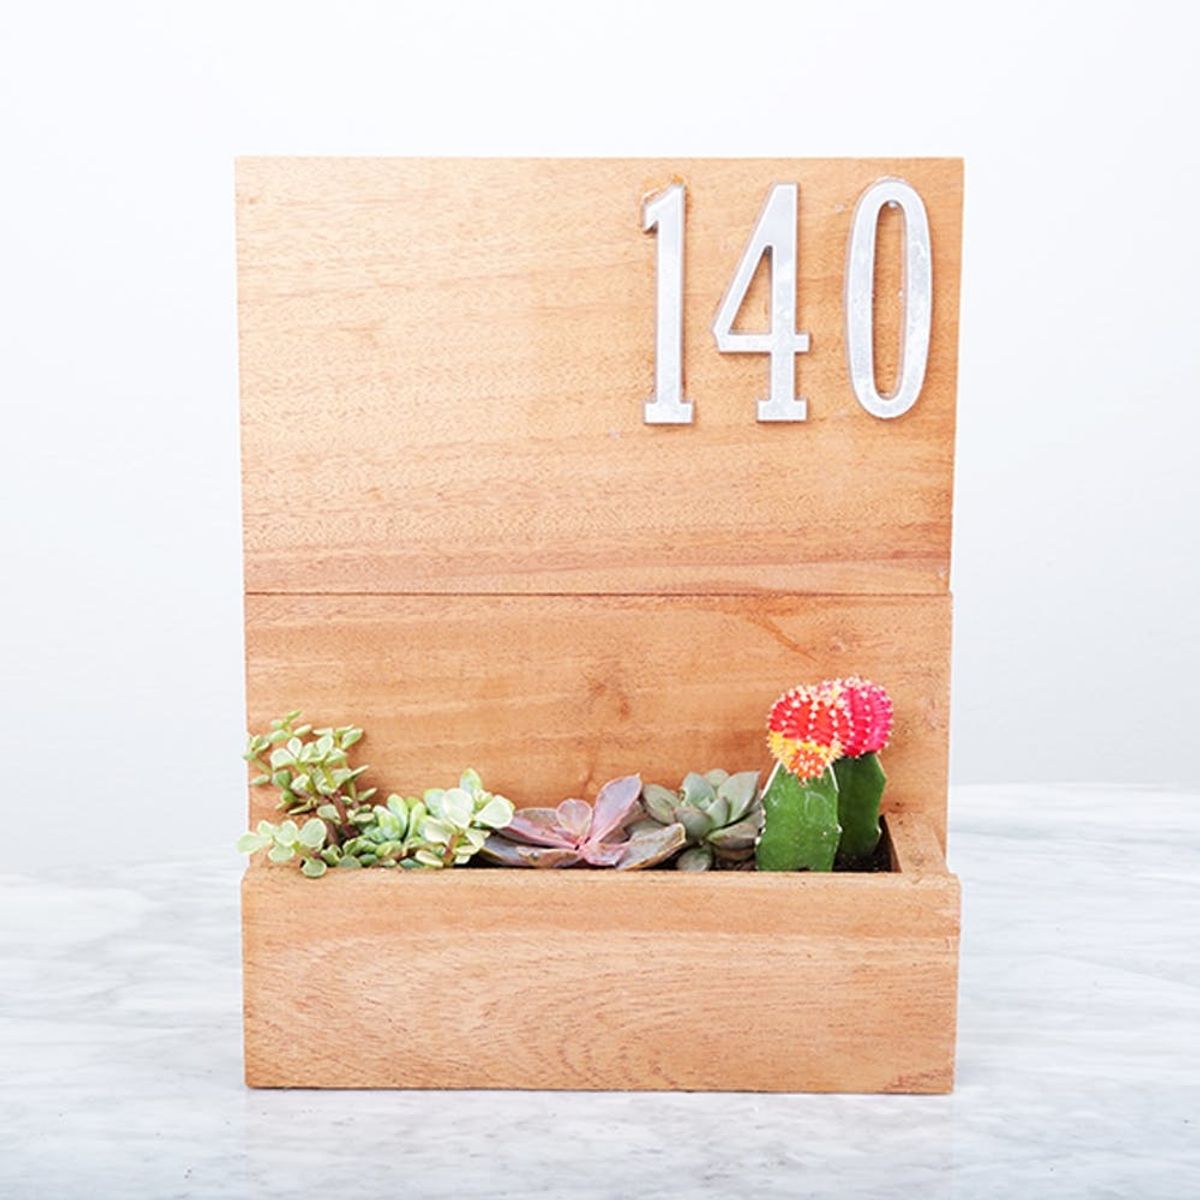
Coming home is about to get even more lovely.
How to Make a Pretty Planter for Your Front Door

If you haven’t paid enough attention to the first spot guests see when they arrive at your home, we recommend doing so starting now — like, today. Because here’s the thing: You can have a front porch that’s just like anyone else’s, or you can have one that’s so irresistibly charming, you’ll have friends coming back based solely on the delight of entering your home. Well, perhaps for a few other reasons, too, but we promise this’ll at least be one of them. Make coming to your house that much more lovely with a pretty front door planter box via this DIY created by the the team at nousDECOR.
Materials:
— two 12 x 7 ¼ inch pieces of wood
— one 1 x 11 ¼ inch piece of wood
— one 1 x 9 ¾ inch piece of wood
— two 1 x 3 ½ inch pieces of wood
— five 1-inch corner braces
— 10 screws
— house numbers
— wood glue
— succulents
Tools:
— drill
Instructions:
1. Begin by drilling three holes across the 11 ¼ inch piece of wood. This is so that the water can drain when you water your succulents.
2. Then, glue one of the 1 x 3 ½ inch pieces of wood to the side of the 11 ¼ inch piece of wood with the three holes in it. Place a corner brace into the right corner formed by the wood. Drill screws into both holes. Repeat on other side with other 1 x 3 ½ inch piece of wood.
3. Take your completed piece and glue it onto the 12 x 7 ¼ inch piece of wood.
4. Take the other three corner braces and drill screws so that your completed piece attaches to the 12 x 7 ¼ inch piece of wood.
5. Then glue your 1 x 9 ¾ inch piece of wood to the top of the open piece, forming the front of your planter box.
6. Take your other 12 x 7 ¼ inch piece of wood. Use a pencil to mark where you want to place your numbers, then glue them down.
7. Glue the 12 x 7 ¼ inch piece with the numbers to the 12 x 7 ¼ inch with the planter box.
8. Plant your succulents and mount beside your front door.
When drilling holes through your first piece of wood, use the side of a table to keep it steady.
You’ll finish with three holes across the top.
Use your hand to stabilize the pieces of wood you just glued together while drilling.
After you place your piece, adjust the wood so that the edges match the bottom precisely.
Depending on the type of wood you buy, you may need to drill small holes into the wood before going straight in with the screws. You’ll know this if you’re not making any progress with the screws right off the bat.
When you finish this portion, place something extremely heavy (like a large stack of books) on top of the planter to hold the wood glue in place as it dries.
We recommend putting your numbers in the top right corner of your piece, but you can switch it up if you like!
When you glue these pieces together, place two extremely heavy objects on either side to reinforce the glue as it dries. Leave overnight.
Ta-da! Now to get planting!
You may need a bit more soil to pack at the bottom of your planter.
Add in a few cacti with your succulents for a pretty pop color.
Will you be embarking on this DIY? Share your creations with us below or tag them on Instagram with #iamcreative.


