This easy sewing project is reversible!
How to Make a Shawl for the Best DIY Layer Ever

Truth: I’m a layering queen. I am the friend who is always cold. Winter is when all the expert layering skills come in handy because it’s bitter cold outside, but once you step inside, central heating makes your office feel like a tropical destination wedding. Now I’m not joking when I say this is a crazy easy shawl to make. It’s a basic square with four straight line stitches to create a comfy cozy layer for day or night. We picked up these two amazing fabrics at Britex in Union Square, but any fabric store will be able to help you find the perfect jersey knit to complete this project.

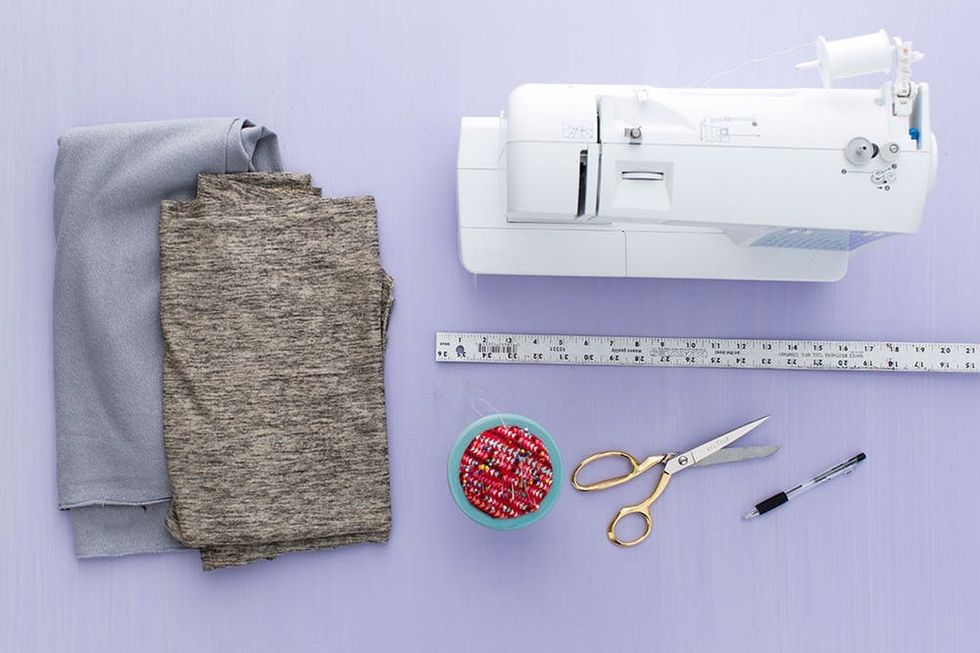
Materials + Tools:
– two types of knit jersey fabric
– sewing machine
– sewing pins
– ruler
– fabric scissors
– pen
Instructions:
1. Cut out two 50 x 50-inch squares from your fabrics — one square of each material. Pin good sides together and then sew, leaving a small opening to turn the fabric right side out.
2. Turn the garment right side out, pin the opening and sew together. Now you have one large square with different prints or colors on each side.
3. Lay the 50-inch square on the table and fold two edges in so they meet in the middle.
4. Overlap the edges that are now meeting in the middle by a half inch. Measure eight inches from each side of the garment along the middle line (where the fabric is overlapped). Pin this eight-inch section closed, then sew.
5. Pin the bottom right and left edges of the square and sew all the way up to the part you just sewed (see image below for reference) to form arm holes.
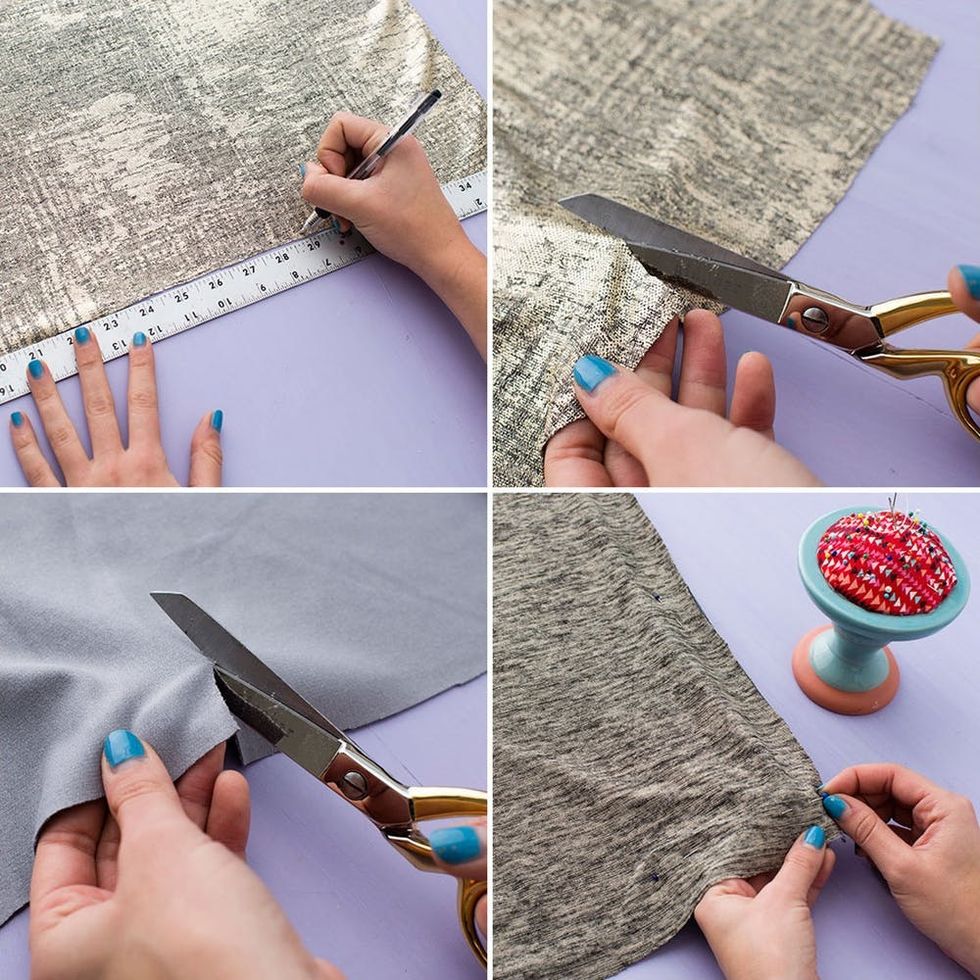
Cut out two 50 x 50-inch squares from your fabrics — one square in each material. This dimension will create a shawl that is one size fits all. If you are nervous about the sizing, try testing a scrap piece of fabric to see what size square would best fit your body.
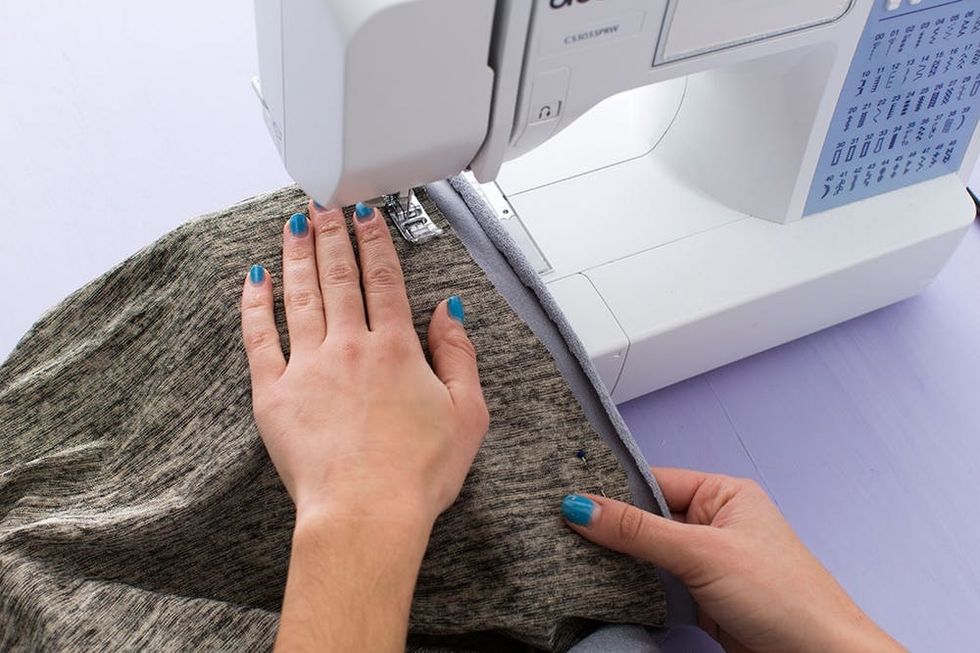
Pin good sides facing in and sew around almost all four sides of the garment. Make sure you leave a gap to turn your shawl right side out.
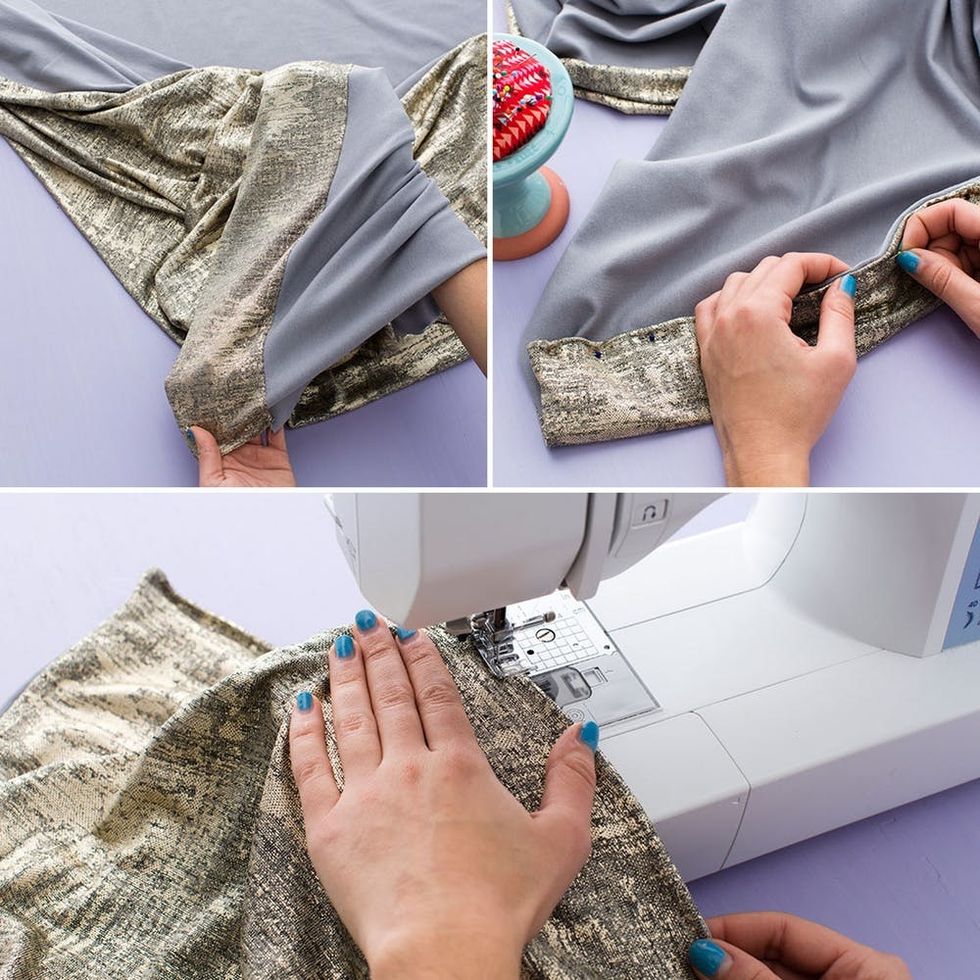
Turn the garment right side out, pin the gap closed and sew.

Lay the 50-inch square fabric on the table and fold two opposite edges toward each other so they meet in the middle. Now you have a rectangle.
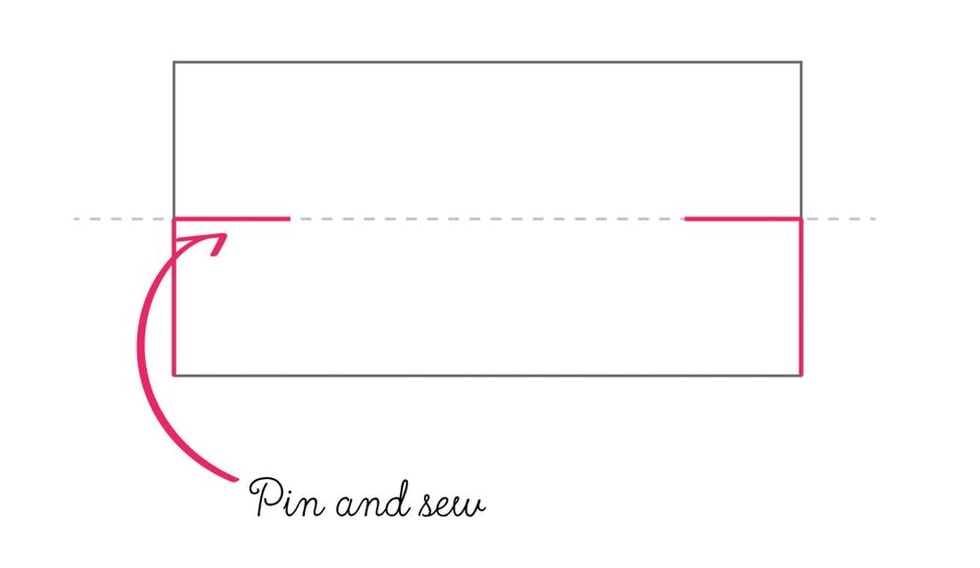
Next, pin and sew along the pink lines. But first, read some important details below.
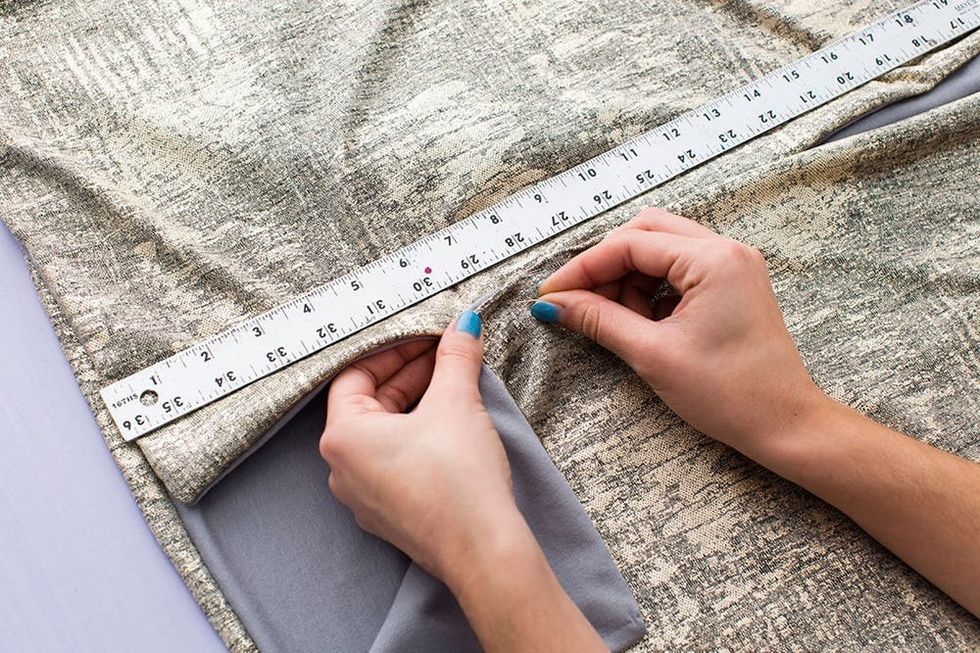
To pin and sew along the pink lines in the middle of the fabric (see drawing), overlap the folds of your fabric (the pieces that met in the middle) by a half inch. Measure out eight inches from each edge of the fabric and pin the flaps together. Once pinned in place, sew the eight-inch sections on both sides of the shawl. Note: Don’t sew through the back side of the original square. You are just sewing the two edges together.
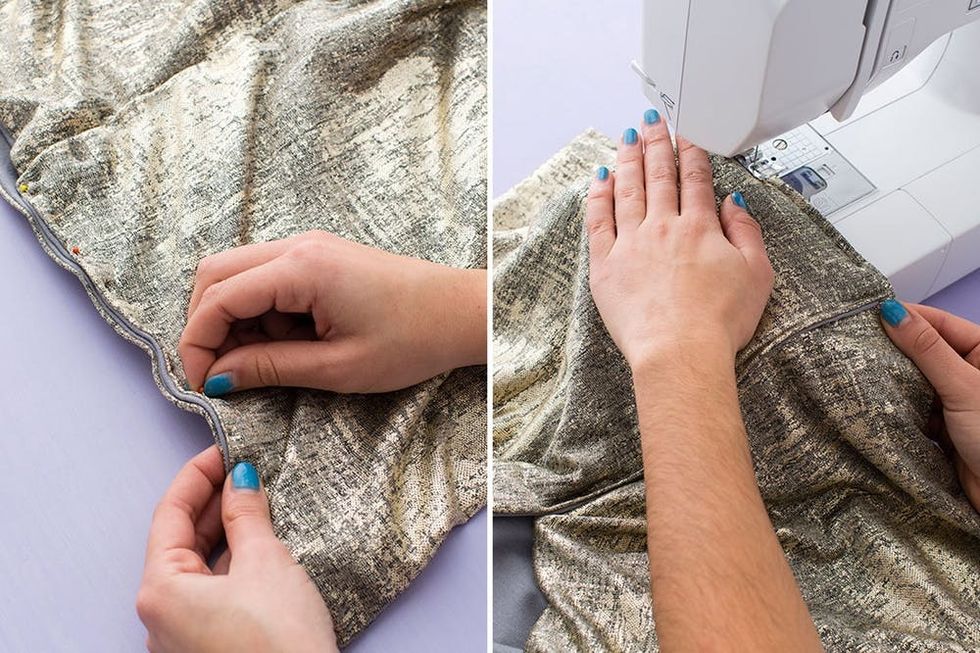
To pin and sew along the side edges, pin the bottom right and left outer edges of the rectangle and sew from the bottom until you reach the middle (where it comes to a right angle with the part you previously sewed). This should be about 12 1/2 inches. By sewing these seams you will create arm holes in your shawl.
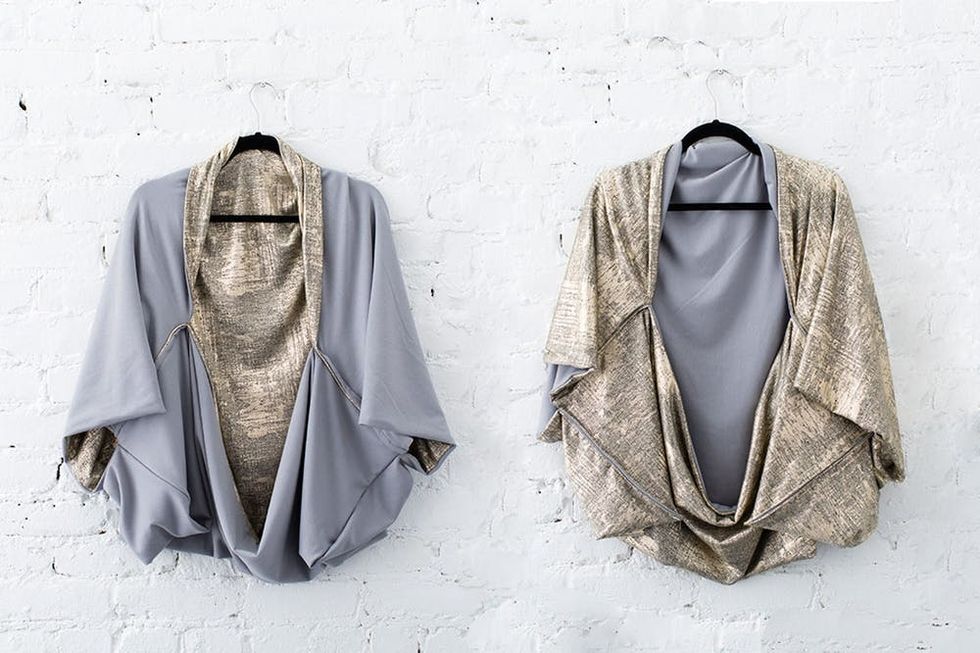
Reversible shawl FTW!

Rock the gray side during the day for a cozy chic #OOTD. Warm up some hot cocoa and get in some quality girl chit-chat time.

Turn it inside out and be ready for a glam night of dancing. Popping champagne out on the dance floor.

Show us your project by tagging us on Instagram + using hashtag #iamcreative!


