We've got some *prime* tips for you!
How To Paint IKEA Furniture For All Your Dreamy DIYs

IKEA remains a prominent home decor source around the world given its affordability, uniqueness, and customization. If you’ve scrolled for any period of time on your social media app of choice, you’ve undoubtedly seen an “IKEA Hack'' or two. One of the coolest things about IKEA’s often unpronounceable products is the ability to make it your own with a few simple changes, like switching the color, adding a unique texture, or swapping out hardware. But if you’ve ever poured blood, sweat, and tears into a cute little DIY, only for it to scratch immediately, I promise you’ve made a very common mistake. Among those tailored options are a few important rules to remember that could make or break your DIY project.
Different Types Of IKEA Materials
Before I share my tips, let’s identify a few key materials that IKEA sells because the treatment of each will vary. ☝️

Image via Mackenzie Edwards
Wood
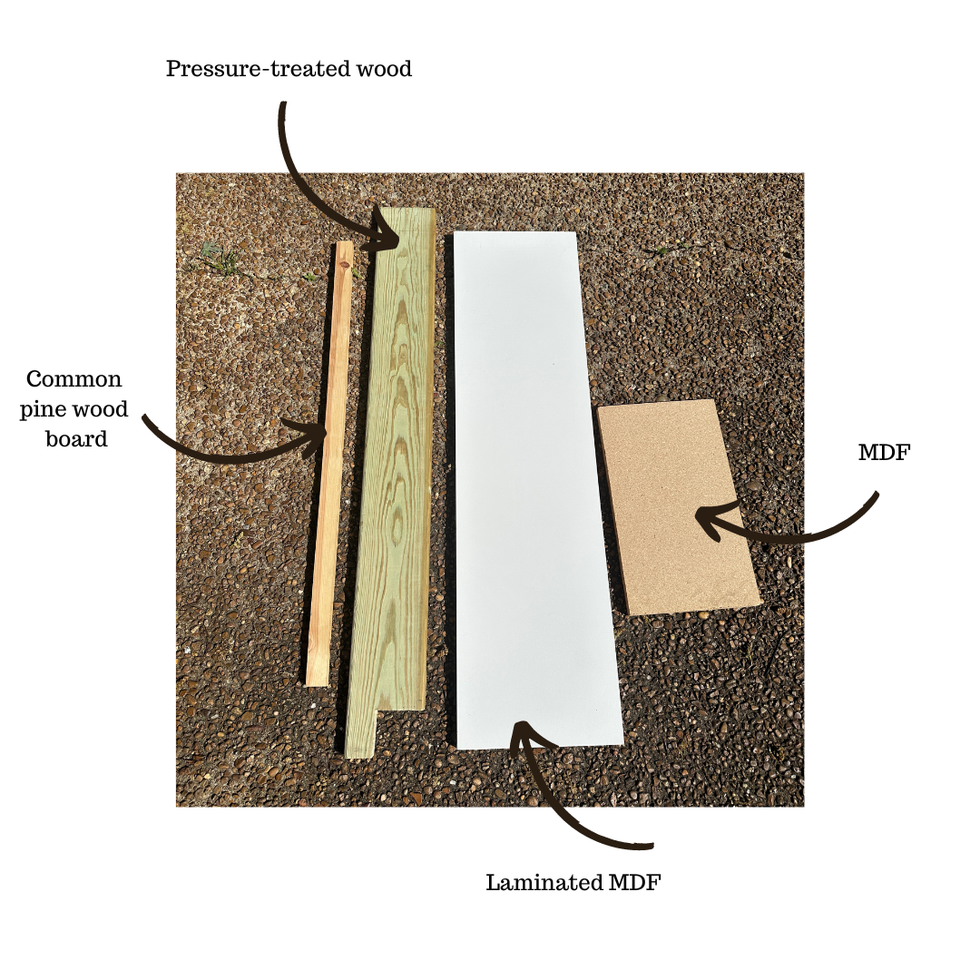
While IKEA lists wood as the first source on their “choosing materials” page, I've yet to own a real wood piece from IKEA. They do sell “untreated,” or “raw” pine products like this IVAR Cabinet which can be used as is or easily painted or stained to your desired color. Ordinary primer, paint, stain, and sealant are all you need to transform these pieces with ease.

Image via Mackenzie Edwards
Composite
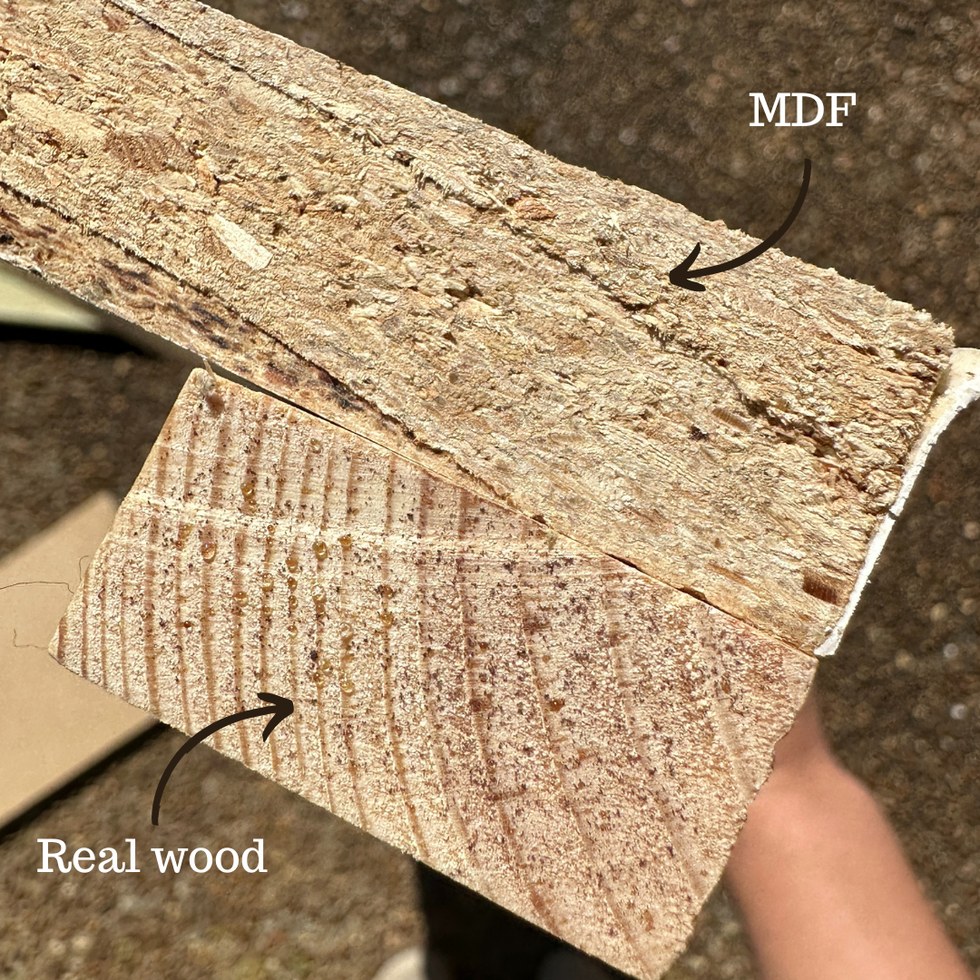
However, more likely than not, if you’ve purchased any IKEA piece in the past, it’s been made of a composite material — which is just a combination of two or more materials. The Swedish superstore says they use composite because “it’s strong, low maintenance, low price, and light.” All of which are true, however, composite cannot be treated as wood or any of its components.
@homebodyhq Replying to @allybee05 those $45 bookcases? Those are made of MDF! It’s sturdy and affordable however is not water proof, can’t be sanded the same way as wood, and can split under stress. Many MDF pieces are laminated giving them that smooth, shiny surface that paint just doesn’t like to stick to without primer #mdf #basicwoodwork #diybasics #mdfboard
IKEA’s famous BILLY line — with an estimated purchase of once every 5 seconds — is made of a myriad of materials including particle board, fibreboard, and melamine. This gives it that classic shiny, smooth surface that’s synonymous with affordable furniture.

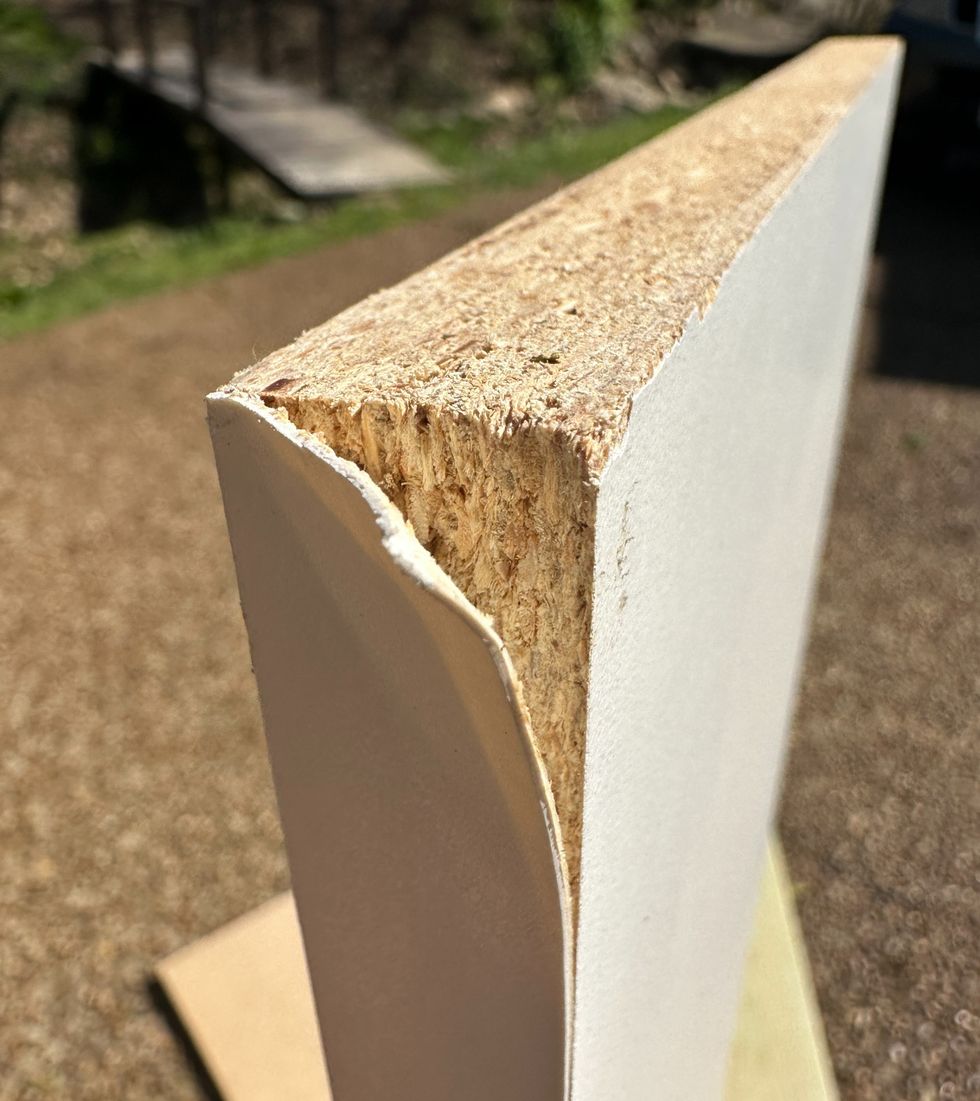
Unlike wood, composite can’t be painted, stained, or even sanded. The laminated surfaces of these kinds of pieces require special attention if you want to make it your own.
IKEA sells these pieces as “finished,” meaning they’re non-absorbing — a trait you typically want in brand-new furniture. However, this means that any paint added to its surface will simply sit on top of the composite finish, rather than soaking in. You may also notice that they’re more likely to chip, scratch, and show more overall wear than traditional wooden furniture or other single material furniture. This, of course, will likely lead you down a paint rabbit hole to revive them.
How To Prepare Your IKEA Furniture For Paint
While it’s not impossible to paint, whether to save an older piece or customize a new one, it does require a few extra steps before cracking open a paint can.
Here’s what you’ll need:
- Drop cloth
- Fan or respirator mask
- Painter’s tape
- Paint brush and paint roller
- Deglosser or liquid sandpaper OR a high-grit sanding block (around #150-180)
- Primer
- Paint
Prep Your Workspace
You will be using several products with high fumes and the potential for spills, so I recommend placing your IKEA piece on a drop cloth, in a highly ventilated area or outside. Otherwise, I suggest using a fan or respirator to protect yourself.
Reminder: The higher the grit number, the smoother the finish. You typically want to start with a lower number and work your way up. The lower grit numbers are coarser, removing dirt, grime, paint, and any shiny materials, while a higher grit number is for finishing and leaving a smooth surface.
Say Goodbye To Shine
Since these materials are designed to repel water and other materials, they will repel paint too. To knock back some of the shine and prepare the surface for paint, use liquid sandpaper, a deglosser, or simply sand the surface until you get the piece to a flat or matte finish.

Image via Mackenzie Edwards
Keep in mind that this is composite and not actual wood, so you don’t want to sand too hard and expose the “center” below the thin layer of laminate or melamine. The goal is simply to remove the “waterproof” layer without damaging the structural integrity of the piece.
Clean The Surface
Next up, you want to remove all that dust or residue that comes from step 2. To do this well, I recommend using a lint-free, microfiber cloth and a cleaning solution like vinegar and hot water or mineral oils.
My secret weapon for any painting project is tack cloth. It’s a sticky, mesh cloth that you can get for a few dollars at any hardware store, and it grabs any lingering sawdust, hair, or dust in general, ensuring that your surface is clean.
Prime With Shellac
@homebodyhq That inexpensive, MDF furniture that’s super slick? Paint will slide right off that. Shellac primer will help it stick so this is a NON-NEGOTIABLE when updating your IKEA furniture #ikeabookshelves #billybookcasefromikea #paintingmdf #diypaintingtips
There are plenty of paints that claim to be both a primer and paint in one, and while this works beautifully for ordinary wood or drywall interiors — I highly advise against it when it comes to IKEA composite materials. It may save you some time upfront, but in my experience, any paint without the correct primer scratches off far too easily.
Best practice is to use a shellac-based primer. You'll see three main types of primer at the store: oil-based, latex, and shellac primer. Shellac is by far the most expensive and smelliest of the three, but it works wonders in preparing previously un-paintable surfaces. I recommend using Zinsser B-I-N Shellac Primer.
Next, you'll want to roll the primer with a high-density foam roller. These rollers are designed for smooth surfaces and won’t leave paint roll lines the way a roller with a nap would. You should only need one coat, unless your piece has significant damage or you’re covering a darker color.
Be Patient
Another common mistake when prepping IKEA furniture for paint is rushing through this process. While you may only need one coat of shellac primer, you still need to give it proper time to dry and adhere, which often means waiting until the next day to actually roll on the paint. Each primer will have its own specific instructions on dry-time, but a good rule of thumb is to wait 6 hours for it to dry before applying paint.
Finally Time To Paint
If you’ve prepped the piece properly, you’re free to use latex, acrylic, or even chalk paint. I prefer an ordinary interior latex paint — the same stuff I use on our walls — because it’s affordable and I usually have it on hand already. That’s the beauty of shellac-based primer: you can then customize it to your heart's content with any color or kind of paint.
Get Inspired To Customize Your IKEA Furniture!
A quick search for IKEA hacks online will yield millions of results. In addition to paint, here are a few of my favorite ways to take your IKEA piece from basic to brilliant.
@luvinou IKEA HACK: Add hardware to furniture #homedecor #tiktokartists #diy #howto #learnontiktok #fyp #foryoupage #decor #beforeandafter
New Hardware
Hardware is so inexpensive and can really elevate a standard piece of furniture. Even if you’re just looking to refresh an older piece, you can often get an entire set of new door knobs or handles for under $40. Many of IKEA pieces come without hardware and it’s a simple DIY anyone can do with just a drill and measuring tape.
@kk_duffeyhome LET’S JUST PRETEND THE CROWN MOULDING IS INSTALLED OKAY? 🤪 #fyp #diy #builtins #ikeahack #homedesign #homedecor #cozyathome #wallpaper #taylorsversion #ts
Wallpaper
I’ve seen so many creative uses of wallpaper and contact paper when it comes to IKEA hacks. Whether you utilize a textured wallpaper for dimension or add a surprisingly pop of color inside your drawers, you have plenty of options to choose from!
@makingitwithabby IKEA HEMNES Nightstand Hack #ikeahack #ikeaflip #furnitureflip #furnituremakeover #furnitureflipper #beforeandafter #ClearGenius
Pole Wrap/Wood Texture
Pole wrap has made a big splash in the DIY scene, but it can be pricey. Adding any sort of molding, trim pieces, or wood texture to your IKEA piece will make it look custom and high-end without breaking the bank. Whether you add something simple like this or cover the entire face of your cabinets or drawers, new texture will breathe new life into any piece.
@valeriajacobs Here goes another Ikea Havsta hack, this is PT. 1 Next is paint and new hardware! Feeling inspire by this audio 💛 #ikeahack #diyproject
Built-In Look Or Adding Height
Custom cabinets or bookcases can run you into the tens of thousands, but IKEA pieces like the BILLY bookcase, can be customized to look “built-in.” You can add arches, unique trim, or other decorative elements to create a similar look for much less.
@homebodyhq Penny has us wrapped around her paw. See our progress here 👉🏼@Mack & Chance | DIYs & Home #catdoor #diybookshelves #cathangout #diydogdoor
Functionality Hacks
One of my favorite DIY projects was an IKEA hack I did for a friend. She wanted built-in bookcases with arches with plenty of space. While we were busy working in her home, her four cats made it known how much they also loved the bookcase. So naturally...we built a cat door into the bookcases and added a magnetic front for kitty safety and easy cleaning.

Image via Mackenzie Edwards
As you decorate your home, don’t write off IKEA as the college-kid starter pack it used to be. There are so many ways to elevate these simple pieces and achieve designer looks for less. Think of these budget-friendly finds as starting blocks for your creativity to run wild. From color to function, you can make these pieces your own with a little DIY elbow grease.
The sky is truly the limit when it comes to transforming these seemingly boring pieces. Tag us in your IKEA DIYs on Instagram!
Looking for more DIY inspo? Sign up for our newsletter and get all the latest home news here!
Header image via Mackenzie Edwards


