All the tips you need to know.
Plant Propagation Techniques Even Beginners Can Follow

The Sill's mission is to empower all people to be plant people. So we're kicking off a new series committed to growing your green thumb. Follow along in the months of April and May for all the gardening tips, hacks, and inspo you need. Happy planting!
Propagating plants might sound like a daunting task, but depending on what type you're working with, it can be quite simple. Two of our favorite plants to propagate here at The Sill are the Pothos (Epipremnum aureum) and the heartleaf Philodendron (Philodendron).
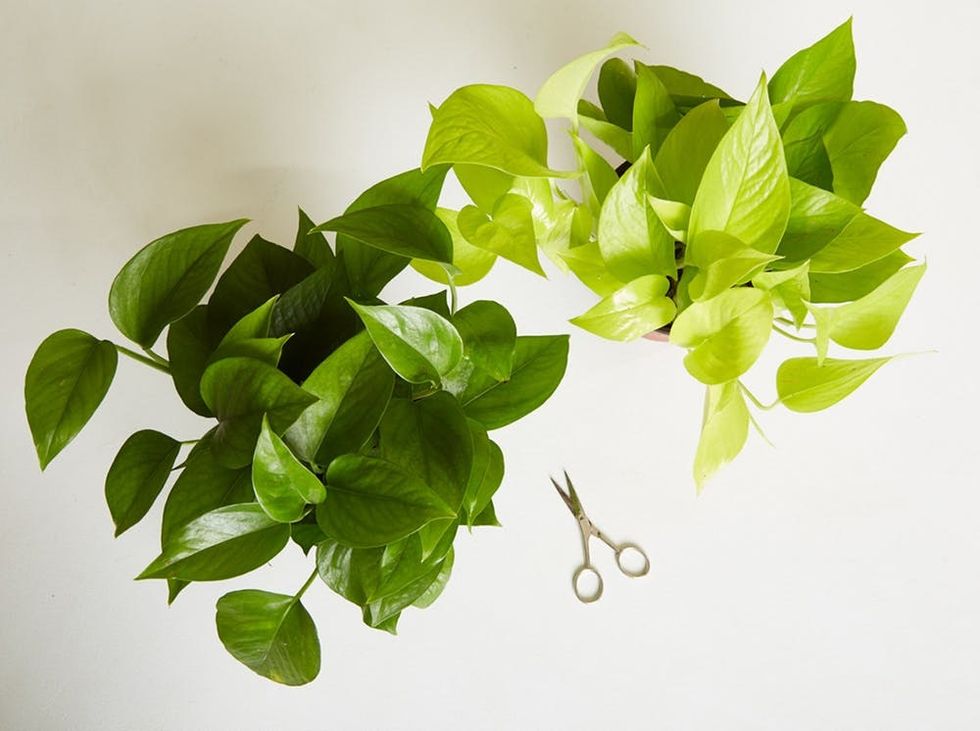
The pothos (two varieties pictured above) and the heartleaf philodendron are often confused for one another. Both are trailing plants with green leaves and are relatively easy to care for, making them incredibly popular houseplants and office plants. (Both are also listed as two of the best plants to clean indoor air, according to a NASA study.)
But when you take a look up close, you'll start to notice some differences. The leaves of the philodendron tend to be more heart-shaped —hence it's common name — while those of the pothos are more of a teardrop shape. The vines of the philodendron are slender and more flexible, and the leaves are thinner. The vines of the pothos are thicker, and their leaves more waxy. The philodendron tends to start trailing straight from the soil, while the pothos tends to grow upward, then trail out.
Follow our simple instructions on how to propagate it below or check out our new downloadable houseplants guide!
How to propagate plants
Step 1: Gather the plant, scissors, and a glass vessel filled with water.
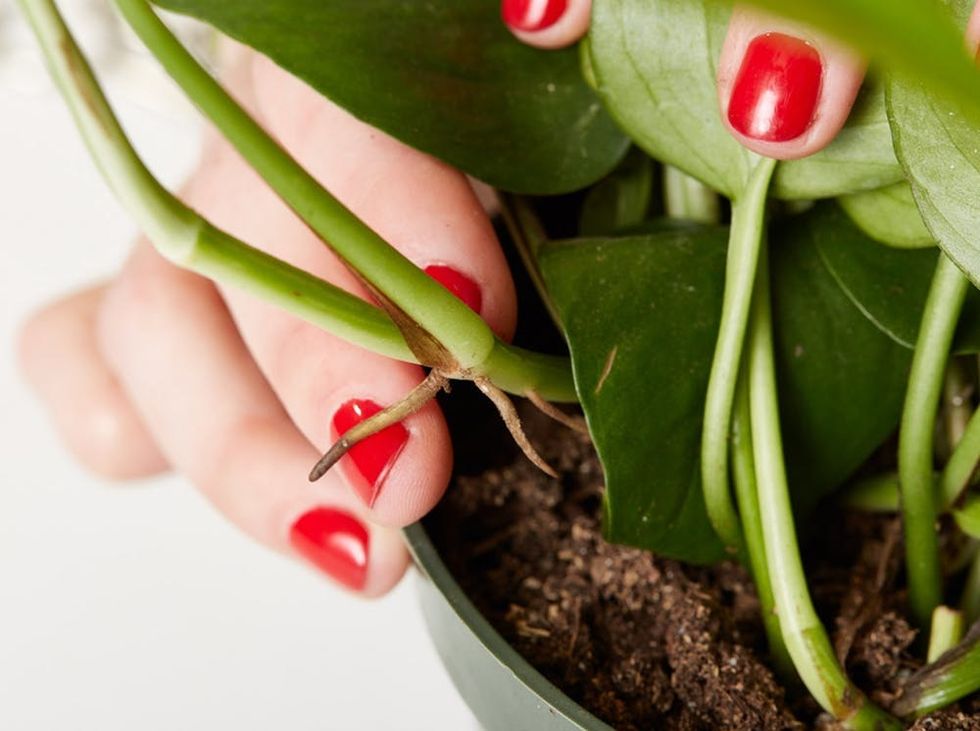
Learn how to propagate philodendron
Step 2: On a mature vine, look right below the leaf or stem/vine juncture for a tiny brown root node. These tiny bumps are the key to propagating pothos and philodendrons. You'll want to snip off a couple inches of healthy stem right before a node, and include a node or two with the cutting.
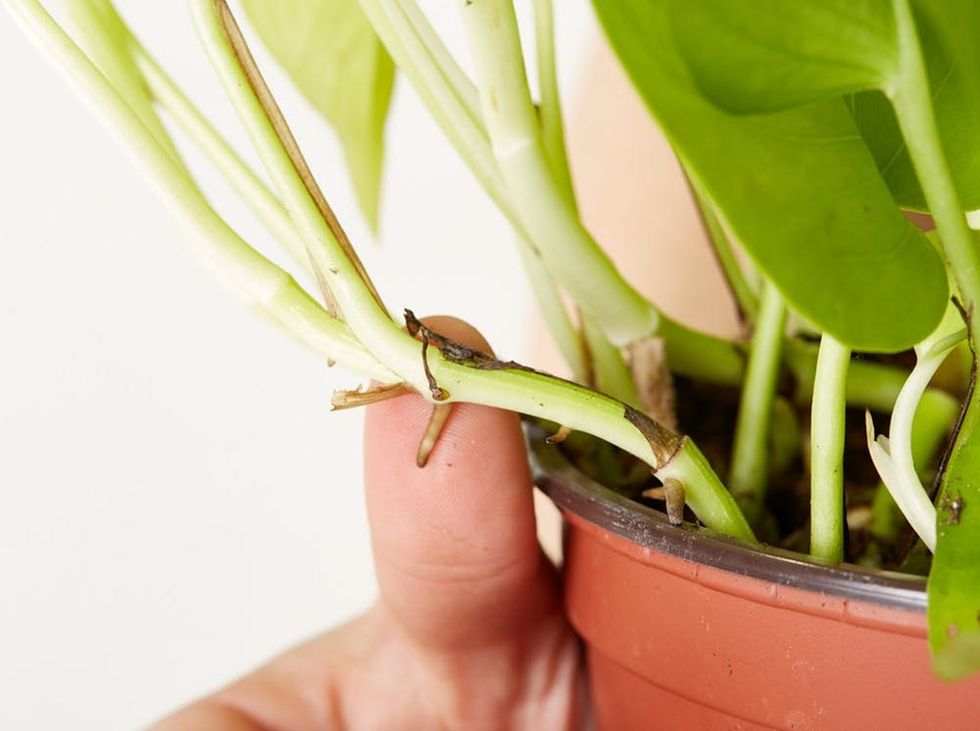
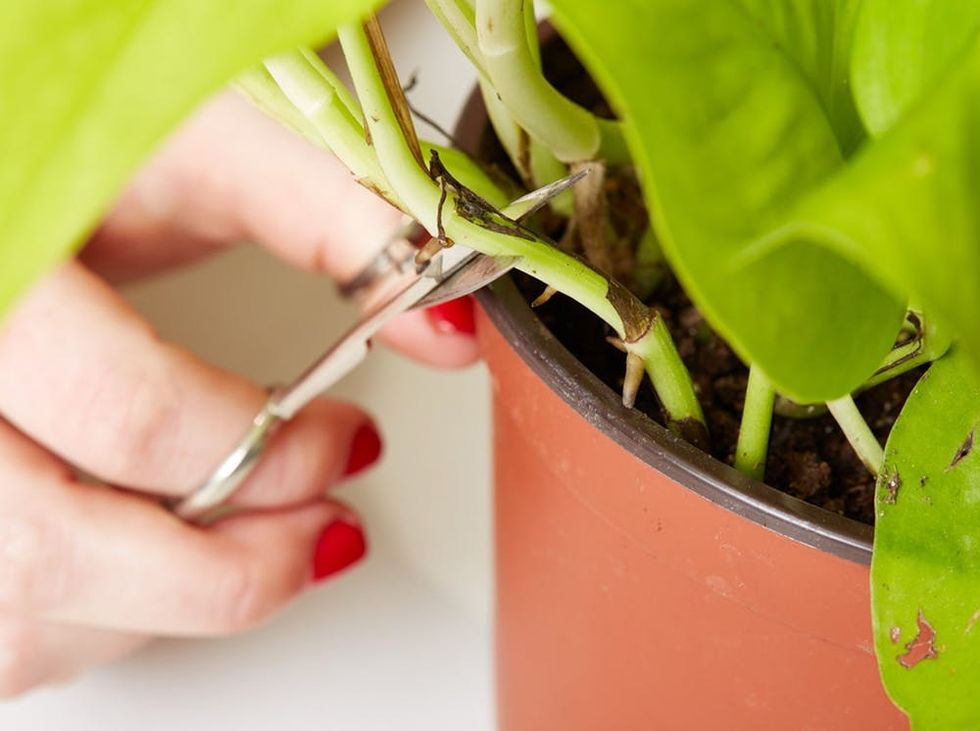
This is how propagating plants in water works
Step 3: Remove any leaves too close to the node, especially the ones that might end up under water when you stick your cutting into your glass vessel.


Step 4: Place your glass vessel and plant cutting in a spot that receives bright to moderate indirect light. Do not place in strong, direct light or super-low light.
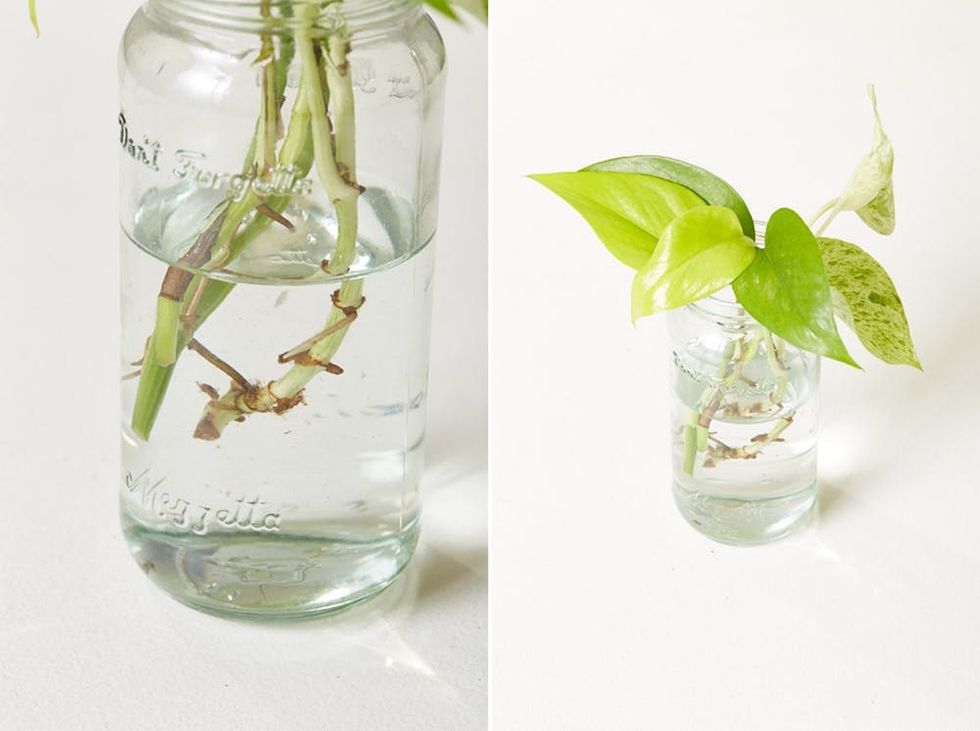
Step 5: Be patient! Check root growth from the node on a weekly basis. Add fresh water when needed. You can replace the water every week, or simply top off the vessel with fresh water when it's looking low. If the water is murky, we do recommend replacing it, both for aesthetics and the health of the root system.
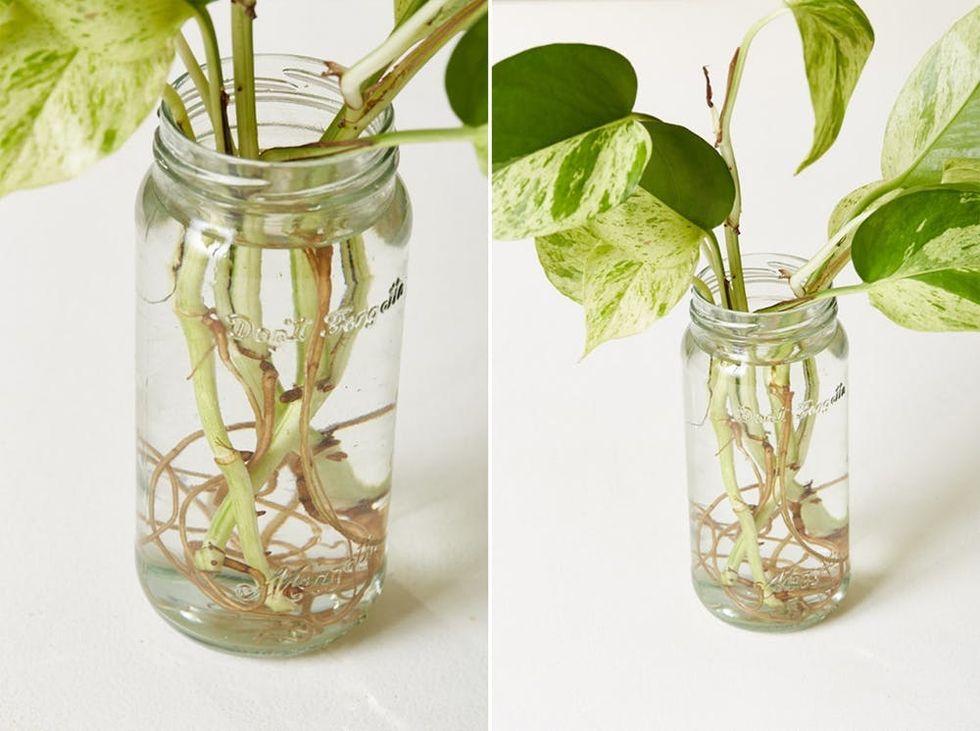
If you'd like to transplant your cutting from its glass vessel into a planter with potting mix, we recommend waiting until the root is an inch or longer; this should take 4-6 weeks. Once the roots of the cutting are potted in fresh potting mix, saturate that mix and place in bright indirect light, then let dry and treat like a regular houseplant.
If you want to keep it growing in water indefinitely, that's also possible! Be careful though, as the longer your cutting sits in water, the harder of a time it will have adapting to potting mix and the higher the risk for fungal infections.
What plant propagation tips do you have to share? Let us know @BritandCo or download our new spring houseplant guide!
Brit + Co may at times use affiliate links to promote products sold by others, but always offers genuine editorial recommendations.
(Photos via The Sill)


