We like quick and easy baking hacks here at Brit HQ. But, sometimes we find a project that is so awesome that we don’t mind putting in a little bit of extra elbow grease. This, dear friends, is one of those projects. In honor of the awesomeness that is food in roll form, we’ve taken […]
Learn How to Make and Decorate a Cake Roll

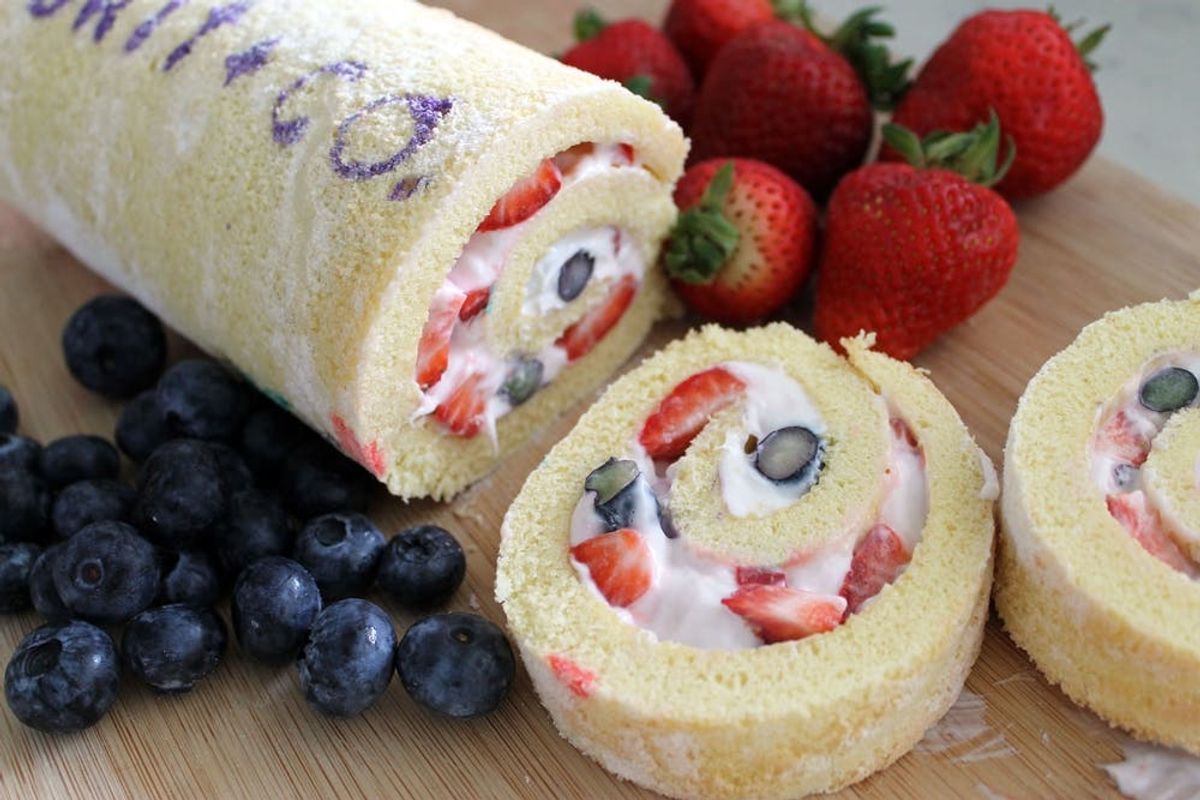
We like quick and easy baking hacks here at Brit HQ. But, sometimes we find a project that is so awesome that we don’t mind putting in a little bit of extra elbow grease. This, dear friends, is one of those projects. In honor of the awesomeness that is food in roll form, we’ve taken on the cake roll! The decorated cake roll is fun, super yummy, impressive to break out in front of guests, and yes, a wee bit more labor intensive than our usual recipes.
Don’t be daunted by the process. With several failed attempts at executing this under our belts we’re here to let you learn from our mishaps so that you can get it right the first time.
Ingredients:
– 4 eggs
– 3/4 cup sugar
– 1 cup flour + 1/2 cup for rolling
– 1 teaspoon baking powder
– 1 tablespoon water
– 1 can frosting
– 10 blueberries
– 5-10 strawberries
– food coloring
– vegetable oil or nonstick spray
Preheat the oven to 375 degrees.
Beat the eggs. Add the sugar and then beat for a couple more minutes or until combined.
Add 1 cup of flour and the baking powder to your egg mixture, stirring with a large spoon. Once you’ve mixed all these ingredients together, add a tablespoon of water and incorporate it into your batter slowly.
Now, for your “paint.” Separate out about a tablespoon of batter (more or less depending on the intricacy of your design) for each color you intend to use for your pattern. Stir a couple drops of food coloring into the batter and then transfer each into a Ziploc.
Cut a tiny corner off of the Ziploc bag and let your creative juices flow!
If you’re using text like us, you’ll probably want to trace your pattern. Pro tip: You’ll have to print it backwards so that when it prints on the cake, it will read the right way.
Cut a piece of parchment paper the size of your cookie sheet. Then, print out your design and tape it onto a cutting board. Tape the parchment paper over your design so you can trace it.
We recommend big, fun patterns over intricate details. As you’ll see, it’s hard to maintain good penmanship with cake batter ;)
Stick the cutting board with your cake batter design in the freezer for 20 minutes, until the batter is set. While it’s in the freezer, go ahead and grease your cooking sheet – vegetable oil or non-stick spray both work fine.
Remove the tape from your parchment paper and transfer the parchment paper to your cookie sheet. Rub down on the paper between your designs. The cooking oil will help it stay flat.
Pour the rest of your non-colored batter on top of your design. Put the cake in the oven for 10 minutes or until springy to the touch. While you’re waiting, coat a tea towel in a layer of flour and cut a piece of parchment paper a little larger than your cake.
Remove the cake from the oven and immediately flip onto the parchment paper. Remove the paper upon which you painted your design. You should see your design printed onto the bottom (now top) of your cake. Yay!
Now, flip your parchment paper onto the prepared tea towel. Starting at one end, roll slowly and carefully into the towel. Set aside and let cool in this position. This should take about 45 minutes, but we left ours overnight to be sure.
While the cake is cooling, prepare the filling. We used canned frosting and berries, but you should feel free to experiment with different frostings, jams, and other fillings.
When the cake is cool, unroll the towel slowly and carefully. It should maintain a little bit of the rolled shape — don’t try to make it lay flat, or it might crack!
Spread your filling in a flat layer across the entirety of the cake.
Starting with the same end you did when you rolled it in the towel, roll your cake up again, this time sans towel. Cut off a thin sliver on each end for a more uniform presentation.
Now, take a deep breath and dig into your awesome cake roll!
We love the idea of experimenting with different designs for birthdays, holidays, anniversaries, and Tuesdays. Oh, and if you mess up, don’t worry: All those experiments taste just as good. Trust us. ;)
Have you ever tried a cake roll? (And do you have any tricks to make it a little easier?) Do you have any fun and unique ways to decorate your desserts? Talk to us in the comments below or come find us on Twitter.


