Get luxurious with this leather jewelry DIY.
Make This DIY Leather Jewelry With Our New Kit
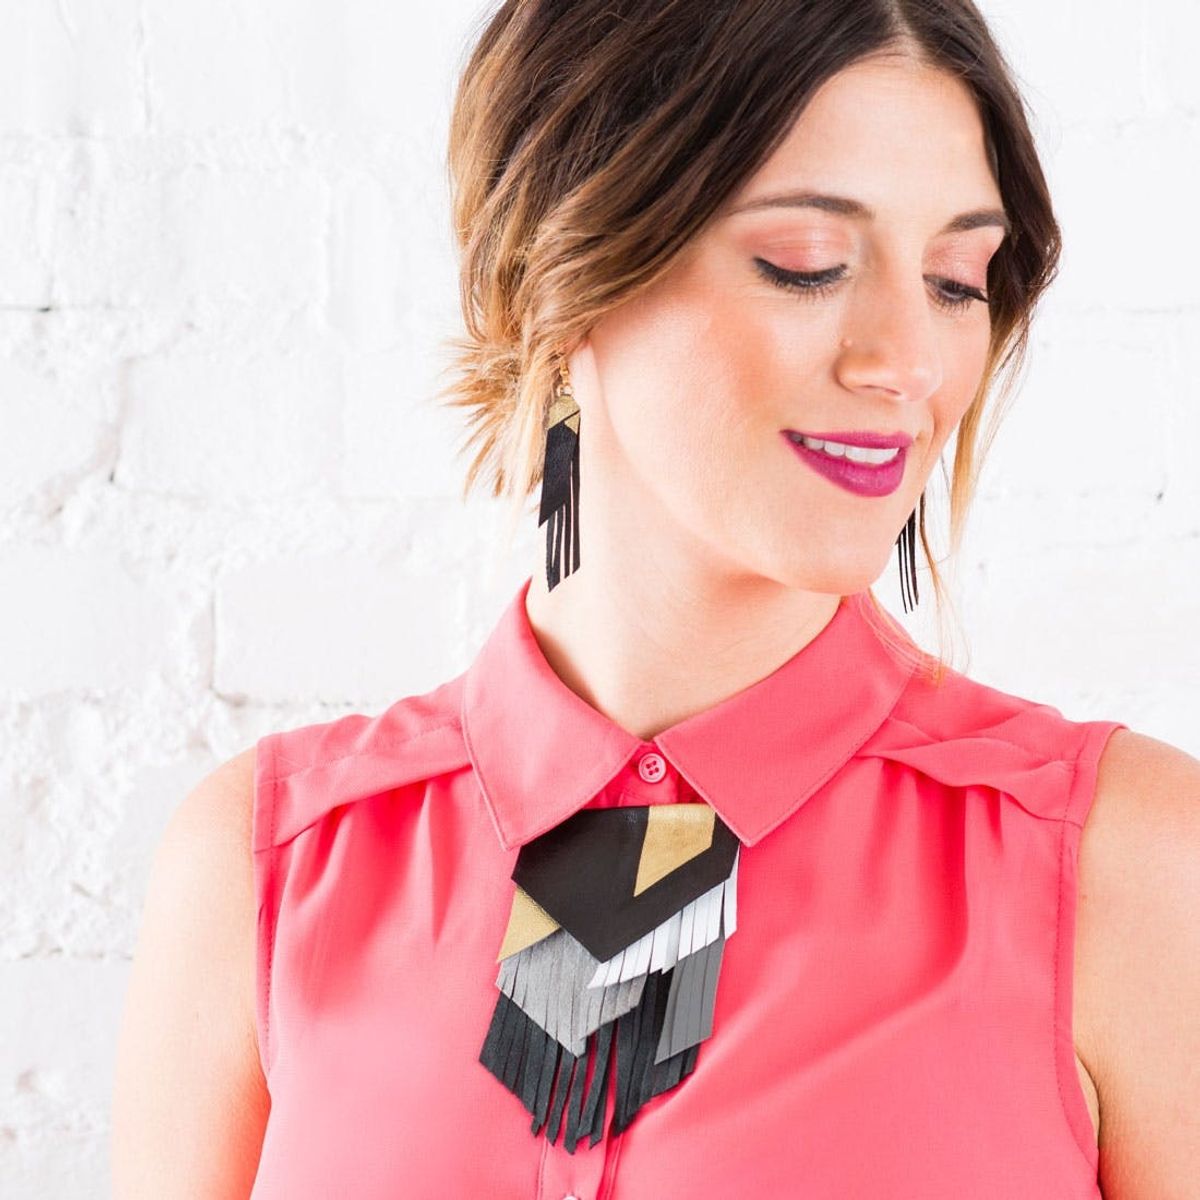
These days we aren’t settling for any old jewelry DIY, so we decided to get luxurious with our leather designs. The possibilities are endless with a few squares of leather and a pair of scissors, but we’ll show you how to make four of our favorite pieces to get you started! Pick up our Leather Fringe Jewelry Kit in the B+C Shop to make it even easier.
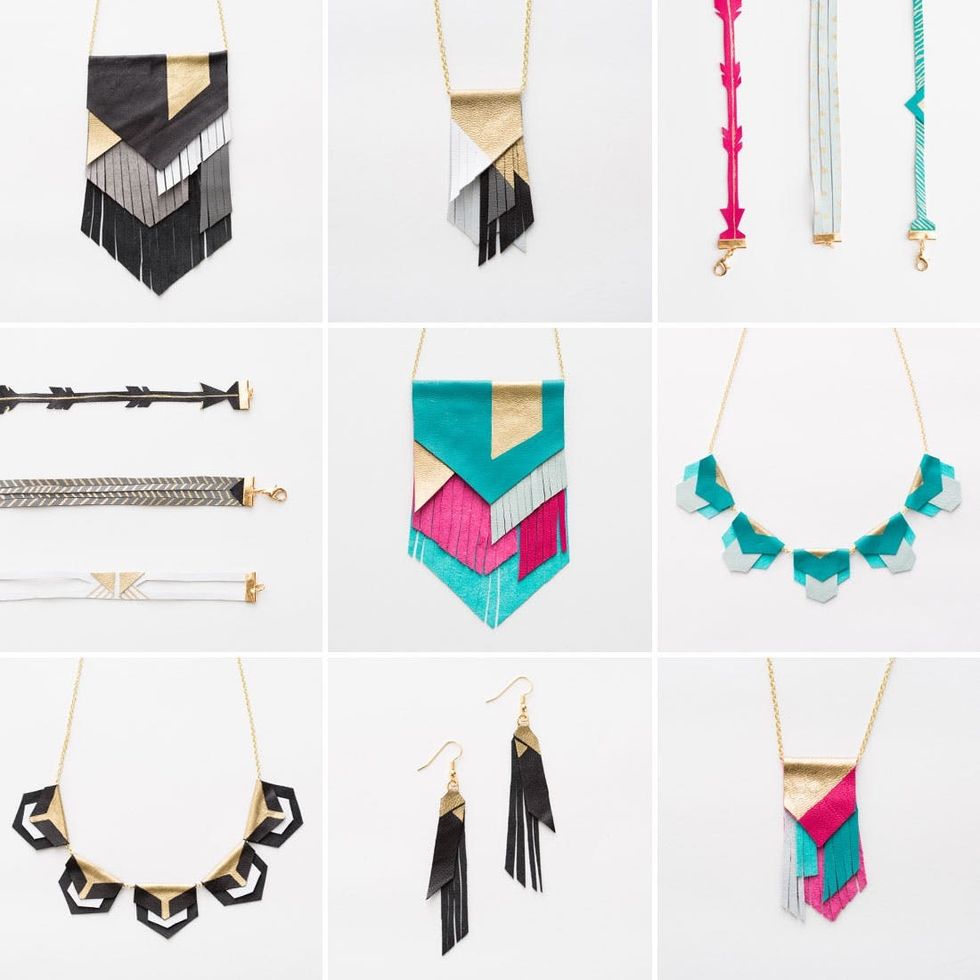
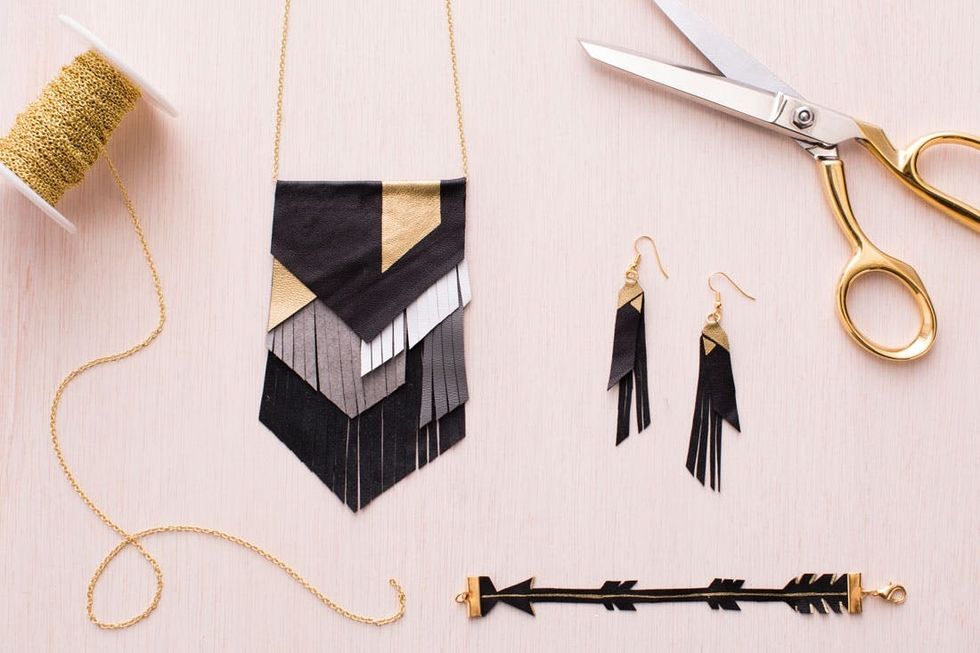
For $35, we give you all the materials you need to create one necklace, one bracelet and one pair of earrings in either a timeless black/white/gray or punchy teal/magenta/mint color combo. Mix and match colors and textures and add a touch of gold with the provided paint pen.
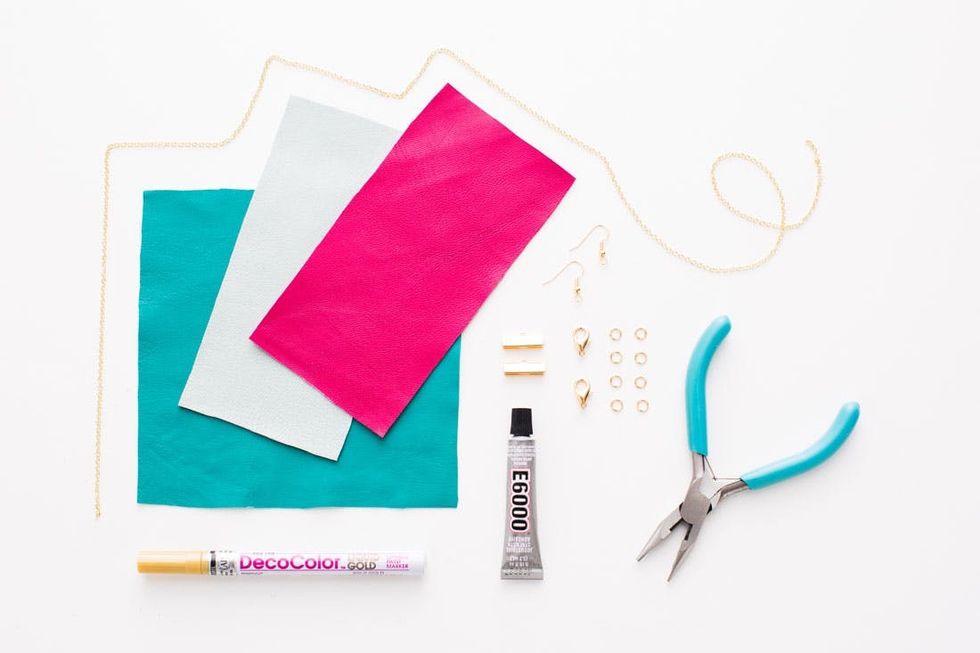
Materials:
– Genuine leather
– Earring hooks
– Jump rings
– Ribbon ends
– Lobster clasp
– Gold paint pen
– E6000 glue
– 2-in-1 Plier/cutter
Additional Tools (not included in kit):
– Scissors
– Scrap of paper
Instructions:
1. Cut multiple shapes out of leather using scissors.
2. Fold your main leather shape over your length of chain and crease.
3. Add smaller shapes in between or on top of your folded shape with glue.
4. Glue down the top flap of your main shape to the internal shapes and let dry.
5. Paint on gold accents using your paint pen and let dry.
6. Cut your leather shapes into thin strips to create a fringe.
7. Add on jump rings and clasps to your chain to finish.
8. Repeat for a total set of one necklace, one bracelet and one pair of earrings.
What are we waiting for? Let’s get our fringe on.
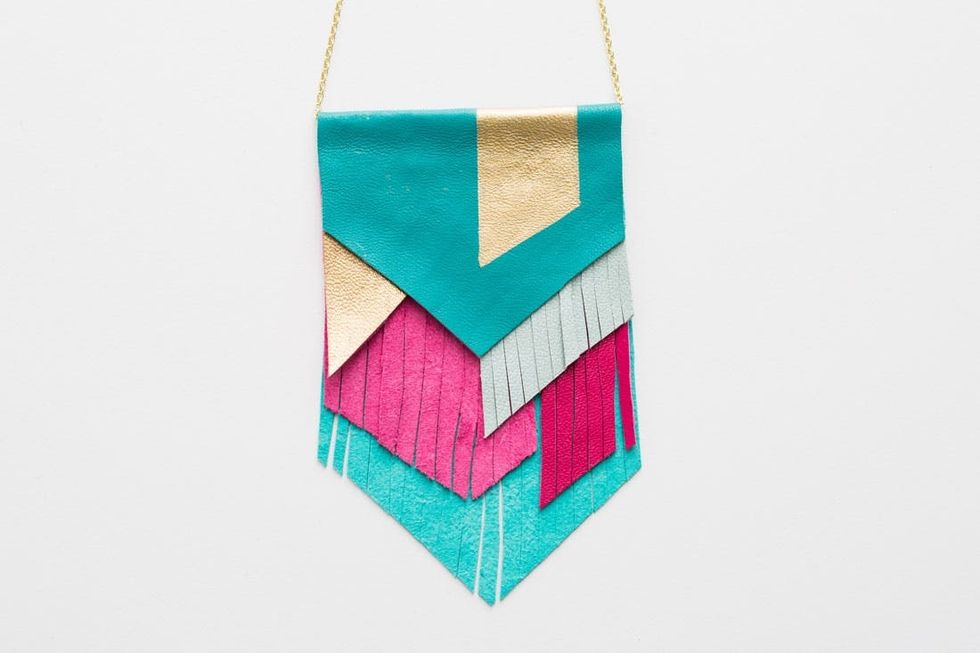
Let’s start this DIY off right by creating one serious statement piece.
STATEMENT FRINGE COLLAR NECKLACE
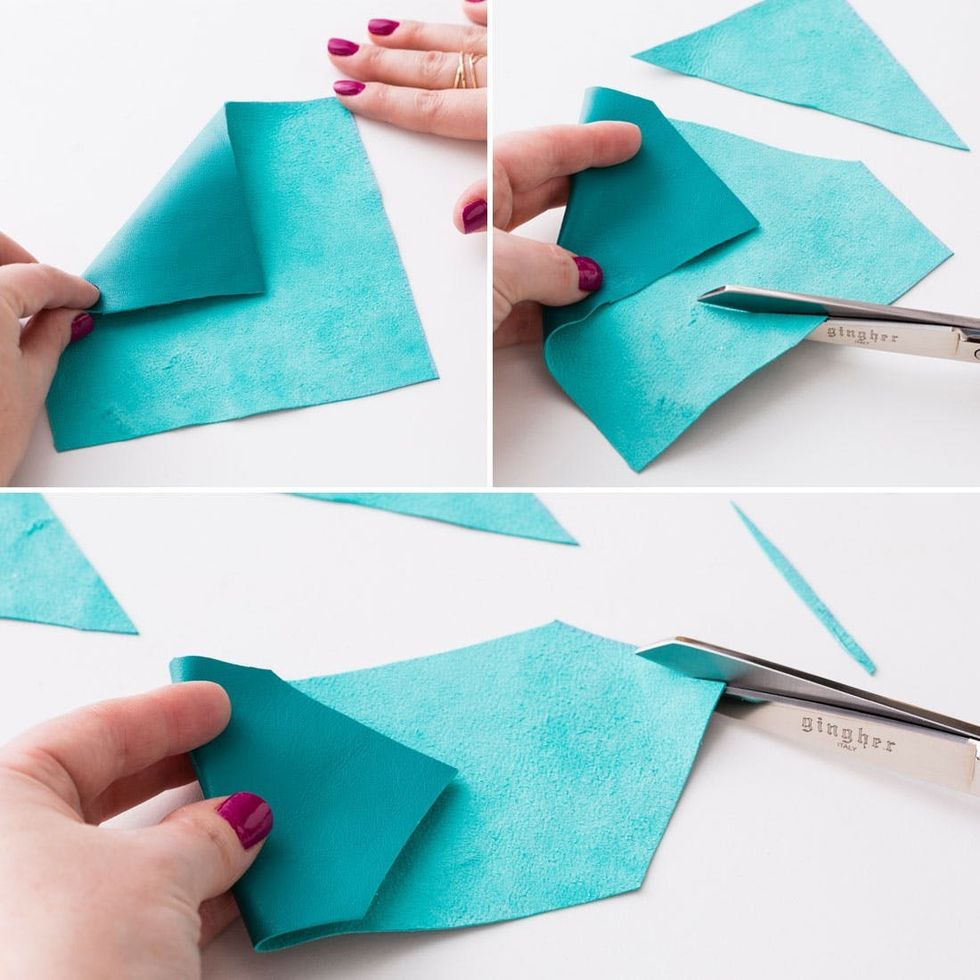
First off, fold over one corner of your largest piece of leather. Cut off the sides to make a folded chevron shape that is approximately three inches wide. Take time to trim the edges for a sharp, polished look.
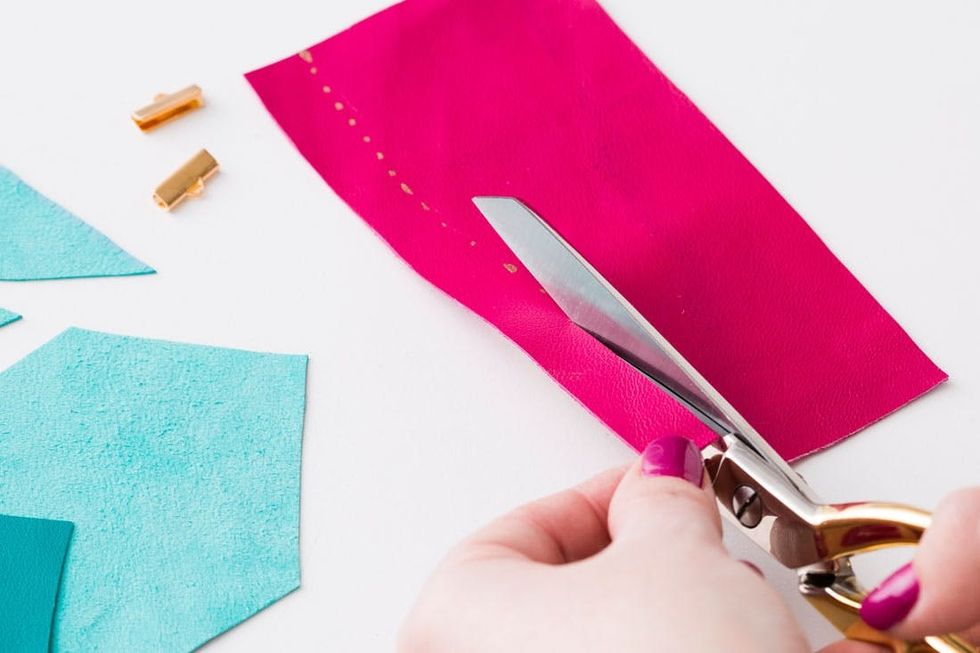
Before we add different colors to this piece, cut a 6-inch long strip of leather from one of your other two leather pieces and set aside for a bracelet. Cut this strip to about 5/8-inch wide to fit the two ribbon ends.
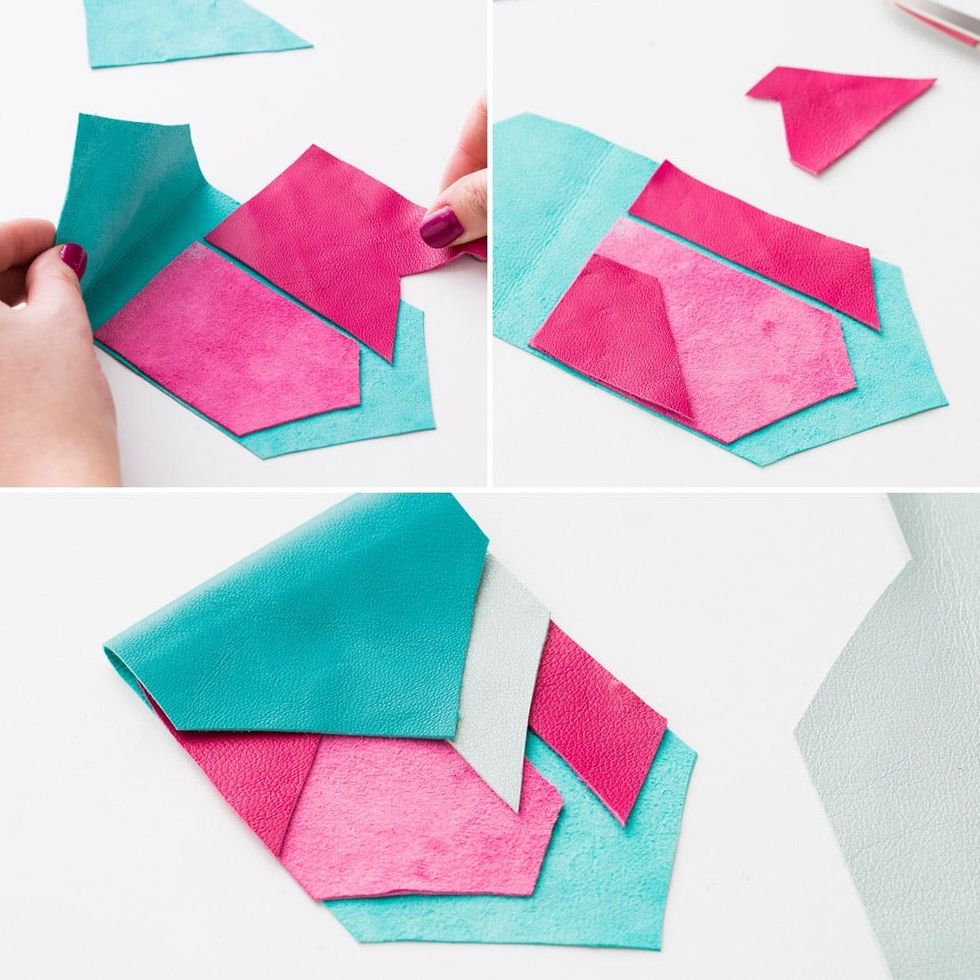
Now back to the statement piece… place different pieces of leather underneath the top flap of your main shape and cut them into shapes that layer underneath.
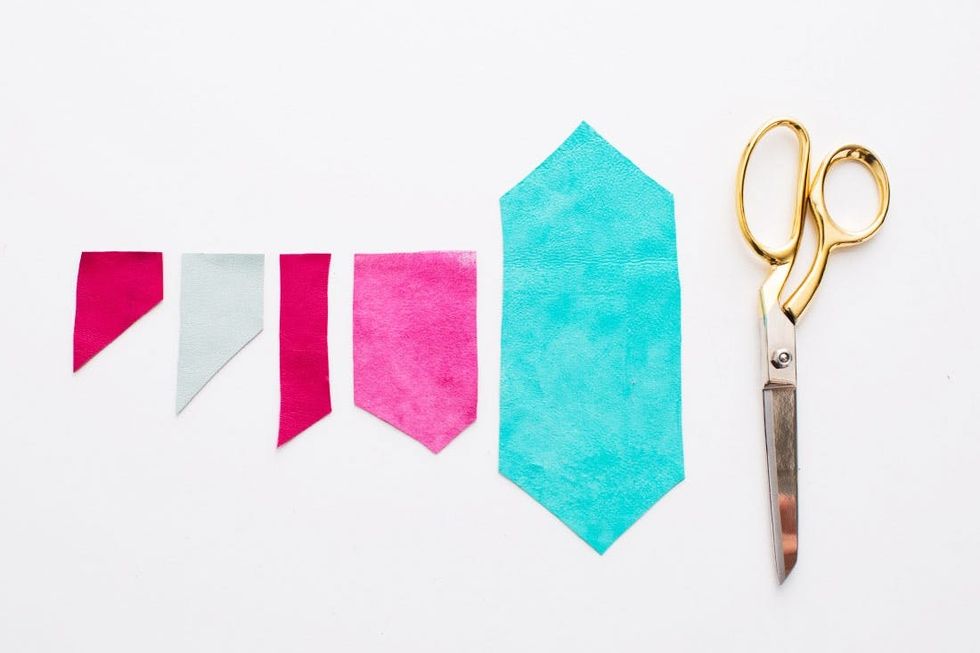
Use both the leather and suede sides of your pieces to show off all those different colors and textures.
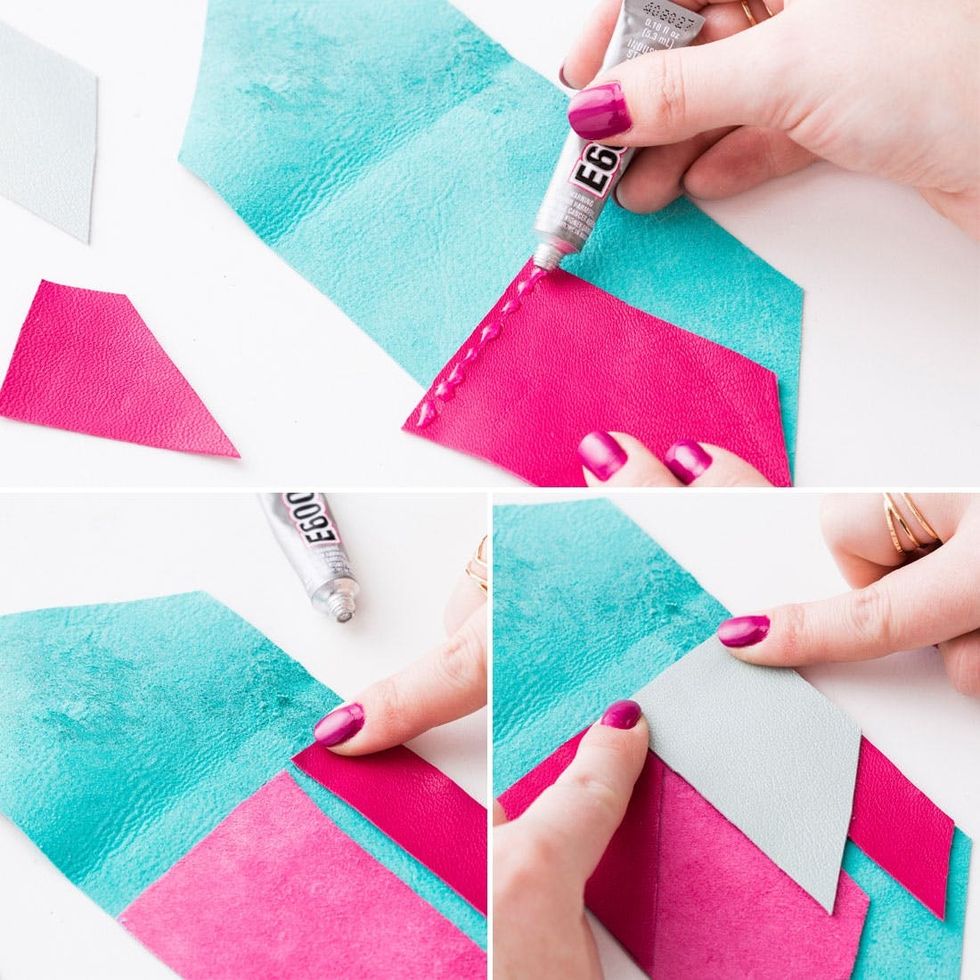
Once you’ve laid out your design, glue just the top edge of each shape onto your main shape, just below the fold line, and press down firmly.
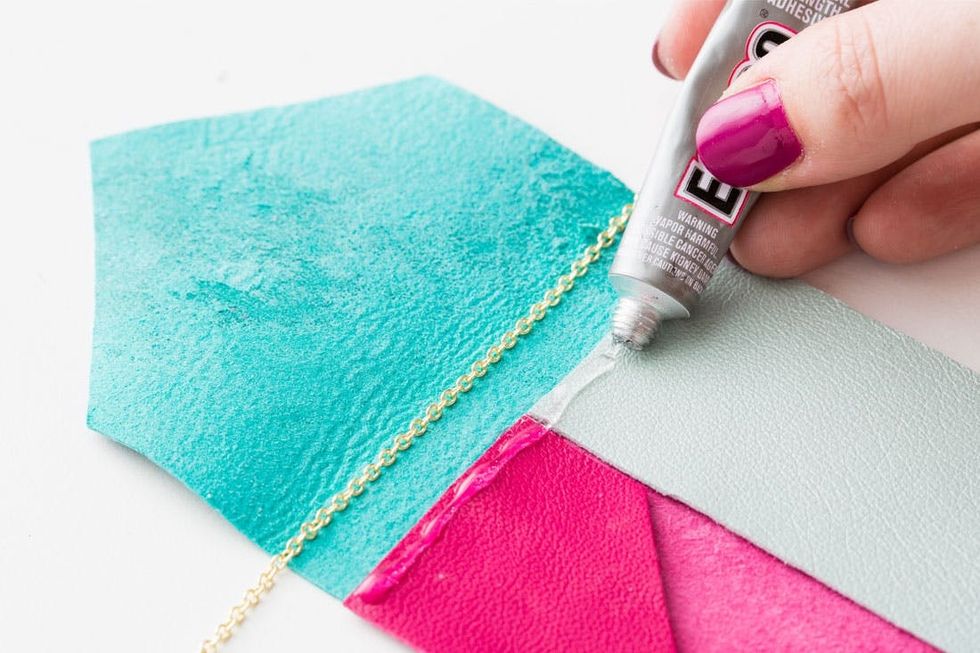
Lay your chain in the fold line and glue along the top edge of your smaller shapes.
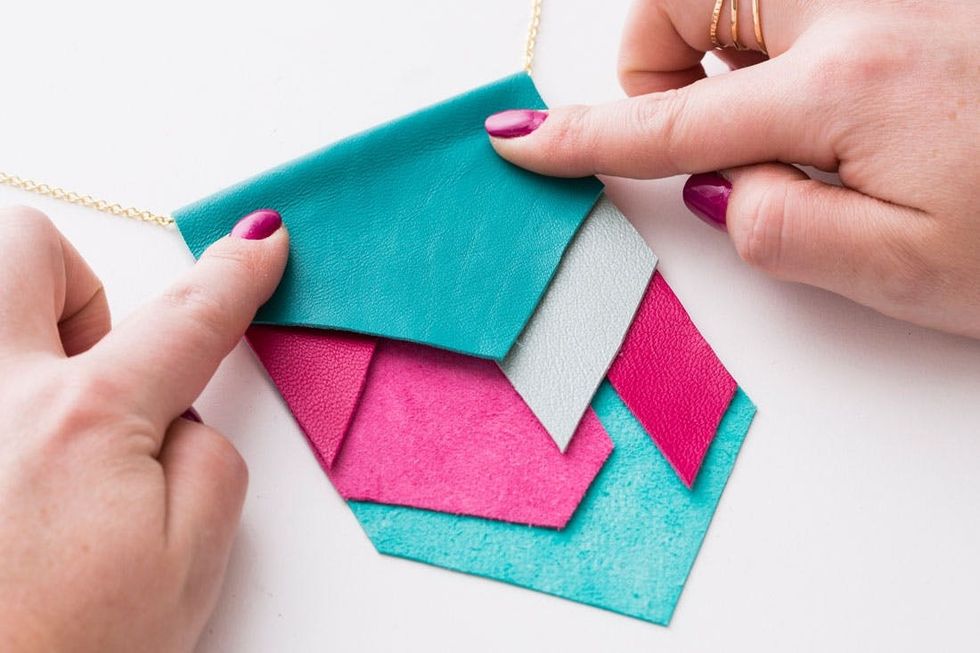
Fold the top flap over the chain and onto the glue line and press down firmly to secure. Let glue dry approximately 15 minutes.
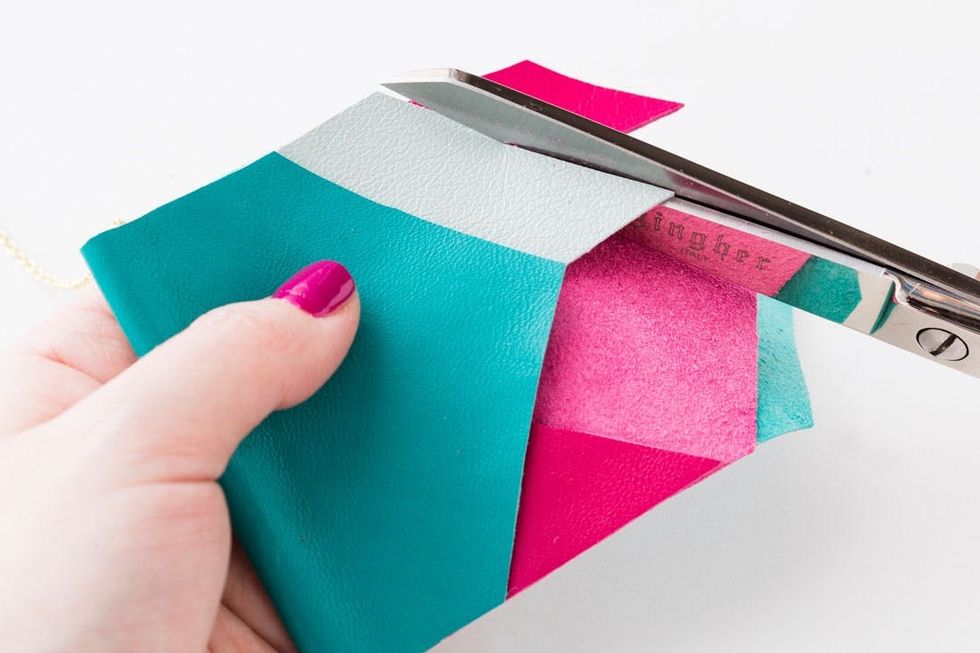
Once the glue has dried, you can continue to trim your shapes until you get a layered effect you like.
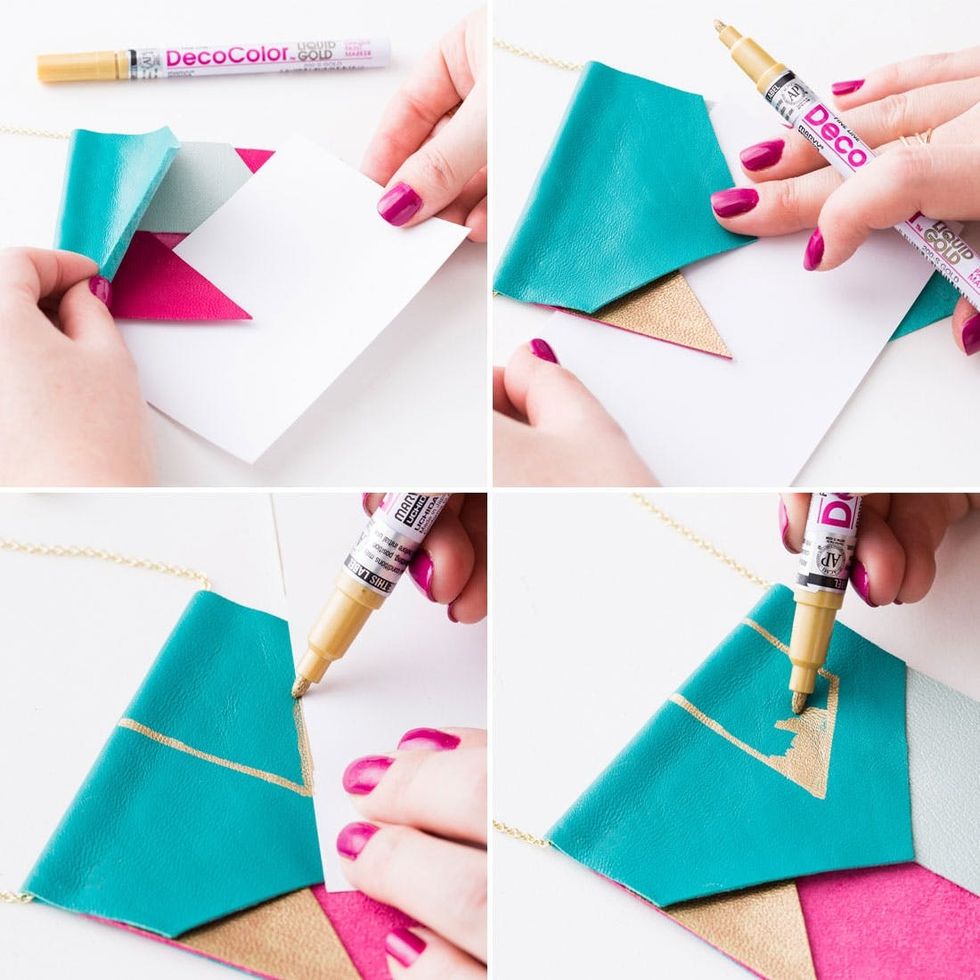
Now it’s time to add gold detail with a paint pen. Place a piece of paper underneath the shape you want to gild so you don’t get paint on the shapes below. You can use this piece of paper to draw straight lines on the leather and create masked gold shapes.

Now let’s get fringing! Cut some or all of your leather shapes into thin strips to give this piece some movement.
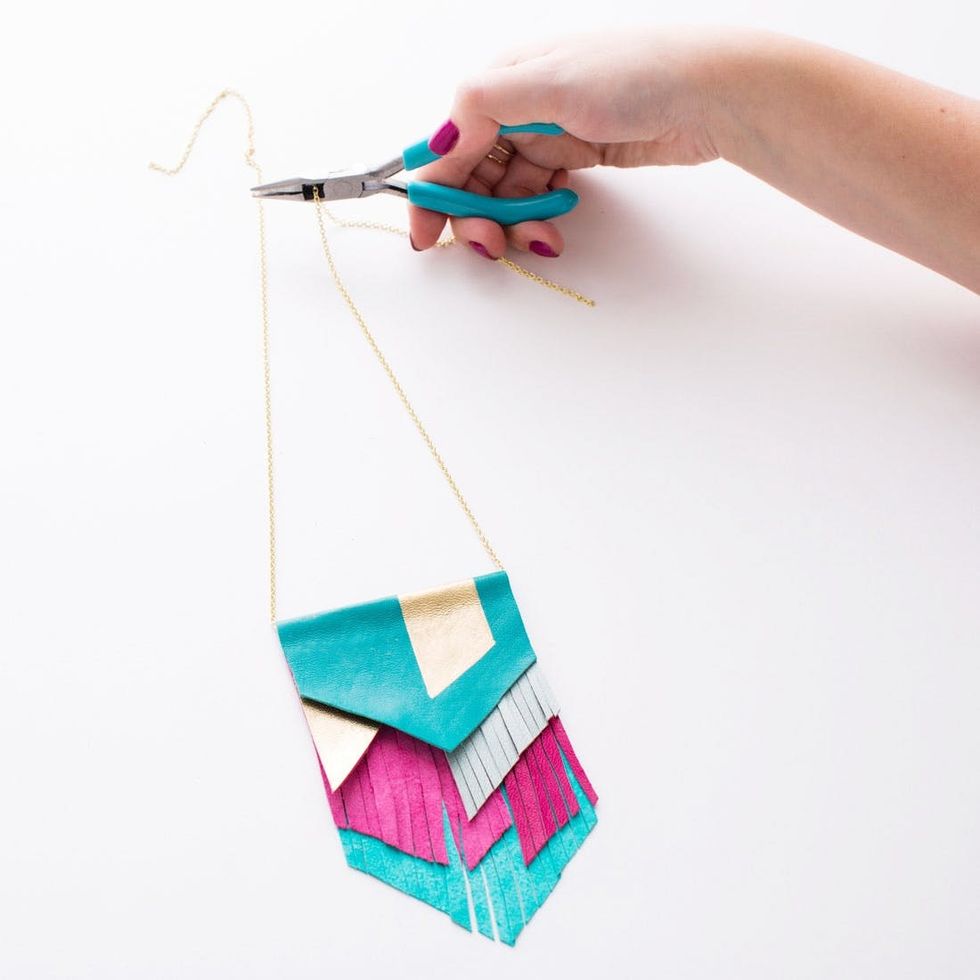
Take a look at that fringed beauty! Next, cut the chain to your desired length. Cut it short for a bib necklace that sits nicely tucked under a buttoned up collar, or leave it long for a lower necklace that stands out nicely against a clean shift dress or high neckline top.
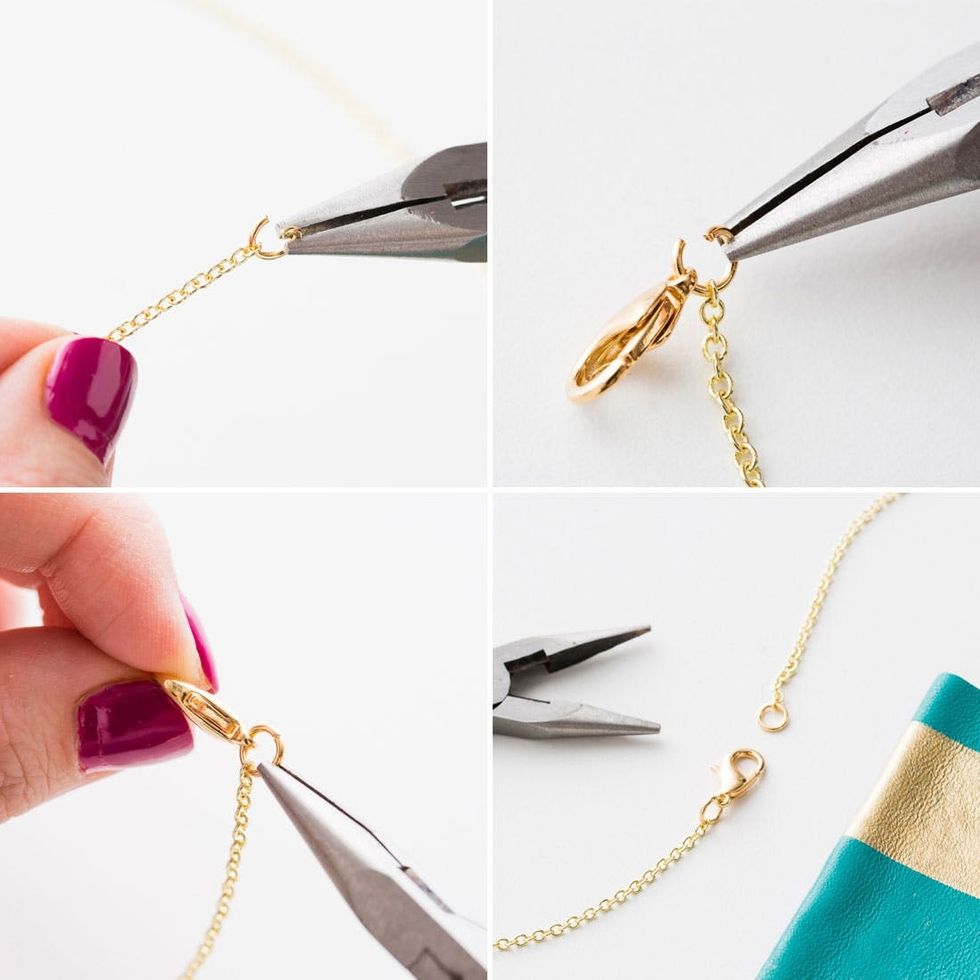
Open up a jump ring using your pliers and string one onto each end of chain. String a lobster clasp onto one side and close the jump ring with pliers to secure.
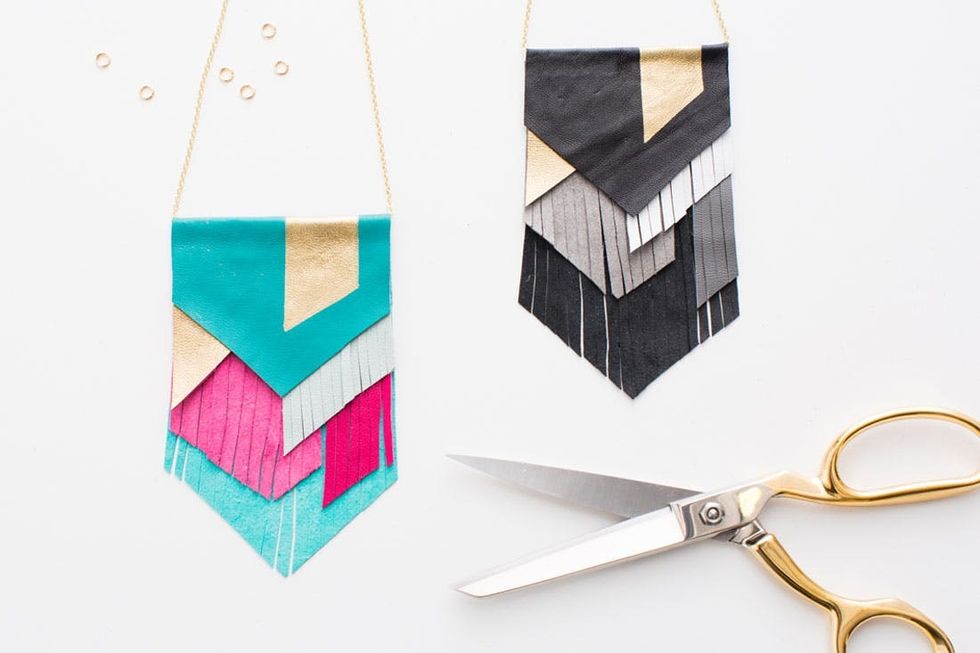
We made one in teal/raspberry/seafoam and another in classic black/white/gray.

Tuck it under a buttoned up collar or wear it longer over a simple shift dress for an equally impressive statement.
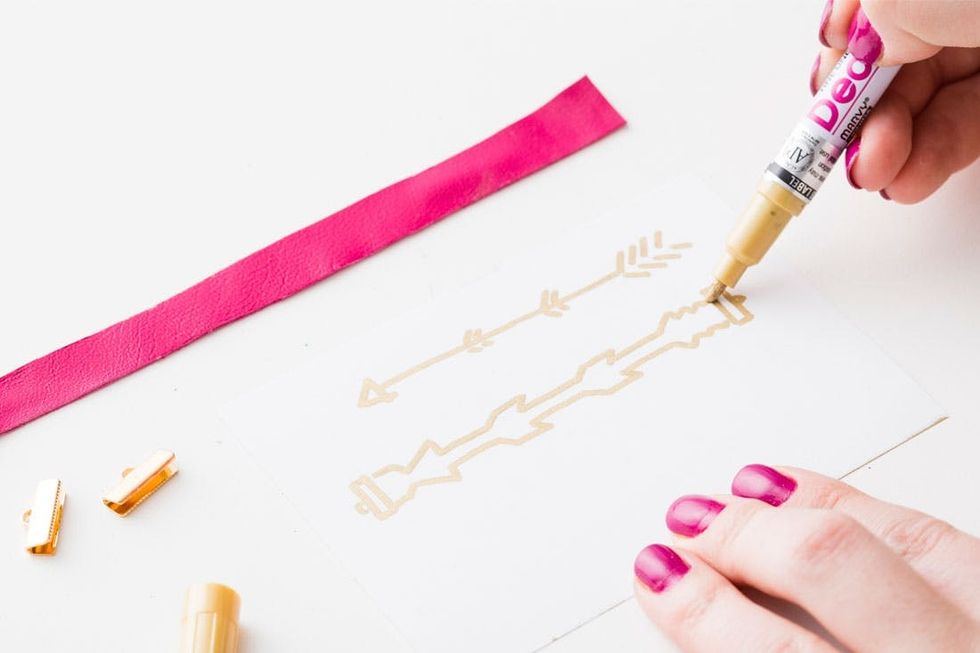
Remember that strip of raspberry leather we set aside? Now is the time to make this simple strip into an awesome bracelet.
CUTOUT ARROW BRACELET

We drew this arrow shape onto the strip of leather in gold pen, cut out the design (inside the gold lines) and added a gold stripe down the middle, using a piece of paper to mask it off. Notice we left the ends at the full width of the ribbon ends (5/8in) to give the brass pieces enough material to hold onto.
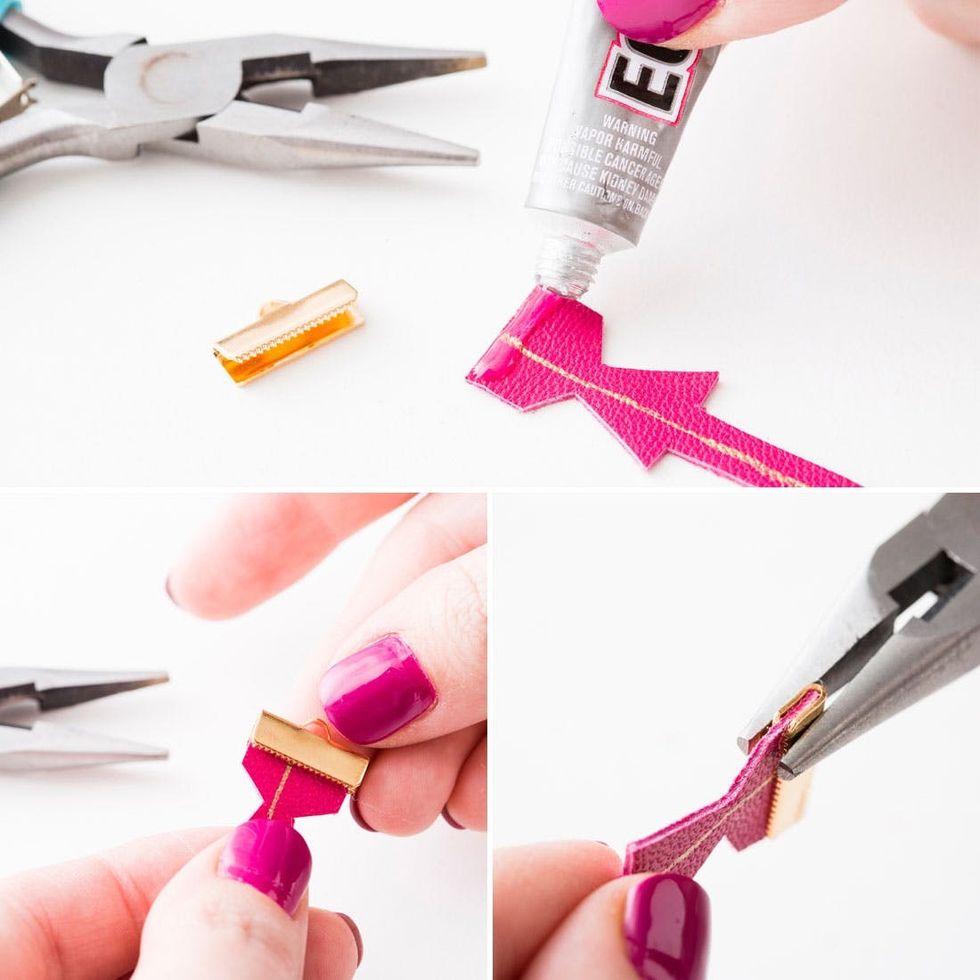
Dab a line of glue across the top, insert into a ribbon end and clamp down firmly on all sides with your pliers. Repeat on the other end and let the glue dry for about 15 minutes.
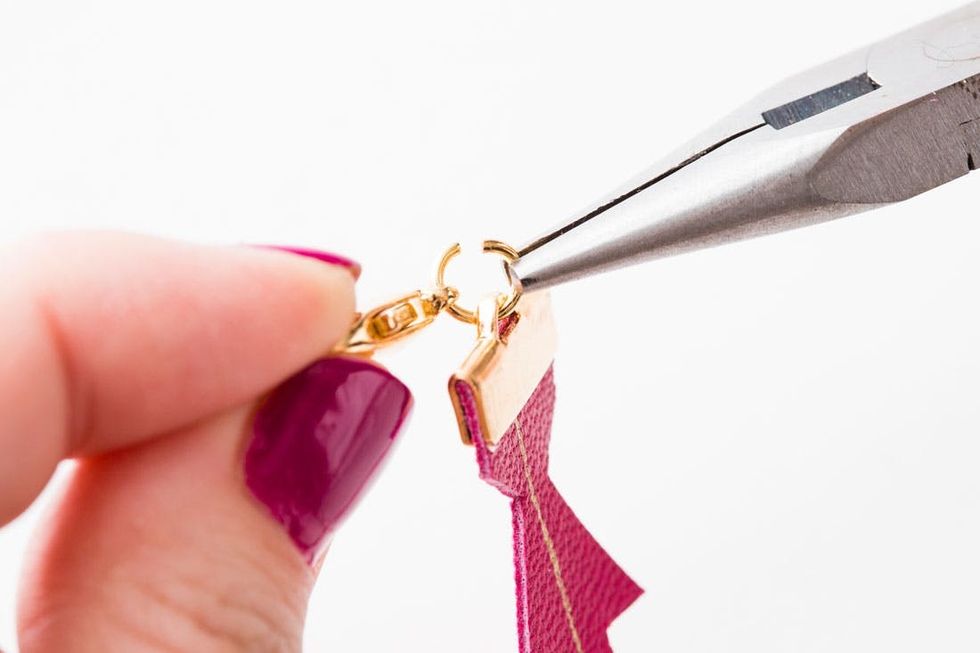
Once dry, attach a jump ring to each end and a lobster clasp at one end using your pliers.
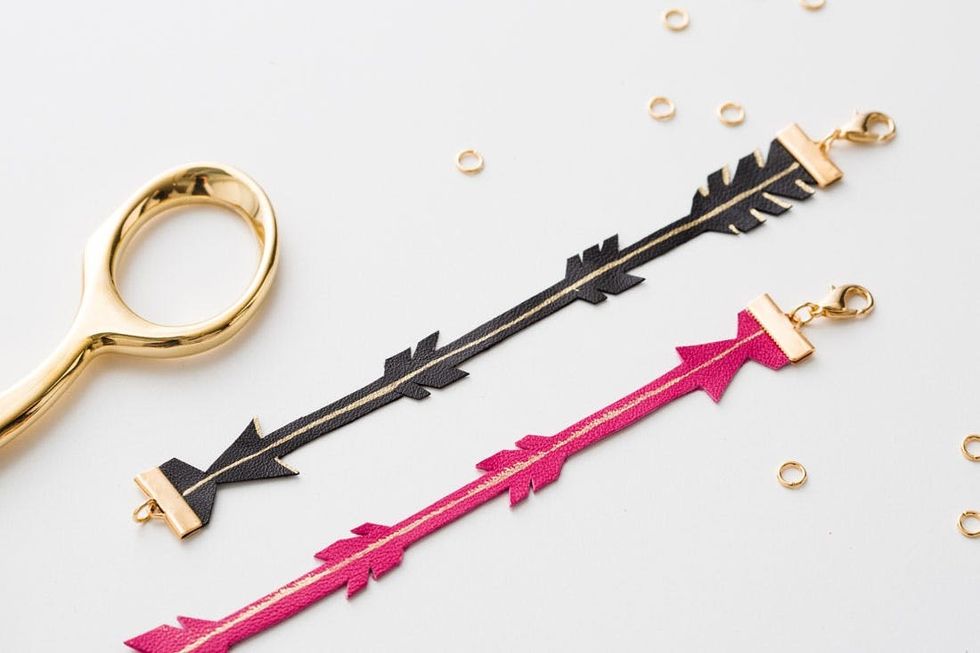
This is just the beginning of what you can make into a bracelet. Essentially any shape that fits into the 5/8in wide ribbon ends will work, so go ahead and try all sorts of cutouts and layered strips.

These bracelets look awesome layered up, and the soft leather feels gorgeous and light. As a reminder, make sure to keep your leather pieces dry and out of the shower. Water and leather are not friends.
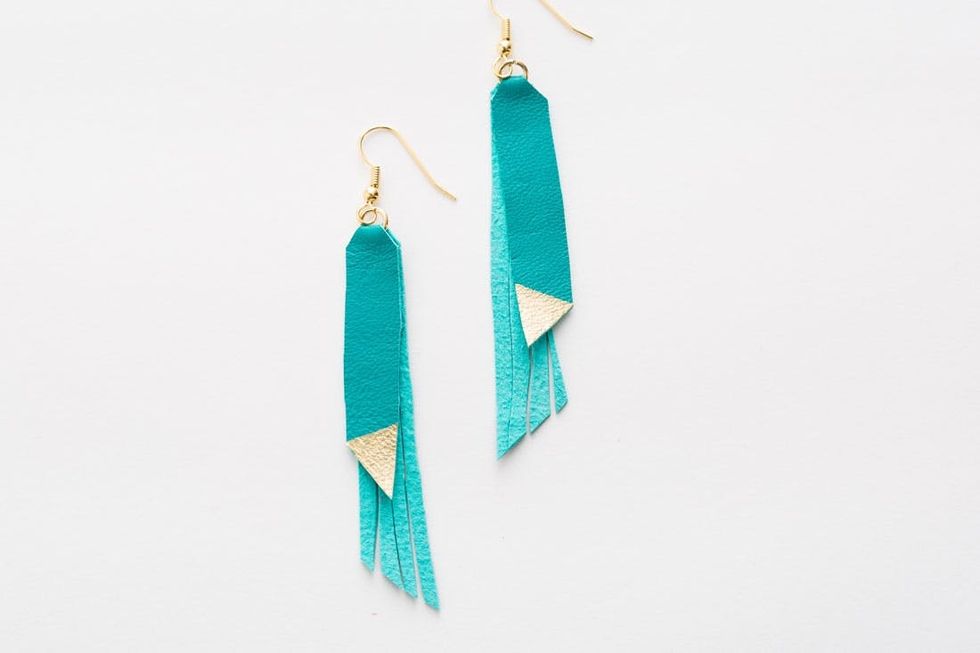
For the third jewelry piece, we created a simple pair of earrings that more than pull their weight in this ensemble!
FOLDOVER FRINGE EARRINGS
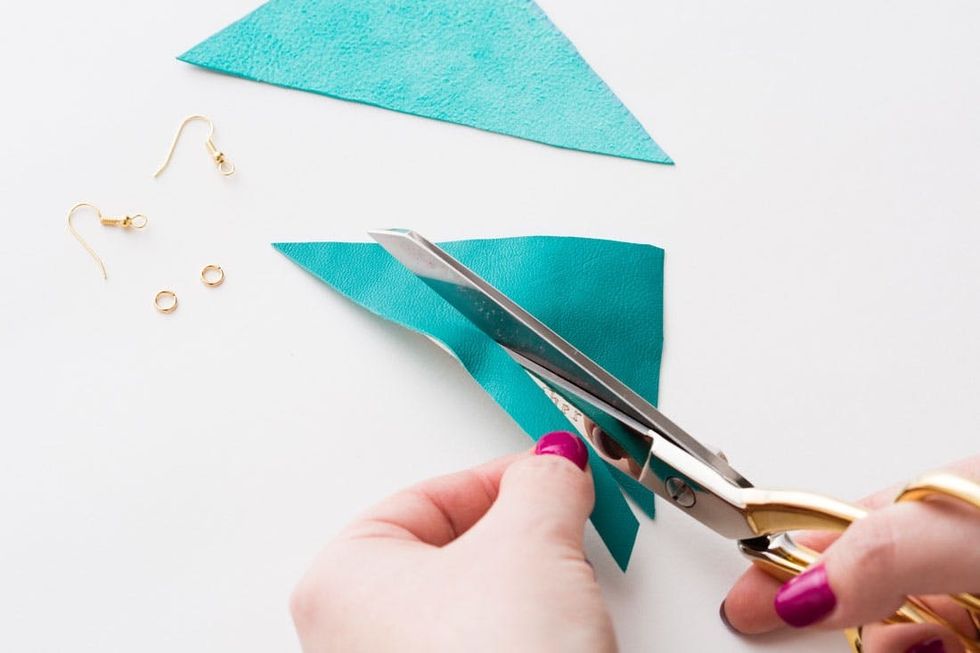
Remember those teal triangles we left behind? No scrap is wasted in this DIY, so go ahead and cut an approximately 3/8-inch-thick strip from the longest side of each triangle.

Take these two strips and fold them over to get a two-tone effect.
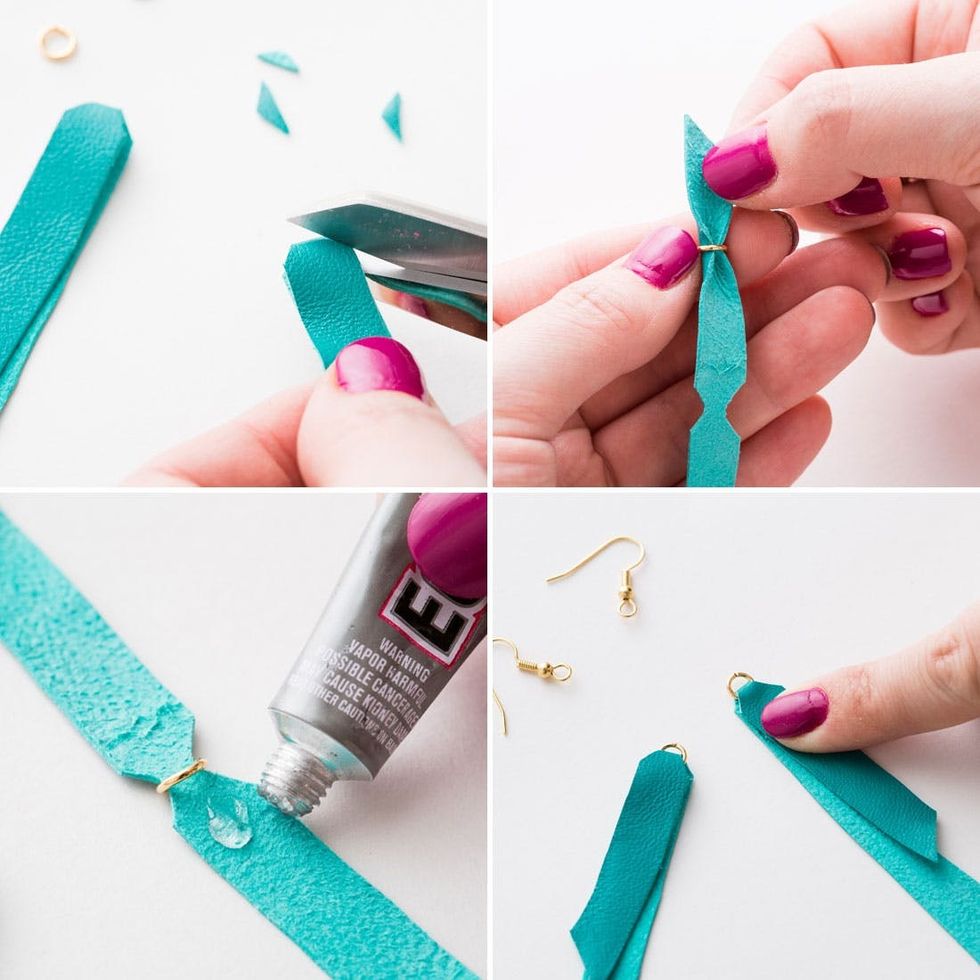
Next, snip off the corners at your folded end and thread each of your strips through a jump ring. Add a dab of glue just under the jump ring, fold the top half over the glue and press down firmly. We folded these slightly off kilter so you can see both leather and suede textures.
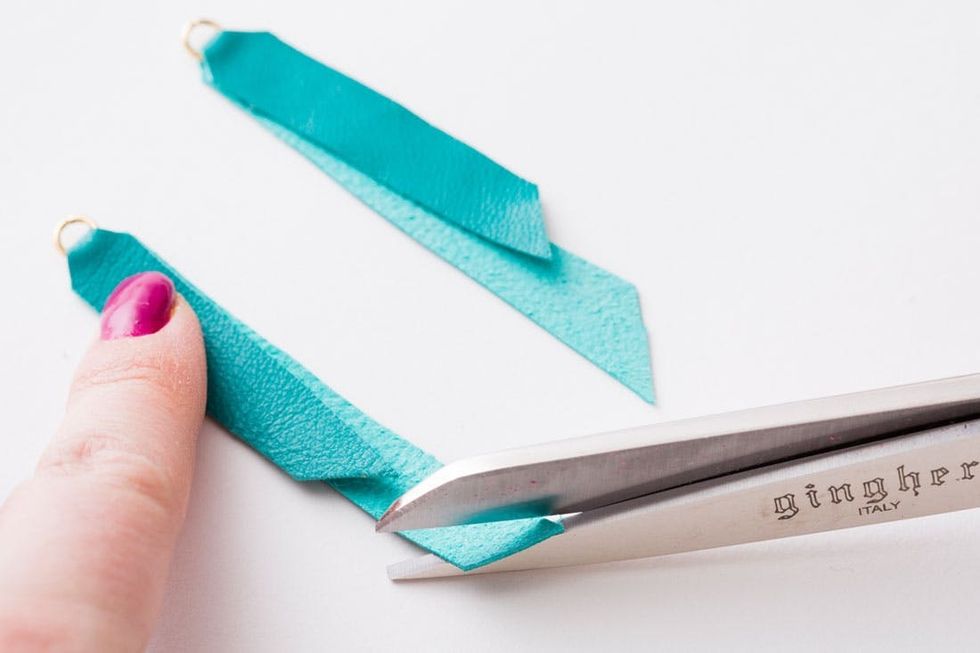
Once the glue is dry, take the time to trim the ends to your desired length.
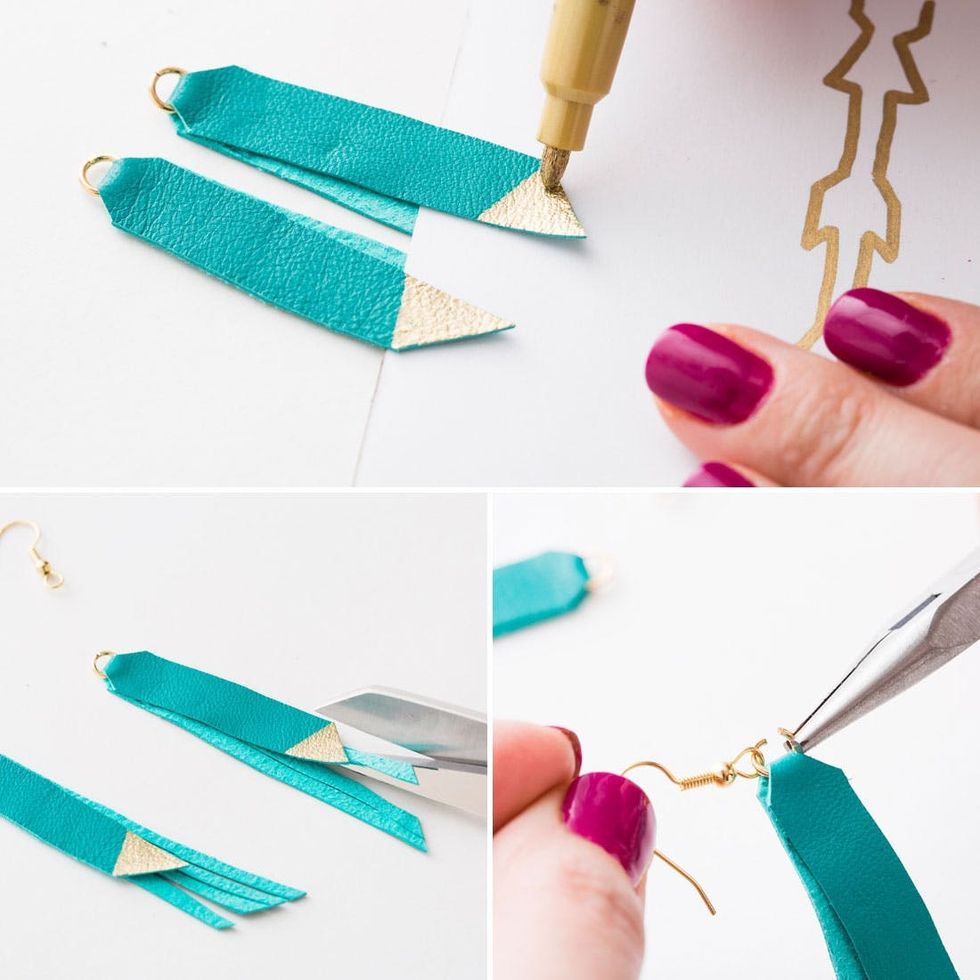
You know the drill: Add a touch of gold, fringe these babies with a pair of scissors and open up the jump rings to attach your earring hooks.
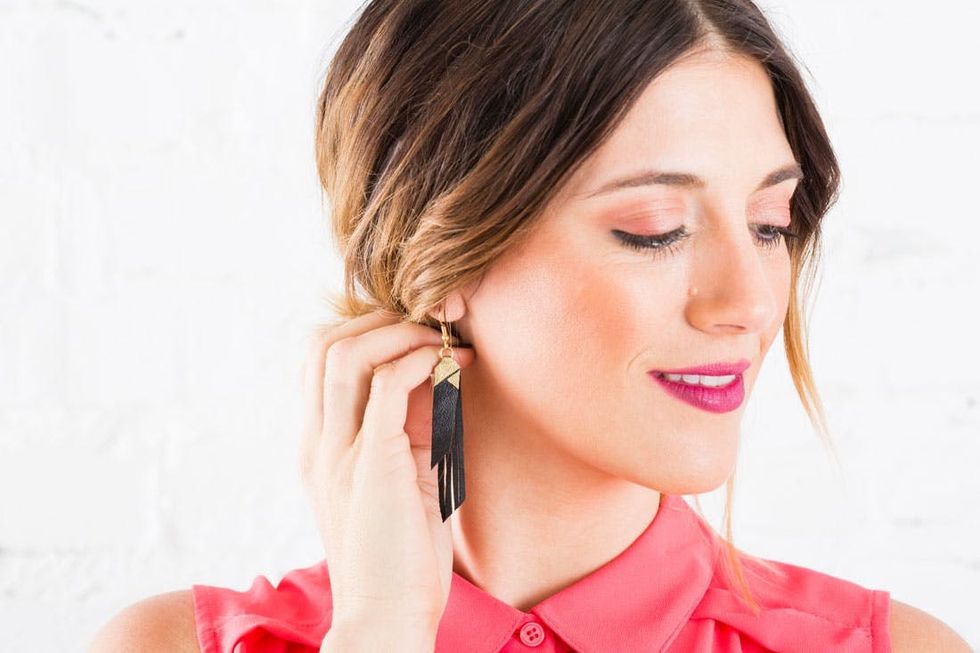
We made a similar version with our black/white/gray kit and are loving the subtle rock and roll edge here.
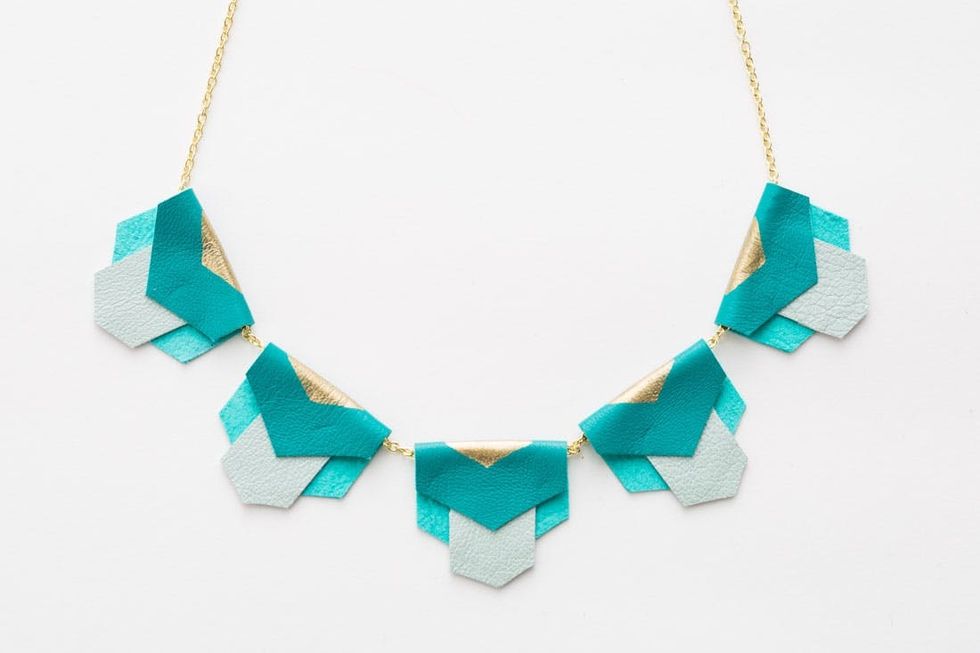
We wanted to throw in one more bonus round for the more clean-cut DIYers out there. We left this alternative statement necklace un-fringed and instead went for a sharp art deco vibe.
FIVE PIECE STATEMENT NECKLACE
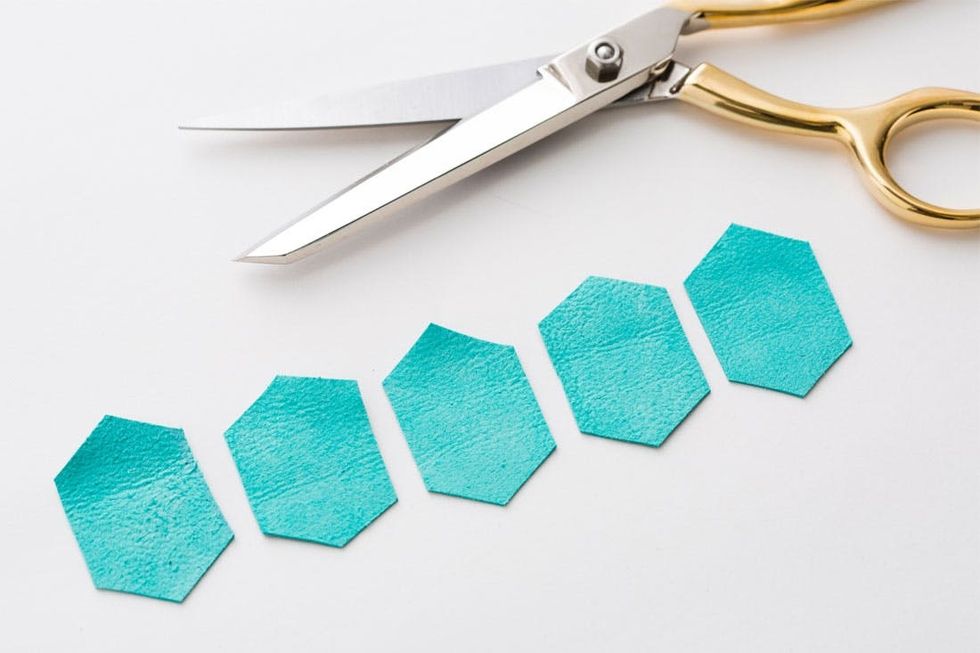
We first cut out these five tall hexagon shapes at about 1 and 1/4-inch tall and 1 inch wide.
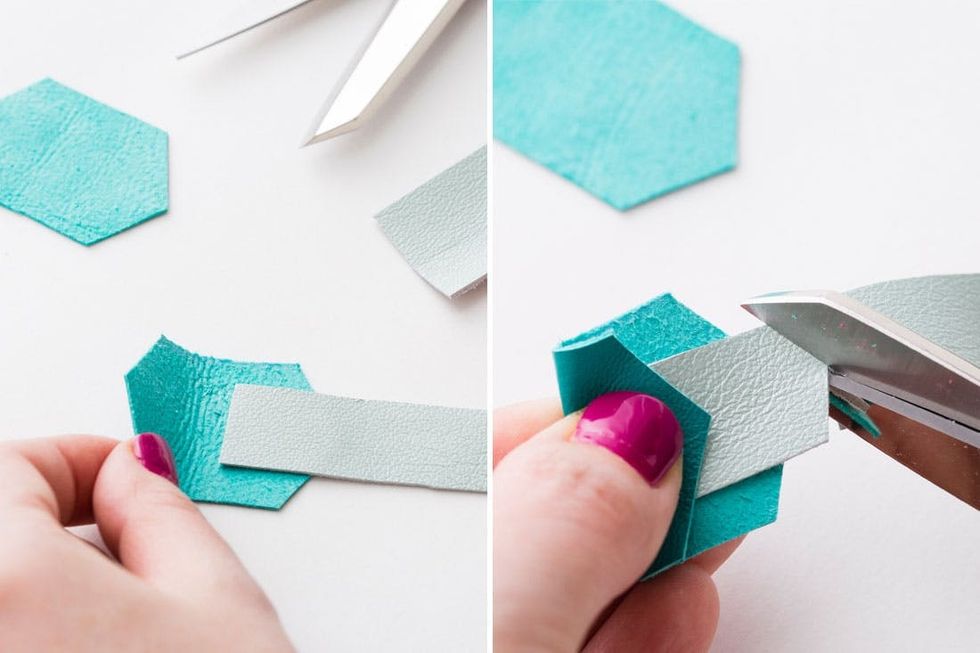
Next, we cut out some smaller shapes in another color — they’ll peek out from our folded over shapes.
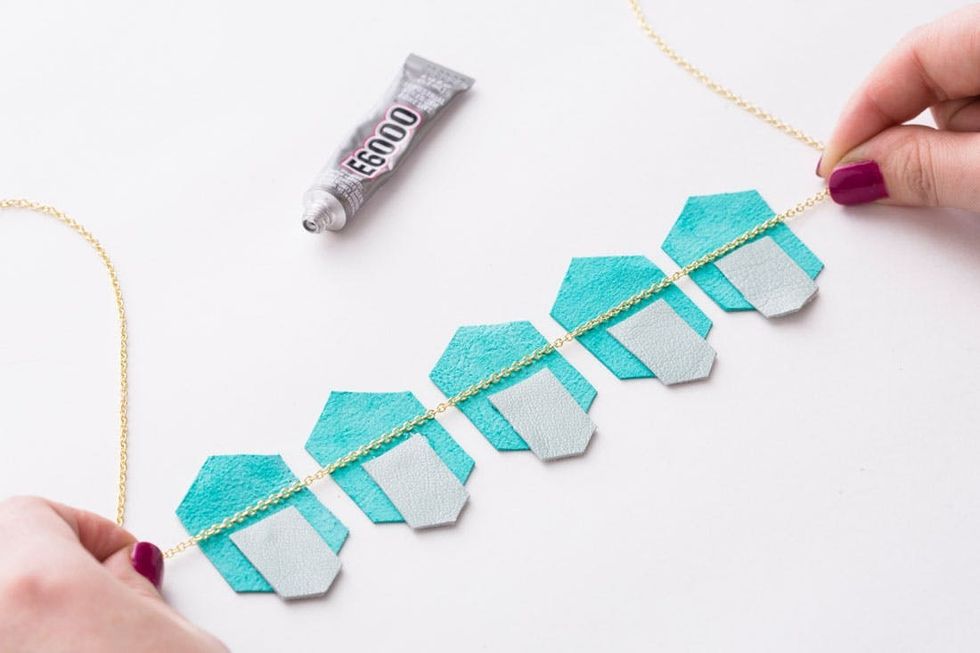
Glue those little guys down just under the fold line and lay your chain over the whole set.
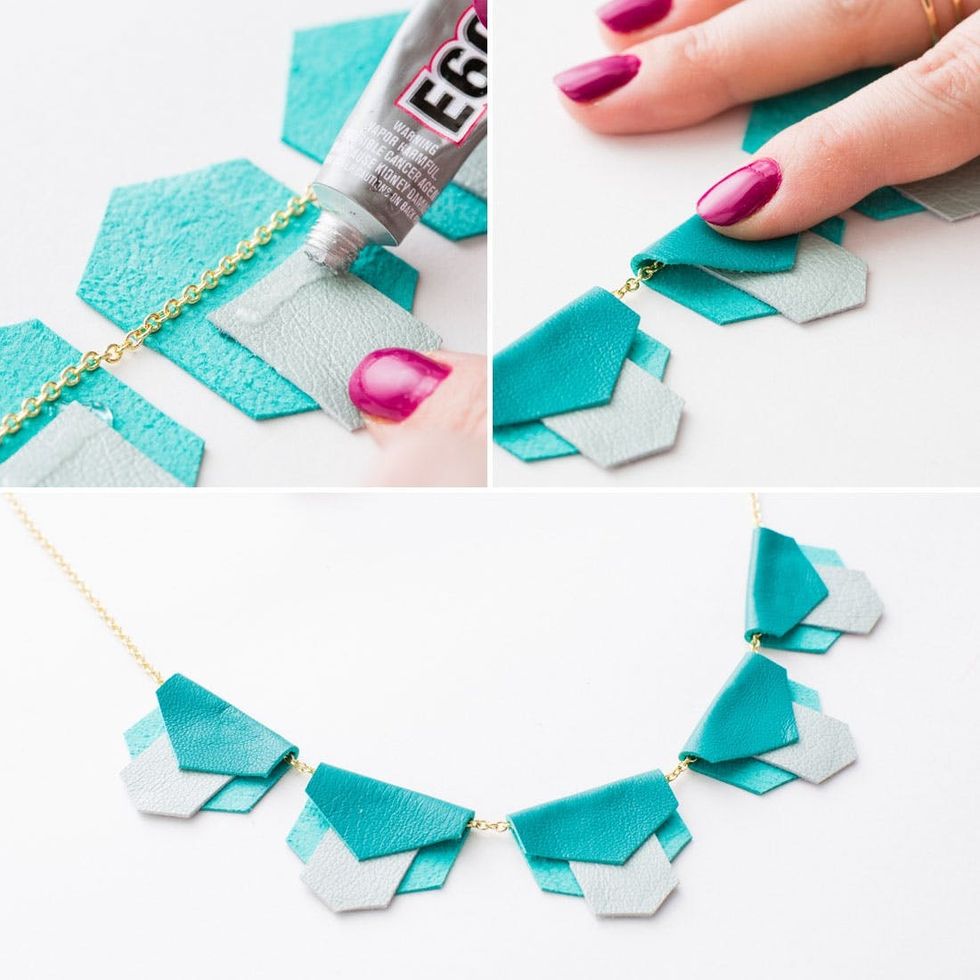
Glue the top flap down over your chain and press down firmly to secure. Before the glue dries, position your five pieces onto the middle of your chain, leaving small gaps between them.
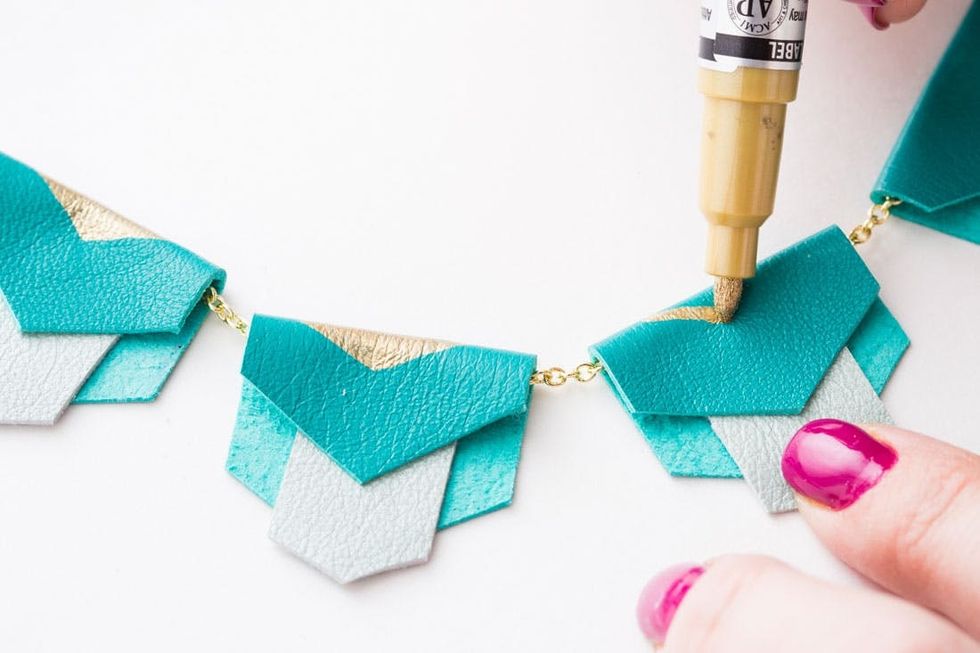
Let the glue dry fully for 15 minutes, add gold details and admire your work.
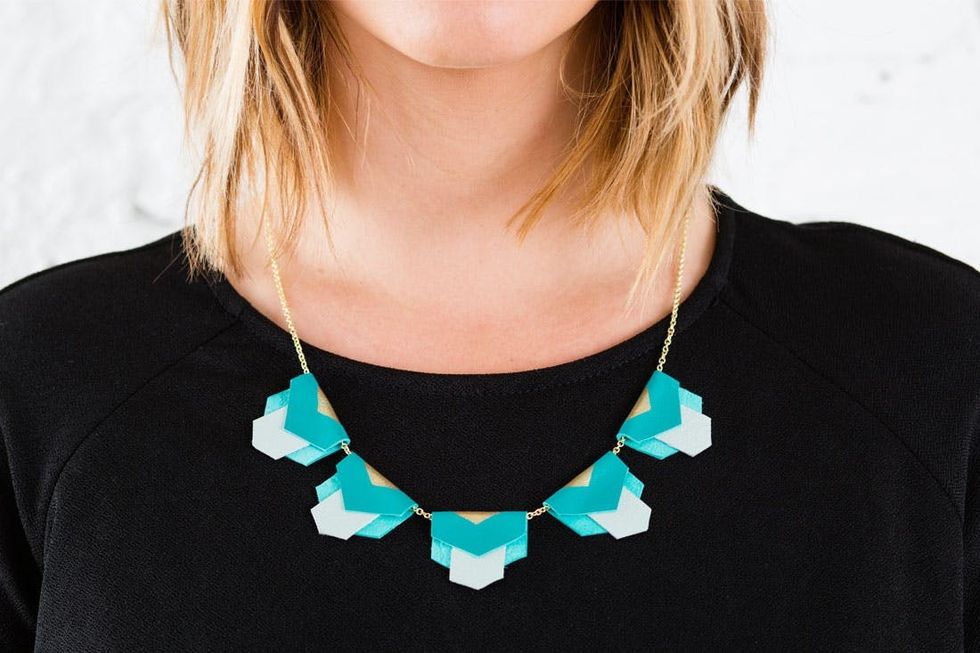
See how easy it is to make all these different styles? Any shape that can be folded over a chain can be made into a unique statement piece!
Leather Fringe Jewelry Kits
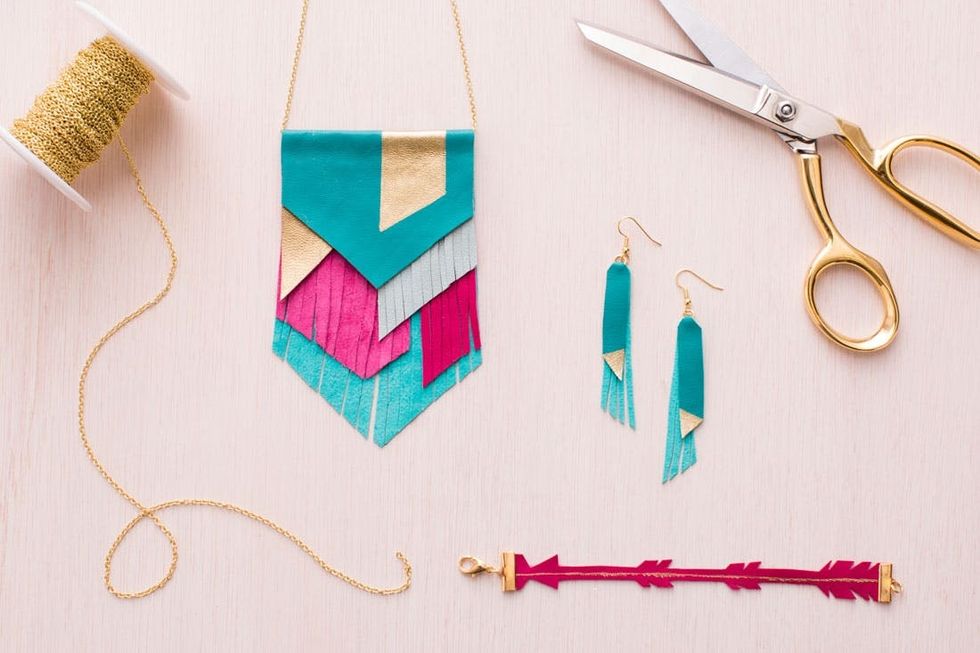 and one pair of earrings to gift to your friends or keep all to yourself.
What other jewelry designs would you make with this kit? Show off your finished pieces on social media using the hashtags #britkits and #iamcreative. We love seeing those end results!


