In case you missed it, this week at Brit HQ, we’re all about hosting the ultimate glow-in-the-dark Halloween party. We’ve got glow-in-the-dark banners, candlesticks, and now… costume accessories. That’s right, we’ve got a DIY that’s guaranteed to add the perfect amount of neon LED flare to any Halloween costume. Get ready for DIY LED headbands for Halloween.
Let’s Get Lit! 3 Easy DIY LED Headbands for Halloween
In case you missed it, this week at Brit HQ, we’re all about hosting the ultimate glow-in-the-dark Halloween party. We’ve got glow-in-the-dark buntings, candlesticks, and now… costume accessories. That’s right, we’ve got a DIY that’s guaranteed to add the perfect amount of neon LED flare to any Halloween costume. Get ready for DIY LED headbands for Halloween.
But, here’s the bigger question: Isn’t it super hard to DIY with circuits and LED? Enter littleBits, a set of electronic modules that snap together with magnets to power things like fans, tiny motors, and of course—LED lights. What does that mean exactly? littleBits pieces snap together (almost like LEGOs) to give your DIY projects the ultimate LED glow. If you were are Re:Make (or followed our Pinterest board), these littleBits might look familiar.
How do they work? It’s easy! All you need to remember is blue, pink, green.
1. The blue piece snaps onto to a battery, and operates as the power source.
2. The pink piece snaps to the blue one, and tells your light what to do (flash, dim, pulse).
3. The green piece snaps to the pink one, and is your light.
Look how easily they snap together! Blue, pink, green, GO! It gets even better! The folks at littleBits are giving Brit + Co. readers $20 off ANY littleBits kit purchase with the promo code: BRIT20.
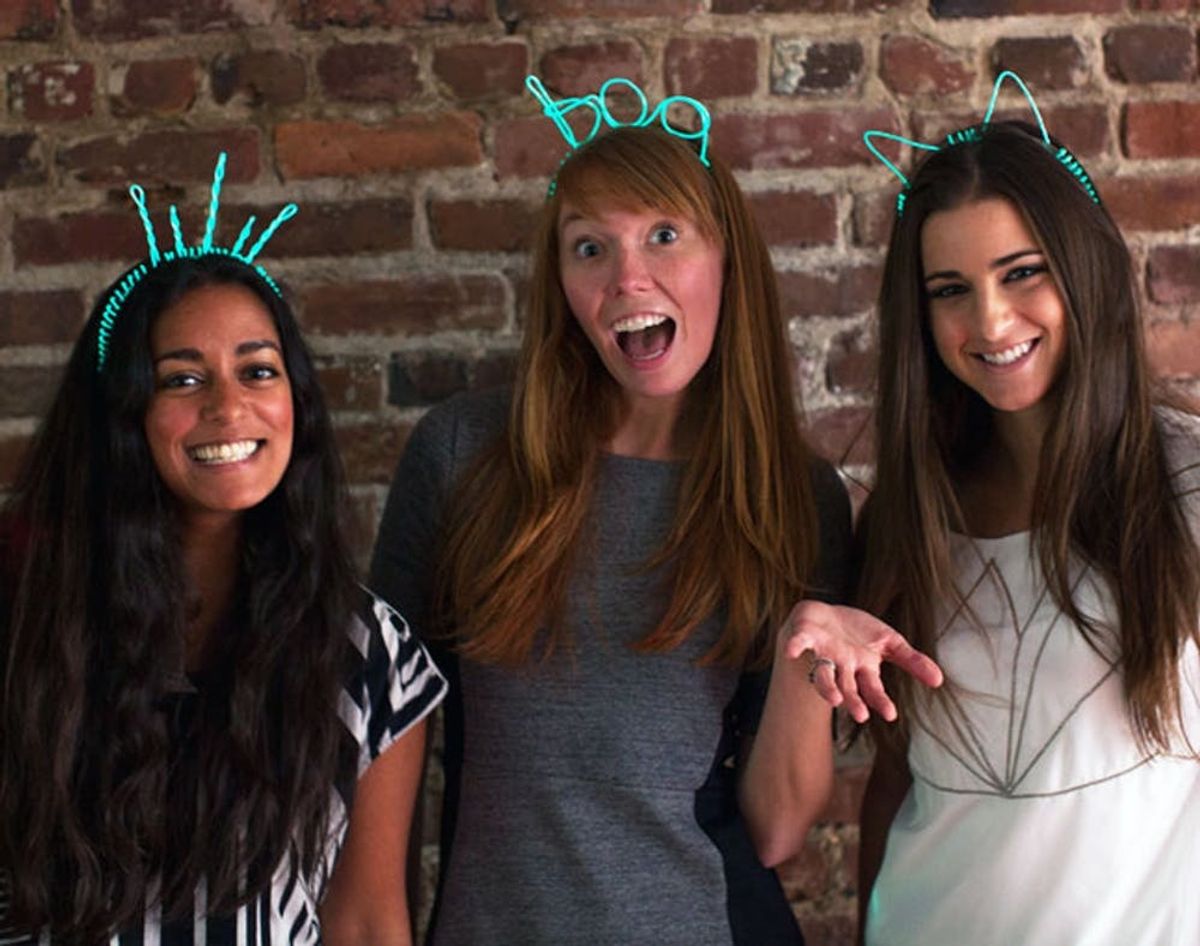
Alright, onto the headbands. This DIY is yet another chance to flex your muscles as a “wrap star”. We’re going to wrap the littleBits light wire around basic headbands to make three shapes: cat ears, “boo”, and electric shock.
Materials:
– 3 headbands
– 3 Base Kits from littleBits (1 for each headband)
– 3 littleBits light wires (1 for each headband)
– tape
Instructions:
1. Start wrapping the light wire around the headband at the base.
2. When you get a little more than half way up the headband, it’s time to start making your design.
3. The best way to make sure your design is even and easy to read is by using a template. You can draw one or find something online.
4. Once you’ve made your design, start wrapping the light wire back around the headband until you reach the other end.
5. Attach the green littleBits module to a pink one and the blue power source. You may want to use the tape, to secure the pieces together. Flip the “On” button, and you’re up and running.
First come the classic cat ears, clearly inspired by Taylor Swift’s music video 22.
The littleBits light wire is super easy to shape. Start wrapping the light wire around the headband at the base. When you get a little more than half way up the headband, it’s time to start making your ears.
The best way to make sure the cat ears are even, is to use a template. We found one on Google Image search. Then we printed out, and traced it closely with the wire to make the first ear.
Secure the first ear by wrapping the wire three or four times. Create the second ear by tracing your template (again very closely). No one wants wonky cat ears!
Now it’s time to get “glowing”. Attached the green littleBits module to a pink one and the blue power source. You may want to use the tape, to secure the pieces together. Flip the “On” button, and you’re up and running.
Now we’re onto the “Boo” headband.
Write “boo” on a piece of paper. Follow the same process as you did for the cat ears. When you get a little more than half way up the headband, simply “trace” the word with the wire. For this one, you’ll want to use tape to secure the letters to the headband.
Now we’re back to the same process as before. Attach the green piece to the rest of the littleBits, and secure with tape!
Finally, we went a little more abstract and wanted to create something that looked like hair standing straight up, a la cartoons being electrocuted.
Follow the same wrapping process as before. When you get a little more than half way up the headband, you’ll start creating tall loops. Wrap around the headband twice between each tall loop.
Now let’s do the twist! Just twist each loop to give it a more polished look.
The final dilemma? What to do with the littleBits pieces? You’ll want to pin the pieces in your hair, or slide it in your shirt and secure it in your back pocket or belt. Or, let’s be honest, we tucked them in our bras.
Okay there’s one more step. Find a couple coworkers who love nerding out on DIY as much as you do, and have a dance party with your brand new LED headbands. Woot woot!
Want to make LED headbands of your own? Grab your kit of littleBits soon. The promo offer expires on 10/28!


