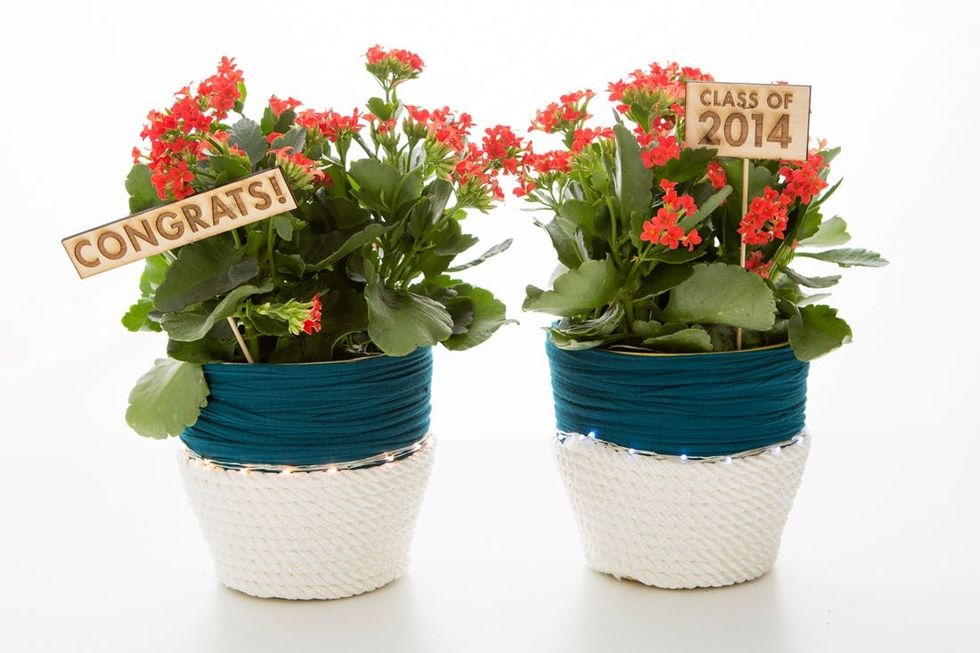
Too distracted posing for epic #classof2014 selfies to shop for a gift, huh? Don’t sweat it! You can DIY a thoughtful gift on the fly, like this light up planter.
Grad Gift Idea: A DIY LED Planter in Your School Colors
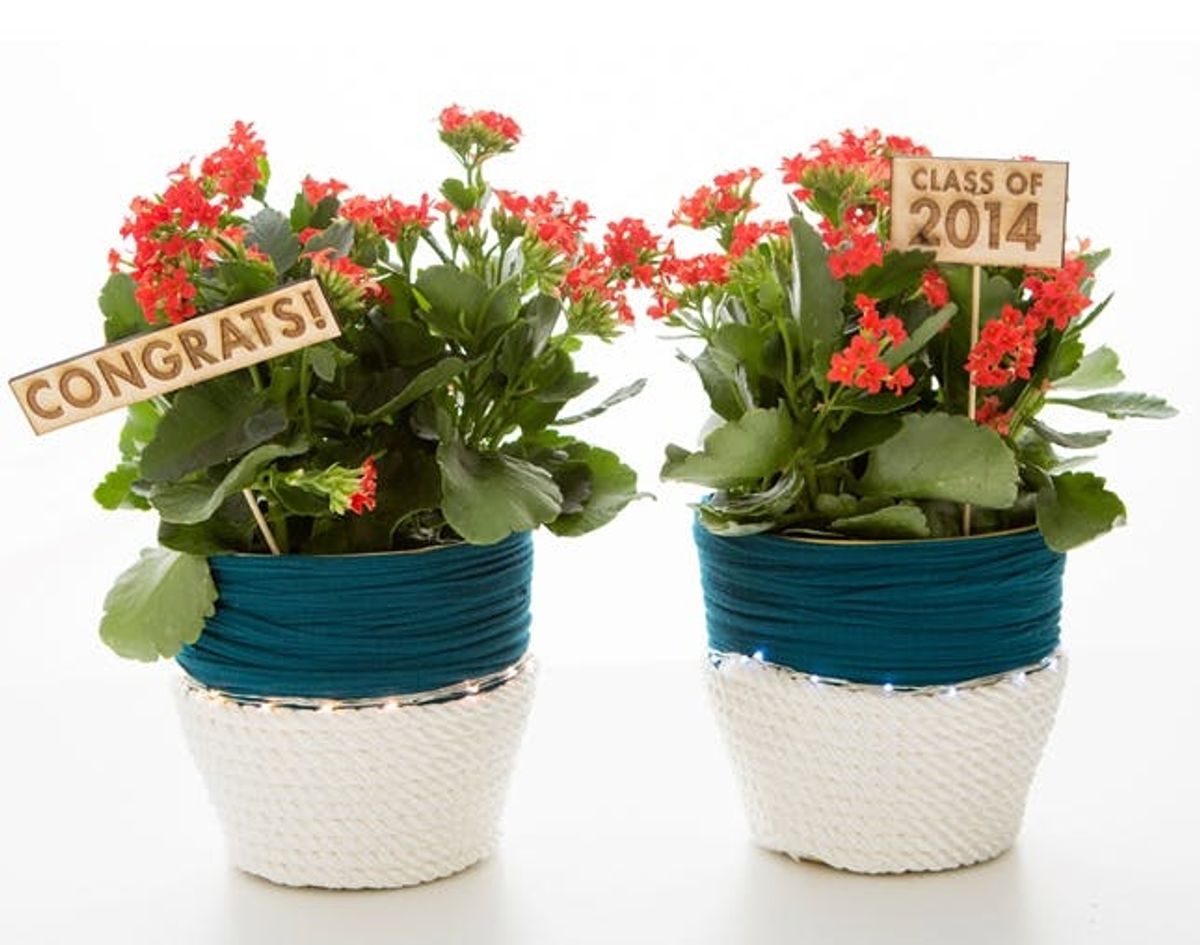

Hey grads (and all you proud parents)! We know your weekends this summer will be busy hopping to post-cap toss celebrations — and you need to bring a gift along to that backyard BBQ or park picnic to congratulate your peers. Hmm… too distracted posing for epic #classof2014 selfies to shop for a gift, huh? Don’t sweat it! You can DIY a thoughtful gift on the fly, like this light up planter. Find any large container (or even a tin can!) and amp it up with rope, jersey fabric and LED lights in the colors of your alma matter, of course! We’d throw a whole other ceremony just to present it.
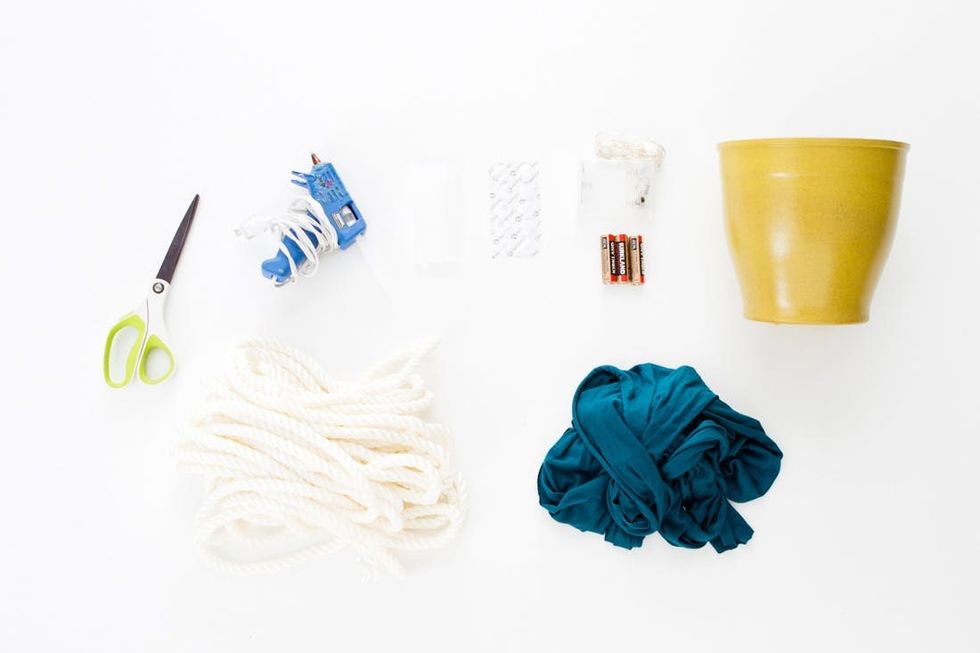
Materials:
– 8 inch plastic planter pot
– thick white rope
– strips of jersey fabric
– micro LED lights (+ batteries)
– Velcro dots
Tools:
– hot glue gun + glue
– scissors
Instructions:
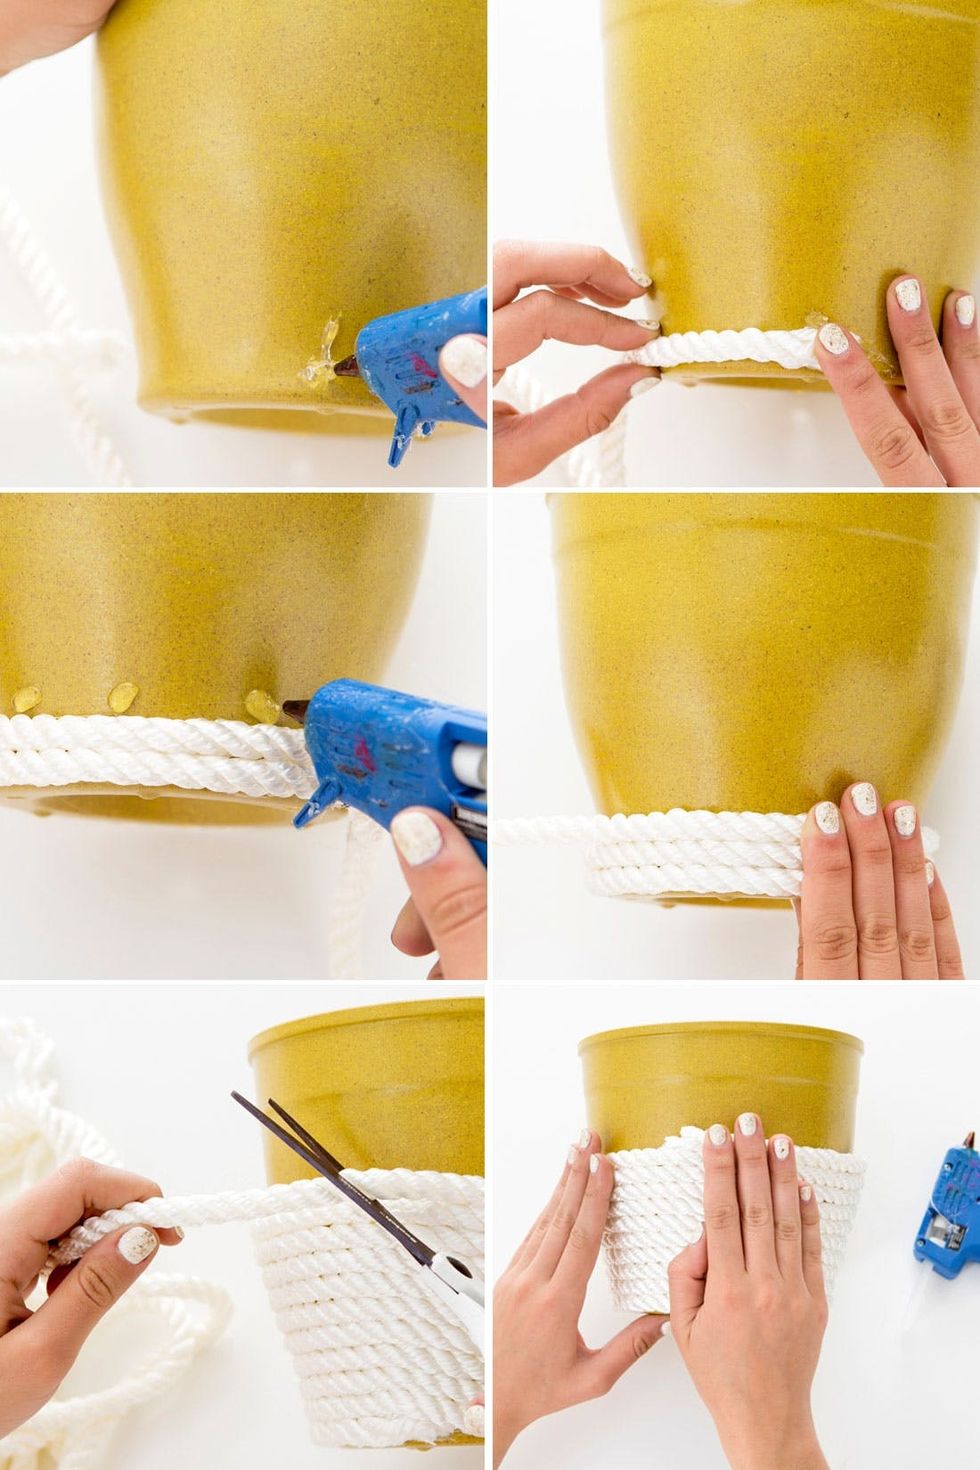
1. Attach the rope to the bottom edge of the bucket with a glob of hot glue. and start wrapping.
2. Keep wrapping the bucket and adding hot glue along the way.
3. Wrap a little more than halfway up the planter, then snip the rope end and secure with hot glue.
4. Cut the jersey into thin strips, then pull it tightly — it will curl up just like rope!
5. Repeat step 2, but this time with the jersey. Wrap it until you reach the top of the planter.
6. Put batteries into your LED lights battery pack. Then, wrap the lights around the center of your planter where the rope and jersey fabric meet. Secure the lights in place with hot glue.
7. Plant your favorite plant and add a cute sign to make it festive!
A big glob of hot glue is all you need to get this project started. Press the rope end into it and then start wrapping it around your planter. Be sure to add hot glue every so often to keep the rope in place. Feel free to wrap as much or as little as you would like — we wrapped ours a little more than halfway up the pot, about 10-12 times. Then, snip the end and secure with hot glue.
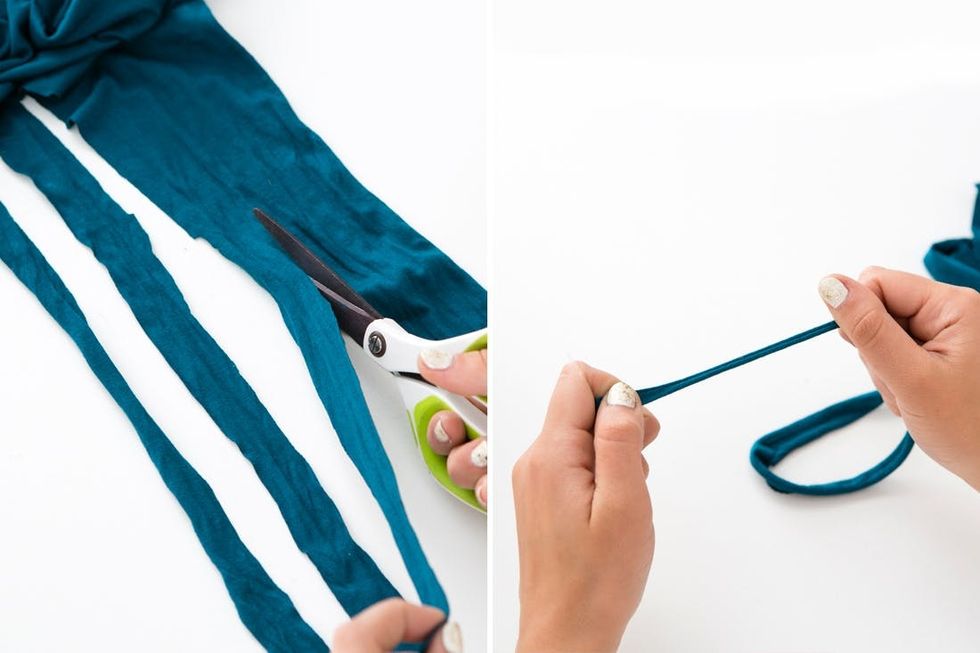
Rather than use rope to cover the entire planter (though you could totally do that too!), we decided to give ours a pop of color (of course) and change up the texture too by using jersey fabric. Cut the jersey into long strips, then pull it tightly — once it’s stretched, it’ll curl up just like rope!
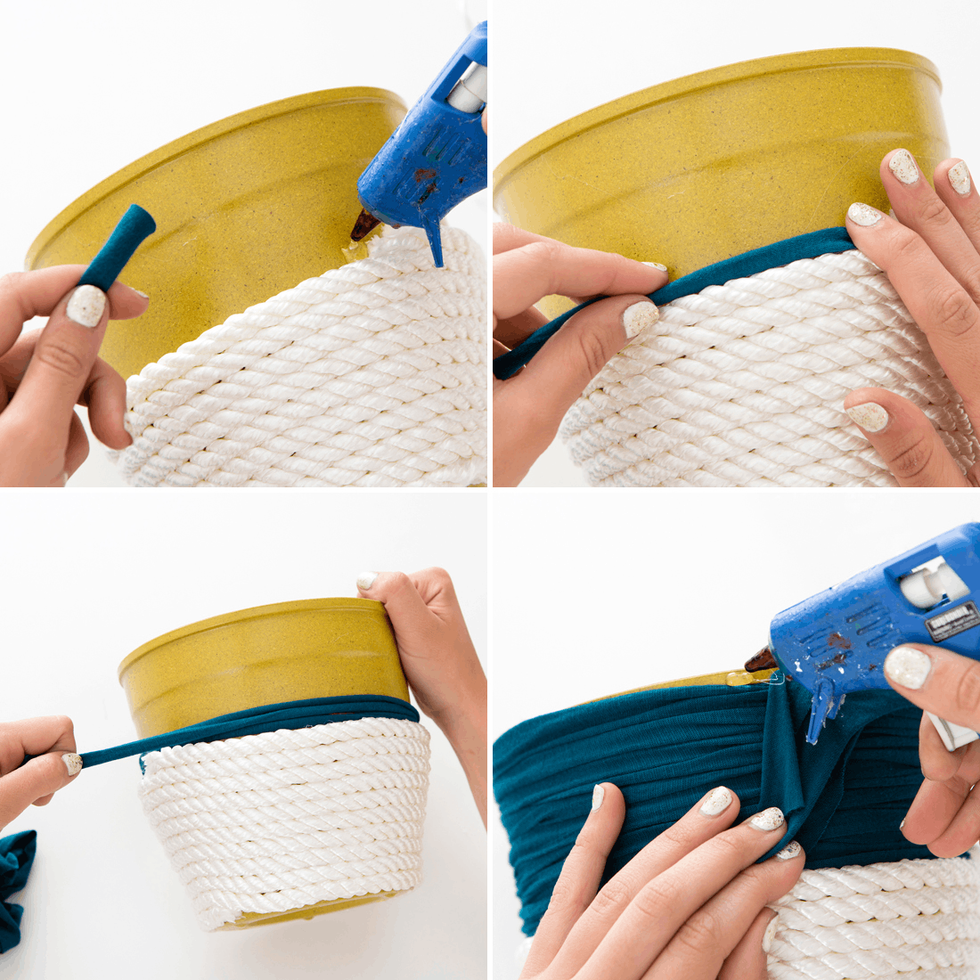
Now, more of the same wrapping. Good news though: Since jersey’s so thin, it’s easier to wrap than rope, so you’ll need less glue + arm power to complete your design.
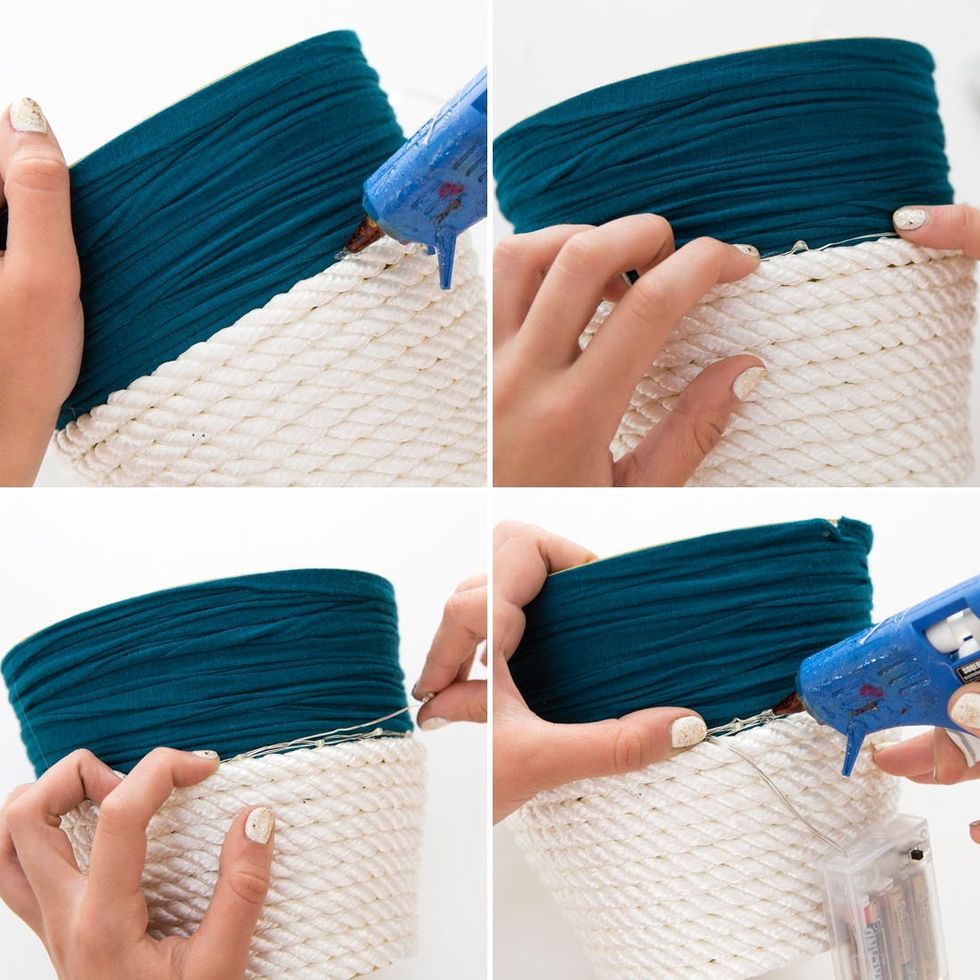
Now it’s time for the really fun part: Tricking out this planter with LEDs! It’s way easier to do than it might sound. Add a little bit of glue at a time to keep the light string in place as you wrap it around the center of your bucket.
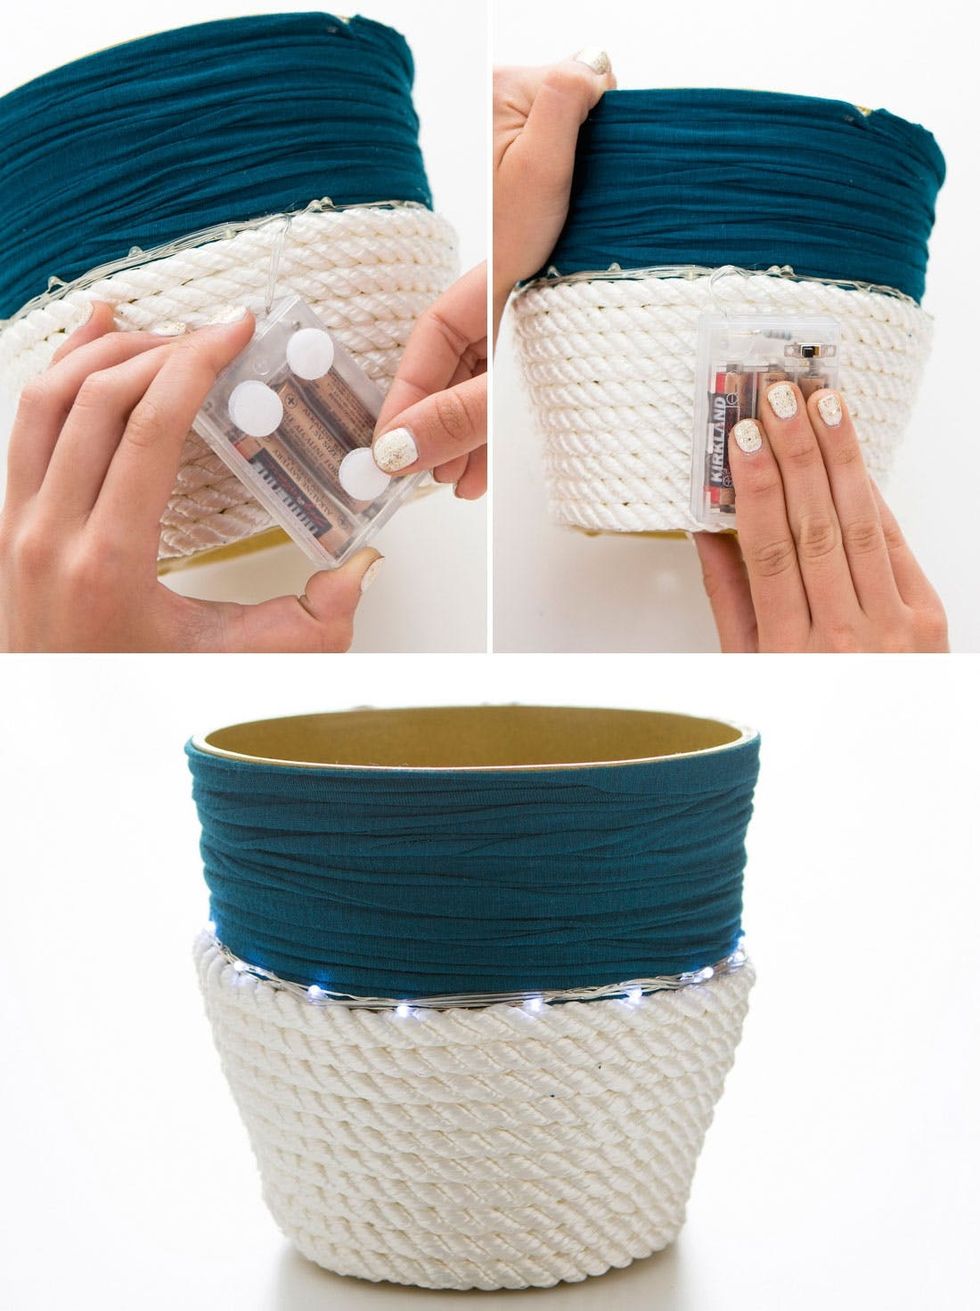
To keep the battery pack from swinging around like crazy, add on Velcro dots and stick it on the back of your planter. Works like magic! These planters will look even more awesome once the sun starts to set. And of course, once they’re full of plants ;)

Wrapped, lit up and potted. High-five! For an extra-extra special touch, we laser cut fun graduation signs to stick in our planters. If you don’t have access to a laser cutter, try using balsa wood and a brown marker to get a similar etched effect.

Shoot out to all my Huskies, friends, and every other recent 2014 graduate! Congratulations!
Are you or someone you know celebrating a graduation? Are you DIY-ing their gifts? What are you making for the recent grads? Tell us in the comments below!


