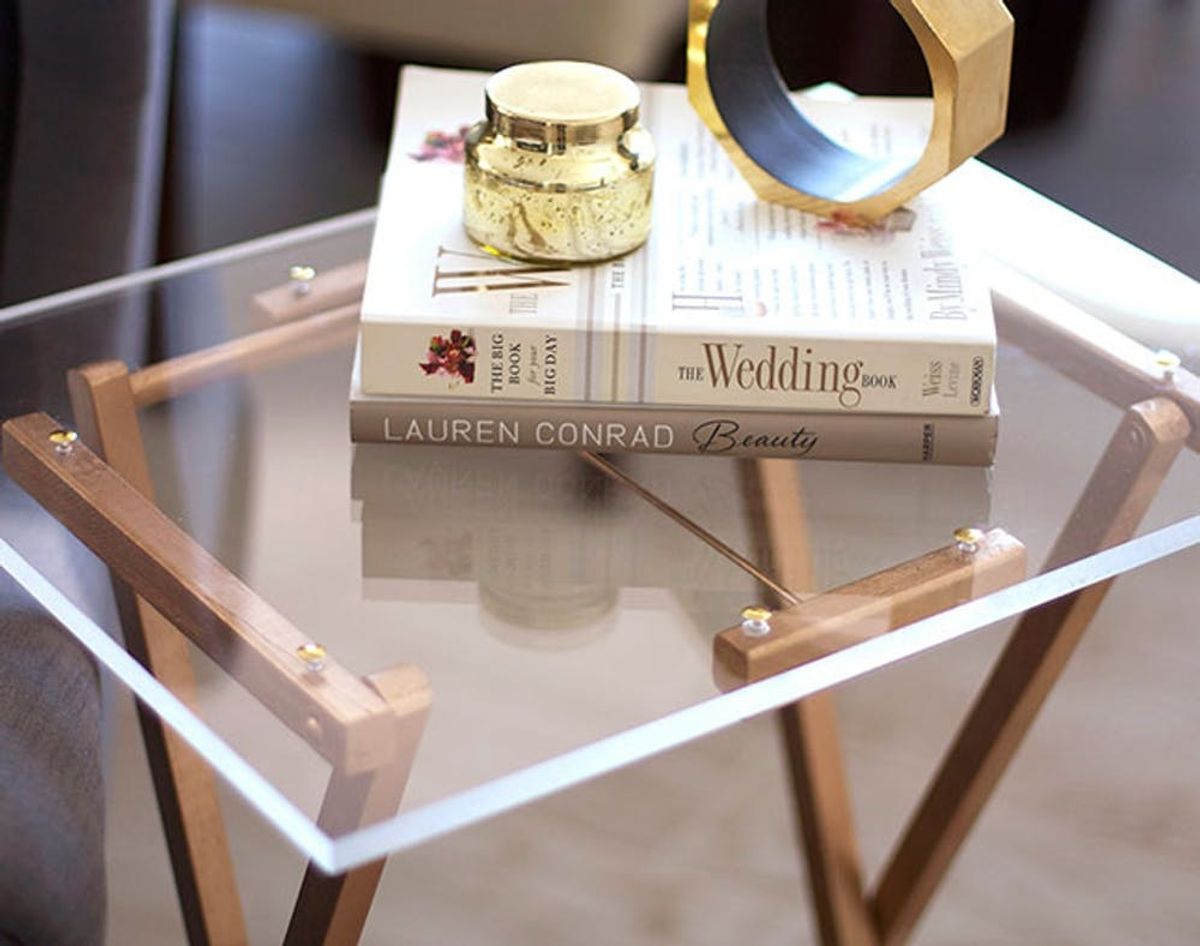
For just $60, learn how to make a cool acrylic tray (peep the one on the right!) that could replace any side table or just keep you looking chic while you’re eating that leftover pizza on the couch ;)
DIY Copycat: Make This $149 CB2 Tray for Just $60

TV trays: so retro, right? If you agree, you’d be way wrong, and you need only glimpse at this elegant number from CB2 — yoo-hoo, it’s on the left below! — to see why. The trick to the upgrade = an acrylic top. The clear material turns just about any decor item into a modern marvel, as it does to this swoon-worthy foldable tray. But with a price tag of $149, we knew there had to be a way to hack it… and there is! Yep, even with a material as luxe looking as lucite, there’s an easy way to take matters into your own hands + keep extra cash in your wallet. For just $60, learn how to make a cool acrylic tray (peep the one on the right!) that could replace any side table or just keep you looking chic while you’re eating that leftover pizza on the couch ;)
Materials:
– 1/2in thick, 15in x 20in acrylic sheet (We got ours here, and they will cut it to size for you for $1.00. You could get away with a 3/8in or 1/4in piece, which would cut your project cost in half)
– TV tray
– gold spray paint
– flat back gold studs
Tools:
– drill + thin drill bit
– screwdriver
– super glue
– pen
Instructions:
1. Unscrew the base from the top of the TV tray.
2. Spray paint the base of the TV tray.
3. Lay the base of the TV tray down on the acrylic. Mark where the holes in the base will be on the acrylic.
4. Drill holes into, but not through, the acrylic (use a drill bit that is smaller than the diameter of your screws).
5. Remove the blue protective covering from the bottom side of the acrylic.
6. Screw the base into the acrylic.
7. Remove the blue protective covering from the top side of the acrylic.
8. Glue studs on the top of the acrylic over the screws.
First, unscrew the base from the top of the TV tray. Make sure to save the screws because we will reuse them later. Also, make note of how the base is attached to the top (snap a photo with your phone!) — you’ll want to attach the base to the acrylic the same way.
Now spray paint the base. For an even coat, make sure to spray at least 12 inches away and use a slow, long sweeping motion. And don’t forget to shake your can for a full minute before you spray + intermittently while you’re spraying! Let that dry at least two hours before handling.
The next steps involve putting the newly gilded base onto the acrylic sheet. First, lay the base down onto the acrylic just like it was on before you removed it (so go glance at that phone pic!). Using a pen, mark where the holes in the base will be on the acrylic. If your pen won’t fit into the holes, you can begin drilling the holes through the base to mark the spots. Once your marks are in place, drill holes into, BUT NOT THROUGH the acrylic — you’ll want to only drill down about halfway or just under the length of your screw. Then, remove the blue protective covering from the side of the acrylic that you just drilled the holes into. Using the screws the TV tray came with, screw the base into the acrylic.
We’re on the home stretch! Turn the tray over and remove the blue protective tape from the top. Finally, glue the studs on top of the acrylic over the screws with super glue and let completely dry. Now prop it up next to your favorite comfy chair and get ready for it to steal the show.
See what just a simple switcheroo can do to a seemingly outdated piece of furniture? Now you’re a proud owner of the most glamorous TV tray ever. Celebrate the new addition (and all that cash saved!) by shopping for the perfect set of coasters to place on this transformed tabletop :)
What was the last DIY copycat you did? Tell us about your projects (even those still on your “to make” list) in the comments below.


