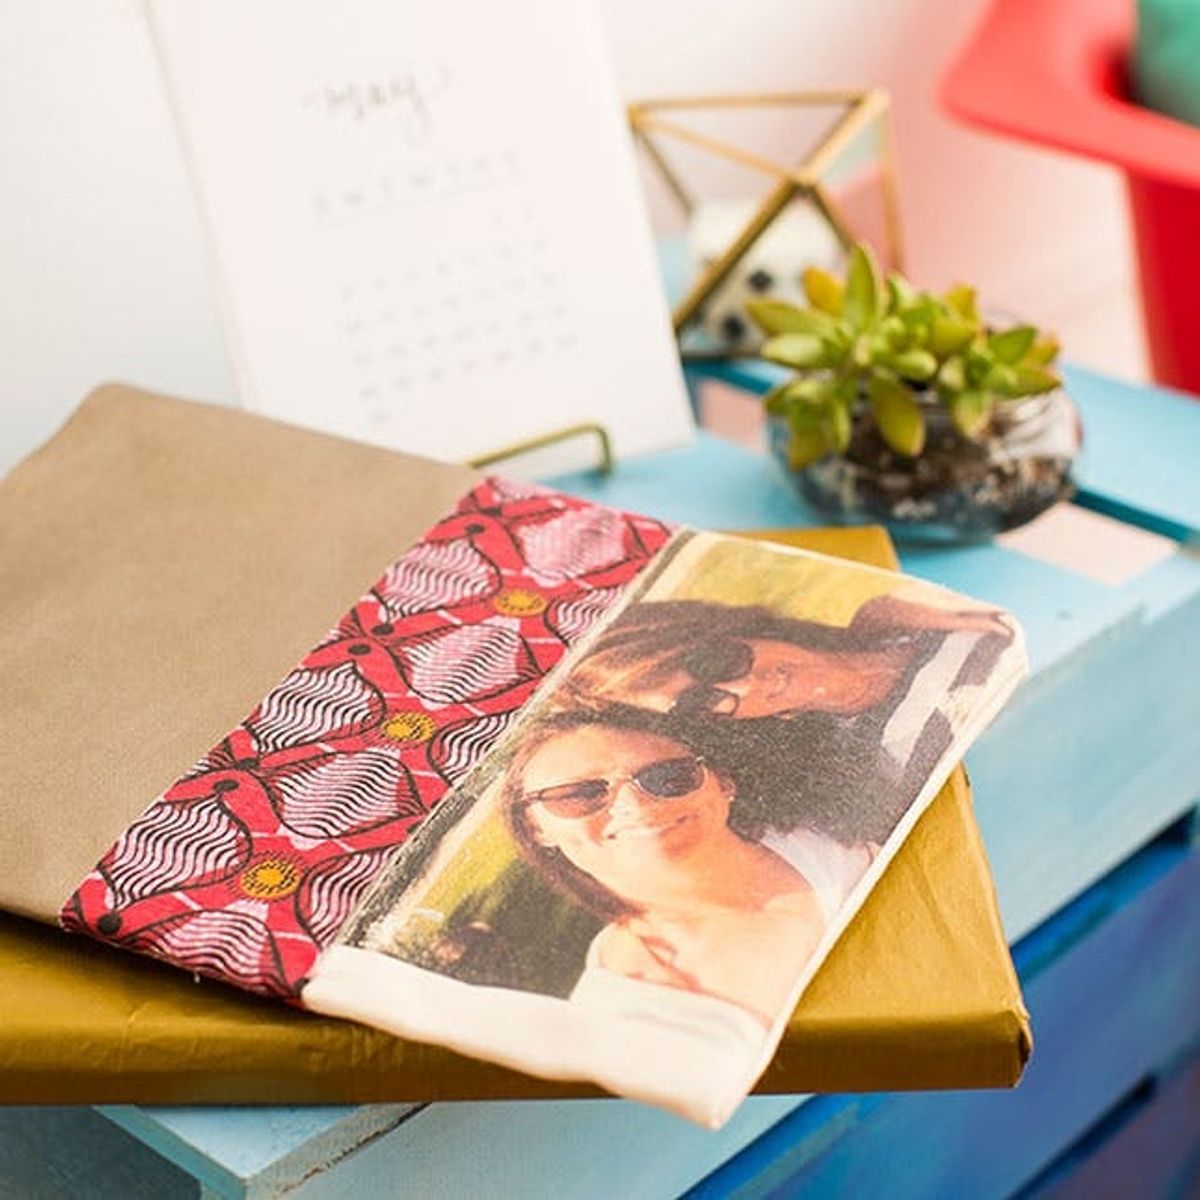
Watch out! Your Mom will shed a few tears over these photo gifts.
This DIY Mother’s Day Gift Will Make Mom Love Her iPad Even More

Spring has sprung and Mother’s Day is almost here! As many of your know, Moms will always shed a tear when it comes to photos of their loved ones. So why not attach photos to something they never take their hands off – their iPad! We are calling this DIY the update on the wallet photos, because you know – who really prints out extremely small photos for their wallets anymore? And of course everyone travels with their iPad. We’ve created two projects for all different levels of DIYers out there, so grab your irons and start making.

Materials:

Tools:
– iron
– sewing machine
– scissors
– pen
– pins
Instructions:
- three types of fabric – we chose canvas, patterned canvas and leather
- felt
- photo transfer paper
- Heat Bond transfer paper

1. Cut out a piece of your base fabric that matches the size of your iPad. Then cut out a piece of your first accent fabric that is half the size of your base fabric and your second accent fabric that is about the width of a ribbon. Remember to cut two of each, one for the front side and one for the back.
2. Measure the fabric cutouts onto Heat Bond, then cut.
3. Attach the base fabric to the felt using Heat Bond, then attach your accent fabrics to the base using your smaller pieces of Heat Bond.
4. Print out your favorite picture of you and mom on the transfer paper and then iron onto your base fabric.
5. Turn inside out and sew the sides to create the case.
6. Flip right side out and slide in your iPad!
Update an Existing Case

To start off you will need to measure the size of your iPad or tablet that you are creating a case for. We created a case for the regular-sized iPad. A sheet of felt turned out to be the perfect size, so we measured our base fabric using the sheet of felt. If you’re making a case for a smaller device, you will need to trim down your felt first. Make sure you choose a neutral base fabric so it is easy to transfer and see the photo.

There are endless possibilities for this step! We chose to create a case with different colors and textures, so we cut a piece of leather that was about half the size of our base fabric and then a patterned canvas piece that was about the thickness of a ribbon. Get creative with the materials you have! You could even leave just the base fabric and cover it with pictures.

Heat Bond is our best friend in craftland. Cut out Heat Bond to the measurements of each piece of fabric you have cut.

Iron all of your pieces together using Heat Bond. You will want the two pieces of felt on the inside facing each other and the accent fabrics on the outside.

Print out your favorite picture of mom and iron it onto your base fabric.

Turn the outside facing in and sew the perimeter, leaving the opening at the top for the iPad.

Turn right–side out and slide in the iPad.

Updated wallet photo — FTW!

Steal Mom’s iPad case for 30 minutes and update it with a collage of old memories.
Materials:
– photo transfer paper
– iPad case
– canvas fabric
– Heat Bond
Tools:
– iron
– scissors
Instructions:

1. Print out your best photo and cut out a piece of canvas and Heat Bond to that size.
2. Iron the heat bond to the canvas, the photo to the other side of canvas, and then the picture to the case.
Cut out a piece of canvas and Heat Bond that are the same size of your photo.

Iron the Heat Bond and photo to opposite sides of the canvas. Then iron the photo onto the iPad sleeve. Use a piece of parchment paper to protect the photo if you have peeled back the paper before ironing it onto the sleeve.

Slide it in!

We’re sure your mom will shed some tears over these personalized photo gifts.


