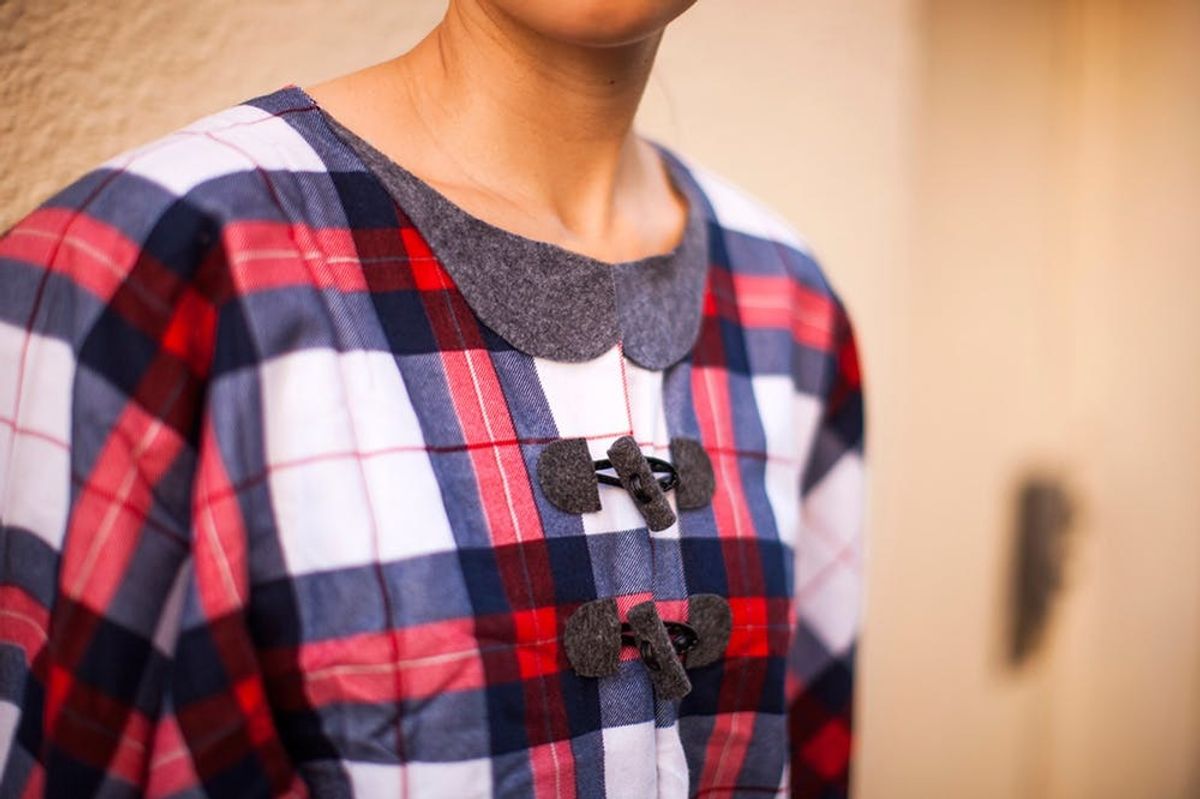
Fall weather is officially here! And when the breezes start to get brisk, we only have one thought on our minds: get cozy! If you ask us, there’s no better way to do that than to snuggle under a set of warm flannel sheets, so we thought we’d keep it comfy even when we’re out and about with this chic collared cape made out of—you guessed it—a flannel bed sheet.
Cuddle Up in This No-Sew Flannel Cape

Fall weather is officially here! And when the breezes start to get brisk, we only have one thought on our minds: get cozy! If you ask us, there’s no better way to do that than to snuggle under a set of warm flannel sheets, so we thought we’d keep it comfy even when we’re out and about with this chic collared cape made out of—you guessed it—a flannel bed sheet.
Stores are just starting to stock up on flannel sheets for the season, and on our last trip to Target, this classic plaid set caught our eye. We thought the bold red and blue pattern seemed perfectly suited for fall, when expert layering can truly “make” an outfit. And since this cold weather DIY doesn’t require any sewing (just like these other rad fall no-sews), it’s a cinch to transform once you’ve folded your fabric just right.
Materials:
– flannel bed sheet
– 2 felt toggles
– felt sheet
Tools:
– fabric scissors
– hot glue gun + glue
– chalk
To fold your sheet to get the perfect, custom cape length, which to us is when it falls right at the hips, fold your sheet in half lengthwise, then fold the top of the sheet down. The trick here is to pull the fabric down long enough so that it reaches exactly from your wrist to your neck, then place it on a flat surface and cut.
Next—just to be safe—locate the corner of your sheet that’s closed on both sides, and mark it with a piece of chalk (we kept ours in the top left corner throughout). This is the ‘do not cut me’ corner for now, so turn your attention to the three more exciting open corners of the sheet. They’re waaay too long as is, so cut the material down into a square. We folded our bottom left corner over to meet the top right to ensure we cut a perfect square.
Now that you have a square sheet, mark off the three lower corners with a curved line to create the bottom of your cape and cut (again, we folded our sheet in half so that it was easier to handle). The bottom of your cape is totally done! So next, turn your attention to your neck.
Unfold your cape completely so that you can see your mark at the top, center of the cape—this is where you’ll trace a half-circle just large enough to fit your neck. We love that we can use the plaid as a makeshift grid to measure and cut lines (You may want to use a yardstick if you chose a less linear fabric.) See how perfectly the center of the cape lines up with this pattern? So go with the flow and cut just the front from top to bottom.
This cape is totally coming together, but don’t toss it on your back quite yet! Remember, this fabric was a bed sheet, so there’s a few more things to add before it’s wardrobe-worthy. How about a cute felt collar and matching felt toggles?
Making the collar is easy: just use the already cut cape neck to trace the top of the collar, then freehand a bib shape below. Fold it over to get a symmetrical cut, then snip it down the center and glue it in place.
Next, mark where you’ll glue your toggles to the cape. We like ours in a pair right underneath the collar. Then, hot glue each piece.
And that’s a wrap! Are you ready to cuddle up in your cozy cape? We sure are!
It’s a perfect piece to have at the beginning of fall when it’s not quite jacket weather, or if you’re looking for something more exciting than your go-to cardigan. The toggles and collar really make the look.
Not only was it near effortless to make, but the cape looks effortlessly stylish! What a great piece to toss on for a lunch run or when you need to get a bit of fresh air outside the office.
What no-sew project are you pumped about completing for fall? Tell us in the comments below!


