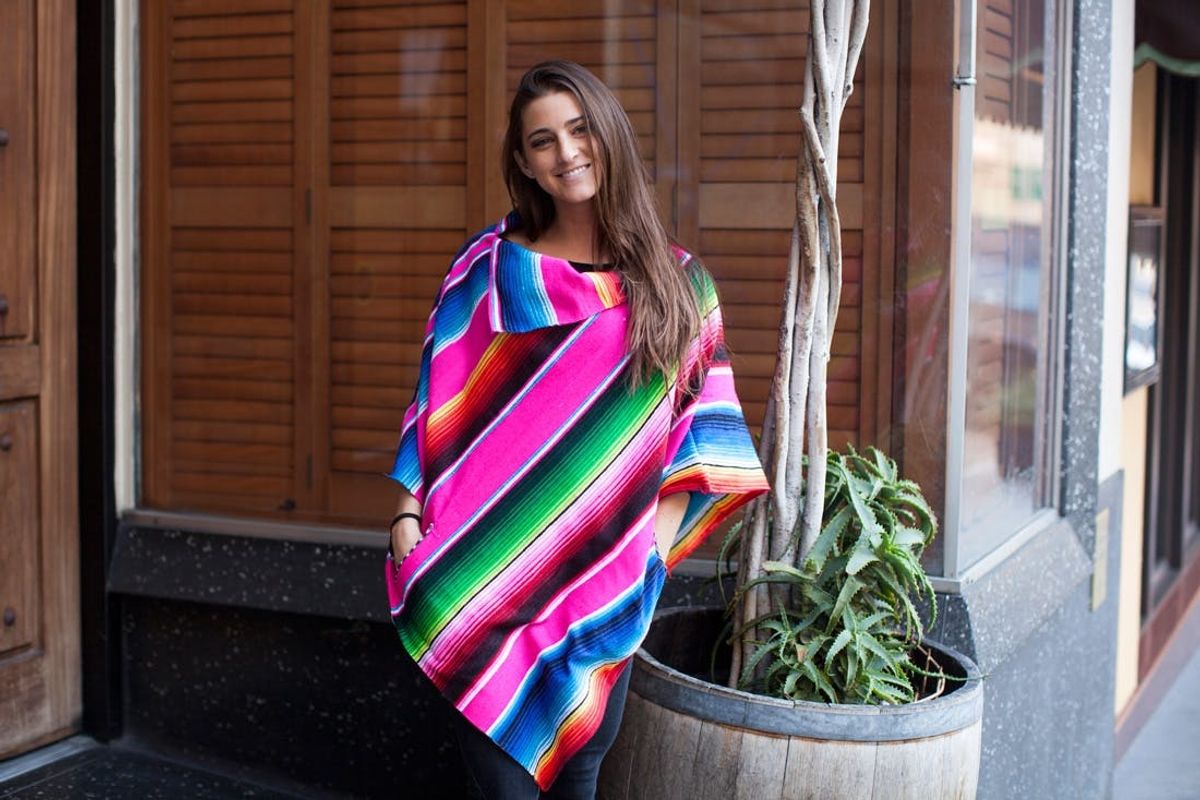
Ever love a blanket, tablecloth, or throw so much that you just want to… wear it? Us too! That’s why we decided to take it upon ourselves to turn a colorful Mexican blanket into a poncho — no sewing required!
Turn a Colorful Blanket into a Chic No-Sew Poncho


Ever love a blanket, tablecloth, or throw so much that you just want to… wear it? Us too! That’s why we took it upon ourselves to turn a colorful Mexican blanket into a poncho — no sewing required! Though this project is no-sew, it does involve a lot of steps and measurements. It took us about an hour to create, so might be best to file under weekend projects.
Materials:
– Mexican siesta blanket (or sarape)
– shoe lace (for pocket trim)
Tools:
– fabric scissors
– hot glue gun
– measuring tape
– pins
Instructions:
1. Fold blanket in half.
2. Measure length (27.5 inches) and width (31 inches) making marks so you know where to cut.
3. Cut out rectangle.
4. Starting at one end of the folded side, measure 7.5 inches and cut along fold.
5. On the open side, measure 12 inches and mark with a pin.
6. Hot glue the open side together.
7. Flip inside out.
8. Create a hem by gluing a small fold on all of the frayed sides including the collar you just cut.
9. Facing the poncho, on the right side measure 10 inches from the top (where your shoulder would be). This is where your pocket will go. Pin this measurement.
10. At an angle mirroring the edge where your shoulder will be, measure 5 inches for your pocket hole and cut.
11. Hem the edges of the pocket hole.
12. Using your shoe lace, measure around the edge of the pocket hole and cut to the correct size.
13. Glue the lace around the pocket hole.
14. From the blanket scraps, cut a 9×7 inch rectangle.
15. Glue the rectangle to the back of the pocket, making sure most of the material sits below the hole (so that your hand has a place to sit).
16. Repeat steps 10 through 15 on the other side, measuring 12 inches from the shoulder for placement rather than 10 inches.

If you don’t already have a blanket to transform, there’s a treasure trove of ’em over on Amazon!

First, fold your blanket it half to cut.

Then, measure length (27.5 inches) and width (31 inches) making marks so you know where to cut. The model (our awesome Ashley!) for this poncho is 5’3″, so you can lengthen or shorten accordingly. Cut out your rectangle.

Starting at one end of the folded side, measure 7.5 inches and cut along fold. This will be your collar!

Move to the open side of your poncho, measure 12 inches and mark with a pin.

Now, hot glue the open side together.

Flip your poncho inside out.

Create a hem by gluing a small fold on all of the frayed sides including the collar you just cut. Do this on every cut edge of your poncho.

Now, it’s time to create some pockets! Facing the poncho, on the right side measure 10 inches from the top (where your shoulder would be). This is where your pocket will go. Pin this measurement.

At an angle mirroring the edge where your shoulder will be, measure 5 inches for your pocket hole and cut.

Hem the edges of the pocket hole using the hot glue hem technique. Then, using your shoe lace, measure around the edge of the pocket hole and cut to the correct size. Glue the lace around the pocket hole to create a trim accent.

From the blanket scraps, cut two 9 x7 inch rectangles — these will be the insides of your pockets!

Glue the rectangle to the back of the pocket, making sure most of the material sits below the hole (so that your hand has a place to sit).

Repeat the pocket steps on the left side, but rather than measuring 10 inches from the top, measure 12 inches.

And that’s it!

We’re loving all the vibrant colors, especially on a brisk winter day here in San Francisco.

What other no-sew projects would you like us to try on here at Brit + Co.? Talk to us in the comments below.


