Nothing says party like fun lighting. Amp up your summer gatherings with these 10 easy ways to create party lights using ribbon, vellum, tissue paper, and… string lights! These are perfect for outdoor summer fiestas, but also look great indoors all year round.
10 Ways to Trick Out Your Party Lights
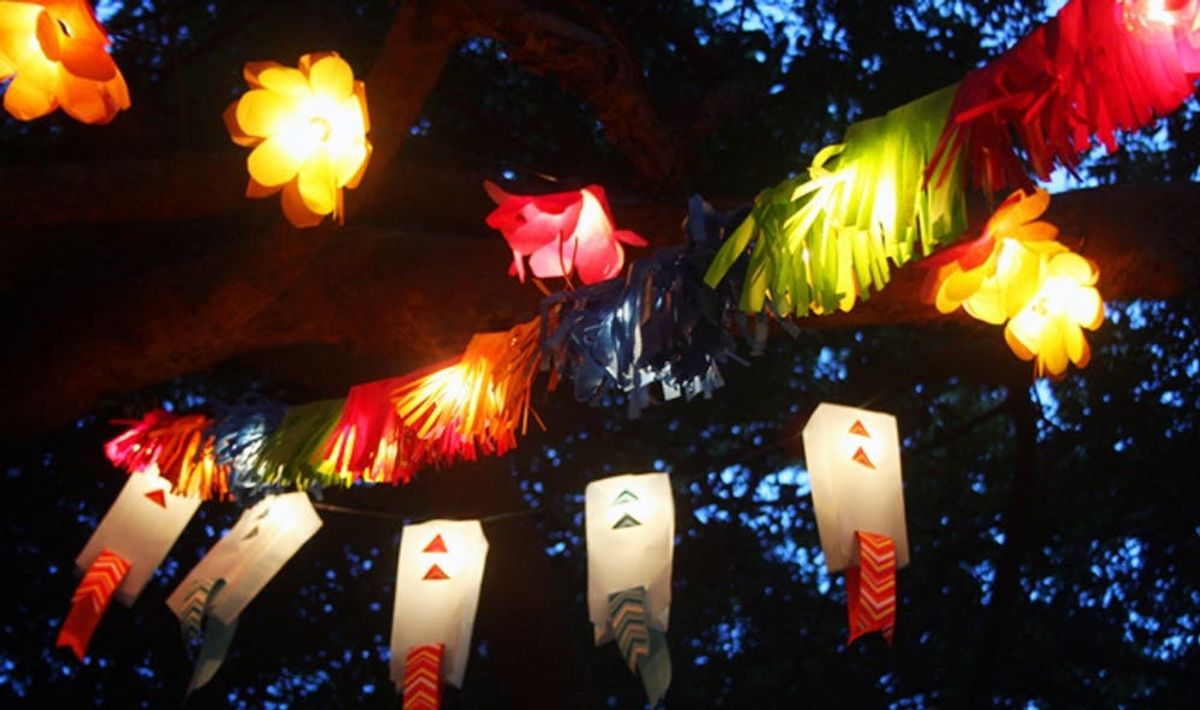
Nothing says party like fun lighting. Amp up your summer gatherings with these 10 easy ways to create party lights using ribbon, vellum, tissue paper, and… string lights! These are perfect for outdoor summer fiestas, but also look great indoors all year round.
Don’t have a party on your calendar in the next few weeks? Here are just a few reasons to throw a party: The Kentucky Derby, Cinco De Mayo, Mother’s Day, Memorial Day, Father’s Day, Graduation, 4th of July, or just a general celebration of SUMMER! We can’t wait to use these lights for all of them.
Materials:
– vellum paper
– ribbon
– tissue paper
– string lights
Tools:
– scissors
– pen
– exacto knife
– ruler
– tape
– paper whole punch
– hot glue gun
1. Ribbon Tassel Lights
Start by cutting your ribbon into 6 inch strips. Apply hot glue to the base of each globe, and press on a row of ribbons. Apply glue on top of those, and press on another row of ribbons. Repeat until your happy with the size of your tassel. Finish the look by gluing a ribbon around the top of each tassel to cover all the messy ends.
These globe lights lend themselves particularly well to being strung outside since they have a green cord and are fairly bright.
2. Tissue Firecracker Lights
Stack several strips of 6 inch tissue papers and cut a fringe. Pull the strips apart and wrap one around each light, securing with hot glue at the beginning and end. Pull the fringes apart to fluff them for full firecracker effect.
These would also look so cute using red, white, and blue tissue paper for the 4th of July!
3. Ribbon Flowers Lights
Cut ribbon into 7 inch strips, rounding the corners. Wrap around each light, using a hot glue gun to secure each wrap. Don’t wrap it too tight, you need the ribbon to gap open to look like blooming petals. Pinch down at the bottom and then tie a little green ribbon in a simple knot to look like leaves at the base of flower.
This is the best kind of garden- one that doesn’t need to be watered and is always in bloom :)
4. Piñata Fringe Lights
Stack your tissue paper and cut into 6 inch strips of fringe. Use hot glue to secure strips to each side of the strand. Alternate colors to create a colorful festive vibe!
Does anyone have Cinco De Mayo plans? ;)
These look awesome during the day, but once the sun sets and the party gets going… they look even cooler!
5. Vellum Globe Lights
Cut your vellum into 1 inch strips. Place 2 strips under the globe light to create an X. Bring them around to make a round globe and staple or tape them in the middle where they meet. Take another 2 strips and place them under the globe light as well. Then bring them up and over as well to create a globe again and secure in place. Now use hot glue to attach the base of the globe light to the vellum globe. Repeat with all your globe lights.
These would definitely look great all year round.
6. Ribbon Loop Lights
Cut your ribbons into 6 inch strips and place a dot of hot glue on each end of the ribbon, but do the front side on one end, and the back side on the either. Press them onto the light strand so there is one twist in the ribbon. Repeat with another ribbon, having it intersect the first one. Repeat along the entire length of lights.
What a great way to use up leftover scraps from your ribbon collection! We say, the more the merrier when mixing colors and patterns!
7. Vellum Cone Lights
Start by drawing out a baseball diamond shape on a piece of vellum paper. The top horizontal line should be 3 inches, and the two sides coming down from that should be 6 inches. Cut it out and punch holes along the base. Tape or glue the two ends together to create a cone. Unscrew the globe light from the base and place the base through the small end of the cone. Screw back in the light inside the cone. Repeat on all the lights.
These next 3 do require some extra steps using very simple folding techniques, but trust us, the outcome is worth it. And once you get the hang of the first one, the rest take no time at all. All right, let’s get started!
8. Ribbon Bag Lights
First we’re going to use vellum to create a bag. Start by measuring the horizontal side and marking 1 inch, 4 1/2 inches, 6 1/2 inches, and 10 inches. Fold at those measurements. Then measure the vertical side at 1 1/2 inches, 8 inches, and 10 inches. Cut off the entire bottom at this vertical 10 inches mark, and fold at the 8 inches mark. Cut out 3 of the bottom sections as shown in the photo above. Make a slit for the ribbon on the 2nd and 5th sections at the 1 1/2 inches vertical mark. Cut an X in the 2nd and 4th bottom sections.
Secure the paper on the side and bottom with hot glue to create a bag. Unscrew the globe light, poke the light base through the bottom of the bag, and screw the light back on. Slide a 12 inch ribbon through both slits, and glue 2 triangles cut out of ribbon onto the bag.
9. Tissue Flower Lights
Start with a square (we used a 7 inch square), placing the pointed end up like a diamond. Fold the bottom point up to meet the point, creating a triangle. Fold the left point up to the top point. Fold the right point up the top point as well. Fold the left point over to meet the right. Draw a petal shape to cut out, as shown above. However, it doesn’t have to be exactly like this shape to look like a flower once it’s unfolded. Cut along those lines and unfold to create a gorgeous flower! Unscrew the globe lights and place 2 flowers over the base before screwing back on the bulb.
Have fun playing around using different shaped petals, or different sized flowers for the center!
Wouldn’t these big floppy flowers look great at a Mother’s Day Brunch?
10. Sailing Lights
Start with a square piece of vellum (we used a 5 inch square) and place pointed end up like a diamond. Fold the bottom point to meet the top to create a triangle. Fold that in half to get a smaller triangle. Unfold the whole thing. Cut out the top right hand triangle and save for later. Fold the bottom right triangle to the left along the vertical crease. Now fold the bottom half up to meet the center. Fold part of the bottom half under so you can have a flat bottom on your sailboat – fold the right tip up to complete it.
Use the triangle you just cut out to trace a sail out of some pretty patterned tissue paper. Glue the tissue sail on. Cut a piece of 1 1/2 inches in half to create two little racing flags and hot glue those on as well. Glue a light on the back of the sailboat, leaving 2 lights in between each one.
Don’t be afraid to experiment with different patterned tissue paper for the sails like we did!
Now let’s take those lights outside and party!
These lights are safe and the vellum is more non-flammable than the tissue paper, but never leave these lights on unattended, just to be sure :)
How ready are you for a hot summer night? These turn a normal gathering into a festive party!
Which of these is your favorite? What summer events do you have coming up that you will be making some party lights for?


