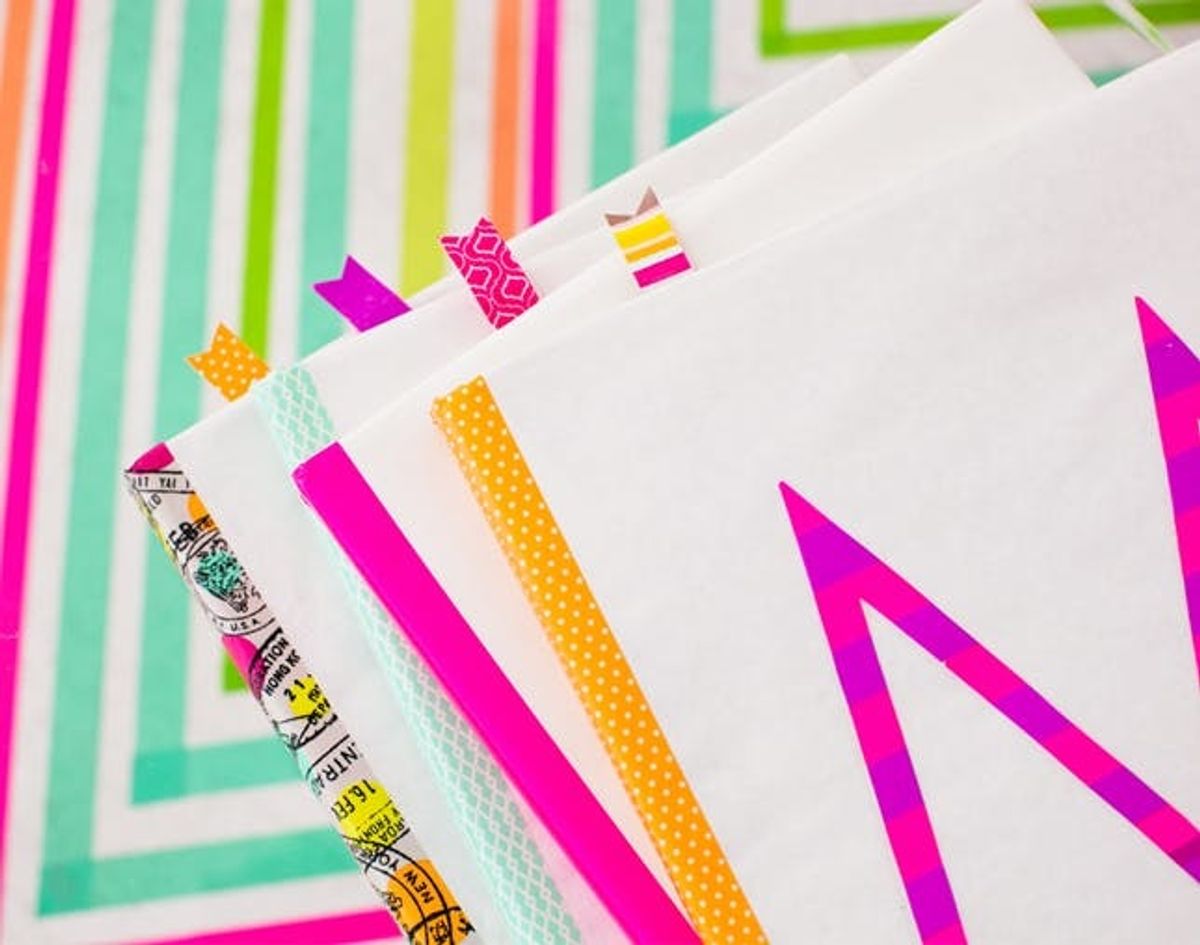
Today we’re working with Scotch to make some classy covered books using colorful patterned tape. They make great decorations on a bookshelf or coffee table, and if you make enough you can even turn them into end tables!
#TBT: Make Old School Book Covers With Colorful Tape!

Remember when you were in elementary school and you had to spend part of your first day covering all of your books with paper grocery bags? Of course, the best part was decorating them once they were snuggly wrapped in brown paper. Well today we’re working with Scotch to make some classy covered books using colorful patterned tape. They make great decorations on a bookshelf or coffee table, and if you make enough you can even turn them into end tables!
Make Amazing Contest
<br/>
– Scotch Double-Sided Tape
– white craft paper (you’ll need a large roll)
– cardstock
– stencil with shapes (we laser cut triangles and squares)
– stencil with the letters “MAKE”
Tools:
– Scotch Scissors
– Scotch Titanium Utility Knife
– cutting mat
– pencil
– straight edge
Book Cover
Steps:
1. Cut a piece of craft paper about twice as long as your book.
2. Open the book and fold over one end making a crease along one edge of the book.
3. Shut the book and wrap the paper over the top. Then fold the other end over the edge. This will account for the spine.
4. Open the book up again and unfold the edges. Cut a line along the crease from the bottom of the paper to the edge of the book. Do this on all four sides. Now fold in each piece so that it is flush with the line along bottom or top edge of the book. With the piece that runs along the bottom or top, fold in the edge creating a triangle. This will keep your edge clean.
5. Cut a small rectangle from the end of the paper to the edge of the book where the spine is.
6. Fold in the piece along the side edge of the book and then the pieces along the top and bottom edges. Tape this in place.
7. Repeat your cuts and folds on the other side of the book.
When covering your book, don’t tape the pieces in place…just yet! Using your stencil, trace your shapes onto the top of the book cover. Then remove the cover from the book. Cut out your shapes with your Scotch utility knife and cutting mat. Trace the same shapes onto a piece of cardstock. Cover the shapes with washi or magic tape and then cut them out. Tape the shapes to the back of the book cover, with the tape side pointing out through the holes. Re-cover the book and now you can tape it in place. These look so cute with the tape peeping through!
Die Cut Shape Covers
M-A-K-E Covers
Laser cut a stencil with the word “MAKE” (or whatever word you want to spell on your book covers). If you don’t have access to a laser cutter, you can simply handwrite box letters. Trace or write the letters on a piece of card stock. Next, cover the letters with Scotch Expressions washi or magic tape, and cut them out. Turn your letters over and add Scotch double-sided tape to the back. Then stick your letter in the middle of your book. Add Scotch Expressions washi or magic tape to the spine to make it extra colorful.
Simply wrap three strips of Scotch Expressions washi tape around your book. Mark the placement of the tape on the next book by stacking it on top of the first. That way they will all line up when you stack them on your coffee table. This is so easy to do and really adds a pop to your stack of books!
Tape-Wrapped Covers
How fun are those patterns?!
That’s a wrap (literally)!
What are some other cool ways to cover or personalize your books? How do you use tape to make amazing things? Tell us your thoughts in the comments below!


